Begin by creaming together butter and confectioners' sugar in a mixer. This combination should be fluffy and light, indicating that the sugar is well incorporated into the butter. Take your time to achieve that perfect creamy texture.
Once creamy, add in the egg and vanilla extract. Beat well until everything is fully combined. You want to see a smooth mixture without lumps—this ensures your cookies will bake evenly.
In a separate medium-sized bowl, sift together the white whole wheat flour, baking powder, and salt. Sifting helps to aerate the dry ingredients, making it easier to combine them with the wet mixture.
Gradually mix the dry mixture into the wet ingredients. You can start with a spatula and then use your hands to knead the dough until it forms a cohesive ball. The dough should not be sticky; if it is, you can add a little more flour.
Wrap the dough in plastic wrap and refrigerate for about 30 minutes. This step is crucial as it firms up the dough, making it easier to handle and shape later.
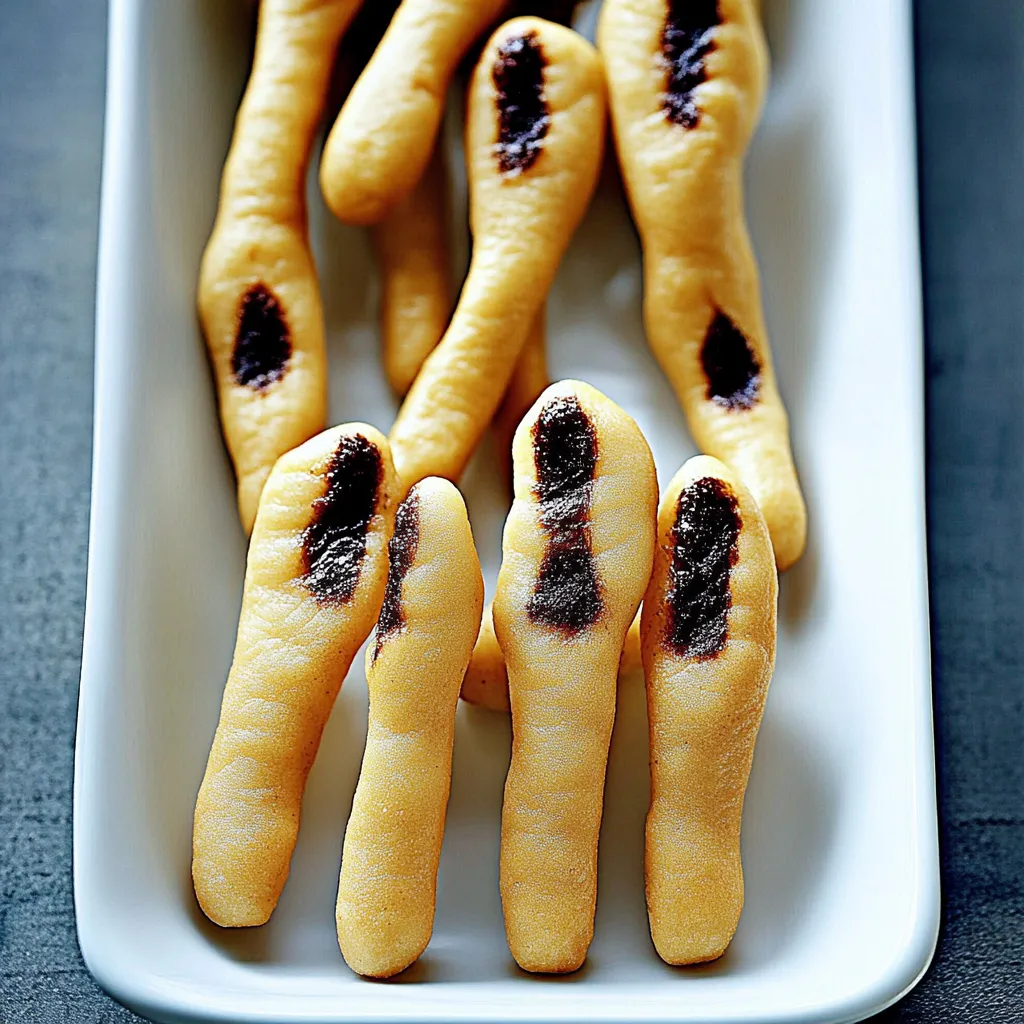
Once chilled, break the dough into small pieces, roughly 2 tablespoons each. Roll each piece into a finger shape, ensuring it’s about 4 to 5 inches long. The fun part is creating the knuckles by gently pinching the dough in the middle.
Using the flat tip of a knife, make an indentation at the end of each finger to form a nail bed. Then, take a toothpick to make three small slashes in the middle of each finger, mimicking knuckles.
Place the shaped fingers onto a lightly greased baking sheet, ensuring there’s space between them as they will expand slightly while baking.
Bake at 325°F for about 20 to 25 minutes. You’re looking for a light golden color on top—too dark will mean they are overcooked.
While the cookies are baking, melt the chocolate chips with the coconut oil in a small bowl in the microwave. Stir until smooth. This melted chocolate will act as the adhesive for your almond “nails”.
After baking, let the cookies cool for a few minutes. Then, take a small dollop of melted chocolate and place it at the tip of each finger. Softly press an almond on top of the chocolate to create the fingernail.
Allow the chocolate to harden slightly before serving. Now, your Witch Fingers Halloween Snack are ready to frighten and delight your guests!