Go Back
No Knead Whole Wheat Dutch Oven Bread

No Knead Whole Wheat Dutch Oven Bread

The ultimate comfort food, No Knead Whole Wheat Dutch Oven Bread is easy to make and absolutely delicious! With a crispy crust and a soft, chewy interior, this bread will quickly become a staple in your home. Perfect for sandwiches or just enjoyed warm with butter, you’ll want to make it tonight!
Prep Time 10 minutes
Cook Time 50 minutes
Total Time 1 hour
Servings: 12 servings
Course: Dinner
Cuisine: American
Calories: 150

Ingredients
  

  • 500 grams Whole Wheat Flour ~3¾ cups
  • 2 teaspoons Kosher Salt
  • 1 teaspoon Dry Active Yeast
  • 2 cups Warm Water between 100-115℉

Equipment

  • Dutch oven
  • Parchment Paper
  • Kitchen Scale

Method
 

  1. Start by placing a large mixing bowl on a kitchen scale. Change the unit to grams and zero it out. Measure out 500 grams of whole wheat flour into the bowl. If you don’t have a scale, don’t worry. You can fluff the flour in its container, spoon it into a measuring cup, and level it off until it amounts to roughly 3¾ cups.
  2. Next, add 2 teaspoons of kosher salt and 1 teaspoon of dry active yeast to the flour. Mix well to incorporate all the dry ingredients together.
  3. Now, it’s time to add 2 cups of warm water. Use a wooden spoon or spatula to mix until all the flour is fully moistened. Be careful not to overmix; you just want to combine everything until there are no dry pockets of flour left.
  4. Cover the mixing bowl with plastic wrap or a clean kitchen towel. Let the dough rest at room temperature for at least 8 hours, or if you have the time, up to 18 hours. This long resting period is crucial for developing flavor and structure.
  5. After the dough has risen nicely, turn it out onto a lightly floured piece of parchment paper or a floured surface. Lightly flour your hands and roughly shape the dough into a circle. Keep in mind that the dough will be sticky, so don’t be alarmed!
  6. While you’re shaping the dough, preheat your oven to 450℉ (230℃) with your Dutch oven (with the lid) placed inside. This step is essential for creating that perfect crust.
  7. Once the oven is preheated, carefully remove the Dutch oven and gently drop the shaped dough into it. It’s okay if it’s not perfect; rustic is part of the charm!
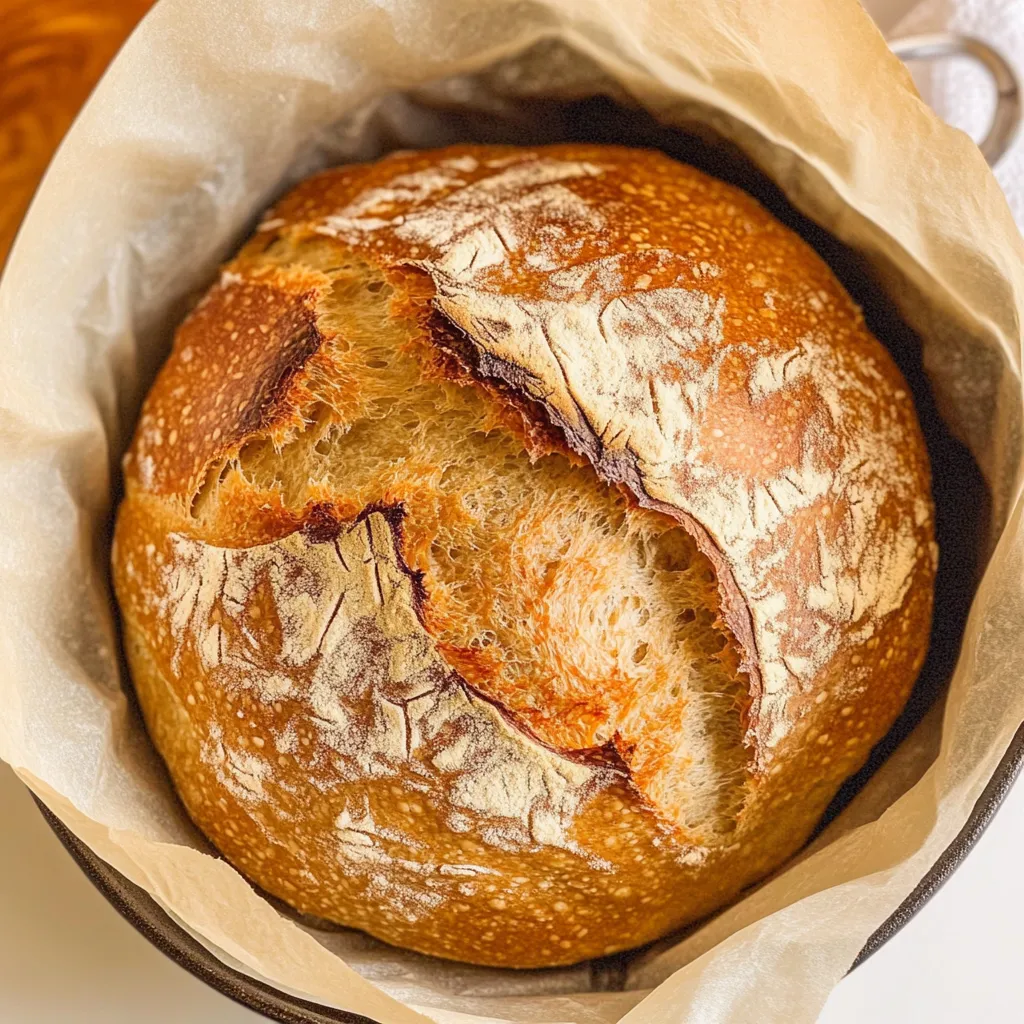
  8. Place the lid on the Dutch oven and bake for 30 minutes. After this first phase, carefully remove the lid and continue baking for an additional 20 minutes, or until the bread is golden brown and the internal temperature reaches between 207-209°F (97-98℃).
  9. Once baked, carefully remove the bread from the Dutch oven and let it cool on a wire rack for 30 to 45 minutes before slicing. This cooling period allows the texture to develop fully, making for a better slice.

Notes

  • Enameled Dutch Oven: If your manufacturer's brand recommends NOT preheating the pan empty, skip the preheat and bake for 40 minutes covered, then remove the lid and continue to bake for 20 minutes.
  • Dutch Oven Pan: Anywhere from a 3.5 to a 6-quart dutch oven with a lid will work to bake this bread. A smaller Dutch oven yields a higher, rounder loaf, while a larger Dutch causes the dough to spread more. While still delicious, the bread will be flatter. I prefer a 4-quart Dutch oven for a beautiful tall loaf.
  • Flour: You can swap the whole wheat flour out for whole white wheat flour, whole wheat pastry flour, bread flour, all-purpose flour, or a combination of flours. Whatever flour used, it must measure 500 grams. And because different varieties of flour have different weights, a scale is critical here. Gluten-free flour blends and self-rising flour are not recommended.
  • Yeast: Be sure your yeast is NOT expired and use dry active yeast (NOT quick-rise or instant yeast).
  • Storage: To store, let the bread cool to room temperature and then wrap it in plastic wrap and foil or place it in an airtight container. Use within 3 days. Alternatively, wrap well in foil, place in freezer-safe bag, and freeze for up to 1 month. Defrost at room temperature.
  • Prevent Sticking: If your pan is high-quality, you should have no issues with the dough sticking to the pan. However, some people have reported this issue. To prevent this from happening, use parchment paper that is suited for 450℉. I don't recommend greasing the pan, as the oil can burn at the high temperature the bread is baked at.