Ingredients
Equipment
Method
- First, start by lining a 9×13-inch pan with foil. Make sure to leave some excess hanging over the edges; this will make it easier to lift the marshmallows out later. Then, spray the foil with non-stick cooking spray to ensure nothing sticks.
- In a small bowl, whisk together the powdered sugar and cornstarch. This mixture will be used to coat the marshmallows later, preventing them from sticking together. Set it aside for now.
- In the bowl of an electric mixer fitted with a whisk attachment, pour in half a cup of the cold water. Sprinkle the unflavored gelatin over the water, allowing it to bloom for about 15 minutes. Watch as it thickens slightly; this is an important step for achieving the right texture.
- Meanwhile, in a medium saucepan, combine the remaining cold water with the light corn syrup. Gradually pour in the granulated sugar and add the salt. Place the pan over medium-high heat. Stir gently until the sugar dissolves and the mixture comes to a boil. Use a candy thermometer to monitor the temperature until it reaches 240 degrees F, about 6 to 8 minutes.
- Once the syrup reaches the correct temperature, turn the mixer on low speed. Carefully pour the hot syrup into the gelatin mixture, avoiding the sides of the bowl as much as possible to prevent any splatter. Gradually increase the speed to high and whip the mixture until it becomes very thick and stiff, which will take about 10 to 12 minutes. Don’t forget to scrape down the sides of the bowl occasionally.
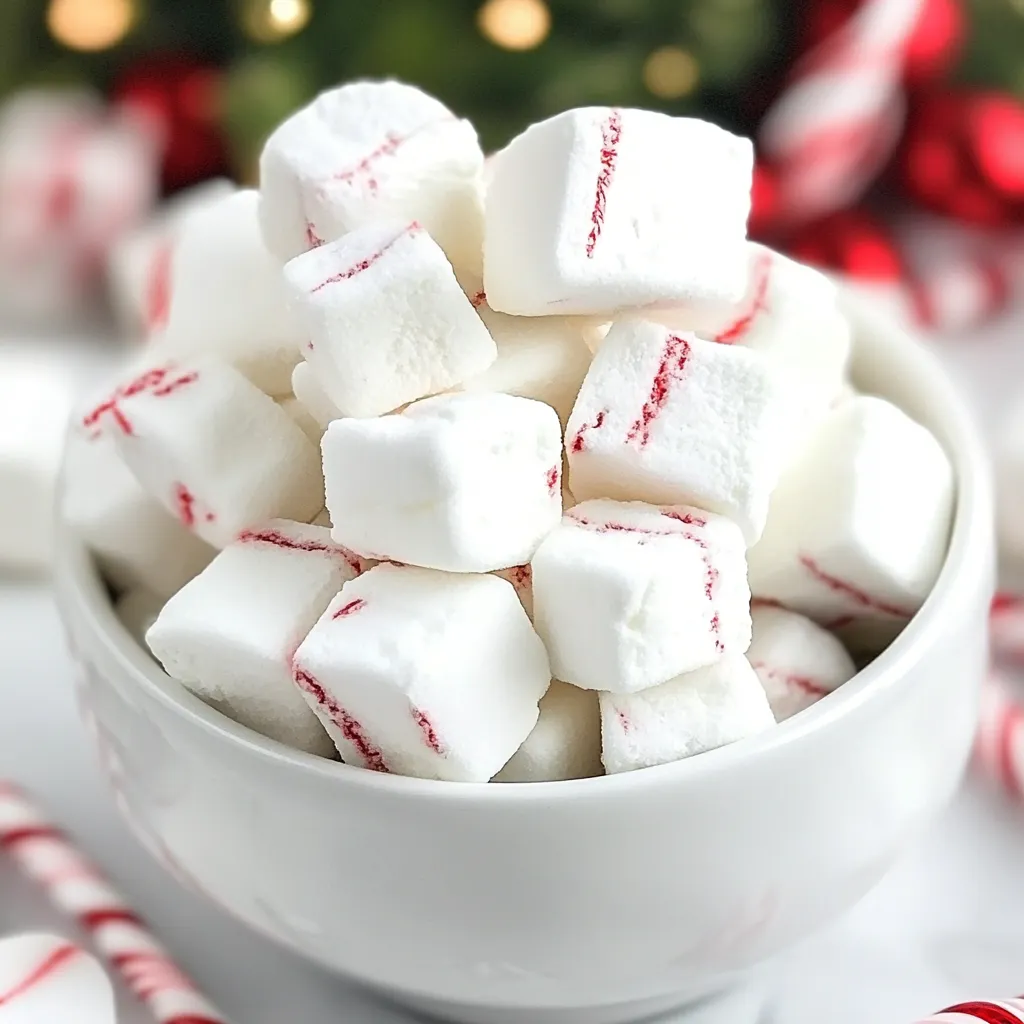
- After the mixture has thickened, add the vanilla extract and peppermint extract, mixing until incorporated, which should take around 15 seconds. The mixture will be fluffy and glossy, a delightful sight!
- Now, working quickly, scrape the mixture into the prepared pan using a spatula sprayed with non-stick cooking spray. Smooth the top to create an even layer. Next, sift 2 tablespoons of your powdered sugar mixture over the top of the marshmallows for a finishing touch. Cover the pan and let it sit at room temperature overnight to set.
- The next day, carefully turn the marshmallow slab out onto a cutting board. Peel away the foil and dust the top with more powdered sugar mixture. Using a pizza cutter or a sharp knife (also sprayed with non-stick cooking spray), cut into 1-inch strips. Then, cut across to create square marshmallows or use round cutters for fun shapes.
- Finally, take the remaining powdered sugar mixture and place it in a large Ziploc bag. Working with a few marshmallows at a time, toss them in the bag to coat with the sugar mixture. Use a fine-mesh strainer to shake off any excess powder. Store your marshmallows in an airtight container or bag for up to 2 weeks. Enjoy your homemade treats!
Notes
While the Nutritional values are based on one marshmallow, it's important to keep in mind that moderation is key to enjoying these delicious treats without overindulging. Store your marshmallows in an airtight container to keep them fresh longer.