Go Back
Fried Chicken

Fried Chicken

The ultimate comfort food, Fried Chicken is crispy on the outside and juicy within. A favorite for dinner or gatherings, this easy recipe will have you craving it tonight!
Prep Time 40 minutes
Cook Time 20 minutes
Total Time 1 hour
Servings: 3 servings
Course: Dinner
Cuisine: American
Calories: 450

Ingredients
  

  • 4 lbs whole chicken cut into pieces
  • vegetable oil for frying Essential for achieving that crispy texture.
  • 2 cups buttermilk Adds moisture and tenderizes the chicken beautifully.
  • 2 cups pickle juice A secret weapon for flavor and tenderness.
  • 1/4 cup hot sauce For those who love a spicy kick!
  • 2 cups all-purpose flour Creates the crispy crust we all crave.
  • 1 tablespoon salt Enhances the overall flavor.
  • 1 teaspoon ground black pepper Adds a hint of spice.
  • 1 tablespoon smoked paprika Brings warmth and depth to the flavor.
  • 1 tablespoon garlic powder A flavorful addition that complements the chicken perfectly.

Equipment

  • Wooden Spoon
  • Mixing Bowl
  • Frying pan
  • Skillet

Method
 

  1. Begin by cutting the chicken into 8 to 10 smaller pieces. It’s important to discard the backbone, but don’t throw it away! You can save it for making rich and flavorful chicken stock.
  2. In a large bowl, combine the pickle juice and buttermilk. Stir well to blend the flavors. If you enjoy a bit of heat, add some hot sauce to the mix.
  3. Carefully immerse the chicken pieces into the mixture, ensuring they are fully coated. This step is crucial for achieving maximum flavor and tenderness. Cover and let it sit aside for 30 minutes, or refrigerate for up to 24 hours for a deeper flavor.
  4. While the chicken is marinating, prepare a flour mixture in a medium, shallow bowl. Combine the flour, salt, pepper, garlic powder, and smoked paprika. This blend will create that irresistible crust.
  5. Set up a wire rack on a baking sheet nearby; this will be essential for draining the chicken after frying.
  6. After the marination period, take one piece of chicken out of the buttermilk mixture. Dredge it in the flour mixture, ensuring an even coat, then place it onto the prepared cooling rack. Let it rest for 20 to 30 minutes to allow the coating to adhere better.
  7. If you’re short on time, you can add the flour mixture to a large baking dish, then toss in the chicken, ensuring each piece is thoroughly coated before transferring them to the rack.
  8. In a large deep frying pan, fill it halfway with vegetable oil. Heat the oil to 365 degrees Fahrenheit. It’s crucial that the oil is hot enough to achieve that perfect crispiness.
  9. Carefully place a few pieces of chicken into the hot oil, being cautious not to overcrowd the pan. Fry in batches for around 10 to 15 minutes, or until each piece is golden brown and cooked through.
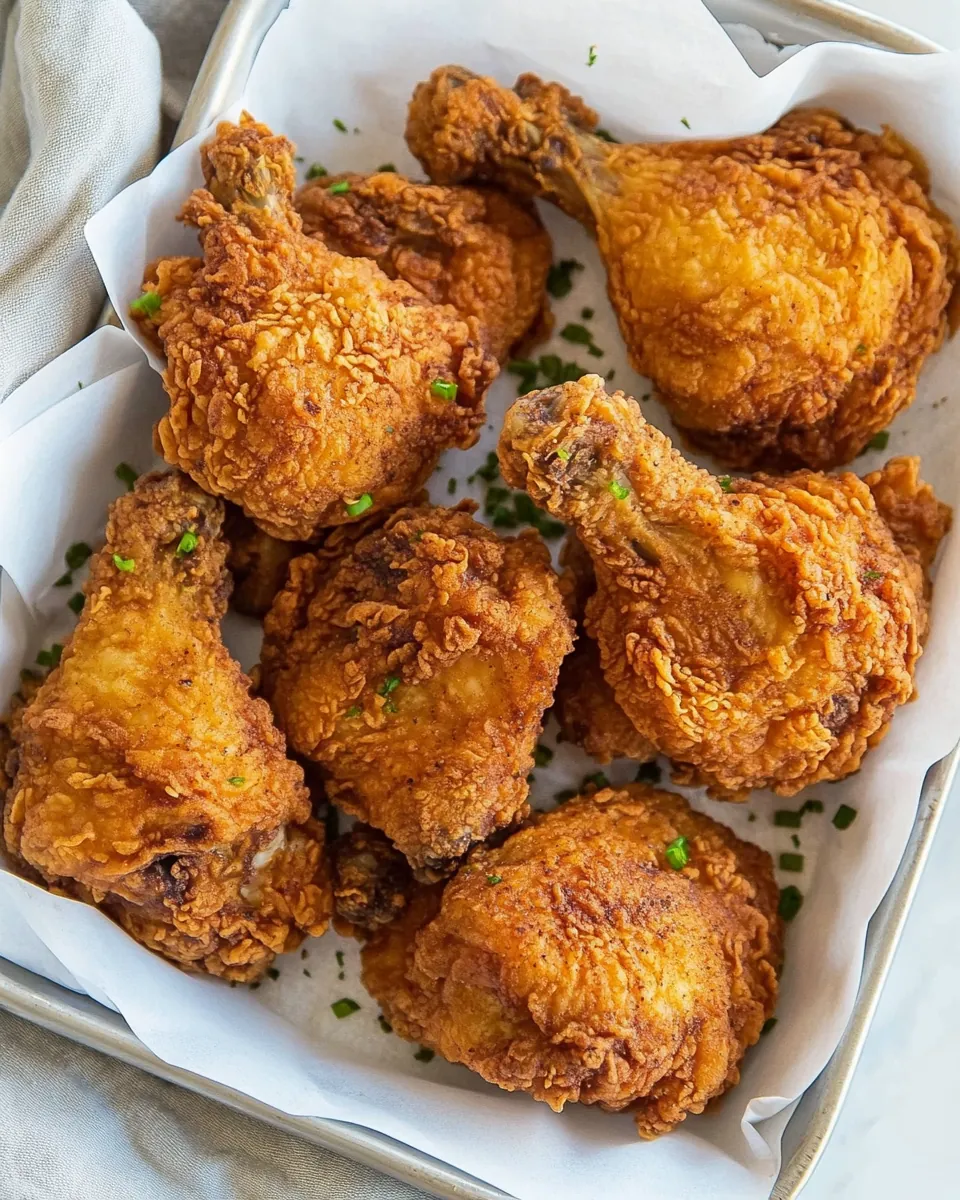
  10. Once fried, remove the chicken from the oil and place it on the cooling rack lined with paper towels. This will help drain any excess oil and keep the coating crispy.
  11. Finally, serve your delicious Fried Chicken with your favorite dipping sauce, and enjoy every juicy, crispy bite!

Notes

  • Tip 1: Do not throw away the backbone and neck. They can be used for chicken stock. Freeze them and they can be saved for up to six months.
  • Tip 2: Before frying, it’s essential to bring the meat to room temperature for even cooking.
  • Tip 3: Another way to check if the oil is hot enough is by using the tip of a wooden spoon. If little bubbles form around it, the oil is ready.
  • Tip 4: Use another thermometer for the chicken. Take it out when it reaches 155 degrees F. It will continue to heat up as it rests until it reaches 165 degrees F when it is served.
  • Tip 5: Drain the chicken on a wire rack OVER paper towels. Laying it on top of paper towels will make it soggy.
  • Tip 6: Be sure to add plenty of salt and pepper. These are the main seasonings in your chicken, so don’t forget them.
  • Tip 7: Avoid frying immediately after dredging, as this can cause the coating to peel off. It’s best to let it rest for at least 10 minutes on a wire cooling rack while the oil heats. Proper resting helps the coating stick, resulting in a crispy skin.