The first time I made Turtle Cookie Balls, I was hosting a game night with friends. We wanted something sweet to snack on between rounds of board games, and I thought these little delights would be the perfect addition. The mixture of creamy cream cheese, crunchy pecans, and rich chocolate made for a winning combination. As we sat around the table, I remember seeing everyone’s faces light up with joy after their first bite. It was a moment of pure bliss, and I knew I had stumbled upon a recipe that would quickly become a favorite. Fast forward to today, and these Turtle Cookie Balls are still a go-to for any gathering or simply when I want to treat myself. They’re easy to whip up, and trust me, once you share them with others, you’ll be asked for the recipe again and again!
Recipe Snapshot
30 mins
30 mins
0 mins
Easy
214 kcal
3 g
Keto, Gluten-Free, Low FODMAP
12 g
Pre-Cut Parchment Paper Baking Sheets, Silicone Spatula Set, Mixing bowl set
The Beauty of This Turtle Cookie Balls
They’re Incredibly Easy to Make
One of the best things about Turtle Cookie Balls is how simple they are to prepare. With just a handful of ingredients that you probably already have in your pantry, you can create these delicious snacks in no time!
The Ultimate Sweet and Salty Combination
The flavor profile of Turtle Cookie Balls is to die for. The sweetness of the chocolate and caramel beautifully contrasts with the crunchy pecans, making every bite a delightful surprise. It’s the perfect way to satisfy your sweet tooth while enjoying that satisfying crunch!
Perfect for Any Occasion
Whether you’re planning a birthday party, a holiday celebration, or just a casual get-together, Turtle Cookie Balls fit right in. They are versatile enough to become your new favorite go-to dessert for any event.
They Freeze Well
Another reason I love these cookie balls is that they freeze beautifully. You can make a large batch ahead of time and pop them in the freezer. When you have unexpected guests or cravings, you can pull them out and have a treat ready in minutes!
Kid-Friendly Fun
If you’re looking for a fun activity to do with the kids, making Turtle Cookie Balls is a great choice! Kids love rolling the cookie mixture into balls and dipping them in melted chocolate. It’s not just a cooking lesson; it’s a delightful experience!
Ingredient List for Turtle Cookie Balls

When it comes to making Turtle Cookie Balls, the ingredients you choose are essential to achieving that perfect combination of taste and texture. Each component plays a vital role in creating these delicious treats. The creamy cream cheese serves as the perfect base, while the rich chocolate coating adds a satisfying crunch. Let’s take a closer look at these key players:
- 8 ounces cream cheese, softened: The creamy base that binds everything together, providing richness and moisture.
- 70 vanilla wafer cookies, finely crushed (about 2-1/3 cups): These add a delightful sweetness and texture to the cookie balls.
- 3 tablespoons caramel ice cream topping: This brings a luscious sweetness and a hint of caramel flavor that enhances the overall experience.
- 16 ounces semi-sweet baking chocolate, broken into pieces, melted: This coats the outside of the cookie balls, providing a decadent chocolate layer that’s hard to resist.
- ¼ cup chopped pecans: These add a wonderful crunch and nutty flavor that perfectly complements the sweetness of the other ingredients.
Making This Turtle Cookie Balls
Creating Turtle Cookie Balls is a fun and rewarding process that I always look forward to. The first step is mixing your ingredients together, which fills your kitchen with an irresistible aroma. You’ll love transforming those simple ingredients into a delightful treat. Let’s dive into the making process!
- In a mixing bowl, combine the softened cream cheese, crushed vanilla wafer cookies, and caramel ice cream topping. Use a spatula to mix them until they are well blended. The mixture should be smooth and creamy, with all the cookie crumbs evenly distributed.
- Once the mixture is combined, it’s time to get your hands a little messy! Shape the mixture into small balls, about 1 inch in diameter. You should get around 42 balls. The dough may be a little sticky, so I like to wet my hands slightly to make this easier.
- After shaping the balls, place them on a baking sheet lined with pre-cut parchment paper. This will prevent them from sticking and make cleanup a breeze.
- Now, pop the baking sheet in the freezer for about 10 minutes. This allows the balls to firm up, making them easier to dip in chocolate.
- While the cookie balls are chilling, melt the semi-sweet baking chocolate. You can do this in a microwave-safe bowl. Heat the chocolate in 30-second intervals, stirring in between until it’s completely melted and smooth.
- Once the cookie balls are firm, take them out of the freezer. Using a fork or a dipping tool, dip each ball into the melted chocolate, coating it evenly. Let any excess chocolate drip off.
- After dipping, return the chocolate-covered balls to the baking sheet. Be sure to work quickly so the chocolate doesn’t harden before you’re finished!
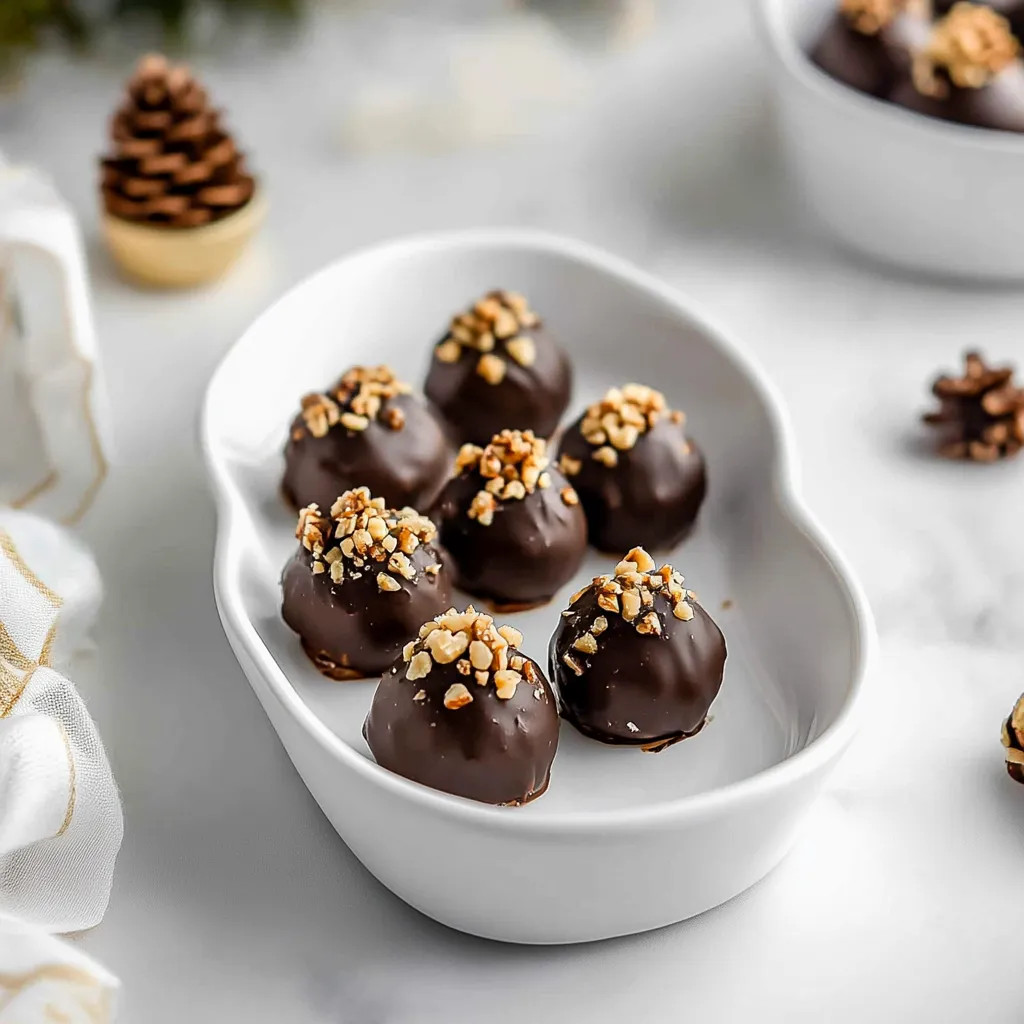
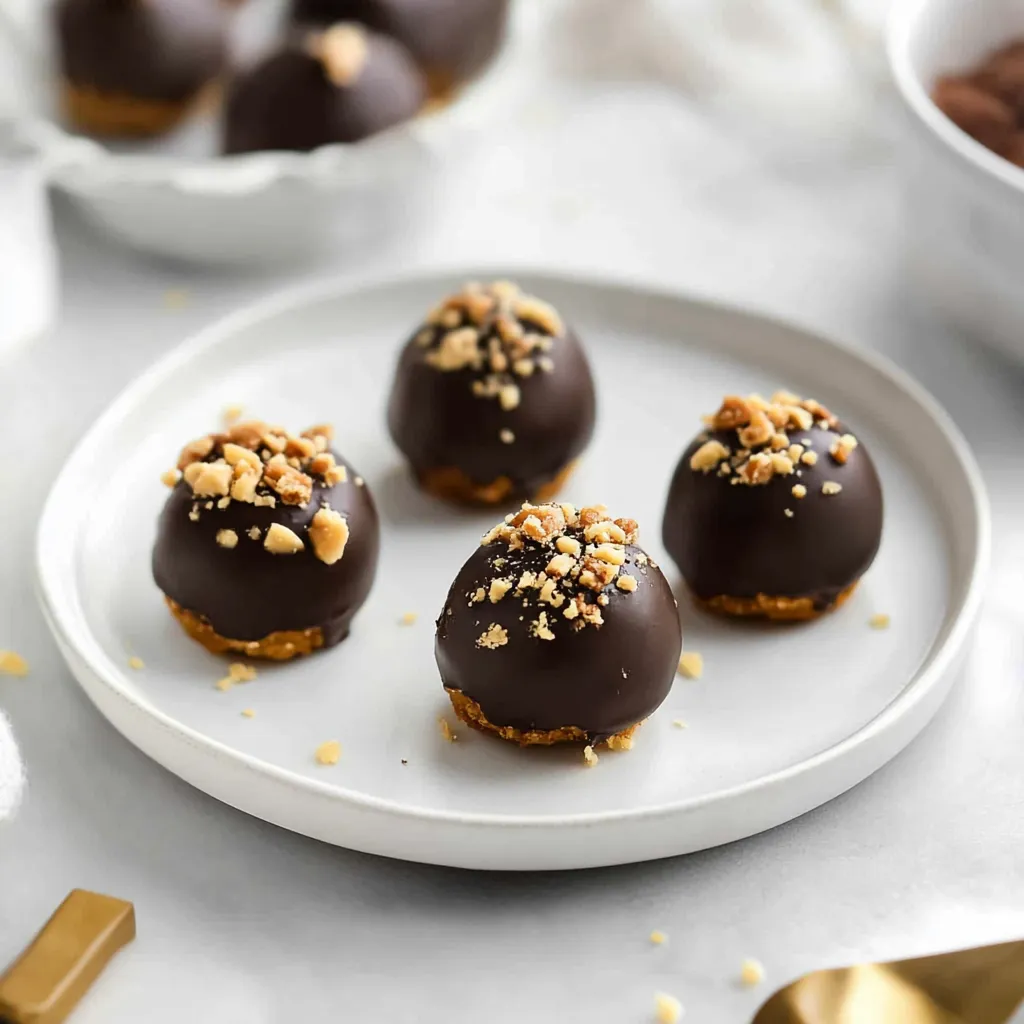
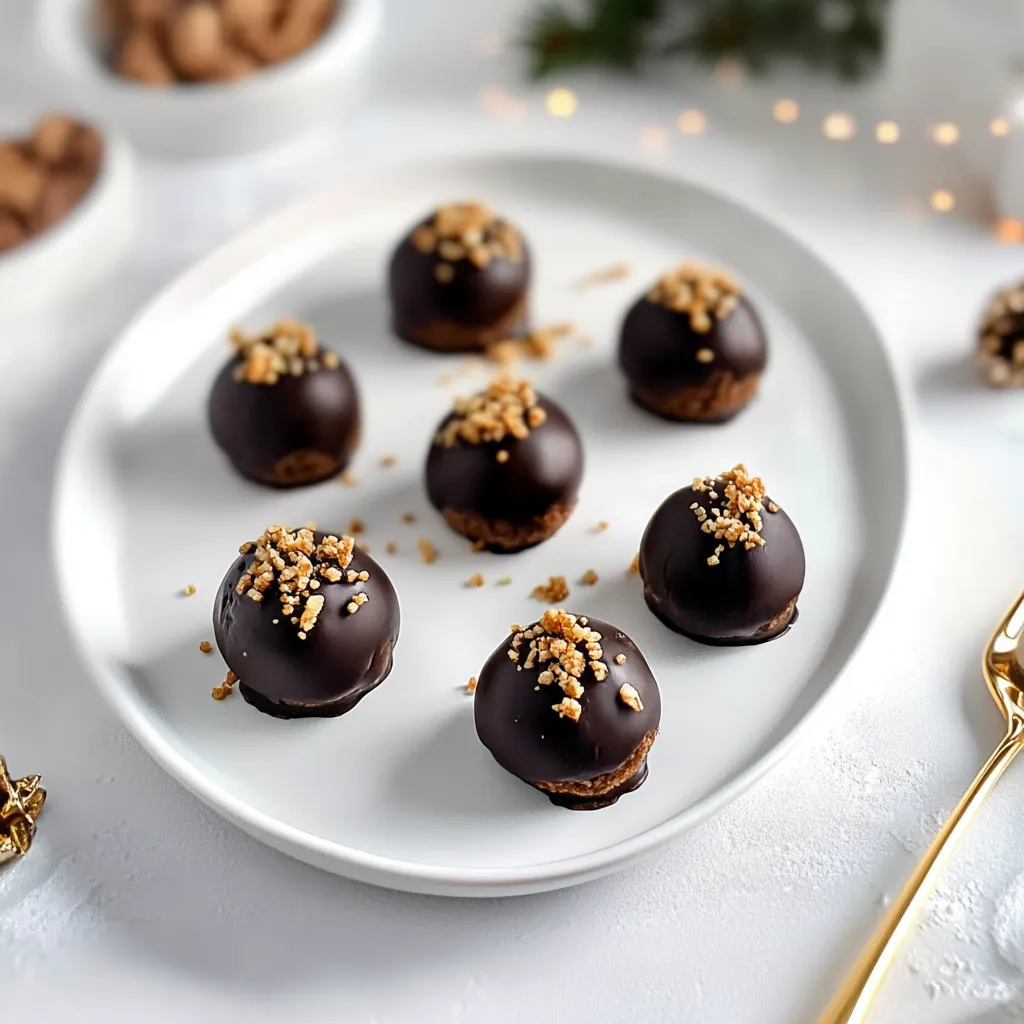
- Before the chocolate sets completely, sprinkle the tops of the balls with chopped pecans. This adds an extra layer of flavor and a delightful crunch.
- Finally, place the baking sheet in the refrigerator for about 1 hour, or until the chocolate is firm. Once set, your Turtle Cookie Balls are ready to be enjoyed!
Things Worth Knowing
- Chill Your Ingredients: For best results, ensure your cream cheese is at room temperature before mixing, as this allows for a smoother blend.
- Be Mindful of Chocolate Temperatures: If you overheat the chocolate, it can seize. Always melt it gently and stir until smooth.
- Experiment with Toppings: Feel free to get creative! You can also use shredded coconut, crushed candy, or sprinkles as toppings.
- Make Ahead: These cookie balls can be made a day in advance and stored in the fridge, making them a great option for parties.
Tips for Success
To make your experience with Turtle Cookie Balls as enjoyable and efficient as possible, here are some helpful tips:
- Storage: Store any leftover cookie balls in an airtight container in the refrigerator. They’ll stay fresh for up to a week.
- Freezing: You can freeze these treats as well! Just place them in a single layer in a freezer-safe container, and they can last for up to 3 months.
- Pairing: These cookies pair wonderfully with a cup of coffee or a glass of milk, making them a perfect afternoon snack.
- Serving Size: Adjust the size of your cookie balls based on your preference. You can make larger or smaller bites depending on the occasion!
- Experiment with Flavor: Want to mix it up? Try adding a hint of cinnamon or a splash of espresso powder to the mixture for a different flavor profile.
- Chocolate Variations: Use white chocolate, milk chocolate, or dark chocolate for coating instead of semi-sweet chocolate, based on your taste preference.
Accompaniments for Turtle Cookie Balls
- Coffee or Tea: Enjoy these cookie balls with a warm cup of your favorite beverage.
- Ice Cream: Pair them with a scoop of vanilla or caramel ice cream for an indulgent dessert.
- Seasonal Parties: These treats are perfect for holiday gatherings, birthday parties, or any celebration!
- Gift Giving: Package them in a decorative box as a sweet gift for friends and family.
- Sweet Tables: Include these in dessert tables at events, alongside other treats for a delightful spread.
- Storage Tips: Keep them cool to maintain their shape, especially in warm weather.
FAQ
Conclusion
Turtle Cookie Balls are not just a delicious treat; they encapsulate the joy of sharing good food with loved ones. Their perfect blend of flavors and textures makes them a standout dessert that everyone will appreciate. I encourage you to try making them for your next gathering or even just for yourself. You won’t regret indulging in these delightful bites!
Turtle Cookie Balls
Ingredients
Equipment
Method
- Mix the softened cream cheese, crushed vanilla wafer cookies, and caramel ice cream topping until blended.
- Shape the mixture into 42 (1-inch) balls.
- Freeze for 10 minutes.
- Dip the balls in melted chocolate and place them in a single layer in a shallow waxed paper-lined pan.
- Sprinkle with chopped pecans.
- Refrigerate for 1 hour or until firm.
Notes
- Storage: Store any leftover cookie balls in an airtight container in the refrigerator. They’ll stay fresh for up to a week.
- Freezing: You can freeze these treats as well! Just place them in a single layer in a freezer-safe container, and they can last for up to 3 months.
- Pairing: These cookies pair wonderfully with a cup of coffee or a glass of milk, making them a perfect afternoon snack.
- Serving Size: Adjust the size of your cookie balls based on your preference. You can make larger or smaller bites depending on the occasion!
- Experiment with Flavor: Want to mix it up? Try adding a hint of cinnamon or a splash of espresso powder to the mixture for a different flavor profile.
- Chocolate Variations: Use white chocolate, milk chocolate, or dark chocolate for coating instead of semi-sweet chocolate, based on your taste preference.