There’s something incredibly nostalgic about the combination of peanut butter and chocolate that takes me straight back to my childhood. It reminds me of summer nights spent under the stars, roasting marshmallows and sharing stories with friends. That’s why I absolutely love these No Bake S’mores Peanut Butter Bars. They capture that perfect blend of flavors without the hassle of turning on the oven. Whenever I make these bars, I can’t help but feel a wave of fond memories wash over me, and I’m sure you’ll want to create some of your own. Perfect for summer gatherings, picnics, or simply a sweet treat after a long day, these bars are definitely a crowd-pleaser!
Recipe Snapshot
60 mins
0 mins
0 mins
Easy
280 kcal
4 g
Vegan, Gluten-Free, Low FODMAP
14 g
Chef’s Knife, Frying Pan, Mixing Bowl, Wooden Spoon
The Beauty of This No Bake S’mores Peanut Butter Bars
Easy to Make
What I love most about the No Bake S’mores Peanut Butter Bars is how simple they are to whip up. You won’t need any fancy equipment or complicated techniques—just a few mixing bowls and your hands! The beauty of no-bake recipes is that they don’t require any oven time, which means you can enjoy delicious treats even on the hottest summer days.
Crowd-Pleasing Flavor
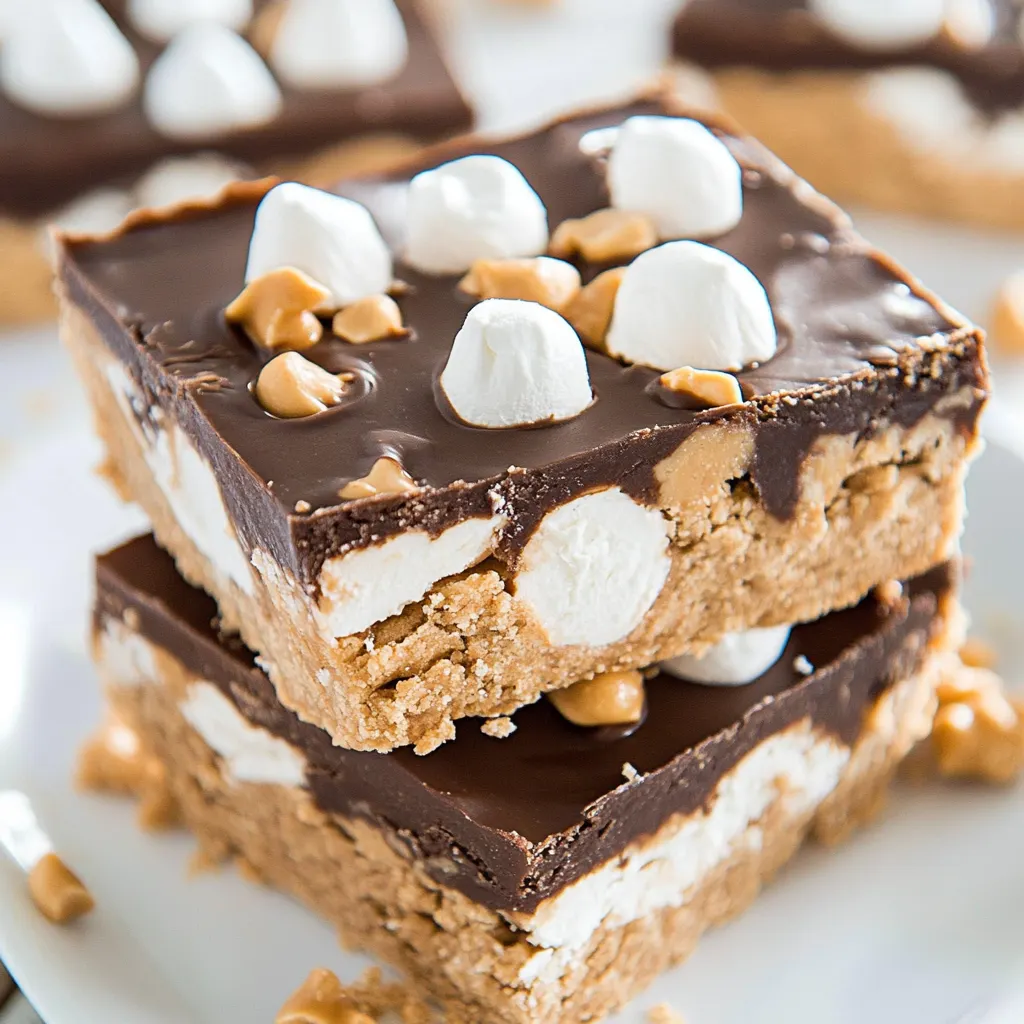
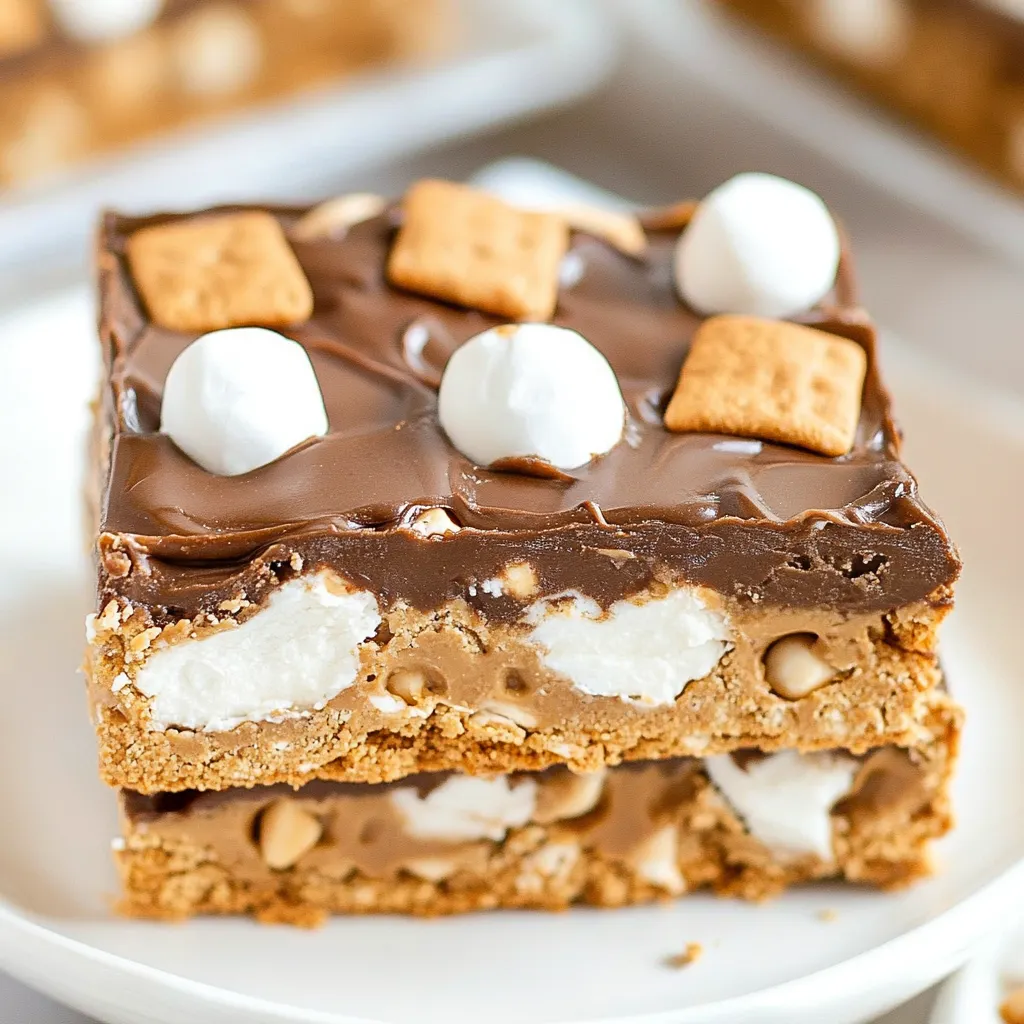
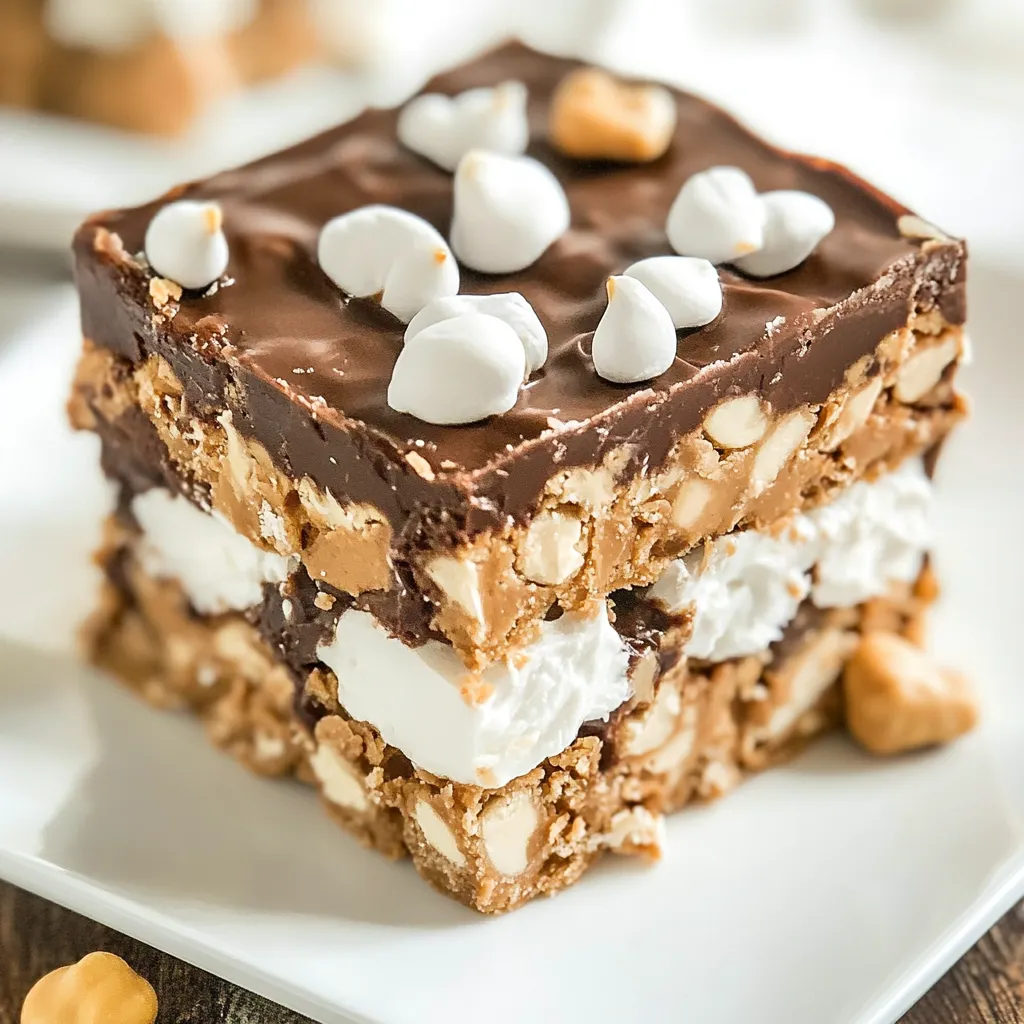
The combination of creamy peanut butter, crunchy Ritz cracker crumbs, and sweet chocolate chips makes these bars irresistible. Each bite is a perfect balance of salty and sweet, which is always a hit at parties. Whether you’re serving them at a family gathering or just for yourself, you’ll be amazed at how quickly they disappear!
Perfect for Any Occasion
These bars are versatile enough for any occasion. Whether you’re hosting a birthday party, a summer BBQ, or just looking for a sweet snack, they fit perfectly into any scenario. Plus, they are easy to transport, making them a great option for potlucks or picnics. Everyone will want to know your secret!
Customizable
While I love the traditional version with mini marshmallows, you can easily customize these bars to suit your taste. Want more crunch? Add in some chopped nuts or a sprinkle of graham cracker crumbs on top. You can even experiment with different types of chocolate or peanut butter. The possibilities are endless!
Make Ahead
These bars are also a great option if you’re looking for something to make ahead of time. Just whip them up, refrigerate them, and they’ll be ready when you are! You can slice them into squares and store them in an airtight container for up to four days—if they last that long!
No Bake S’mores Peanut Butter Bars Shopping List
Gathering the right ingredients for these No Bake S’mores Peanut Butter Bars is half the fun. The ingredients come together beautifully to create a sweet and satisfying treat. Each element plays a crucial role, from the peanut butter that brings creaminess to the bars to the chocolate chips that add that irresistible sweetness. Let’s dive into what you’ll need.
- 8 tablespoons unsalted butter – Melted butter is essential for binding the ingredients together and adding richness to the flavor.
- 2 cups Ritz Cracker crumbs – These give the bars a lovely crunch and salty flavor, balancing the sweetness perfectly.
- 1 1/4 cups powdered sugar – This sweet component helps to sweeten the bars and create a smooth texture.
- 3/4 cup + 2 tablespoons peanut butter – The star of the show! It adds creaminess and a delicious nutty flavor.
- 3 cups mini marshmallows – These provide that classic s’mores flavor and texture, making each bite chewy and delightful.
- 1 cup chocolate chips – Melted and drizzled on top, they bring a rich chocolate flavor that everyone loves.
Making No Bake S’mores Peanut Butter Bars
Making these scrumptious No Bake S’mores Peanut Butter Bars is a breeze and so much fun! You’ll be amazed at how quickly they come together. Just follow these simple steps to create your own batch of deliciousness. Let’s get started!
- Begin by lining a 9×9” pan with foil and spritzing it with nonstick cooking spray. This makes it easy to remove the bars later!
- In a large mixing bowl, stir together the melted butter, Ritz cracker crumbs, 3/4 cup of peanut butter, and powdered sugar. Mix until everything is well combined. The mixture will be thick, so don’t be afraid to use your hands if necessary!
- Next, fold in the mini marshmallows gently but thoroughly. You want to ensure that they’re evenly distributed throughout the mixture. This will give your bars those delightful pockets of gooey marshmallow.
- Once everything is mixed well, press the mixture into the prepared pan, making sure it’s evenly spread out. Use a spatula to smooth the top for a nice presentation.
- Now it’s time to melt the chocolate chips! Combine them with the remaining 2 tablespoons of peanut butter in a microwave-safe bowl. Heat in 30-second increments, stirring between each, until the mixture is completely melted and smooth.
- Spread the melted chocolate mixture evenly over the top of your pressed bars. This chocolate layer adds an indulgent finish to your No Bake S’mores Peanut Butter Bars.
- Refrigerate the bars for about 2 hours or until they’re firm enough to slice. You’ll know they’re ready when the chocolate has set and the bars hold together well.
- Once set, lift the bars out of the pan using the foil edges. Cut into squares, and admire your delicious creation!
- Store any leftovers in an airtight container in the refrigerator for up to four days. But let’s be honest, they probably won’t last that long!
Things Worth Knowing
- Make sure your butter is fully melted before mixing; this helps the bars hold together.
- Press the mixture firmly into the pan; this ensures your bars won’t crumble when cut.
- For a touch of extra flavor, consider adding a pinch of salt to the melted chocolate mix.
- If you prefer a thicker layer of chocolate, feel free to double the amount!
Tips for Success

To ensure your No Bake S’mores Peanut Butter Bars turn out perfectly, here are some helpful tips. These suggestions will make your experience smoother, and your bars even more delicious!
- Storage: Keep your bars in an airtight container to maintain their freshness and prevent them from drying out.
- Freezing: You can freeze these bars for up to three months. Just wrap them tightly in plastic wrap before placing them in a freezer-safe container.
- Serving: For an extra special treat, serve these bars drizzled with more melted chocolate or a sprinkle of crushed graham crackers on top.
- Variations: Experiment with different types of chocolate or add-ins, such as nuts or dried fruits!
- Make Ahead: These bars can be made a day in advance, making them perfect for entertaining.
Serving Ideas for No Bake S’mores Peanut Butter Bars
When it comes to serving your No Bake S’mores Peanut Butter Bars, the options are plentiful! Here are some ideas to elevate your serving game:
- Picnic Treats: Cut the bars into smaller squares and pack them in a container for an easy on-the-go treat during a family picnic.
- Summer BBQ: Serve these bars as a dessert option at your next BBQ. They pair wonderfully with grilled foods and are a hit with kids and adults alike.
- Movie Night: These bars make the perfect sweet snack for movie nights. Just cut them into bite-sized pieces and enjoy!
- Celebration Parties: Whether it’s a birthday or a casual gathering, these bars are sure to impress your guests.
- Pair with Ice Cream: Serve a square of the bars alongside a scoop of vanilla ice cream for a deliciously decadent dessert.
FAQ
Conclusion
The No Bake S’mores Peanut Butter Bars are a delightful dessert that perfectly combines flavors and textures, making them a must-try for any gathering. I encourage you to whip up a batch and share them with friends and family. Everyone will love the nostalgia and comfort they bring—trust me, you won’t be disappointed!
No Bake S'mores Peanut Butter Bars
Ingredients
Equipment
Method
- Line a 9x9” pan with foil and spray with nonstick cooking spray.
- Stir melted butter, cracker crumbs, 3/4 cup peanut butter, and powdered sugar in a large bowl until smooth. Mixture will be thick. Stir in mini marshmallows. Press into prepared pan.
- Melt chocolate chips with remaining 2 tablespoons peanut butter. Heat on high for 30 second increments, stirring between each, until melted and smooth. Spread over the top of the bars.
- Chill the bars to let them set, then slice into squares. Store in an airtight container in the refrigerator for up to 4 days.
Notes
- Storage: Keep your bars in an airtight container to maintain their freshness and prevent them from drying out.
- Freezing: You can freeze these bars for up to three months. Just wrap them tightly in plastic wrap before placing them in a freezer-safe container.
- Serving: For an extra special treat, serve these bars drizzled with more melted chocolate or a sprinkle of crushed graham crackers on top.
- Make Ahead: These bars can be made a day in advance, making them perfect for entertaining.