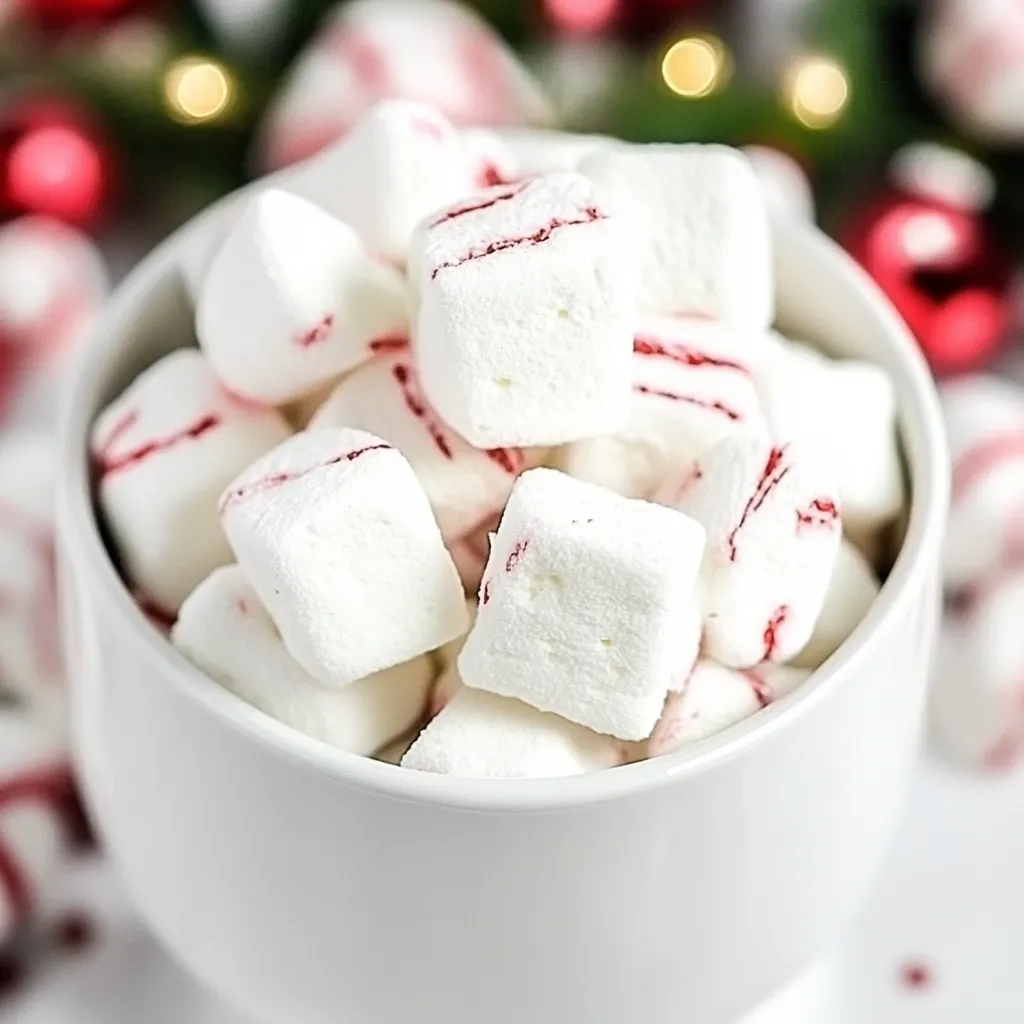
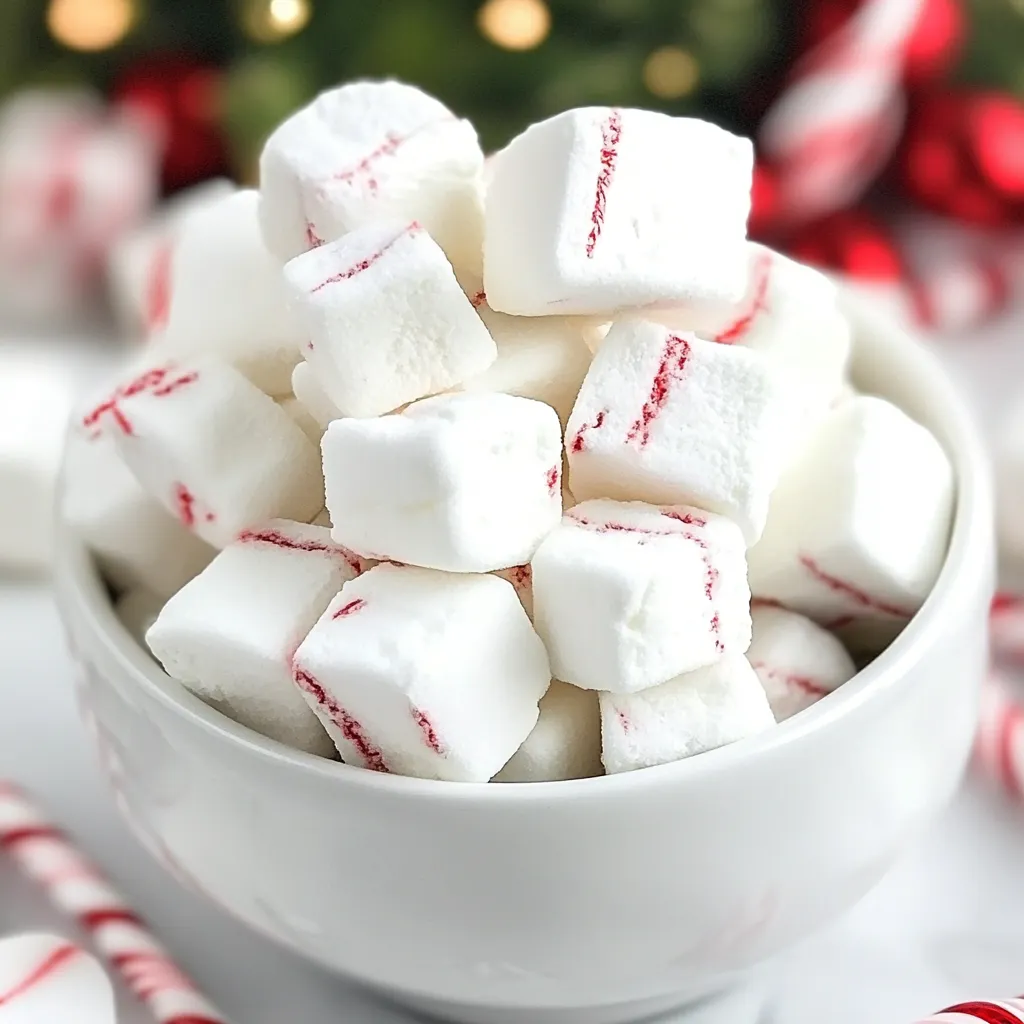
When the colder months roll in, I find myself reminiscing about the cozy evenings spent with warm treats and sweet delights. One of my favorite go-to recipes is Homemade Peppermint Marshmallows. There’s just something magical about crafting these fluffy bites of joy, especially when the peppermint aroma fills the air. I remember the first time I made them; my kitchen was a whirlwind of sugar and laughter, and my family’s faces lit up with excitement as I shared them. These marshmallows are not just a treat; they’re a wonderful activity to do with loved ones, bonding over the sticky sweetness and the anticipation of tasting our creations. Whether you enjoy them in hot cocoa or simply munch on them as a delightful snack, they bring warmth and a touch of nostalgia to any winter gathering.
Recipe Snapshot
30 mins
30 mins
0 mins
Medium
50 kcal
0g g
Gluten-Free, Low FODMAP
0g g
Large Pot, Frying Pan, Whisk, Mixing Bowl, Peeler
What You’ll Enjoy About This Homemade Peppermint Marshmallows
They’re Incredibly Fun to Make
There’s a certain joy that comes from making Homemade Peppermint Marshmallows. The process itself is filled with playful moments, from whipping the mixture to watching it transform into fluffy clouds. I love involving my kids or friends, making it a fun-filled culinary adventure!
The Perfect Addition to Hot Beverages
Nothing beats a steaming cup of cocoa topped with a fluffy homemade marshmallow. The way they slowly melt into your drink is pure bliss, creating a comforting winter experience that warms your heart and soul.
Customizable Flavors and Sizes
While these marshmallows are delightfully peppermint-flavored, you can experiment with various extracts or spices to create your own unique versions. I often make different shapes and sizes, perfect for every occasion!
Great for Gifting
Homemade treats always make lovely gifts, especially around the holidays. Imagine giving a box of Homemade Peppermint Marshmallows wrapped in festive packaging, a truly heartfelt present that shows how much you care.
Wonderful for Celebrations
Whether it’s Christmas or a winter party, these marshmallows add a whimsical touch to any gathering. They can be used in s’mores, desserts, or simply enjoyed on their own, making them a versatile treat.
Perfectly Nostalgic
For many of us, marshmallows remind us of our childhood. Making Homemade Peppermint Marshmallows allows me to pass on this nostalgic experience to the next generation, a sweet tradition to cherish.
Ingredients You’ll Need for Homemade Peppermint Marshmallows
Each ingredient in this recipe plays a vital role in achieving that fluffy, light texture we all adore. The combination of granulated sugar, light corn syrup, and unflavored gelatin is what gives these marshmallows their delightful chew and softness. The powdered sugar and cornstarch create a perfect coating, keeping them from sticking together. And, of course, the peppermint extract adds that signature refreshing flavor, making them ideal for wintertime indulgence.
- Powdered Sugar: ⅔ cup (80g) – This is essential for dusting the marshmallows and preventing them from sticking.
- Cornstarch: ⅓ cup (42.67g) – Used alongside powdered sugar for coating to create a non-stick layer.
- Cold Water: 1 cup (250ml), divided – It helps in dissolving the gelatin and also in the syrup mixture.
- Unflavored Gelatin: 2½ tablespoons – This is the magic ingredient that gives marshmallows their fluffy texture.
- Light Corn Syrup: ⅔ cup (227.33ml) – It helps in preventing crystallization in the sugar syrup.
- Granulated Sugar: 2 cups (400g) – The base sweetness of the marshmallows.
- Salt: ¼ teaspoon – A little salt balances the sweetness perfectly.
- Peppermint Extract: ½ teaspoon – For that refreshing minty flavor that makes these marshmallows special.
- Vanilla Extract: 2 teaspoons – Adds depth to the flavor profile.
Step by Step Instructions for Homemade Peppermint Marshmallows
Making Homemade Peppermint Marshmallows is a delightful adventure that results in fluffy, sweet goodness. Follow these steps carefully to ensure the perfect outcome, and don’t rush the process. Enjoy each stage, knowing that soon you’ll have a treat that everyone will love!
First, start by lining a 9×13-inch pan with foil. Make sure to leave some excess hanging over the edges; this will make it easier to lift the marshmallows out later. Then, spray the foil with non-stick cooking spray to ensure nothing sticks.
In a small bowl, whisk together the powdered sugar and cornstarch. This mixture will be used to coat the marshmallows later, preventing them from sticking together. Set it aside for now.
In the bowl of an electric mixer fitted with a whisk attachment, pour in half a cup of the cold water. Sprinkle the unflavored gelatin over the water, allowing it to bloom for about 15 minutes. Watch as it thickens slightly; this is an important step for achieving the right texture.
Meanwhile, in a medium saucepan, combine the remaining cold water with the light corn syrup. Gradually pour in the granulated sugar and add the salt. Place the pan over medium-high heat. Stir gently until the sugar dissolves and the mixture comes to a boil. Use a candy thermometer to monitor the temperature until it reaches 240 degrees F, about 6 to 8 minutes.
Once the syrup reaches the correct temperature, turn the mixer on low speed. Carefully pour the hot syrup into the gelatin mixture, avoiding the sides of the bowl as much as possible to prevent any splatter. Gradually increase the speed to high and whip the mixture until it becomes very thick and stiff, which will take about 10 to 12 minutes. Don’t forget to scrape down the sides of the bowl occasionally.
After the mixture has thickened, add the vanilla extract and peppermint extract, mixing until incorporated, which should take around 15 seconds. The mixture will be fluffy and glossy, a delightful sight!
Now, working quickly, scrape the mixture into the prepared pan using a spatula sprayed with non-stick cooking spray. Smooth the top to create an even layer. Next, sift 2 tablespoons of your powdered sugar mixture over the top of the marshmallows for a finishing touch. Cover the pan and let it sit at room temperature overnight to set.
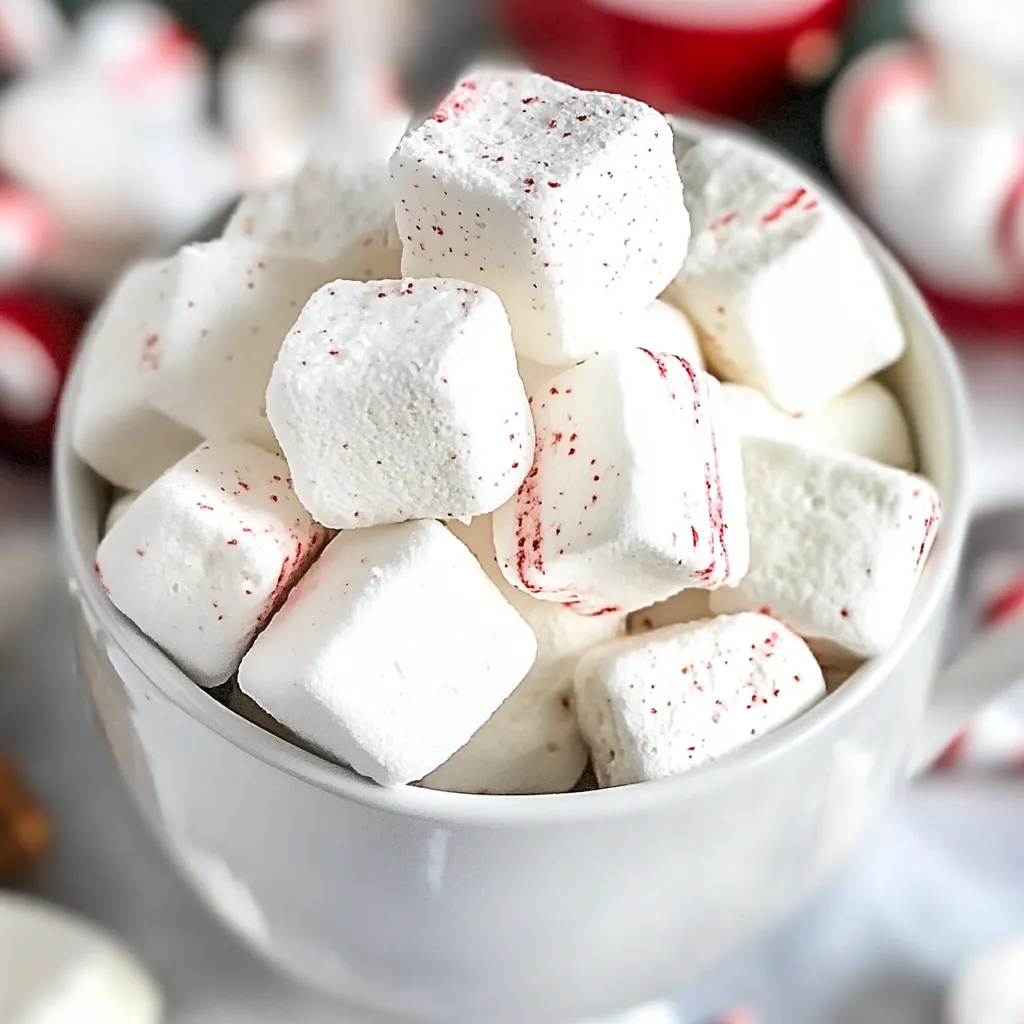
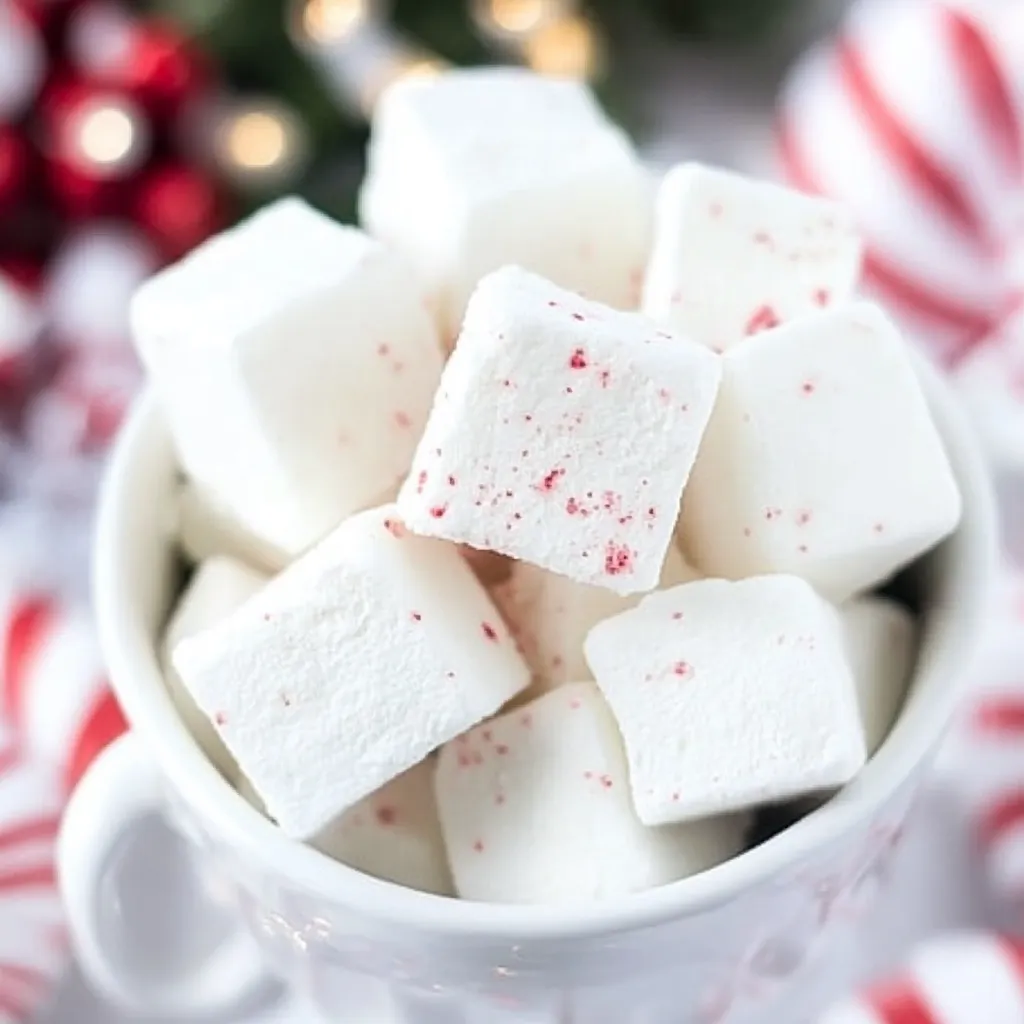
The next day, carefully turn the marshmallow slab out onto a cutting board. Peel away the foil and dust the top with more powdered sugar mixture. Using a pizza cutter or a sharp knife (also sprayed with non-stick cooking spray), cut into 1-inch strips. Then, cut across to create square marshmallows or use round cutters for fun shapes.
Finally, take the remaining powdered sugar mixture and place it in a large Ziploc bag. Working with a few marshmallows at a time, toss them in the bag to coat with the sugar mixture. Use a fine-mesh strainer to shake off any excess powder. Store your marshmallows in an airtight container or bag for up to 2 weeks. Enjoy your homemade treats!
Things Worth Knowing
- Use a Candy Thermometer: It’s crucial for achieving the right sugar temperature. This ensures the marshmallows set perfectly without being too sticky or too firm.
- Blooming Gelatin: Allowing the gelatin to bloom properly is key. It gives marshmallows their signature fluffy texture.
- Mixing Speed: Start on low speed when adding the syrup to avoid splattering, then increase to high for the best results.
- Thickening Time: Whipping the mixture for the full 10 to 12 minutes helps it achieve maximum volume and stability.
Ways to Customize
There are endless possibilities when it comes to customizing your Homemade Peppermint Marshmallows. Here are some fun ideas to try!
- Flavor Variations: Experiment with other flavors by swapping out the peppermint extract for almond or coconut extract.
- Color Themes: Add food coloring to the mixture for festive colors that match the occasion.
- Coating Options: Instead of powdered sugar, try using crushed nuts or cocoa powder for unique coatings.
- Shape it Up: Use different cookie cutters to create fun holiday shapes for parties or events.
- Infused Sugars: Infuse your granulated sugar with flavors like vanilla or citrus zest for extra flavor depth.
- Dip in Chocolate: Once set, dip half of each marshmallow in melted chocolate for a delicious twist.
What to Pair With Homemade Peppermint Marshmallows
Pairing Homemade Peppermint Marshmallows with the right accompaniments can elevate your treat! Here are some ideas to enhance your experience:
- Hot Chocolate: Nothing beats a warm cup of hot chocolate topped with these fluffy marshmallows.
- Coffee: Add them to your coffee for a sweet twist on your morning brew!
- Ice Cream: Use as a topping over vanilla ice cream for a delightful contrast of textures and flavors.
- Baking: Incorporate into brownies or rice crispy treats for an unexpected twist.
- Gifts: Package them nicely in jars for the perfect homemade gift during the holiday season.
- Parties: Serve as a fun dessert option at gatherings or enjoy them while watching movies.
FAQ
Conclusion
In summary, Homemade Peppermint Marshmallows are a delightful treat that brings warmth and joy to any occasion. With their fluffy texture and refreshing flavor, they’re sure to impress your family and friends. I encourage you to try making them; it’s a fun and rewarding experience that will fill your home with sweet memories.
Homemade Peppermint Marshmallows
Ingredients
Equipment
Method
- First, start by lining a 9×13-inch pan with foil. Make sure to leave some excess hanging over the edges; this will make it easier to lift the marshmallows out later. Then, spray the foil with non-stick cooking spray to ensure nothing sticks.
- In a small bowl, whisk together the powdered sugar and cornstarch. This mixture will be used to coat the marshmallows later, preventing them from sticking together. Set it aside for now.
- In the bowl of an electric mixer fitted with a whisk attachment, pour in half a cup of the cold water. Sprinkle the unflavored gelatin over the water, allowing it to bloom for about 15 minutes. Watch as it thickens slightly; this is an important step for achieving the right texture.
- Meanwhile, in a medium saucepan, combine the remaining cold water with the light corn syrup. Gradually pour in the granulated sugar and add the salt. Place the pan over medium-high heat. Stir gently until the sugar dissolves and the mixture comes to a boil. Use a candy thermometer to monitor the temperature until it reaches 240 degrees F, about 6 to 8 minutes.
- Once the syrup reaches the correct temperature, turn the mixer on low speed. Carefully pour the hot syrup into the gelatin mixture, avoiding the sides of the bowl as much as possible to prevent any splatter. Gradually increase the speed to high and whip the mixture until it becomes very thick and stiff, which will take about 10 to 12 minutes. Don’t forget to scrape down the sides of the bowl occasionally.
- After the mixture has thickened, add the vanilla extract and peppermint extract, mixing until incorporated, which should take around 15 seconds. The mixture will be fluffy and glossy, a delightful sight!
- Now, working quickly, scrape the mixture into the prepared pan using a spatula sprayed with non-stick cooking spray. Smooth the top to create an even layer. Next, sift 2 tablespoons of your powdered sugar mixture over the top of the marshmallows for a finishing touch. Cover the pan and let it sit at room temperature overnight to set.
- The next day, carefully turn the marshmallow slab out onto a cutting board. Peel away the foil and dust the top with more powdered sugar mixture. Using a pizza cutter or a sharp knife (also sprayed with non-stick cooking spray), cut into 1-inch strips. Then, cut across to create square marshmallows or use round cutters for fun shapes.
- Finally, take the remaining powdered sugar mixture and place it in a large Ziploc bag. Working with a few marshmallows at a time, toss them in the bag to coat with the sugar mixture. Use a fine-mesh strainer to shake off any excess powder. Store your marshmallows in an airtight container or bag for up to 2 weeks. Enjoy your homemade treats!