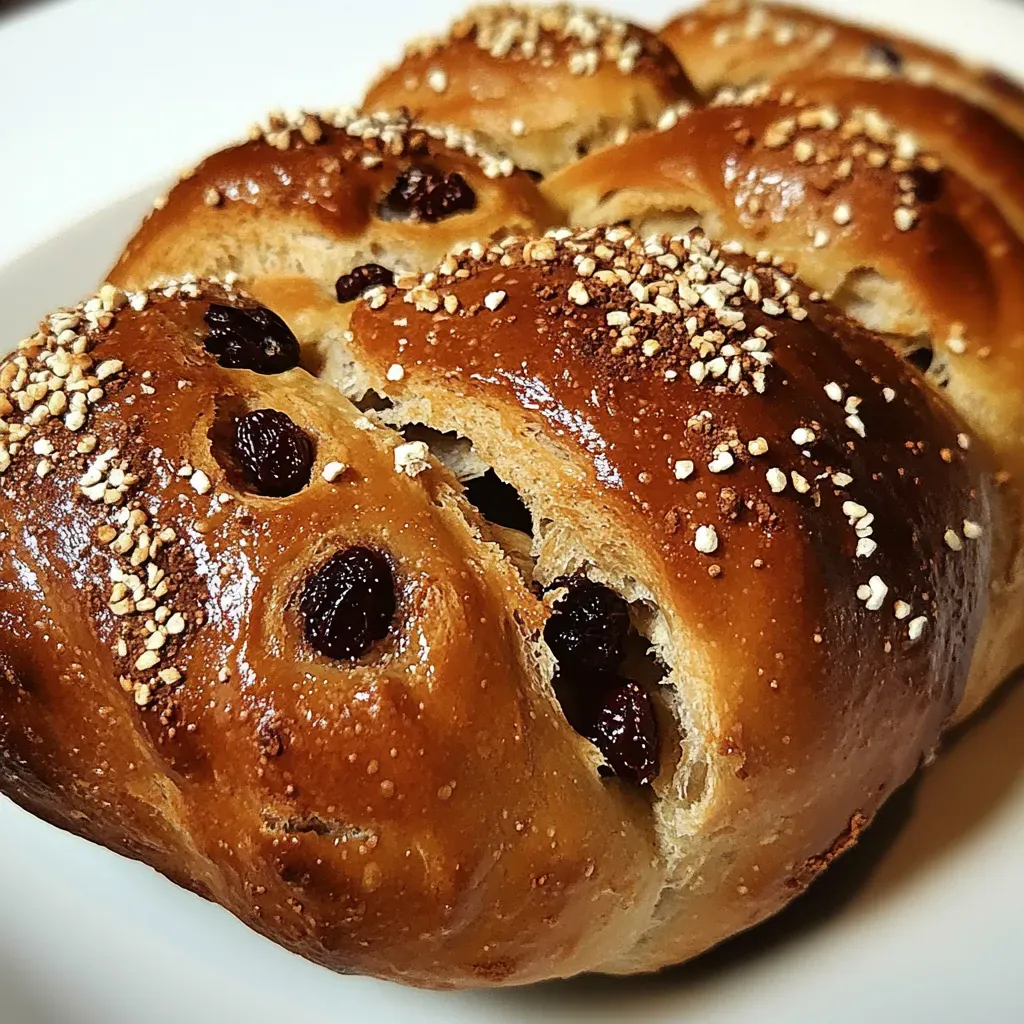
There’s something truly special about baking bread, especially when it comes to the traditional Greek Celebration Bread Christopsomos. Growing up, my family often prepared this beautiful loaf during the holiday season, filling the house with the warm aroma of spices and sweetness. As a kid, I was mesmerized by the intricate process, from mixing the ingredients to the magical moment when the dough rose to perfection. Each loaf was a labor of love, symbolizing togetherness and celebration. I remember gathering around the table, excited to share slices of this soft, fragrant bread, topped with a sprinkling of sesame seeds. Whether it was for Christmas or a family gathering, Greek Celebration Bread Christopsomos has always been more than just food; it’s a cherished tradition that brings my loved ones closer.
Recipe Snapshot
2 hr 35 mins
130 mins
25 mins
Hard
220 kcal
6 g
Gluten-Free
5 g
Large Pot, Frying Pan, Wooden Spoon, Oven, Chef’s Knife, Mixing Bowl, Baking Sheet
Why You Need This Greek Celebration Bread Christopsomos
1. A Symbol of Tradition
The Greek Celebration Bread Christopsomos isn’t just a delicious treat; it carries deep cultural significance. Traditionally, it’s baked to commemorate the feast of the Nativity. Each ingredient is chosen not just for flavor but for its symbolic meaning in Greek culture, making every bite a connection to our heritage.
2. Perfect for Sharing
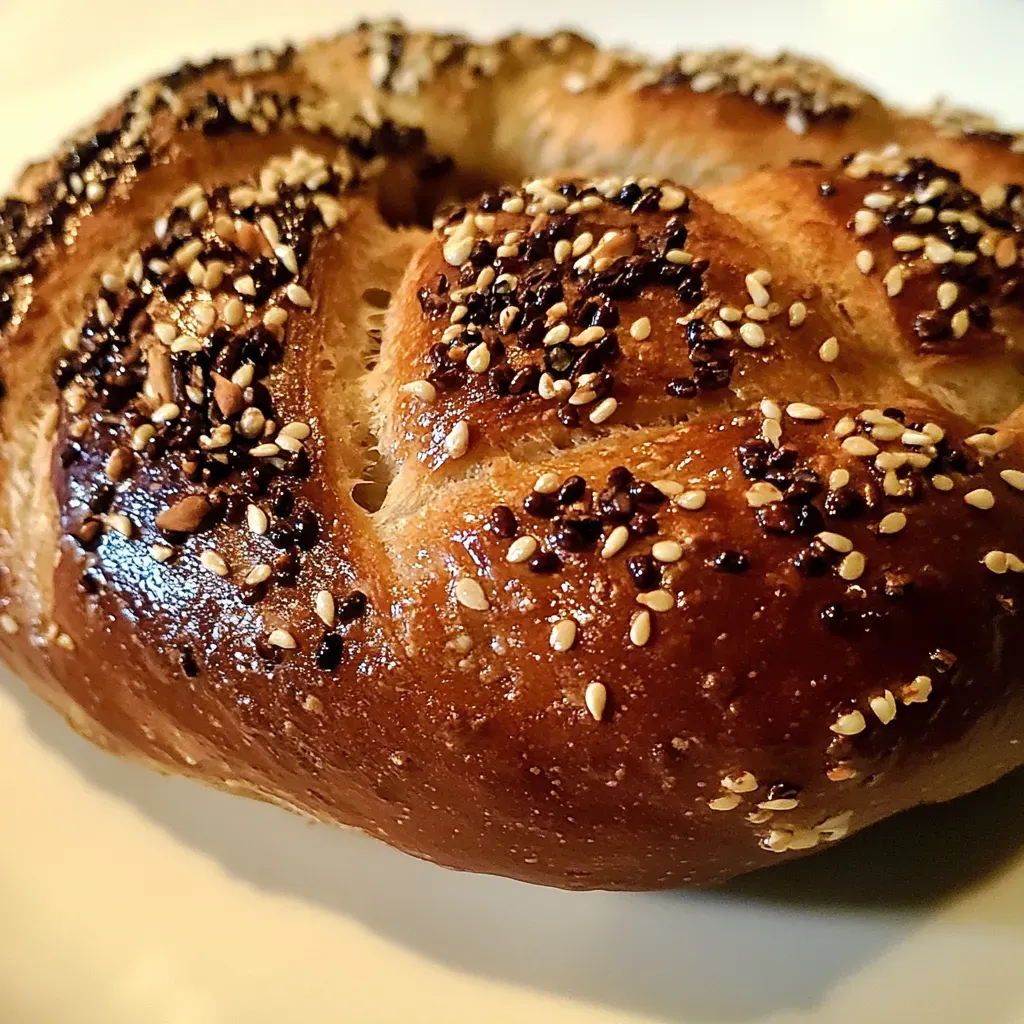
This bread is perfect for gatherings. Its large size and beautiful presentation make it an ideal centerpiece for any holiday table, inviting everyone to break bread together. Plus, it’s a conversation starter, with its unique flavor profile and decorative cross on top.
3. Understanding the Ingredients
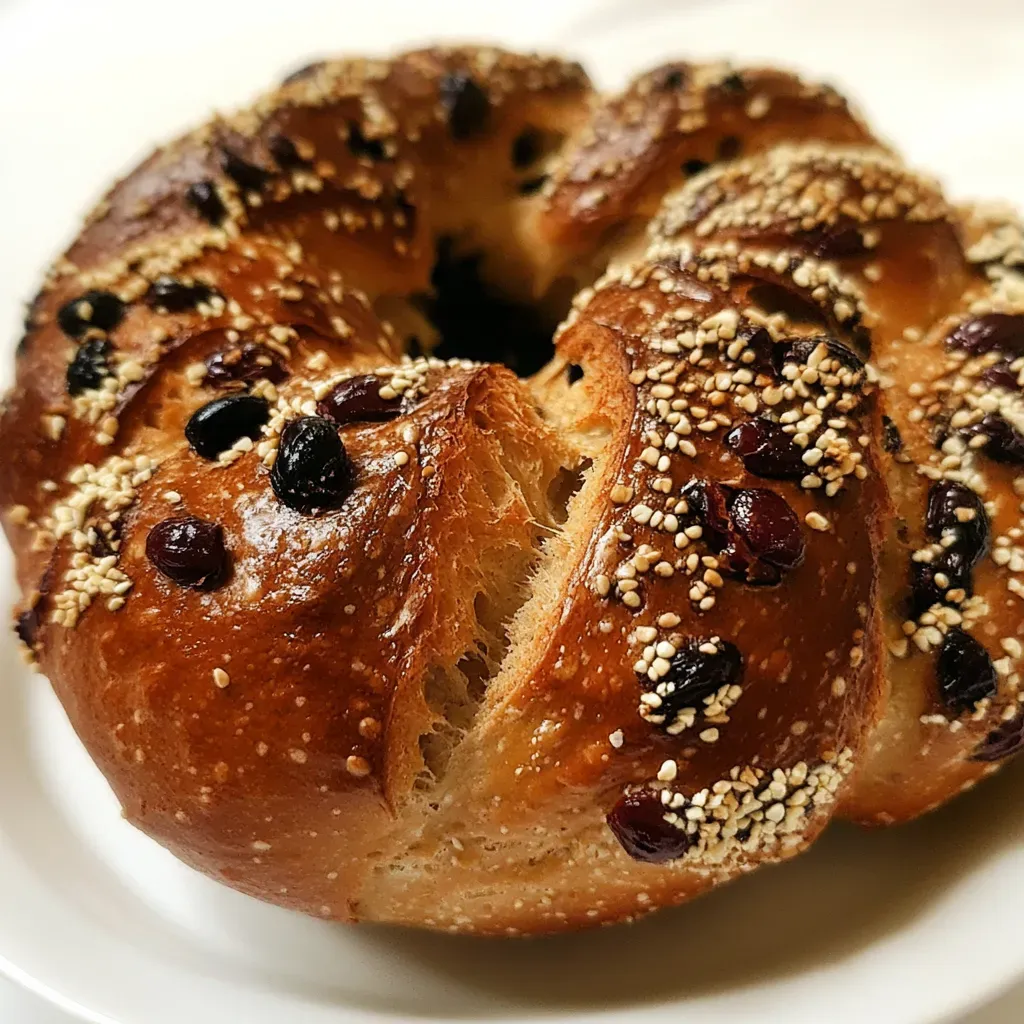
One of the reasons I love Greek Celebration Bread Christopsomos is the harmony of flavors. The combination of spices like cinnamon, nutmeg, and cloves, along with the sweetness of honey and dried fruits, creates a symphony that’ll dance on your palate. Each bite is a reminder of the warmth and joy of family gatherings.
4. A Creative Outlet
Baking this bread becomes a creative endeavor. You can shape the dough in various ways, and even decorate it differently each time you make it. I love experimenting with the decorative cross, sometimes adding personal touches to make it uniquely mine!
5. A Recipe to Win Hearts
There’s nothing like the satisfaction of sharing homemade bread with friends and family. The delight on their faces as they take their first bite of Greek Celebration Bread Christopsomos is absolutely priceless. It’s a heartfelt gift that will leave lasting memories.
6. Flexibility in Serving
This bread is wonderfully versatile. It can be enjoyed fresh, toasted, or even used for sandwiches. Whether served at breakfast, brunch, or as an evening snack, Greek Celebration Bread Christopsomos fits perfectly into any meal.
What You’ll Need for Greek Celebration Bread Christopsomos
To create the perfect Greek Celebration Bread Christopsomos, we need a selection of simple yet powerful ingredients. Each plays a critical role in bringing this loaf to life. From the flour that forms the body of the bread to the spices that add warmth and character, understanding these ingredients is key to mastering this delightful recipe.
- 2½ cups unbleached bread flour
- 1½ cups water, at room temperature
- ¼ teaspoon instant yeast
- 1 cup poolish
- 3½ cups unbleached bread flour
- 1 teaspoon salt
- 1½ teaspoons instant yeast
- 1 teaspoon ground cinnamon
- ¼ teaspoon ground nutmeg
- ¼ teaspoon ground allspice
- ¼ teaspoon ground cloves
- 1 teaspoon orange extract
- 1 teaspoon almond extract
- 2 large eggs, slightly beaten
- ¼ cup honey
- ¼ cup olive oil
- ¾ cup whole or low-fat milk, lukewarm
- ½ cup raisins
- ½ cup chopped dried figs
- ½ cup chopped walnuts
- 2 tablespoons water
- 2 tablespoons sugar
- 2 tablespoons honey
- 1 teaspoon orange extract
- 1 teaspoon sesame seeds
Putting Together Greek Celebration Bread Christopsomos
Making Greek Celebration Bread Christopsomos is a labor of love, filled with moments of anticipation and joy. It’s a multi-step process that results in a beautiful loaf you can be proud of. So, let’s roll up our sleeves and get started!
- To begin, let’s make the poolish. In a mixing bowl, stir together 2½ cups of unbleached bread flour, 1½ cups of water, and ¼ teaspoon of instant yeast. You want to ensure all the flour is hydrated. The consistency should resemble very thick pancake batter, soft and sticky. Cover the bowl with plastic wrap and let it ferment at room temperature for 3 to 4 hours until it becomes bubbly and foamy. Once it’s ready, pop it into the refrigerator where it can keep for up to 3 days.
- Next, remove the measured poolish from the refrigerator about an hour before you plan on making the dough.
- In a large mixing bowl or electric mixer, combine 3½ cups of unbleached bread flour, 1 teaspoon of salt, 1½ teaspoons of instant yeast, 1 teaspoon of ground cinnamon, ¼ teaspoon of ground nutmeg, ¼ teaspoon of ground allspice, and ¼ teaspoon of ground cloves. Mix these dry ingredients together thoroughly.
- Add in the poolish, 1 teaspoon of orange extract, 1 teaspoon of almond extract, 2 slightly beaten eggs, ¼ cup of honey, ¼ cup of olive oil, and ¾ cup of lukewarm milk. Stir everything together with a sturdy spoon or mix on low speed with the paddle attachment until the dough forms a cohesive ball.
- Now, it’s time to knead! Sprinkle some flour on your counter; transfer the dough onto it and begin kneading. If you’re using an electric mixer, switch to medium speed with the dough hook. As you knead, add more milk or flour as necessary to form the dough into a soft, yet not sticky ball. The texture should feel tacky and supple. Knead for about 10 minutes, and during the last two minutes, mix in the raisins, chopped dried figs, and chopped walnuts.
- Once kneaded, perform the windowpane test to ensure the dough is ready. It should be pliable and register between 77° to 81°F. Lightly oil a bowl and place the dough in it, rolling it around to coat it with oil. Cover the bowl with plastic wrap and let it ferment at room temperature for 90 minutes, or until it doubles in size.
- After the dough has risen, shape it into a boule. Transfer it to a sheet pan lined with baking parchment. Mist the dough with some spray oil and loosely cover it with plastic wrap. Let it proof at room temperature for about 60 to 90 minutes or until it nearly doubles in size.
- For the decorative cross, before shaping the dough into a boule, divide it into two pieces, one piece twice the size of the other. Shape the larger piece into a boule and proof it as instructed in the previous step. Place the smaller piece into a plastic bag and chill it in the refrigerator.
- When the larger piece is ready to bake, take the smaller piece out from the refrigerator. Divide it in half and roll each half into a 10-inch-long strand. Cross the two strands of dough over the top of the boule. Using a pastry scraper, split the ends of each strand and coil them to form a decorative cross.
- Preheat your oven to 350°F, ensuring the oven rack is in the middle position.
- Now, bake the loaf for about 20 minutes. After that, rotate the pan 180 degrees for even baking and continue baking for another 20 to 25 minutes. You’re looking for a golden brown loaf that registers 190°F and makes a hollow sound when thumped on the bottom.
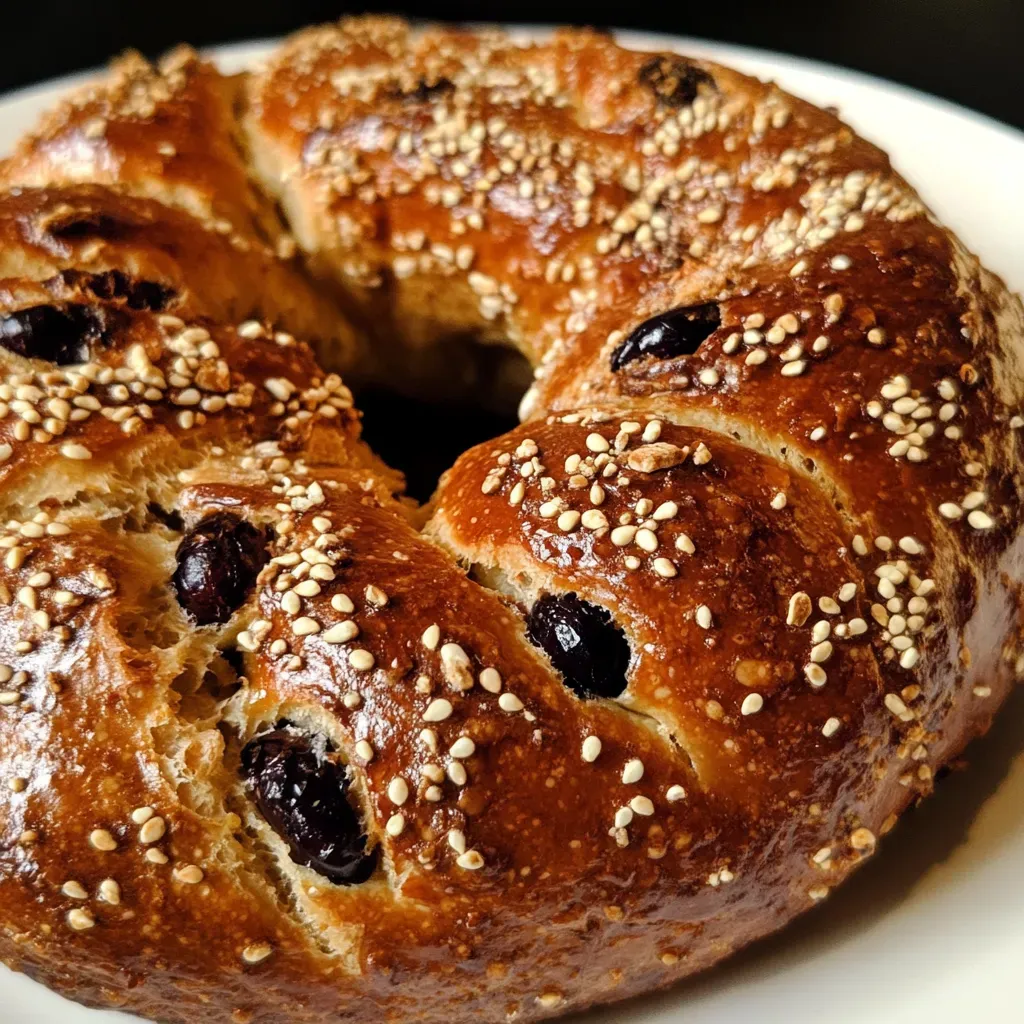
- For the glaze, combine 2 tablespoons of water and 2 tablespoons of sugar in a saucepan, bringing it to a boil. Add the honey and 1 teaspoon of orange extract, then turn off the heat. If necessary, reheat the glaze before applying it to the bread. Brush the loaf with the glaze and immediately sprinkle with sesame seeds.
- Finally, transfer the bread to a rack and allow it to cool for at least 1 hour before slicing or serving. Enjoy this beautiful creation that brings a taste of Greek tradition to your table!
Things Worth Knowing
- Poolish preparation: Allowing the poolish to ferment helps develop complex flavors and texture in the bread.
- Kneading technique: Proper kneading is crucial for gluten development, which creates a chewy texture in the bread.
- Temperature monitoring: Keeping an eye on the dough’s temperature ensures optimal yeast activity during fermentation and baking.
- Decoration significance: The decorative cross on top of the loaf isn’t just beautiful; it symbolizes the Christian faith and adds a festive touch.
Expert Tips about Greek Celebration Bread Christopsomos
Perfecting Greek Celebration Bread Christopsomos can take practice, but I’ve got some tips that can help you along the way. Here’s what I’ve learned through my own baking journey:
- Storage: Keep any leftover bread wrapped in plastic or in an airtight container at room temperature to maintain freshness for up to 4 days.
- Freezing: You can freeze the bread for up to 3 months. Just ensure it’s wrapped tightly to prevent freezer burn.
- Pairing: This bread pairs wonderfully with honey, cheese, or even a warm cup of tea. It’s perfect for breakfast or as an afternoon snack.
- Variations: Feel free to experiment with different nuts or dried fruits. Pecans or apricots can add exciting flavors!
- Proofing time: Don’t rush the proofing process; it’s vital for achieving that perfect rise and texture.
- Using fresh ingredients: Ensure your yeast is fresh for the best rise. Old yeast can lead to disappointing results.
What to Pair With Greek Celebration Bread Christopsomos
- Honey: Drizzle some honey over the slices for a sweet touch that enhances the flavors.
- Cheese: Serve with a selection of cheeses like feta or a mild goat cheese for a delightful contrast.
- Tea or Coffee: Enjoy with a warm cup of tea or coffee; the spices in the bread complement these beverages beautifully.
- Fruit Salad: A fresh fruit salad adds a refreshing element to your meal and balances the sweetness of the bread.
- Festive Gatherings: This bread is ideal for Christmas, Easter, or any family gathering, making it a wonderful centerpiece.
- Storage Tips: Any leftover bread can be stored wrapped in foil or in a container. It stays fresh on the counter for several days but can also be frozen for longer storage.
FAQ
Conclusion
The Greek Celebration Bread Christopsomos is truly a special recipe, capturing the essence of Greek tradition and culture. Its delightful flavor, combined with the love put into its preparation, makes it a perfect centerpiece for any festive occasion. Don’t hesitate to try it for your next gathering; you’ll create beautiful memories with every slice, and your family and friends will be asking for seconds!
Greek Celebration Bread Christopsomos
Ingredients
Equipment
Method
- To begin, let’s make the poolish. In a mixing bowl, stir together 2½ cups of unbleached bread flour, 1½ cups of water, and ¼ teaspoon of instant yeast. You want to ensure all the flour is hydrated. The consistency should resemble very thick pancake batter, soft and sticky. Cover the bowl with plastic wrap and let it ferment at room temperature for 3 to 4 hours until it becomes bubbly and foamy. Once it’s ready, pop it into the refrigerator where it can keep for up to 3 days.
- Next, remove the measured poolish from the refrigerator about an hour before you plan on making the dough.
- In a large mixing bowl or electric mixer, combine 3½ cups of unbleached bread flour, 1 teaspoon of salt, 1½ teaspoons of instant yeast, 1 teaspoon of ground cinnamon, ¼ teaspoon of ground nutmeg, ¼ teaspoon of ground allspice, and ¼ teaspoon of ground cloves. Mix these dry ingredients together thoroughly.
- Add in the poolish, 1 teaspoon of orange extract, 1 teaspoon of almond extract, 2 slightly beaten eggs, ¼ cup of honey, ¼ cup of olive oil, and ¾ cup of lukewarm milk. Stir everything together with a sturdy spoon or mix on low speed with the paddle attachment until the dough forms a cohesive ball.
- Now, it’s time to knead! Sprinkle some flour on your counter; transfer the dough onto it and begin kneading. If you're using an electric mixer, switch to medium speed with the dough hook. As you knead, add more milk or flour as necessary to form the dough into a soft, yet not sticky ball. The texture should feel tacky and supple. Knead for about 10 minutes, and during the last two minutes, mix in the raisins, chopped dried figs, and chopped walnuts.
- Once kneaded, perform the windowpane test to ensure the dough is ready. It should be pliable and register between 77° to 81°F. Lightly oil a bowl and place the dough in it, rolling it around to coat it with oil. Cover the bowl with plastic wrap and let it ferment at room temperature for 90 minutes, or until it doubles in size.
- After the dough has risen, shape it into a boule. Transfer it to a sheet pan lined with baking parchment. Mist the dough with some spray oil and loosely cover it with plastic wrap. Let it proof at room temperature for about 60 to 90 minutes or until it nearly doubles in size.
- For the decorative cross, before shaping the dough into a boule, divide it into two pieces, one piece twice the size of the other. Shape the larger piece into a boule and proof it as instructed in the previous step. Place the smaller piece into a plastic bag and chill it in the refrigerator.
- When the larger piece is ready to bake, take the smaller piece out from the refrigerator. Divide it in half and roll each half into a 10-inch-long strand. Cross the two strands of dough over the top of the boule. Using a pastry scraper, split the ends of each strand and coil them to form a decorative cross.
- Preheat your oven to 350°F, ensuring the oven rack is in the middle position.
- Now, bake the loaf for about 20 minutes. After that, rotate the pan 180 degrees for even baking and continue baking for another 20 to 25 minutes. You're looking for a golden brown loaf that registers 190°F and makes a hollow sound when thumped on the bottom.
- For the glaze, combine 2 tablespoons of water and 2 tablespoons of sugar in a saucepan, bringing it to a boil. Add the honey and 1 teaspoon of orange extract, then turn off the heat. If necessary, reheat the glaze before applying it to the bread. Brush the loaf with the glaze and immediately sprinkle with sesame seeds.
- Finally, transfer the bread to a rack and allow it to cool for at least 1 hour before slicing or serving. Enjoy this beautiful creation that brings a taste of Greek tradition to your table!
Notes
- Tip 1: Keep any leftover bread wrapped in plastic or in an airtight container at room temperature to maintain freshness for up to 4 days.
- Tip 2: You can freeze the bread for up to 3 months. Just ensure it’s wrapped tightly to prevent freezer burn.
- Tip 3: Serve with a selection of cheeses like feta or a mild goat cheese for a delightful contrast.
- Tip 4: Feel free to experiment with different nuts or dried fruits. Pecans or apricots can add exciting flavors!
- Tip 5: Don’t rush the proofing process; it’s vital for achieving that perfect rise and texture.