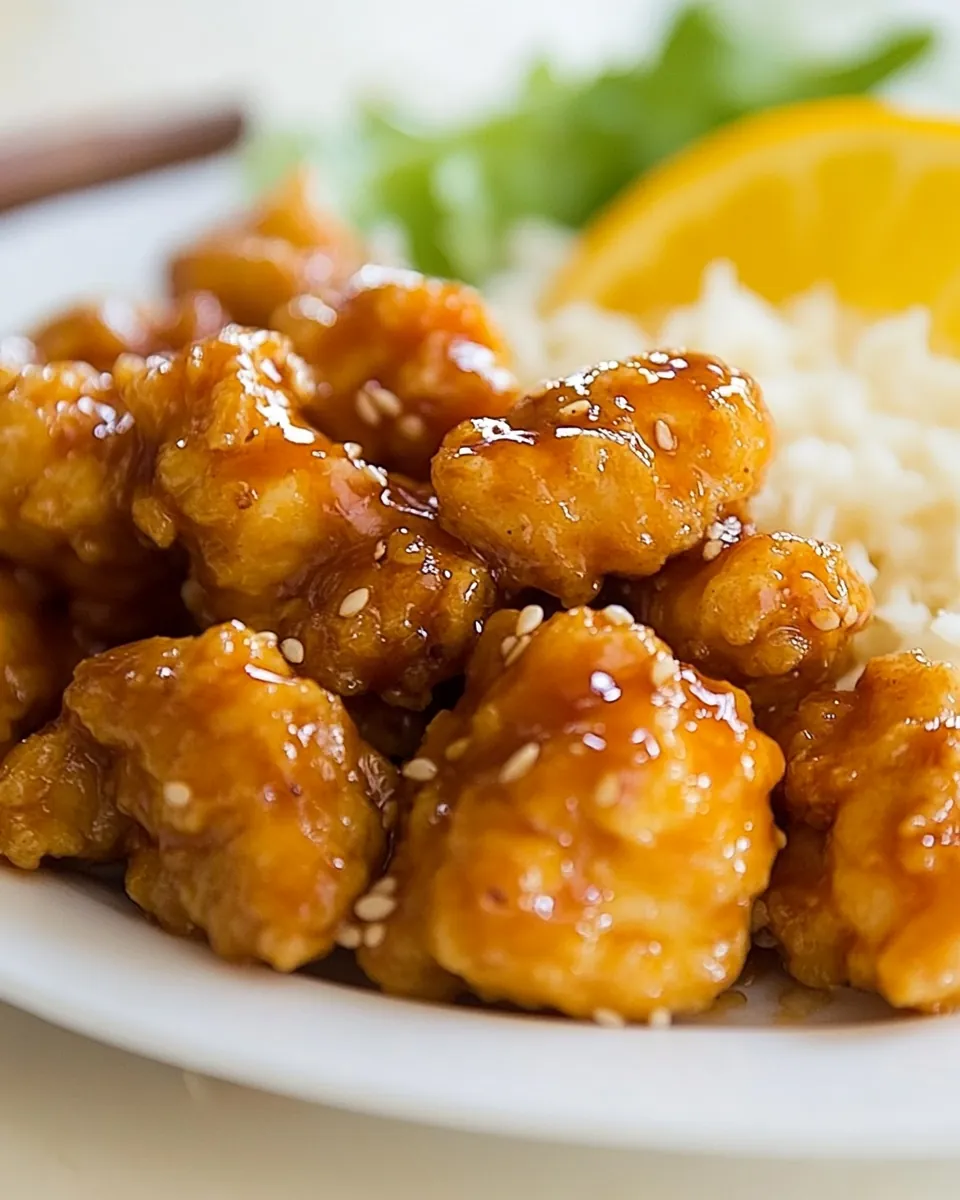
There’s something incredibly comforting about making your own Healthy Orange Chicken. I still remember the first time I tried it at a local restaurant, the crispy chicken enveloped in a tangy orange sauce, instantly brightening my day. After some experimenting in my kitchen, I created a version that captures that delicious flavor but is much healthier. It’s perfect for those busy weeknights when you crave something satisfying yet nutritious. Plus, it’s freezer-friendly, making it a lifesaver when time is tight.
Recipe Snapshot
40 mins
20 mins
20 mins
Medium
345 kcal
22 g
Whole30, Vegan, Gluten-Free
15 g
Large Pot, Baking Sheet, Whisk, Oven, Frying Pan
Why This Healthy Orange Chicken Works
Convenient Freezer Meal
One of the best things about this Healthy Orange Chicken is its freezer-friendliness. You can prepare it in advance, freeze it, and have a wholesome meal ready in a pinch. I love knowing that on chaotic days, I can pull this out and enjoy a home-cooked dish without the fuss.
Family-Friendly Flavor
This dish is a huge hit with my family. The sweet and tangy orange sauce is not just delicious but also appealing to kids. I often hear, “Can we have this again?” It’s the kind of meal that brings everyone together, making it perfect for family dinners.
Healthier Ingredients
By using wholesome ingredients like chicken, orange juice, and honey, this recipe is both tasty and nutritious. It’s a fantastic way to enjoy a classic dish without the excess calories and unhealthy additives found in takeout versions.
Easy to Make
Even if you’re not an experienced cook, you’ll find this Healthy Orange Chicken straightforward. The steps are simple, and I promise you’ll feel accomplished when you see the final result. It’s perfect for beginner cooks looking to impress their family or friends.
Versatile Serving Options
This dish pairs beautifully with so many sides. Whether you serve it over rice, with steamed vegetables, or in lettuce wraps, it’s adaptable to whatever you have on hand. I love creating a little buffet-style meal where everyone can customize their plates.
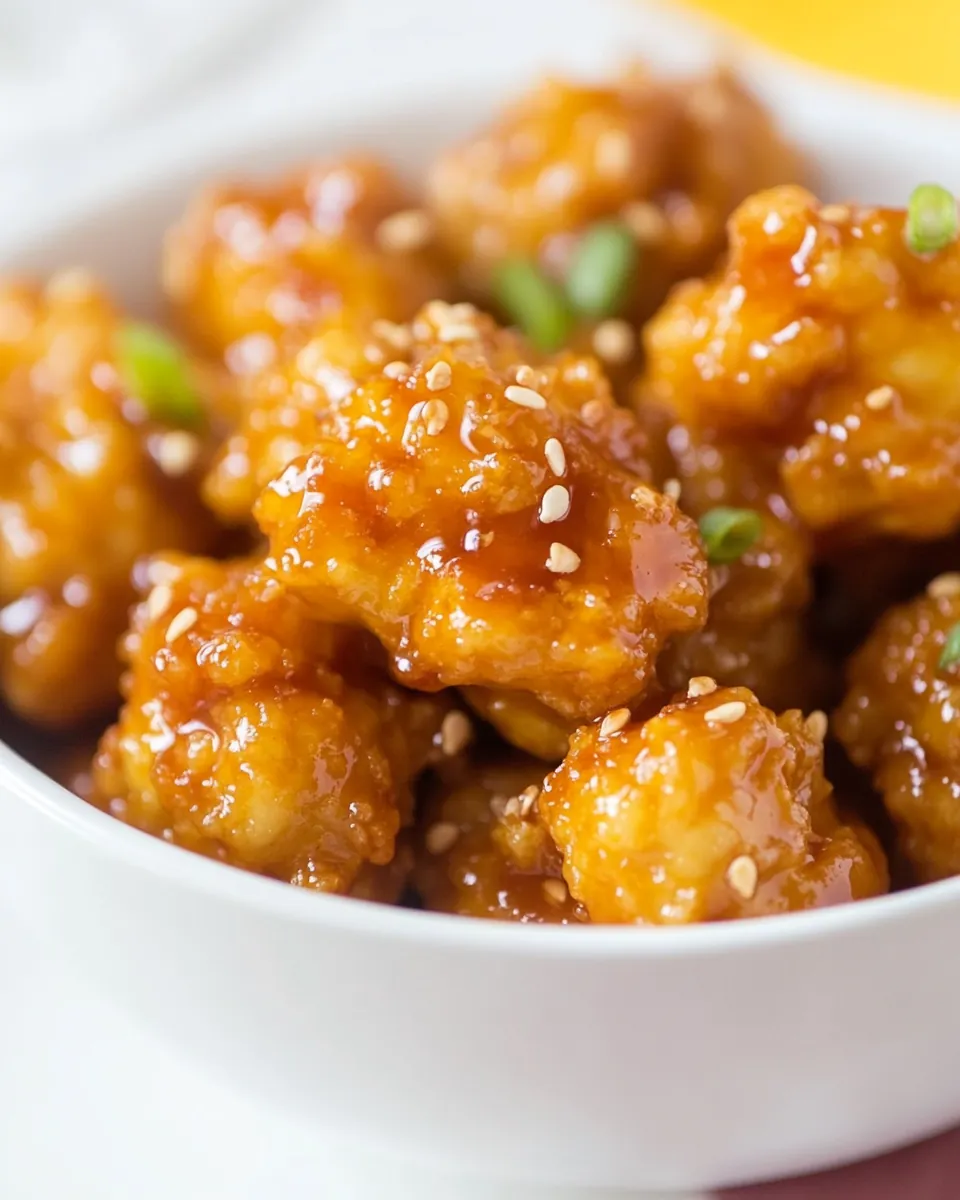
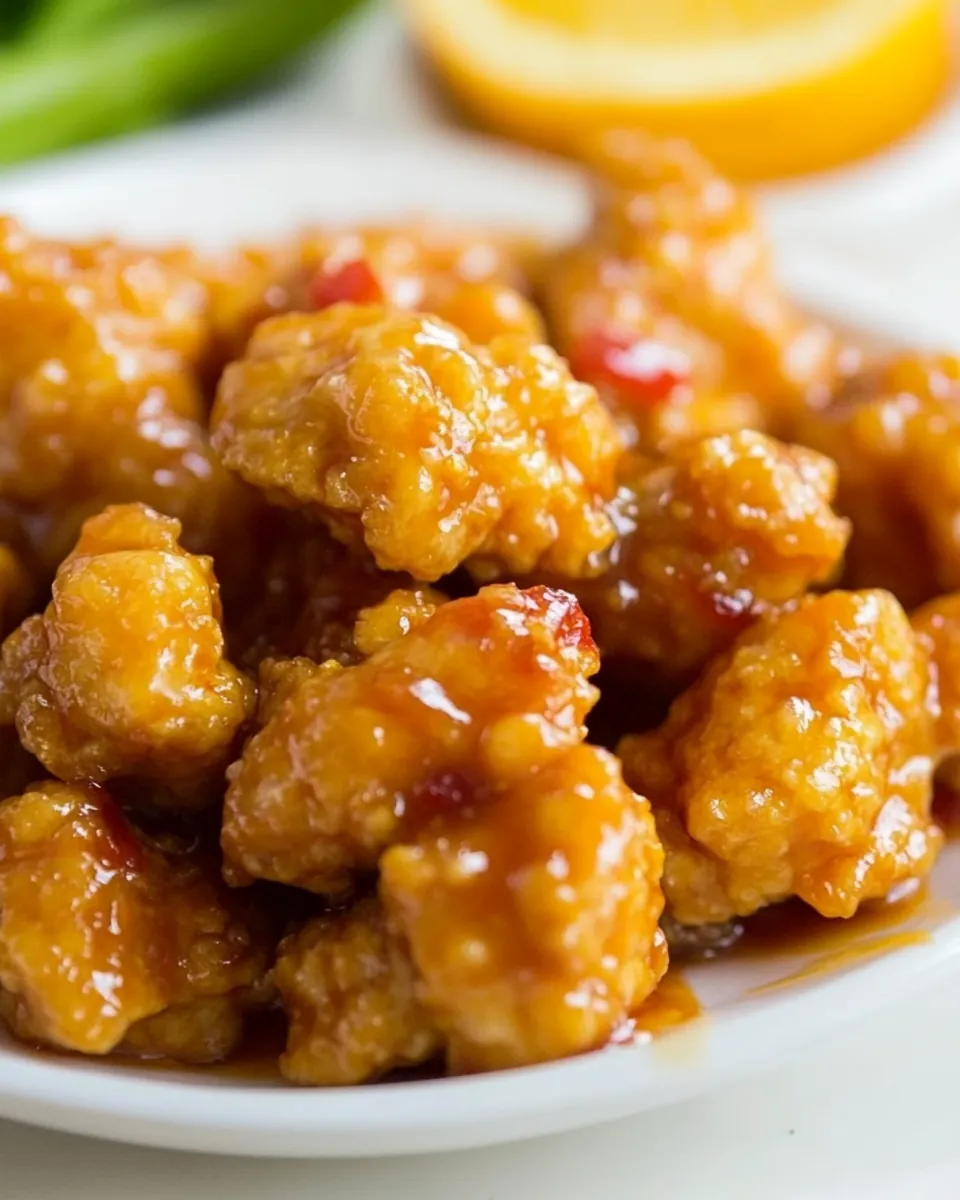
Flavorful Sauce
The sauce is what really makes this meal shine. It’s a delightful blend of orange juice, soy sauce, and a hint of ginger. This combination not only brings out the flavors in the chicken but also leaves your kitchen smelling divine while it cooks.
What’s In This Healthy Orange Chicken

The ingredients for Healthy Orange Chicken come together beautifully. Each component is carefully selected to enhance flavor while keeping things wholesome. The star of the show is definitely the chicken, which is complemented by the bright and zesty orange juice. Together, they create a dish that is both satisfying and nourishing.
- 4 pieces chicken thigh, boneless, skinless: The main protein, tender and juicy, ideal for absorbing flavors.
- 1/2 cup flour, all-purpose: Provides a light coating for the chicken, giving it that delicious crunch.
- 2 medium egg: Binds the flour to the chicken, helping the coating adhere better.
- 1 cup panko (Japanese bread crumbs): Adds an extra crispy texture to the dish.
- 1/2 cup orange juice: The star ingredient, bringing a sweet and tangy flavor.
- 1 tablespoon soy sauce, low sodium: Enhances the umami flavor in the sauce.
- 1 tablespoon honey: Adds sweetness to balance the tanginess of the orange juice.
- 1 tablespoon vinegar, rice: Brightens the flavor of the sauce.
- 1/2 teaspoon sesame oil: Adds a nutty depth to the sauce.
- 1 clove garlic, minced: Infuses the dish with aromatic flavor.
- 1 teaspoon ginger root, fresh: Adds warmth and a bit of spice.
- 2 teaspoons cornstarch: Helps thicken the sauce for a perfect consistency.
- 3 tablespoons water: Used to help dissolve the cornstarch.
How to Prepare Healthy Orange Chicken
Making Healthy Orange Chicken is straightforward and fun. You’ll enjoy the process as much as the delicious results! Let’s walk through the steps together, and before you know it, you’ll have a mouthwatering dish ready to serve.
- Preheat your oven to 450 degrees Fahrenheit and grease a large cookie sheet. It’s essential to have your oven hot, ensuring your chicken gets that perfect crispiness.
- Cut the chicken into bite-sized pieces. This not only makes it easier to cook but also helps each piece absorb the flavors beautifully.
- In three separate bowls, place the flour, eggs, and panko. Make sure to whisk the eggs gently until combined; this will be your binding agent for the chicken.
- Coat each piece of chicken in the flour, ensuring it’s completely covered. Then dip it into the whisked egg, and finally coat it in the panko. This three-step process gives the chicken its delicious crunch.
- Once all the pieces are coated, place them on the greased cookie sheet. Make sure to leave space between the pieces to allow for even cooking.
- Now, bake the chicken for about 15 minutes, or until golden brown and cooked through. You want to keep an eye on it; the aroma will be mouthwatering!
- While the chicken is baking, prepare the sauce. In a small saucepan over medium-high heat, add the orange juice, soy sauce, honey, rice vinegar, sesame oil, garlic, and ginger. Stir until well combined.
- In a small dish, whisk together the cornstarch and water until smooth. Add this to the sauce mixture. Bring it to a boil, stirring continuously until it thickens. This sauce is what makes your chicken shine!
- Once the chicken is done baking, pour the sauce over the cooked chicken. Toss to coat evenly, ensuring every piece is covered in that delightful orange goodness.
- Serve immediately with rice or steamed veggies for a complete meal. Enjoy the fruits of your labor with your loved ones!
Things Worth Knowing
- Cooking Temperature: Always preheat your oven to ensure even cooking. A hot oven helps achieve that perfect golden color.
- Chicken Preparation: Make sure to cut the chicken into uniform sizes so they cook evenly. Larger pieces may take longer to cook.
- Panko Usage: Using panko instead of regular breadcrumbs adds an extra crunch and can elevate the texture of the dish.
- Thickening Sauce: The cornstarch needs to be mixed with water before adding it to the sauce to prevent clumps. Stir continuously to achieve a smooth consistency.
Ways to Adapt This Recipe
The Healthy Orange Chicken is quite versatile, and there are plenty of ways to mix things up. Here are a few tips to adapt this recipe and make it your own:
- Storage: Store leftovers in an airtight container in the fridge for up to three days. Reheat in the oven to maintain crispiness.
- Freezing: You can freeze the cooked chicken and sauce separately. When ready to serve, bake the chicken from frozen for 20 minutes at 350°F to ensure it’s heated through.
- Pairing: This dish is delightful over a bed of rice, but it also pairs well with quinoa or cauliflower rice for a low-carb option.
- Vegetable Additions: Feel free to add in your choice of vegetables, like bell peppers or broccoli, during the last few minutes of cooking for added nutrition.
- Spice It Up: For a bit of heat, add some crushed red pepper or sriracha to the sauce for a spicy kick.
Serving This Healthy Orange Chicken
When it comes to serving your Healthy Orange Chicken, the possibilities are endless! Here are some of my favorite ways to serve it:
- Over Rice: Serve it over jasmine or brown rice for a filling meal. The rice soaks up the delicious sauce beautifully.
- With Steamed Vegetables: Pair it alongside steamed broccoli, snap peas, or carrots for a colorful and healthy plate.
- In Lettuce Wraps: For a fun twist, spoon the chicken into lettuce leaves for a fresh, crunchy alternative.
- As a Meal Prep Option: This dish is perfect for meal prepping. Portion it out with sides in containers for lunches throughout the week.
- For Special Occasions: Consider serving this dish during gatherings or dinner parties; it’s sure to impress your guests with its vibrant flavors and presentation.
FAQ
Conclusion
The Healthy Orange Chicken is a delightful way to enjoy a classic dish without compromising on flavor. It’s perfect for busy weeknights when you want something quick yet satisfying. I encourage you to try this recipe; you might find it becoming a staple in your home!
Healthy Orange Chicken
Ingredients
Equipment
Method
- Preheat your oven to 450 degrees Fahrenheit and grease a large cookie sheet. It’s essential to have your oven hot, ensuring your chicken gets that perfect crispiness.
- Cut the chicken into bite-sized pieces. This not only makes it easier to cook but also helps each piece absorb the flavors beautifully.
- In three separate bowls, place the flour, eggs, and panko. Make sure to whisk the eggs gently until combined; this will be your binding agent for the chicken.
- Coat each piece of chicken in the flour, ensuring it’s completely covered. Then dip it into the whisked egg, and finally coat it in the panko. This three-step process gives the chicken its delicious crunch.
- Once all the pieces are coated, place them on the greased cookie sheet. Make sure to leave space between the pieces to allow for even cooking.
- Now, bake the chicken for about 15 minutes, or until golden brown and cooked through. You want to keep an eye on it; the aroma will be mouthwatering!
- While the chicken is baking, prepare the sauce. In a small saucepan over medium-high heat, add the orange juice, soy sauce, honey, rice vinegar, sesame oil, garlic, and ginger. Stir until well combined.
- In a small dish, whisk together the cornstarch and water until smooth. Add this to the sauce mixture. Bring it to a boil, stirring continuously until it thickens. This sauce is what makes your chicken shine!
- Once the chicken is done baking, pour the sauce over the cooked chicken. Toss to coat evenly, ensuring every piece is covered in that delightful orange goodness.
- Serve immediately with rice or steamed veggies for a complete meal. Enjoy the fruits of your labor with your loved ones!
Notes
- Tip 1: Store leftovers in an airtight container in the fridge for up to three days. Reheat in the oven to maintain crispiness.
- Tip 2: You can freeze the cooked chicken and sauce separately. When ready to serve, bake the chicken from frozen for 20 minutes at 350°F to ensure it’s heated through.
- Tip 3: This dish is delightful over a bed of rice, but it also pairs well with quinoa or cauliflower rice for a low-carb option.
- Tip 4: Feel free to add in your choice of vegetables, like bell peppers or broccoli, during the last few minutes of cooking for added nutrition.
- Tip 5: For a bit of heat, add some crushed red pepper or sriracha to the sauce for a spicy kick.