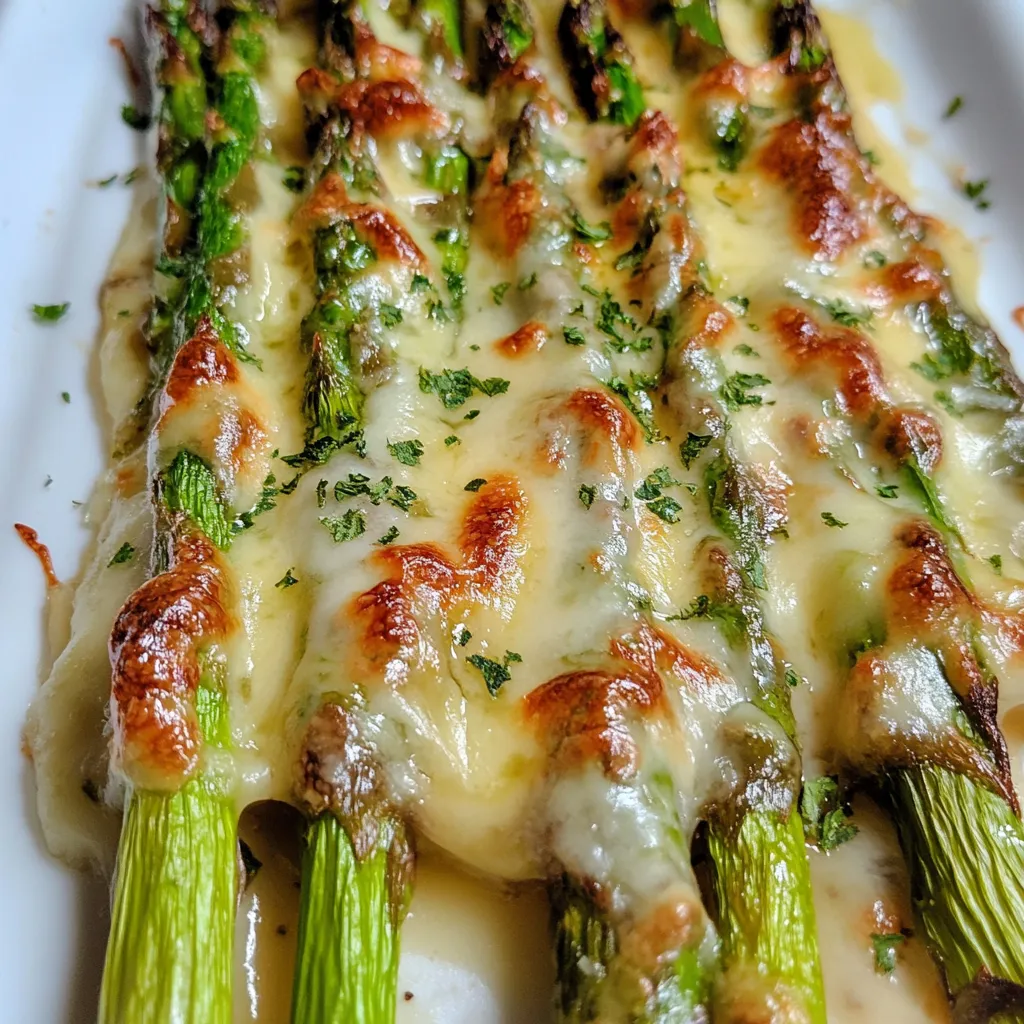
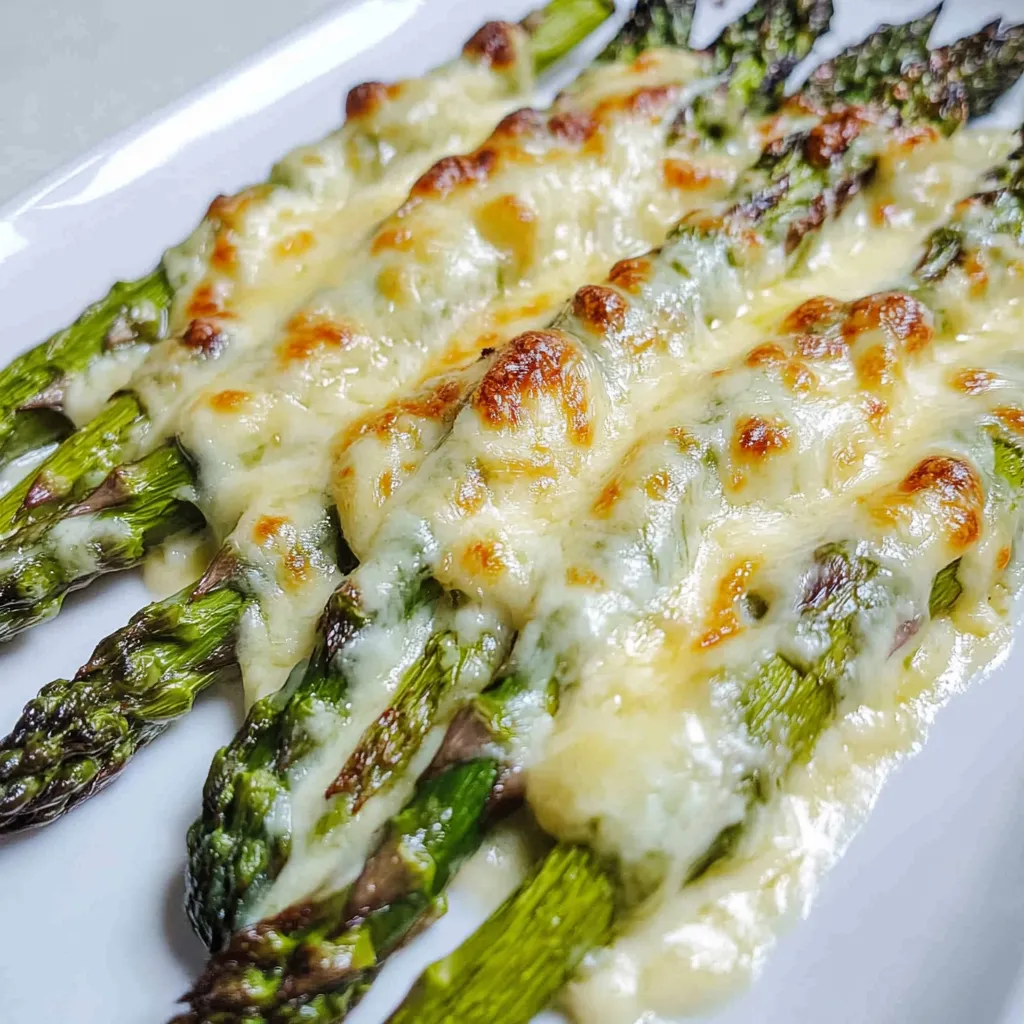
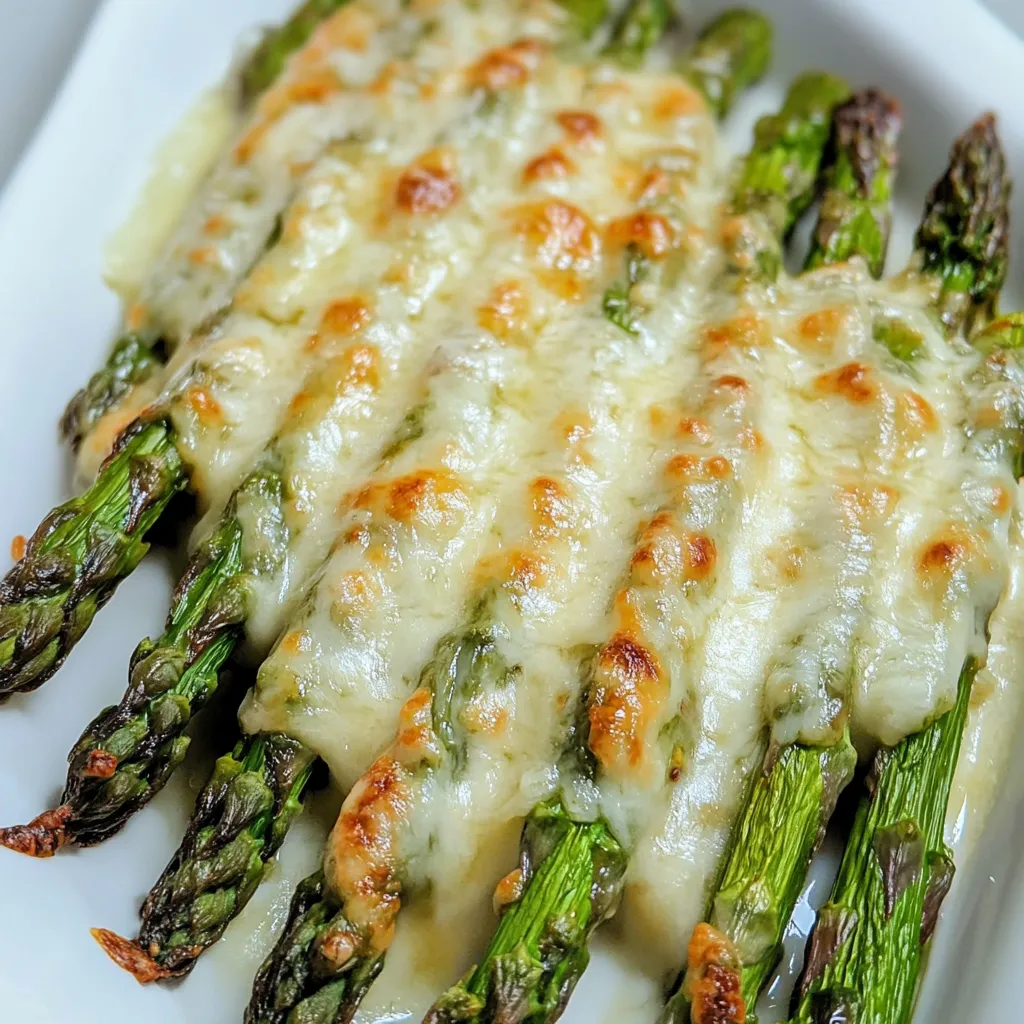
There’s something incredibly comforting about a dish that combines the crispness of fresh asparagus with the rich flavors of cheese. When I first experimented with Cheesy Baked Asparagus, I was looking for a way to elevate a simple vegetable into something that truly shines on the dinner table. As spring rolled in, the farmers’ markets filled with vibrant greens, and the thought of incorporating tender asparagus into my meals became irresistible. Picture a sunny afternoon, the scent of melting cheese wafting through the kitchen as the dish bakes in the oven, anticipation building for that first bite. This recipe has quickly become one of my go-to side dishes, perfect for family gatherings or a cozy dinner at home.
Recipe Snapshot
20 mins
5 mins
15 mins
Medium
290 kcal
9 g
Keto, Gluten-Free
26 g
Oven, Baking Sheet, Grater
Why You Need This Cheesy Baked Asparagus
Elevated Simplicity
One of the best things about Cheesy Baked Asparagus is how easy it is to prepare. With just a handful of ingredients, you can transform a basic vegetable into a gourmet side dish that impresses everyone at the table. The creamy texture of the heavy whipping cream acts as a luxurious base, allowing the flavors of the Monterey cheese and parmesan to shine through, creating a delightful harmony that’s hard to resist.
Ideal for Any Occasion
This dish is incredibly versatile. Whether you’re hosting a spring brunch, a summer barbecue, or simply enjoying a quiet weeknight dinner, Cheesy Baked Asparagus fits the bill. It pairs beautifully with grilled meats or can stand alone as a magnificent vegetarian option. The vibrant green of the asparagus adds a splash of color to your plate, making it visually appealing.
Health Benefits
Asparagus isn’t just delicious; it’s also packed with nutrients! This vegetable is rich in vitamins A, C, E, and K, as well as fiber and antioxidants. By incorporating it into your meals, you’re not just indulging in a comforting dish but also nourishing your body. The combination of creamy and cheesy flavors makes it a satisfying option without guilt.
Perfectly Baked
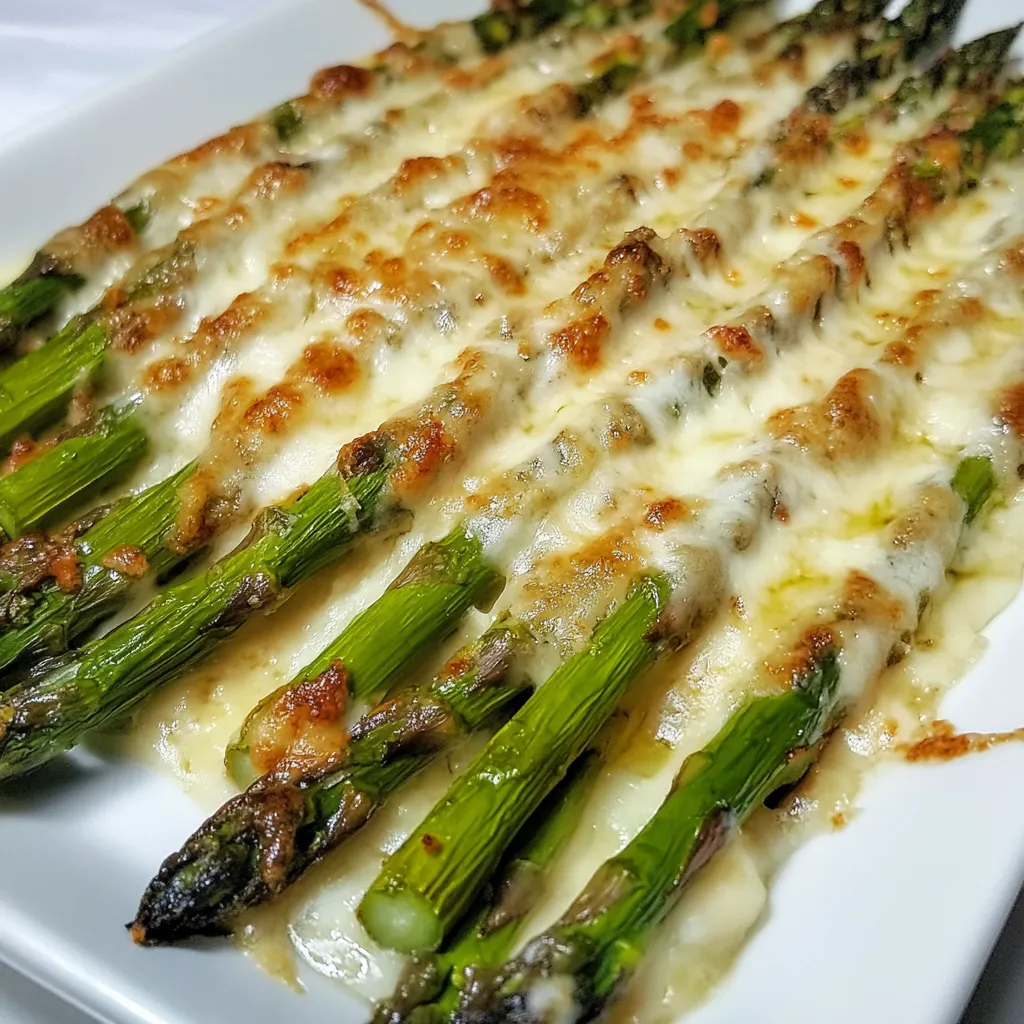
The baking process is what brings everything together. As the dish cooks, the cheese becomes bubbly and golden, while the asparagus turns tender yet still retains a perfect crunch. You can even adjust the baking time slightly if you prefer your asparagus a bit firmer or softer, giving you flexibility in achieving your ideal texture.
Family Favorite
Upon trying this dish, my family instantly fell in love. It’s rare to find a recipe that pleases both kids and adults alike, and Cheesy Baked Asparagus does just that. The rich flavors combined with the fresh taste of asparagus create a dish that quickly becomes a staple in our home.
Quick and Easy Cleanup
Another bonus? Cleanup is a breeze! Everything can be made in one baking dish, so you won’t be left with a mountain of pots and pans to wash afterward. This makes it an excellent choice for busy weeknights or when hosting friends.
Cheesy Baked Asparagus Ingredients
The ingredients for Cheesy Baked Asparagus work together beautifully to create a dish that’s both indulgent and wholesome. The star of the show, fresh asparagus, is complemented by the rich creaminess of heavy whipping cream and the melty goodness of Monterey cheese. Each element enhances the others, resulting in a deliciously satisfying experience.
- 1 cup heavy whipping cream: This luxurious ingredient provides a creamy base that melds all the flavors together.
- 2 bunches asparagus: Fresh and vibrant, this vegetable is the highlight of the dish, bringing both nutrition and crunch.
- Salt and pepper: Simple seasonings that elevate the flavors of the asparagus and cheese.
- 2 cups Monterey cheese: A melty cheese that adds richness and a deliciously gooey texture when baked.
- 1/4 cup grated parmesan cheese: The final touch that brings a sharp, nutty flavor and a beautiful golden crust to the dish.
Instructions for Cheesy Baked Asparagus
Making Cheesy Baked Asparagus is a straightforward process that brings together fresh ingredients for a delightful meal. Follow these steps for a dish that’s sure to impress!
- Preheat your oven to 400 degrees Fahrenheit. This initial step is crucial for ensuring the asparagus cooks evenly and the cheese melts perfectly.
- Grab a 9×13 inch baking dish. Pour the heavy whipping cream into the bottom. This will create a deliciously creamy layer that helps cook the asparagus and adds moisture to the dish.
- Next, add the fresh asparagus to the dish. Make sure the spears are evenly distributed to ensure each piece gets coated in the cream and cheese.
- Sprinkle salt and pepper over the asparagus. Seasoning is key; these simple spices will enhance the natural flavor of the asparagus without overpowering it.
- Now it’s time for the cheese! Top the asparagus generously with Monterey cheese followed by a sprinkle of grated parmesan cheese. This combination will create a rich, cheesy topping that turns golden as it bakes.
- Place the dish in the oven and bake for 15 to 20 minutes. Keep an eye on it; the cheese should be bubbly and the asparagus tender, but still have a slight crunch.
- Once finished, remove the dish from the oven and let it sit for a few minutes before serving. This resting time allows the cheese to set slightly, making it easier to serve.
- Using a spatula, carefully serve the Cheesy Baked Asparagus onto plates, ensuring each serving gets a good amount of cheese and cream.
- Enjoy your dish warm, and prepare for the compliments!
Things Worth Knowing
- Choosing Asparagus: Look for firm, bright green spears when selecting asparagus. Avoid those that are limp or have dry, woody ends.
- Testing Doneness: To check if the asparagus is done, pierce a spear with a fork. It should be tender but still slightly firm.
- Cheese Variations: Feel free to mix and match cheeses! Try using cheddar or a blend for a twist on the flavors.
- Leftover Use: If you have leftover Cheesy Baked Asparagus, it can be reheated in the oven or enjoyed cold in salads.
Tips for Success
To ensure your Cheesy Baked Asparagus turns out perfectly, here are some helpful tips to consider.
- Storage: Store leftovers in an airtight container in the fridge for up to three days. The flavor will continue to develop!
- Freezing: While this dish is best fresh, you can freeze it before baking. Thaw in the fridge overnight before baking.
- Pairing: This delightful side dish pairs wonderfully with grilled chicken or fish.
- Texture Preference: If you prefer softer asparagus, bake it a little longer, but be cautious not to overdo it.
- Serving Temperature: Cheesy Baked Asparagus is best enjoyed warm, right out of the oven.
- Experiment: Don’t hesitate to add other toppings like breadcrumbs or herbs for added flavor and texture.
Side Dish Ideas for Cheesy Baked Asparagus
When it comes to serving Cheesy Baked Asparagus, the options are endless. Here are some wonderful ideas to consider:
- Grilled Chicken: The rich flavors of the asparagus complement grilled chicken perfectly.
- Steak: A juicy steak paired with Cheesy Baked Asparagus creates a satisfying meal for special occasions.
- Fish: Light, flaky fish like salmon or tilapia make a lovely counterpart.
- Salad: Serve alongside a fresh garden salad for a light lunch or dinner.
- Seasonal Occasions: This dish is perfect for spring gatherings, holiday meals, or just a cozy dinner at home.
- Storage Tips: For leftovers, store in the fridge and reheat gently in the oven to maintain texture.
- Variations: Try adding different vegetables like broccoli or cauliflower for a mixed dish.
FAQ
Conclusion
The Cheesy Baked Asparagus is a delightful dish that brings a burst of flavor and nutrition to any table. Its creamy texture and cheesy goodness make it a crowd-pleaser that’s easy to whip up. I encourage you to give this recipe a try at your next family gathering or cozy dinner. You won’t regret adding this delicious side to your culinary repertoire!
Cheesy Baked Asparagus
Ingredients
Equipment
Method
- Preheat your oven to 400 degrees Fahrenheit. This initial step is crucial for ensuring the asparagus cooks evenly and the cheese melts perfectly.
- Grab a 9×13 inch baking dish. Pour the heavy whipping cream into the bottom. This will create a deliciously creamy layer that helps cook the asparagus and adds moisture to the dish.
- Next, add the fresh asparagus to the dish. Make sure the spears are evenly distributed to ensure each piece gets coated in the cream and cheese.
- Sprinkle salt and pepper over the asparagus. Seasoning is key; these simple spices will enhance the natural flavor of the asparagus without overpowering it.
- Now it’s time for the cheese! Top the asparagus generously with Monterey cheese followed by a sprinkle of grated parmesan cheese. This combination will create a rich, cheesy topping that turns golden as it bakes.
- Place the dish in the oven and bake for 15 to 20 minutes. Keep an eye on it; the cheese should be bubbly and the asparagus tender, but still have a slight crunch.
- Once finished, remove the dish from the oven and let it sit for a few minutes before serving. This resting time allows the cheese to set slightly, making it easier to serve.
- Using a spatula, carefully serve the Cheesy Baked Asparagus onto plates, ensuring each serving gets a good amount of cheese and cream.
- Enjoy your dish warm, and prepare for the compliments!
Notes
- Storage: Store leftovers in an airtight container in the fridge for up to three days. The flavor will continue to develop!
- Freezing: While this dish is best fresh, you can freeze it before baking. Thaw in the fridge overnight before baking.
- Pairing: This delightful side dish pairs wonderfully with grilled chicken or fish.
- Texture Preference: If you prefer softer asparagus, bake it a little longer, but be cautious not to overdo it.
- Serving Temperature: Cheesy Baked Asparagus is best enjoyed warm, right out of the oven.
- Experiment: Don’t hesitate to add other toppings like breadcrumbs or herbs for added flavor and texture.