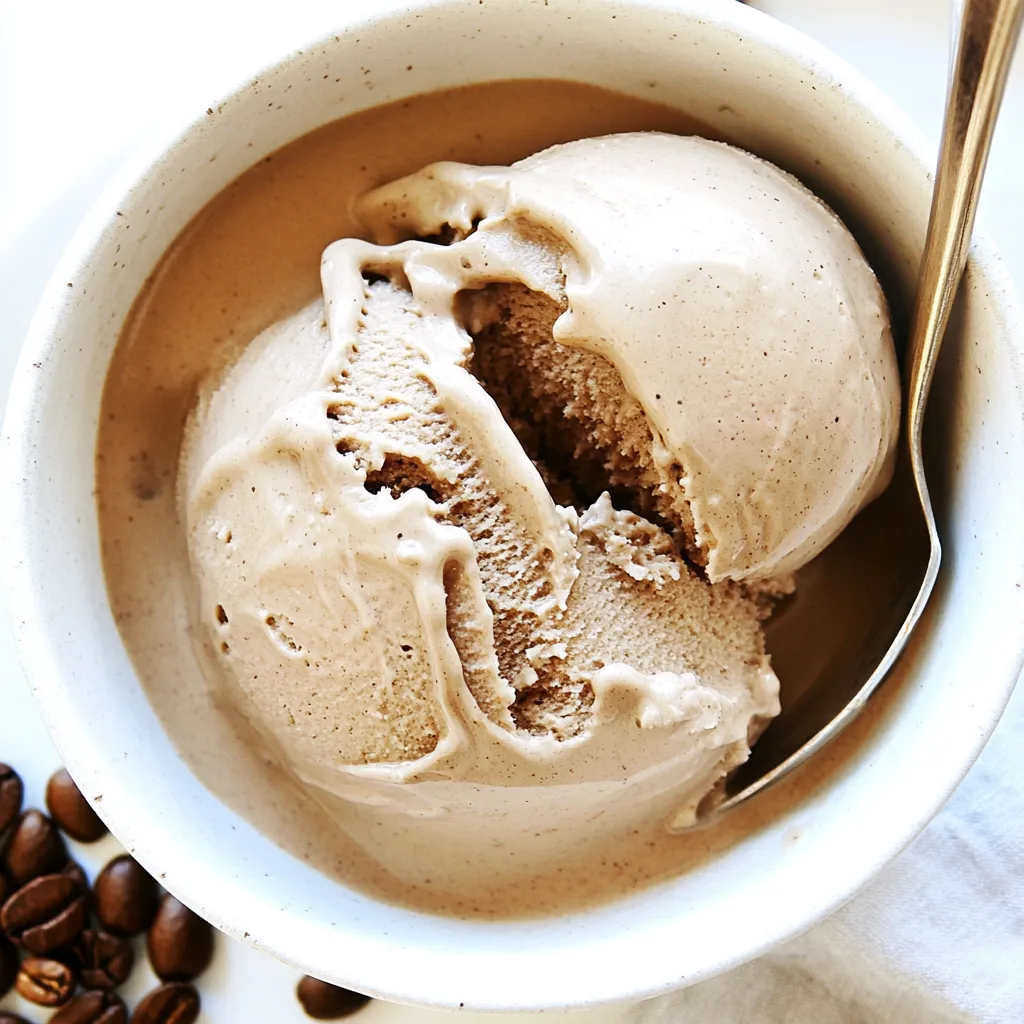
There’s something magical about making your own ice cream, especially when that ice cream is Coffee Ice Cream. I remember the first time I decided to try my hand at this creamy delight; it was a hot summer day, and I was craving something refreshing yet indulgent. I had some strong brewed coffee left over from breakfast and a craving that simply wouldn’t quit. It wasn’t long before I realized that I could turn that cooling brew into a luscious treat that would not only satisfy my sweet tooth but also my love for coffee. Mixing together simple ingredients like cashews and maple syrup, I embarked on a delicious adventure that left my taste buds tingling with joy.
As I started blending those rich flavors together, the aroma filled my kitchen, transporting me to my favorite coffee shop. With every step, the excitement grew; could I really create something this good at home? The answer was a resounding yes! The blend of creamy cashews with the robust coffee resulted in a smooth texture that simply melted in my mouth. And the best part? It’s totally dairy-free! Whether you’re winding down after a long day or looking to impress your friends at a summer gathering, this Coffee Ice Cream recipe is sure to win hearts and minds.
So, grab your blender and ice cream maker, and let’s dive into the world of homemade ice cream! Trust me, once you taste this creamy, dreamy Coffee Ice Cream, you’ll never want store-bought again.
Recipe Snapshot
60 mins
0 mins
0 mins
Medium
220 kcal
5 g
Keto, Paleo, Whole30
10 g
Mixing Bowl, Blender, Food Processor
Why This Coffee Ice Cream Hits Different
It’s Incredibly Simple
Making Coffee Ice Cream is much easier than you might think! With just a handful of ingredients and a little patience, you can whip up a delightful treat that’s perfect for any occasion. You don’t need to be a culinary genius to achieve that creamy, mouthwatering texture. Just follow the simple steps, and you’ll be rewarded with a delicious homemade dessert.
Rich and Creamy Flavor
The combination of coffee and cashews creates a rich flavor profile that’s both indulgent and satisfying. The cashews add a creamy base without any dairy, making this ice cream not only delicious but also a great option for those who are lactose intolerant or following a vegan lifestyle. Each spoonful is packed with the robust essence of coffee, perfect for coffee lovers like me.
Perfect for Hot Days
Let’s face it, nothing beats a scoop of ice cream on a hot summer day, and this Coffee Ice Cream is a great way to cool off while treating yourself. Whether you serve it in a cone or in a bowl topped with a sprinkle of cocoa, it’s sure to bring a smile to your face. It’s the perfect sweet treat to enjoy while lounging by the pool or hosting a summer barbecue.
Versatile and Customizable
This recipe is wonderfully versatile. You can add your own twist by mixing in chocolate chips, a swirl of caramel, or even a sprinkle of sea salt for a gourmet touch. The base recipe is just a jumping-off point, allowing you to create a flavor that’s uniquely yours. Get creative and have fun experimenting with different add-ins!
Great for Entertaining
Impress your guests with homemade ice cream! Whether it’s a birthday party or a casual dinner with friends, serving Coffee Ice Cream will make you the star of the show. Your friends will rave about your culinary skills, and you’ll feel proud to have made something so special from scratch. Plus, it’s always a crowd-pleaser!
Healthy Indulgence
This Coffee Ice Cream is not only delicious but also a healthier alternative to traditional ice creams packed with sugar and cream. With natural ingredients like maple syrup for sweetness and no artificial flavors, you can indulge guilt-free. It’s a sweet treat that feels good to eat!
Ingredients Required for Coffee Ice Cream
The ingredients for Coffee Ice Cream are simple yet effective, allowing the rich flavors to shine through. The star ingredient is, of course, coffee, which lends a deep, invigorating taste. The cashews serve as a creamy base, while maple syrup adds a touch of natural sweetness. Together, they create a harmonious blend that will leave you wanting more!
- 1 1/2 cups brewed coffee (cooled, approximately 12 ounces) – This is the essence of our ice cream, providing that robust flavor that coffee lovers crave.
- 1 1/2 cups raw cashews (approximately 206 grams) – Soaked and blended, they create a creamy texture without any dairy.
- 1/2 cup maple syrup (approximately 155 grams) – Natural sweetness that complements the bitterness of the coffee perfectly.
Coffee Ice Cream Instructions
Making Coffee Ice Cream is a delightful process that’s sure to become a favorite! Be prepared to enjoy the aromatic blend of coffee and cashews right in your kitchen. Let’s dive into the steps to create this creamy dessert.
- First, if your ice cream maker requires a frozen bowl, make sure to freeze the bowl at least 24 hours in advance. This is crucial for achieving that perfect creamy texture.
- Next, gather your ingredients: the cold brewed coffee, raw cashews, and maple syrup. Make sure the coffee is cooled to room temperature for the best blending results.
- In a high-speed blender, add the cooled coffee, cashews, and maple syrup. Blend the mixture until it’s completely smooth and creamy. You should not see any visible pieces of cashew at this stage. This might take a couple of minutes, so be patient!
- Once the mixture is smooth, pour it into the prepared frozen bowl of your ice cream maker. Turn on the machine and let it process until the mixture thickens, which will take about 30 to 35 minutes. You’ll notice it changing from liquid to soft-serve consistency.
- After processing, you can enjoy your ice cream immediately for a soft-serve texture. It’s delicious this way, but if you prefer a firmer consistency, transfer the mixture to an airtight container.
- To store, place the container in the freezer and let it firm up for 2 to 4 hours. This will allow the ice cream to become scoopable and hold its shape better.
- When ready to serve, remove the Coffee Ice Cream from the freezer and let it sit at room temperature for a few minutes to soften slightly before scooping. This makes it much easier to serve.
- Enjoy your homemade Coffee Ice Cream on its own, or get creative with toppings like chopped nuts or a drizzle of chocolate sauce!
- Don’t forget to share your creation with friends or family, as this delicious dessert is perfect for sharing and making memories together!
Things Worth Knowing
- Best Coffee Choice: Use a high-quality brewed coffee for the best flavor in your ice cream. The better the coffee, the richer the taste.
- Soak the Cashews: Soaking the cashews for at least 4 hours will help achieve a smoother texture. If you’re short on time, soaking them in hot water for 1 hour works too.
- Temperature Matters: Ensure that your ice cream maker bowl is completely frozen, as this is key to achieving that creamy, scoopable ice cream.
- Storage Tips: Keep the ice cream stored in an airtight container to prevent freezer burn and maintain its flavor and texture.
Pro Tips and Tweaks
Here are some helpful tips to enhance your Coffee Ice Cream experience and ensure your ice cream turns out perfectly every time!
- Storage: To store leftovers, transfer the ice cream to an airtight container. Make sure to press a piece of plastic wrap directly onto the surface to minimize air exposure.
- Freezing: You can freeze this ice cream for up to 3 months. However, for the best flavor and texture, it’s recommended to enjoy it within the first month.
- Pairing: This Coffee Ice Cream pairs beautifully with chocolate desserts or a slice of warm pie, creating a delightful contrast of flavors.
- Mix-ins: Feel free to customize your Coffee Ice Cream by adding mix-ins like crushed cookies, dark chocolate chips, or toasted coconut for added texture and flavor.
- Non-Dairy Alternative: If you want to keep it non-dairy, this recipe is already perfect as it uses cashews instead of traditional cream!
- Serving Tip: Serve in chilled bowls to keep your ice cream cold longer, especially on warm days.
Serving Ideas for Coffee Ice Cream
When it comes to serving Coffee Ice Cream, there are countless delicious ways to enjoy this treat. Here are some ideas to inspire you:
- Classic Scoop: Serve your ice cream in bowls or cones, topped with a sprinkle of cocoa powder or dark chocolate shavings for an elegant touch.
- Affogato Style: Pour a shot of hot espresso over a scoop of Coffee Ice Cream for a decadent dessert that combines hot and cold elements.
- Ice Cream Sandwiches: Stack between two cookies for a fun dessert. Chocolate cookies with Coffee Ice Cream offer a delightful flavor pairing.
- Float: Create a coffee float by adding your ice cream to a glass of cold brew or iced coffee for a refreshing twist.
- With Baked Goods: Serve alongside a slice of warm cake, brownies, or pie to create a comforting dessert experience.
- Seasonal Toppings: Enhance your ice cream with seasonal fruits, such as fresh berries in summer or spiced nuts in fall, to elevate its flavor.
- Gourmet Presentation: Create an ice cream sundae bar at gatherings, allowing guests to customize their desserts with toppings like crushed nuts, syrups, and whipped cream.
FAQ
Conclusion
In essence, Coffee Ice Cream is not just a dessert; it’s an experience that brings together the rich, robust flavors of coffee and the creamy goodness of cashews. Making this treat at home allows you to explore your culinary creativity while enjoying a refreshing delight. I encourage you to try this recipe and share it with friends and family. You won’t regret it!

Coffee Ice Cream
Ingredients
Equipment
Method
- First, if your ice cream maker requires a frozen bowl, make sure to freeze the bowl at least 24 hours in advance.
- Next, gather your ingredients: the cold brewed coffee, raw cashews, and maple syrup.
- In a high-speed blender, add the cooled coffee, cashews, and maple syrup. Blend the mixture until it’s completely smooth and creamy.
- Once the mixture is smooth, pour it into the prepared frozen bowl of your ice cream maker.
- After processing, you can enjoy your ice cream immediately for a soft-serve texture.
- To store, place the container in the freezer and let it firm up for 2 to 4 hours.
- When ready to serve, remove the Coffee Ice Cream from the freezer and let it sit at room temperature for a few minutes to soften slightly before scooping.
- Enjoy your homemade Coffee Ice Cream on its own, or get creative with toppings!
Notes
- Tip 1: This recipe should make 3 1/4 cups total.
- Tip 2: If you don't have an ice cream maker, you can still make this without one!