Creating Peppermint Chocolate Macarons in my kitchen feels like stepping into a festive dream. The moment I whip up these delicate treats, the aroma of chocolate and peppermint fills the air, instantly transporting me to a winter wonderland. I remember the first time I made these macarons; it was a snowy afternoon, and my friends were coming over for a holiday gathering. I wanted to impress them with something special. As I piped the vibrant batter onto the baking sheets, I felt a rush of excitement, knowing these treats would be the centerpiece of our dessert table.
These macarons are not just visually stunning; they encapsulate the spirit of the season with their rich chocolate flavor and refreshing peppermint essence. Each bite is a delightful combination of crunchy shells and creamy filling, making them a perfect treat for any holiday celebration. I often find myself making a double batch because they disappear so quickly. Trust me, once you start sharing these beautiful macarons, everyone will be asking for the recipe!
Recipe Snapshot
2 hr 4 mins
90 mins
34 mins
Hard
120 kcal
1 g
Keto, Paleo, Gluten-Free
7 g
Stand mixer, Silicone Macaron Mat, Digital Scale, Oven Thermometer
Why This Peppermint Chocolate Macarons Stands Out
Sweet Holiday Tradition
There’s a certain magic about making Peppermint Chocolate Macarons during the holidays. It’s become a cherished tradition in my home, where we gather around the kitchen, laugh, and share stories as we whisk, fold, and pipe these delightful treats. Every year, I look forward to this special time that not only brings delicious cookies but also strengthens our family bonds.
Perfect for Gifting
These macarons make for exquisite gifts. Who wouldn’t love receiving a beautifully packaged box of homemade Peppermint Chocolate Macarons? The vibrant colors and festive flavor are sure to brighten anyone’s day. I often include a handwritten note with serving suggestions, making it a personal touch that friends and family appreciate.
Visual Appeal
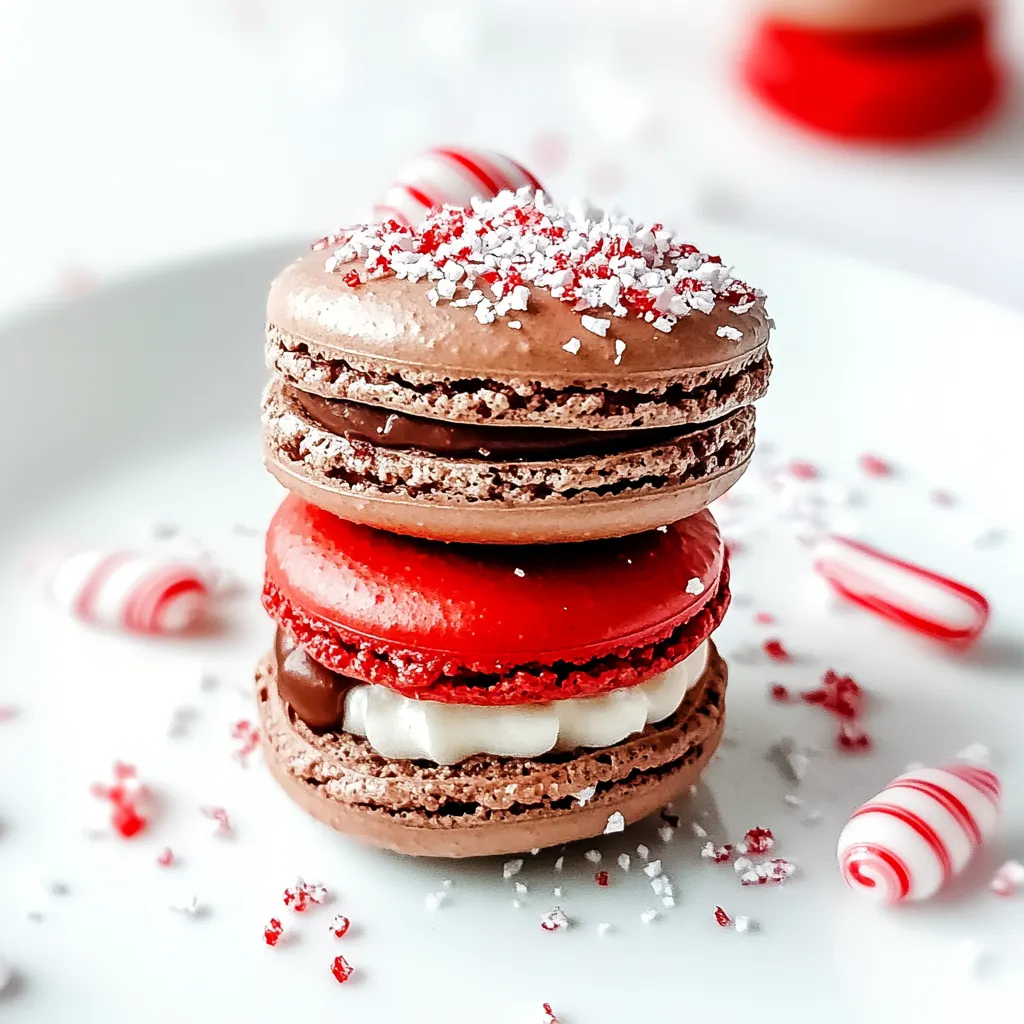
Let’s face it: macarons are incredibly photogenic! The vibrant red and white colors of the filling and crushed candy canes create a stunning visual that’s perfect for Instagram. Each time I post a picture of my macarons, the comments flood in, and friends ask how I manage to create such beautiful treats. It’s a fun way to share my passion for baking with others.
Versatile Flavor
While the classic chocolate and peppermint combo is a winner, the base recipe is incredibly versatile. You can swap out the flavorings and fillings to create different variations. I love experimenting with flavors like espresso or coconut, but the holiday season always calls me back to the comforting taste of Peppermint Chocolate Macarons.
Impressive Yet Achievable
Many people shy away from attempting macarons due to their reputation for being tricky. However, with the right technique and a little practice, they can be incredibly rewarding to make. I often remind my friends that every batch is a learning experience. The joy of pulling a perfectly baked macaron from the oven is unmatched!
What You Need for Peppermint Chocolate Macarons
Gathering the right ingredients is crucial when making Peppermint Chocolate Macarons. This recipe features a delightful combination of flavors and textures that come together beautifully. The main players include almond flour for the perfect macaron shell, powdered sugar for sweetness, and egg whites that provide structure. Each component plays a vital role in achieving that coveted crisp exterior and soft interior, making these macarons a true treat.
- 100 grams almond flour (1 cup) – Provides a nutty flavor and essential texture for the macarons.
- 180 grams powdered sugar (1½ cups) – Adds sweetness and helps achieve a smooth texture.
- 3 large egg whites (around 90 grams, room temperature) – Essential for creating the meringue base.
- ¼ teaspoon cream of tartar – Stabilizes the egg whites for perfect peaks.
- ¼ cup granulated sugar – Sweetens the meringue mixture.
- ½ teaspoon red gel food coloring – Adds a festive hue to the batter.
- ½ teaspoon peppermint extract – Infuses the macarons with a refreshing flavor.
- ½ cup unsalted butter (room temperature) – Forms the creamy filling.
- 2 cups powdered sugar – Sweetens the buttercream filling.
- 2 tablespoons unsweetened cocoa powder – Enhances the chocolate flavor of the filling.
- 1 to 2 tablespoons heavy whipping cream – Adjust for desired filling consistency.
- 1 teaspoon peppermint extract – Enhances the filling’s flavor.
- 12 crushed candy canes – For decoration, adding a festive crunch.
Putting Together Peppermint Chocolate Macarons

Let’s dive into the fun part of making Peppermint Chocolate Macarons. Making macarons can be a bit of an art, but with patience, you’ll master the steps! I enjoy the process, especially the moment when I see them rise in the oven, creating that iconic “foot.” Follow these steps closely, and you’ll create a delightful masterpiece.
- Start by using a large sieve to sift the almond flour and powdered sugar together into a large bowl. This step is crucial as it breaks up any clumps and ensures a smooth batter. Sift the mixture a second time into another bowl to double-check its consistency.
- In a clean, dry bowl, pour in the egg whites and add the cream of tartar. Begin beating the egg whites on medium-low speed until soft peaks form. This means the mixture will hold a peak, but it will gently fall over when you lift the whisk.
- Gradually add the granulated sugar to the egg whites while continuing to beat. Watch closely as the mixture transforms; keep beating until it almost reaches stiff peaks, which means the mixture holds its shape firmly when you pull out the whisk.
- Now, add the red gel food coloring and peppermint extract. Continue beating until you achieve stiff peaks, which means you can tip the bowl upside down, and nothing moves! This is crucial for light, airy macarons.
- Next, fold in a third of the dry sifted ingredients into the egg white mixture using a spatula. Be gentle to retain the air you’ve whipped in. Once mixed, fold in the remaining ingredients until the batter runs off the spatula in a smooth, consistent flow, forming a “figure-8.” Be careful not to overmix!
- Prepare a large piping bag fitted with a large round tip (I prefer a Wilton 2A tip). Scoop the macaron batter into the piping bag. Pipe 1 to 1½ inch circles onto parchment-lined baking sheets, leaving about 1 to 2 inches between them. If you have a silicone macaron mat, it works wonders here!
- Tap the pan firmly on the counter at least 5 times to release any air bubbles trapped in the batter. If you see any bubbles rise to the surface, use a toothpick to pop them gently.
- This step is vital! Allow the macarons to rest at room temperature in a dry area for 30 minutes to an hour until the tops are no longer tacky. This drying time is key for achieving that smooth top.
- While the macarons are resting, preheat your oven to 315°F/157°C. This ensures it’s hot right when your macarons are ready to bake.
- Bake the macarons one sheet at a time for 17 minutes. You’ll see them rise beautifully and form “feet” at the base. The tops should remain smooth and slightly shiny.
- Once baked, let the macarons cool in the pan for 10 minutes. If they come off easily without sticking, that’s a sign of a perfect bake! Transfer them to a cooling rack and leave them to cool completely.
- While the macarons cool, prepare the filling. In a large mixing bowl, cream the unsalted butter using a handheld mixer on medium speed. Gradually add the powdered sugar until it’s well combined and smooth.
- Add in the cocoa powder, and continue mixing until fully incorporated. Follow this with the peppermint extract and 1 tablespoon of heavy whipping cream. Mix well, adding a second tablespoon if the filling is too thick, ensuring that it’s smooth and creamy.
- Transfer the buttercream to a piping bag. Pipe the filling onto the flat side of half of the macaron cookies. Top each with the other half to create delightful macaron sandwiches.
- For a festive touch, roll the edges of the assembled macarons in the crushed candy canes. This not only adds a pop of color but also a delightful crunch!
Things Worth Knowing
- Resting Time is Key: Allowing the piped macarons to rest is crucial. This helps develop a skin on the outside, resulting in a smooth surface.
- Use a Kitchen Scale: For the best results, weigh your ingredients using a digital scale. Accurate measurements are essential for macarons.
- Oven Temperature Matters: Use an oven thermometer to ensure your oven is at the correct temperature. This prevents overbaking or underbaking.
- Watch for Macaron Feet: The “feet” are the ruffled edges that form on the bottom of the macaron. It’s a sign that they’ve baked properly!
Tips and Tricks about Peppermint Chocolate Macarons

Let’s talk about some valuable tips to ensure your Peppermint Chocolate Macarons turn out perfectly every time. Understanding these helpful hints will make your baking journey much smoother!
- Storage: Store leftover macarons in an airtight container. They’ll stay fresh at room temperature for up to three days, in the refrigerator for seven days, or in the freezer for up to two months.
- Freezing: Both assembled macarons and just the shells freeze well. Allow them to sit at room temperature for 8 to 12 hours before freezing in an airtight container. To thaw, place in the fridge before serving.
- Flavor Variations: Don’t hesitate to experiment with different flavorings in the filling. Coconut, chocolate, or even a hint of citrus can create exciting variations!
- Pipe with Precision: Take your time when piping the batter. A steady hand helps create evenly shaped macarons, ensuring uniform baking.
- Be Patient: Macarons can be finicky, but patience pays off. If your first batch doesn’t rise perfectly, don’t get discouraged; practice makes perfect!
- Step into the Festive Spirit: Decorate your macarons with holiday-themed sprinkles or edible glitter for a festive touch.
Serving Options for Peppermint Chocolate Macarons
When it comes to serving Peppermint Chocolate Macarons, the possibilities are endless! Here are some delightful suggestions:
- Holiday Gatherings: These macarons are perfect for holiday parties. Serve them on a decorative platter for a stunning display.
- Gift Giving: Package your macarons in a beautiful box or tin tied with a festive ribbon. It’s a lovely homemade gift that friends and family will cherish.
- Pairing with Beverages: Enjoy these macarons with a warm cup of hot chocolate or coffee for a cozy afternoon treat.
- Special Occasions: They make a great addition to dessert tables for weddings or birthdays, adding a touch of elegance.
- Seasonal Themes: Try using different food colorings to match the theme of various holidays, like green for St. Patrick’s Day or pastels for Easter.
- Storage Tips: If you have leftovers, store them in an airtight container. Proper storage keeps them fresh and ready to enjoy!
FAQ
Conclusion
In summary, Peppermint Chocolate Macarons are a delightful blend of rich chocolate and refreshing peppermint, perfectly suited for the holiday season. Their impressive appearance and delicious flavor make them a favorite at any gathering. I encourage you to give this recipe a try; you’ll find that the joy of making these macarons is as rewarding as enjoying them. So gather your ingredients and create these festive treats today!

Peppermint Chocolate Macarons
Ingredients
Equipment
Method
- Using a large sieve, sift the almond flour and powdered sugar together into a large bowl. Then sift the mixture a second time into another large bowl. Set aside.
- In a large bowl, pour in the egg whites and cream of tartar. Beat the egg whites on medium-low speed until soft peaks form.
- Add the granulated sugar to the eggs. Continue beating until the mixture almost reaches stiff peaks.
- Add the red gel food coloring and peppermint extract and beat until stiff peaks form, and you can tip the bowl upside down and nothing falls out.
- Fold in a third of the dry ingredients to the egg white mixture with a spatula until completely mixed. Fold in the rest of the ingredients until the batter can run off the spatula forming a “figure-8” without breaking. Be careful not to overmix the batter or you will lose air bubbles from the egg whites.
- Scoop the batter into a large piping bag fitted with a large round tip (I used a Wilton 2A tip). Pipe 1 to 1½ inch circles onto parchment-lined baking sheets, leaving about 1 to 2 inches between each macaron. You can also use a silicone macaron mat.
- Tap the pan on the counter at least 5 times to release air bubbles to the top of the macarons. Use a toothpick to pop any bubbles on the surface.
- Allow the macarons to rest in a dry area for 30 minutes to an hour until the tops of the macarons are no longer tacky to the touch.
- Preheat the oven to 315°F/157°C.
- Bake the macarons, one cookie sheet at a time, for 17 minutes. The cookies should rise and form “feet” as they bake.
- Let the macarons cool on the pan set on top of a cooling rack for 10 minutes. Then remove the pan, keeping the macarons on the parchment paper, and leave on the cooling rack until completely cool, at least 10 more minutes. The macarons should peel off of the parchment paper leaving little to no cookie residue on the parchment paper.
- In a large mixing bowl, cream the softened butter with a handheld mixer on medium speed. Gradually add the powdered sugar until it is well mixed with no lumps.
- Add the cocoa powder, and mix until completely incorporated. Then add the peppermint extract and 1 tablespoon of heavy whipping cream. Mix well on medium speed. If the buttercream is still thick or clumpy, add in a second tablespoon of cream. Mix until the texture is smooth and creamy.
- Add the buttercream to a piping bag and pipe the buttercream on the flat side of half of the macaron cookies. Then place the other half of the macarons on top of the buttercream to form a macaron sandwich.
- Roll the macarons in the crushed candy canes to coat the edges.
Notes
- Use Gel Food Coloring: Liquid food coloring is not ideal for macarons, as any extra liquid can affect how the eggs whip up.
- Be Sure to Let them Rest: The step of letting the piped macarons rest before baking them is very important. This allows the tops to dry, which will make them smooth after baking.
- Check the oven temperature: You can’t always trust that your oven is the temperature it says it is. An oven thermometer will take all the guesswork out of that.
- Don’t Open the Oven: This is true of any type of meringue. Opening the oven can cause forceful airflow and a change in temperature that can mess up everything!
- Storing: Place the macarons in an airtight container. They will stay fresh at room temperature for 3 days, in the refrigerator for 7 days, or in the freezer for up to two months.
- Freezing: Assemble macarons or just the shells freeze very well. Allow them to sit at room temperature for 8-12 hours, then freeze them in an airtight container.