One of my fondest memories from childhood is spending time in the kitchen with my grandma, making her famous Homemade Caramels. The air would be thick with the sweet aroma of melting sugars, and I’d watch in awe as she turned simple ingredients into something magical. Each batch was a labor of love, filled with patience and care, and the best part was always indulging in the warm, gooey confections that we would wrap up and share with family. These Homemade Caramels are not just candies; they’re little bites of nostalgia, each one bringing back cherished moments of laughter and warmth. Today, I’m excited to share with you this wonderful recipe that allows you to create your own sweet memories in the kitchen. You’ll find that making Homemade Caramels is easier than you might think, and trust me, the result is well worth the effort!
Recipe Snapshot
40 mins
5 mins
35 mins
Easy
100 kcal
0 g
Gluten-Free, Low FODMAP
4 g
Frying Pan, Wooden Spoon, Whisk
Why This Homemade Caramels Shines
Perfectly Chewy Texture
The texture of Homemade Caramels is simply irresistible. When you take a bite, it’s soft and chewy, melting in your mouth with every piece. This perfect balance comes from cooking the mixture to the ideal temperature, allowing the sugars to reach that magical point where they create that delicious caramel chewiness.
Versatility of Flavor
What’s great about making Homemade Caramels is the versatility in flavor. You can make them classic or spice them up with flavors like sea salt, chocolate, or even a hint of espresso. The base recipe is just a canvas waiting for your creative touch, and you can easily make these caramels fit any occasion or preference.
Ideal for Gifting
These little bites of sweetness are perfect for gifting. Who wouldn’t love a beautifully wrapped box of Homemade Caramels? Whether it’s for a birthday, holiday, or just to show someone you care, they make a heartfelt gift that’s sure to bring a smile. You can get creative with your packaging, adding a personal touch that makes the gift even more special.
Family Tradition
In my family, making Homemade Caramels has become a cherished tradition. Every year, we gather to make a big batch, and it’s always a fun time filled with laughter and sharing stories. It’s a wonderful way to bond and create lasting memories, and I believe this tradition can be passed down through generations, bringing people together in the kitchen.
Simple Ingredients
Another reason to love Homemade Caramels is the simplicity of the ingredients. You likely already have most of them in your pantry. This recipe calls for just a few basic staples, making it accessible for anyone to try their hand at candy making. Plus, knowing exactly what goes into your treats is always a plus!
What You Need for Homemade Caramels
To create the perfect Homemade Caramels, you’ll need a few simple ingredients that work beautifully together. Each component serves its purpose, combining to create a rich, decadent treat that is sure to please. The key players in this recipe are the different types of sugars, which contribute to the overall flavor and texture, along with cream and butter for that rich, indulgent mouthfeel.
- ¾ cup granulated sugar: A staple sweetener that helps form the base and provides sweetness.
- ¾ cup packed dark brown sugar: Adds a depth of flavor and a hint of molasses, making the caramels rich and flavorful.
- ½ cup light corn syrup: This ingredient helps prevent crystallization, ensuring a smooth texture.
- ½ cup evaporated milk: Provides creaminess and helps create that soft, chewy texture we all love.
- 1 cup heavy whipping cream: The key to a luxurious mouthfeel, enhancing the richness of the caramels.
- ½ teaspoon salt: Balances the sweetness and enhances the overall flavor profile.
- ½ cup unsalted butter: Adds richness and contributes to the silky texture of the caramels.
- 2 teaspoons vanilla extract: Infuses a warm, comforting flavor that rounds out the sweetness.
Making This Homemade Caramels
Getting started with Homemade Caramels is a delightful journey. You’ll find that while it does require some attention, the process is straightforward and rewarding. Follow these steps, and you’ll soon have a batch of delicious caramels ready to indulge in or share with loved ones.
Begin by lining a 9 x 9 x 2-inch baking pan with parchment paper. Make sure the paper goes up the sides, leaving at least 2 inches of overhang. This will help you lift out the caramels once they’re set. Lightly spray the parchment with pan spray to ensure easy removal. Set the pan aside as you prepare your ingredients.
In a medium-sized heavy-bottomed pot, combine ¾ cup granulated sugar, ¾ cup packed dark brown sugar, ½ cup light corn syrup, ½ cup evaporated milk, 1 cup heavy whipping cream, ½ teaspoon salt, and ½ cup unsalted butter. Stir these ingredients together until they are well mixed.
Place your pot over medium-low heat. As the mixture begins to heat, whisk frequently to prevent the sugars from sticking to the bottom of the pot. This process will take about 30 minutes, and you’ll want to keep an eye on it to ensure nothing burns.
Use a candy thermometer to monitor the temperature of the mixture. You’re aiming for it to reach between 238 to 240 degrees Fahrenheit. This will ensure the caramels have the right texture – not too soft and not too hard.
Once the mixture reaches the desired temperature, remove it from heat. Carefully stir in 2 teaspoons vanilla extract, mixing it in thoroughly. The vanilla adds a beautiful aroma and flavor that complements the sugars beautifully.
Pour the caramel mixture into your prepared baking pan. Use a spatula to spread it evenly if needed. It will be very hot, so handle it with care. Let the caramels sit at room temperature for a few hours until they are fully set.
After a few hours, check to see if the caramels are firm. Once they have set, take them out of the pan using the parchment overhang. Place them on a cutting board.
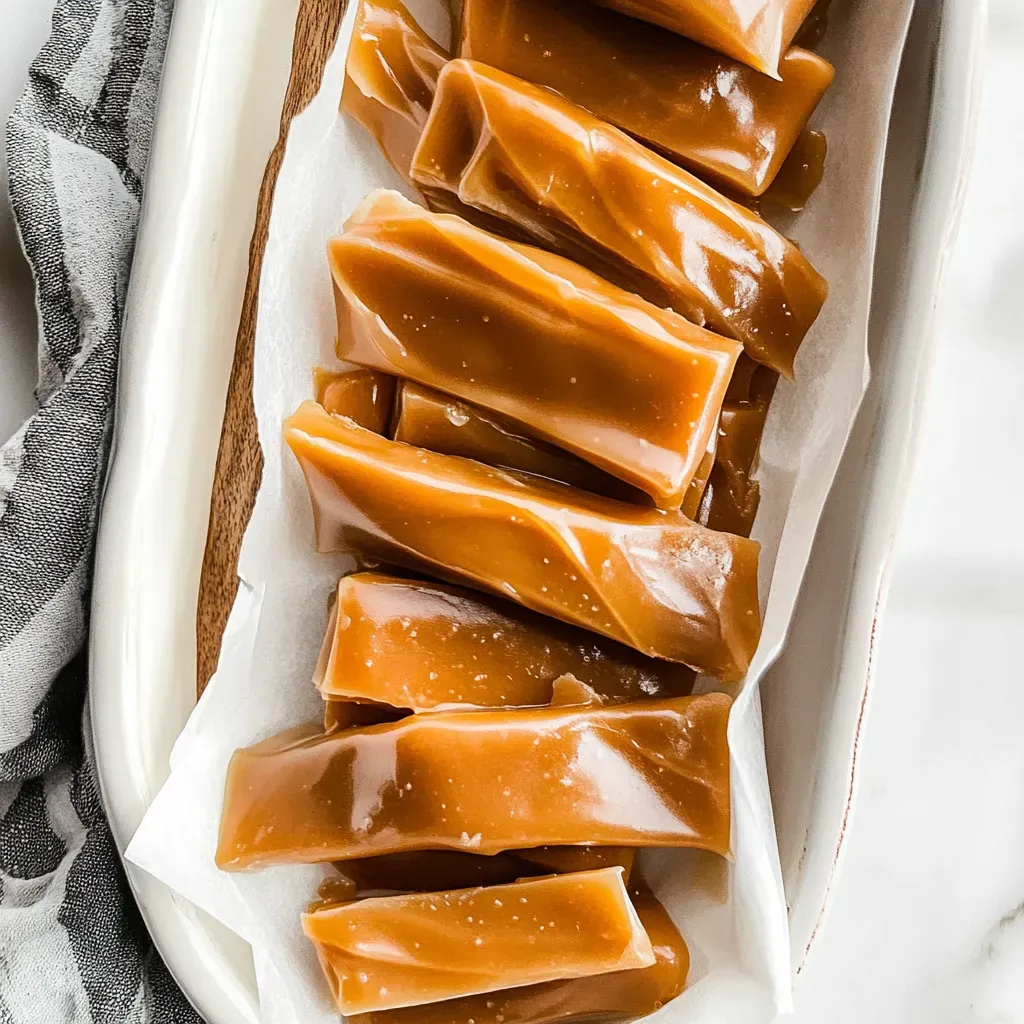
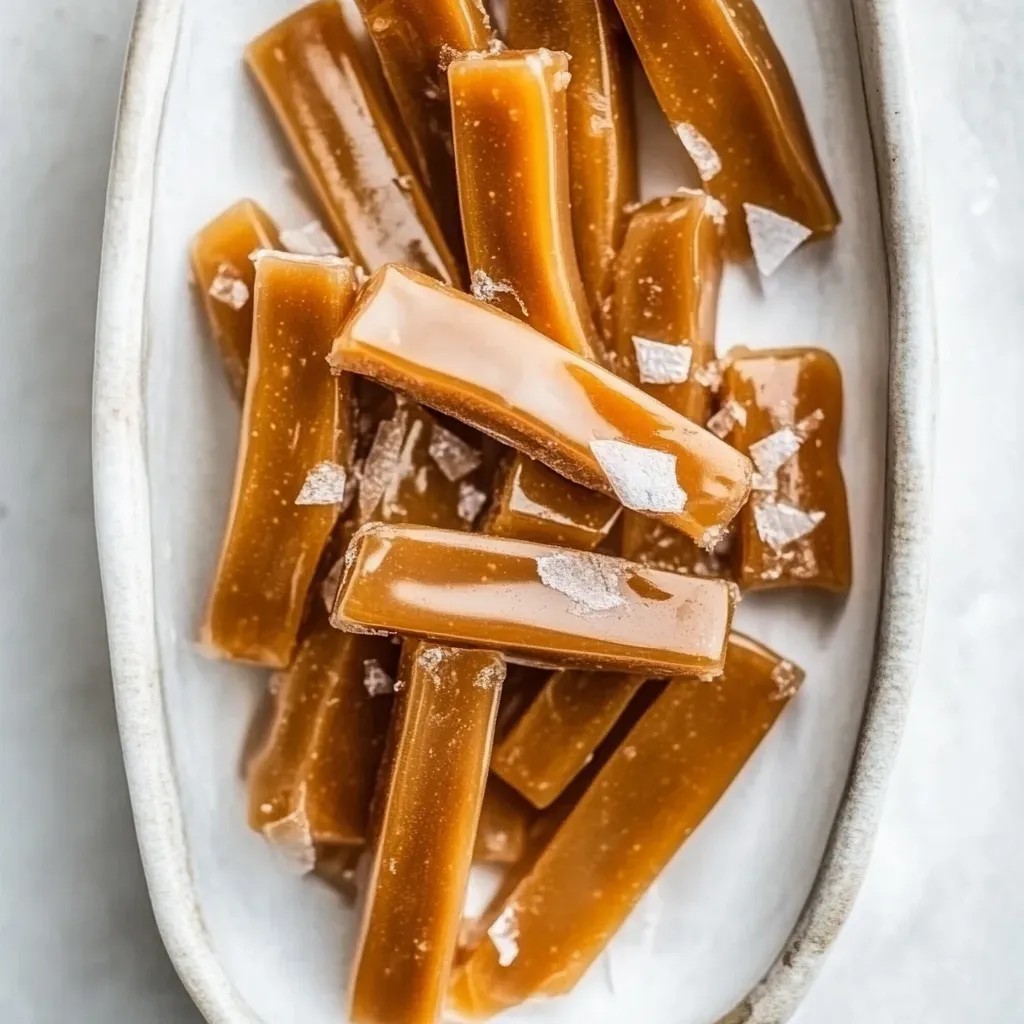
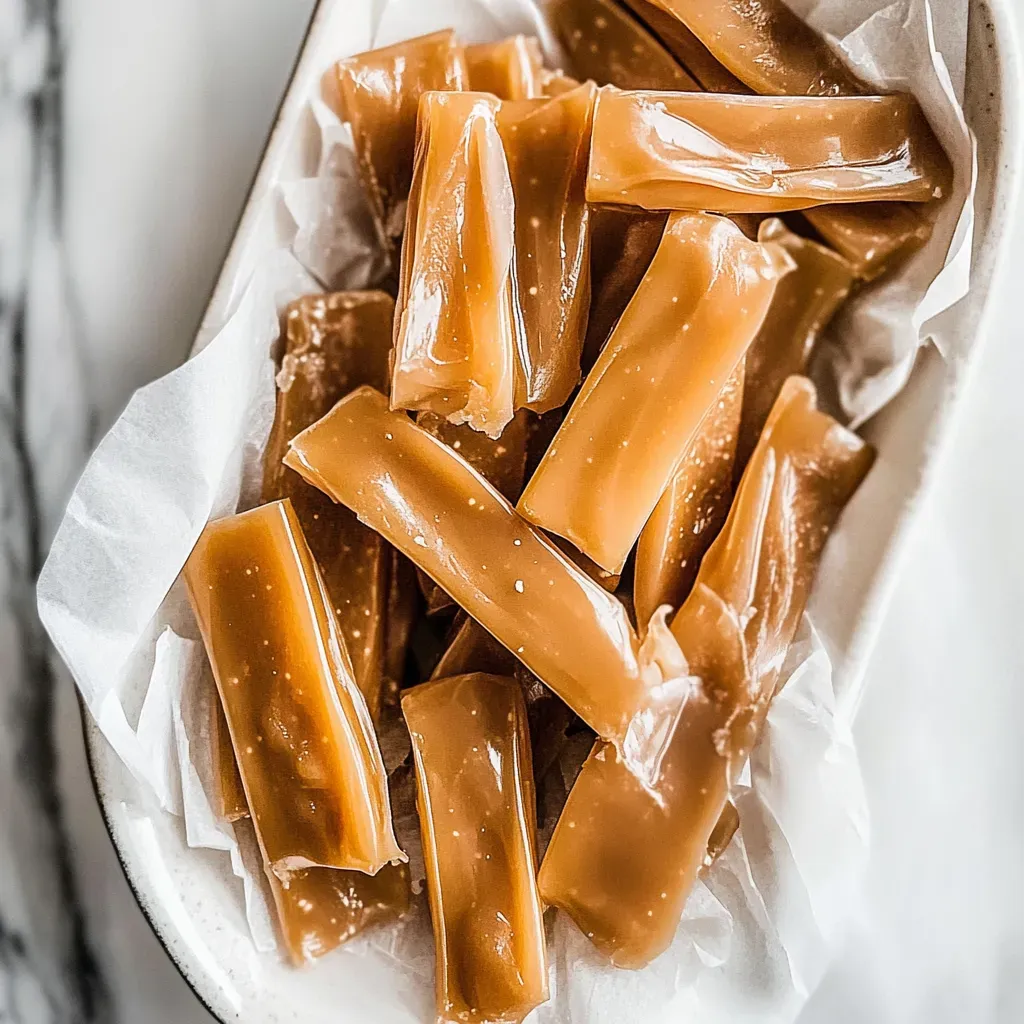
Using a sharp knife or pizza cutter, cut the caramels into 1 x ½ inch pieces. It’s best to do this quickly while the caramels are still slightly warm, as they can become more difficult to cut as they cool completely.
Finally, wrap each piece of caramel individually in wax paper. This not only keeps them fresh but also makes them easy to share or gift.
Things Worth Knowing
- When making Homemade Caramels, always use a heavy-bottomed pot. This helps distribute heat evenly and prevents burning.
- Keep an eye on the temperature while cooking. Using a candy thermometer is essential for achieving the right consistency.
- Patience is key! Do not rush the cooking process; it’s crucial to allow the sugars to reach the right temperature for the perfect caramel.
- Store your caramels in a cool, dry place to maintain their texture and prevent them from becoming too sticky.
Customization Ideas

If you’re eager to put your own spin on Homemade Caramels, there are countless ways to customize this recipe. Here are some fun ideas that can make your caramels unique and tailored to your taste!
- Add nuts: Chopped nuts like pecans or almonds can add a delightful crunch to your caramels.
- Try different extracts: Instead of vanilla, consider using almond extract or even rum extract for a different flavor twist.
- Use sea salt: A sprinkle of flaky sea salt on top can enhance the sweetness and provide a delicious contrast.
- Infuse with spices: Cinnamon or pumpkin spice can create a seasonal twist, perfect for fall treats.
- Dip in chocolate: For an extra decadent treat, dip your caramels in melted chocolate and let them set.
- Experiment with colors: You can add food coloring to your caramel mixture to create fun, vibrant treats for parties.
What to Serve With Homemade Caramels
- Warm beverages: Pair your Homemade Caramels with a cozy cup of hot chocolate or coffee for a delightful afternoon treat.
- On a dessert platter: Slice your caramels and serve them on a dessert platter alongside cookies and candies during gatherings.
- Gift giving: Wrap your caramels beautifully and present them as gifts for birthdays or holidays.
- Chocolate pairings: Enjoy them alongside chocolate desserts like brownies or cakes for a sweet tooth satisfaction.
- Seasonal celebrations: These caramels make excellent treats during holidays like Christmas or as sweet additions to Halloween goodie bags.
- Indulge solo: Sometimes, the best way to enjoy Homemade Caramels is simply by savoring them on their own!
FAQ
Conclusion
The beauty of Homemade Caramels lies in their rich, sweet flavor and delightful chewy texture. Each bite is a reminder of the warmth and joy of the kitchen, making them a perfect treat for any occasion. I encourage you to give this recipe a try and experience the satisfaction of creating something truly special. You won’t be disappointed—your loved ones will cherish these delicious caramels just as much as I do!
Homemade Caramels
Ingredients
Equipment
Method
- Line a 9 x 9 x 2-inch baking pan with parchment paper going up the sides, leaving at least 2 inches of overhang and spray lightly with pan spray. Set aside.
- Add ¾ cups granulated sugar, ¾ cups packed dark brown sugar, ½ cup light corn syrup, ½ cup evaporated milk, 1 cup heavy whipping cream, ½ teaspoon salt, and ½ cup unsalted butter to a medium-sized heavy-bottomed pot.
- Cook over medium-low heat while whisking frequently for about 30 minutes, until it reaches 238-240 degrees Fahrenheit on a candy thermometer.
- Remove from heat and stir in 2 teaspoons vanilla extract before pouring into the prepared pan. Set aside and let sit for a few hours until fully set up.
- Cut into 1 x ½ inch pieces with a sharp knife or pizza cutter and wrap the caramels in wax paper.
Notes
- Tip 1: Store leftover caramels in an airtight container at room temperature for up to two weeks.
- Tip 2: If you want to freeze them, wrap each caramel individually in plastic wrap and place them in a freezer-safe bag.
- Tip 3: Consider adding different flavors or toppings to customize your caramels.
- Tip 4: Make sure to use a heavy-bottomed pot to prevent burning the mixture.
- Tip 5: Always monitor the temperature carefully to achieve the perfect caramel consistency.