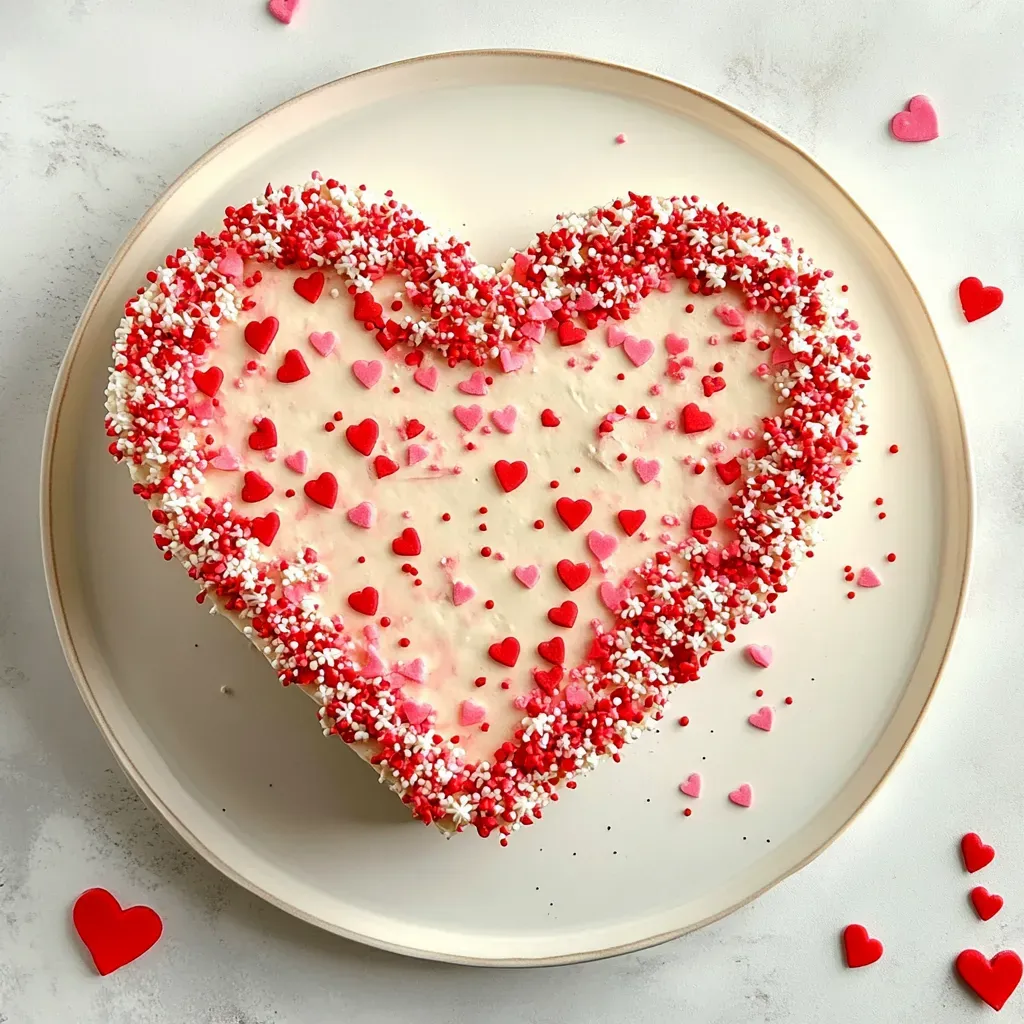
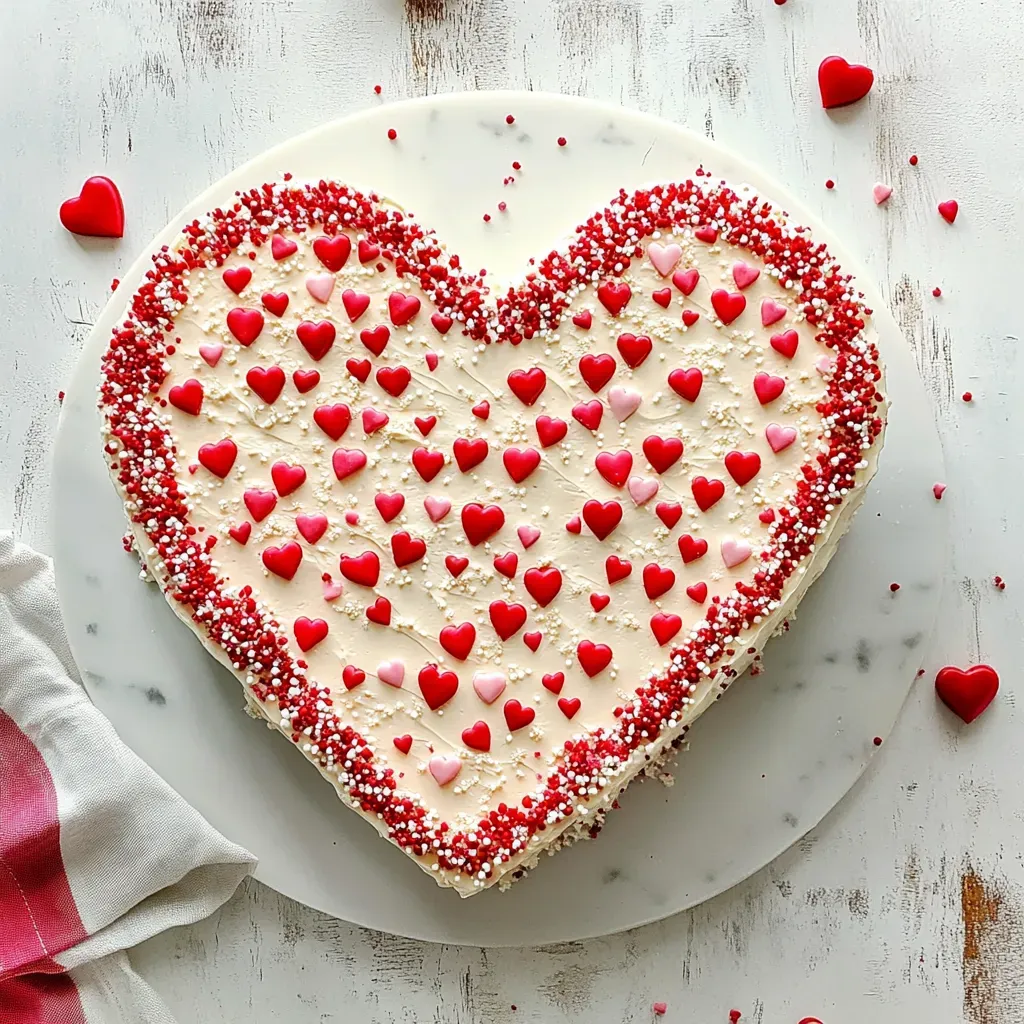
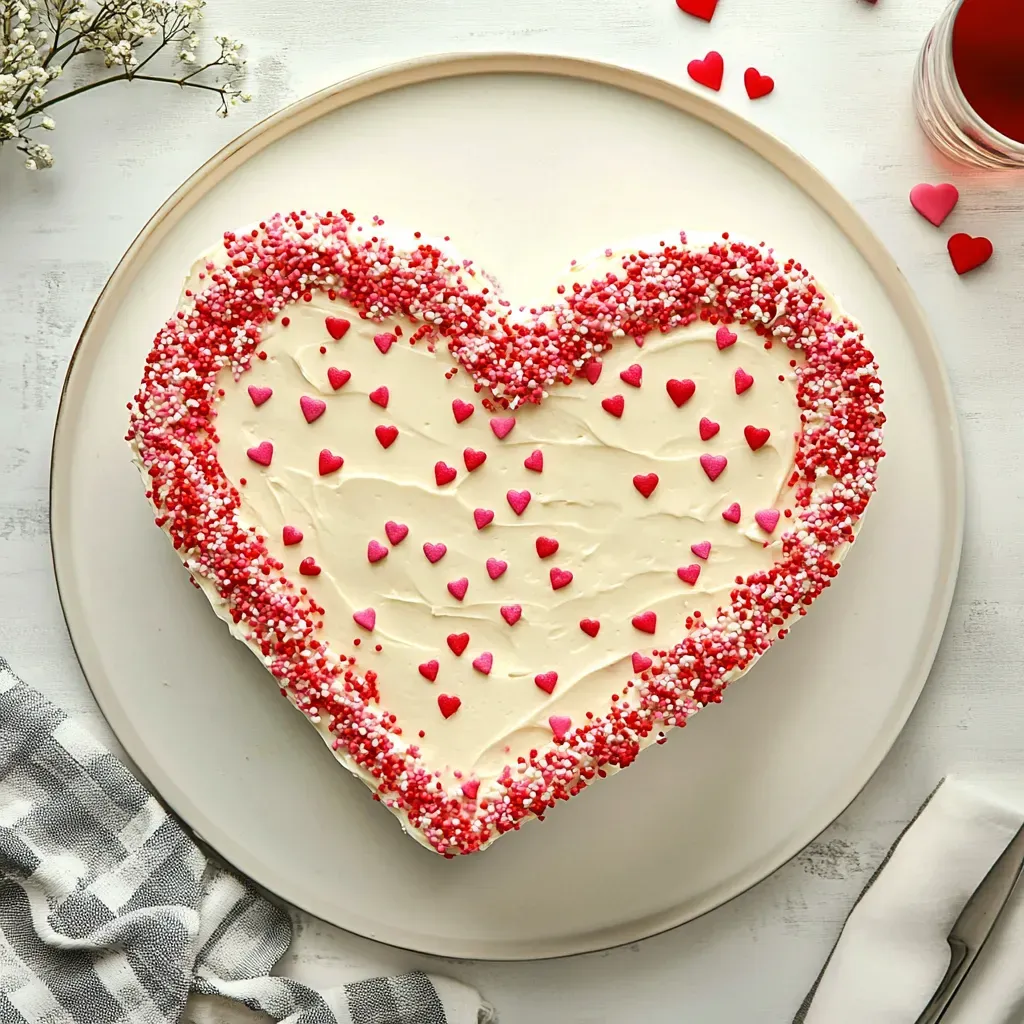
Every year, Valentine’s Day brings a wave of love and joy, and what better way to celebrate than with a beautiful Heart Shaped Cake? I remember the first time I baked this cake for my partner—it was a spontaneous decision fueled by the desire to create something special. As I poured the vibrant red batter into the pans, I could already envision the delight on their face when they saw the heart shape. This cake isn’t just a dessert; it’s a token of affection, a way to express love through baking. Each slice is a sweet reminder that love can be fun, colorful, and oh-so-delicious. Whether it’s a romantic dinner or a fun gathering with friends, this Heart Shaped Cake is sure to steal the show and add sweetness to any occasion.
Recipe Snapshot
1 hr 15 mins
40 mins
35 mins
Medium
370 kcal
4 g
Whole30, Vegan, Gluten-Free
16 g
Frying Pan, Oven, Whisk, Mixing Bowl, Baking Sheet
The Best Thing About This Heart Shaped Cake
1. A Symbol of Love
The Heart Shaped Cake is more than just a dessert; it embodies the spirit of love and affection. Whether you’re celebrating an anniversary, Valentine’s Day, or simply want to show someone you care, this cake is a perfect choice. Its charming shape instantly brings a smile and warmth to any gathering.
2. Vibrant Color
What sets this cake apart is its stunning red hue, which not only looks appealing but also evokes feelings of passion and joy. The addition of liquid red food coloring makes the cake festive and eye-catching. It’s a great conversation starter and a visual treat that enhances your dessert table.
3. Creamy Frosting
The luscious cream cheese frosting that accompanies the Heart Shaped Cake adds a rich, creamy texture that contrasts beautifully with the cake’s softness. It’s not overly sweet and complements the cake’s flavor perfectly. Plus, decorating the cake with frosting allows for creativity—let your imagination run wild!
4. Easy to Make
Don’t be intimidated by the heart shape; this cake is relatively easy to make. With just a few ingredients and straightforward steps, you’ll be on your way to impressing your loved ones. The process is enjoyable, and you’ll find yourself savoring every moment spent baking.
5. Perfect for Any Occasion
Whether it’s a birthday, anniversary, or just a cozy evening at home, the Heart Shaped Cake fits all occasions. It’s versatile enough for casual and formal events, making it a fantastic dessert choice for any celebration.
Heart Shaped Cake Ingredients
This Heart Shaped Cake is crafted with a delightful blend of ingredients that come together to create a moist and flavorful cake. The combination of all-purpose flour, cocoa powder, and buttermilk gives it a rich texture and taste, while the cream cheese frosting adds a creamy indulgence. Each ingredient plays a vital role in achieving the perfect balance of flavor and sweetness.
- 2 ½ Cups all-purpose flour – Provides the structure and base for the cake, making it fluffy.
- ¼ cup cocoa powder – Adds a rich chocolate flavor that complements the sweetness.
- 1 ½ teaspoons baking soda – Helps the cake rise, giving it a light texture.
- 1 teaspoon baking powder – Works alongside baking soda to ensure proper rising.
- 1 ½ cups granulated sugar – Sweetens the cake, balancing the cocoa powder.
- ½ teaspoon salt – Enhances the flavors and balances the sweetness.
- 1 ½ cups buttermilk, room temperature – Adds moisture and a slight tanginess to the cake.
- 1 cup vegetable oil – Ensures the cake remains moist and tender.
- 2 large eggs, room temperature – Binds the ingredients together and contributes to the cake’s structure.
- 1 teaspoon white vinegar – Reacts with baking soda to enhance the cake’s rise.
- 2 teaspoons vanilla extract – Provides a warm flavor that enhances the overall taste.
- 2 tablespoons liquid red food coloring – Gives the cake its vibrant red color, perfect for a heart shape.
- 1 pound cream cheese, room temperature – Essential for the creamy frosting, providing richness.
- 8 ounces unsalted butter, room temperature – Adds richness and flavor to the frosting.
- 1 teaspoon vanilla extract – Another layer of flavor in the frosting.
- 1 ½ cups powdered sugar – Sweetens the frosting and gives it the perfect texture.
Cooking Method for Heart Shaped Cake
Making a Heart Shaped Cake is a delightful experience that combines the joy of baking with a touch of creativity. Follow these steps to create a stunning cake that will impress everyone. Take your time and enjoy the process as you create each layer of deliciousness.
- Preheat your oven to 350 degrees Fahrenheit. Prepare an 8-inch round pan and an 8-inch square pan by spraying them with pan spray and lining them with parchment paper. This step is crucial for ensuring that your cakes release easily.
- In a medium bowl, sift together the flour, cocoa powder, baking soda, and baking powder. This means all dry ingredients must be combined to ensure even distribution. Then, add the granulated sugar and salt, whisking everything together until well combined. Set aside.
- In a large mixing bowl, combine the buttermilk, vegetable oil, eggs, white vinegar, vanilla extract, and liquid red food coloring. Use a whisk to mix these wet ingredients thoroughly until they’re well blended. The mixture should be smooth and vibrant.
- Gradually add the dry mixture to the wet ingredients, whisking consistently until you have a smooth batter. The batter should be thick and glossy, with no lumps visible. Be careful not to overmix.
- Divide the batter evenly between the two prepared pans. Bake them in the preheated oven for about 30 to 35 minutes. Keep an eye on them; you’ll know they’re done when a toothpick inserted into the center comes out clean or the cake springs back when lightly pressed.
- Once baked, allow the cakes to cool in the pans for about 10 to 15 minutes. After cooling, carefully turn them out onto a cooling rack to cool completely. This step is vital for achieving the right texture and preventing sogginess.
- While the cakes cool, prepare the cream cheese frosting. In a large mixing bowl or using a stand mixer, cream together the unsalted butter and cream cheese until they’re thoroughly mixed and creamy. This should take a few minutes; the mixture should be smooth.
- Add the vanilla extract and mix to combine. Make sure to scrape down the sides of the bowl to ensure everything is evenly mixed. After that, gradually add the powdered sugar, mixing slowly to incorporate it all.
- Once fully combined, increase the speed of the mixer and beat the frosting until it’s fluffy and light. This should create a delightful creamy texture that’s perfect for spreading.
- When the cakes are completely cool, take the round cake and slice it in half to create two equal half-circles. On your chosen serving platter, position the square cake in the center. Place the two half circles on the sides to form the rounded part of the heart.
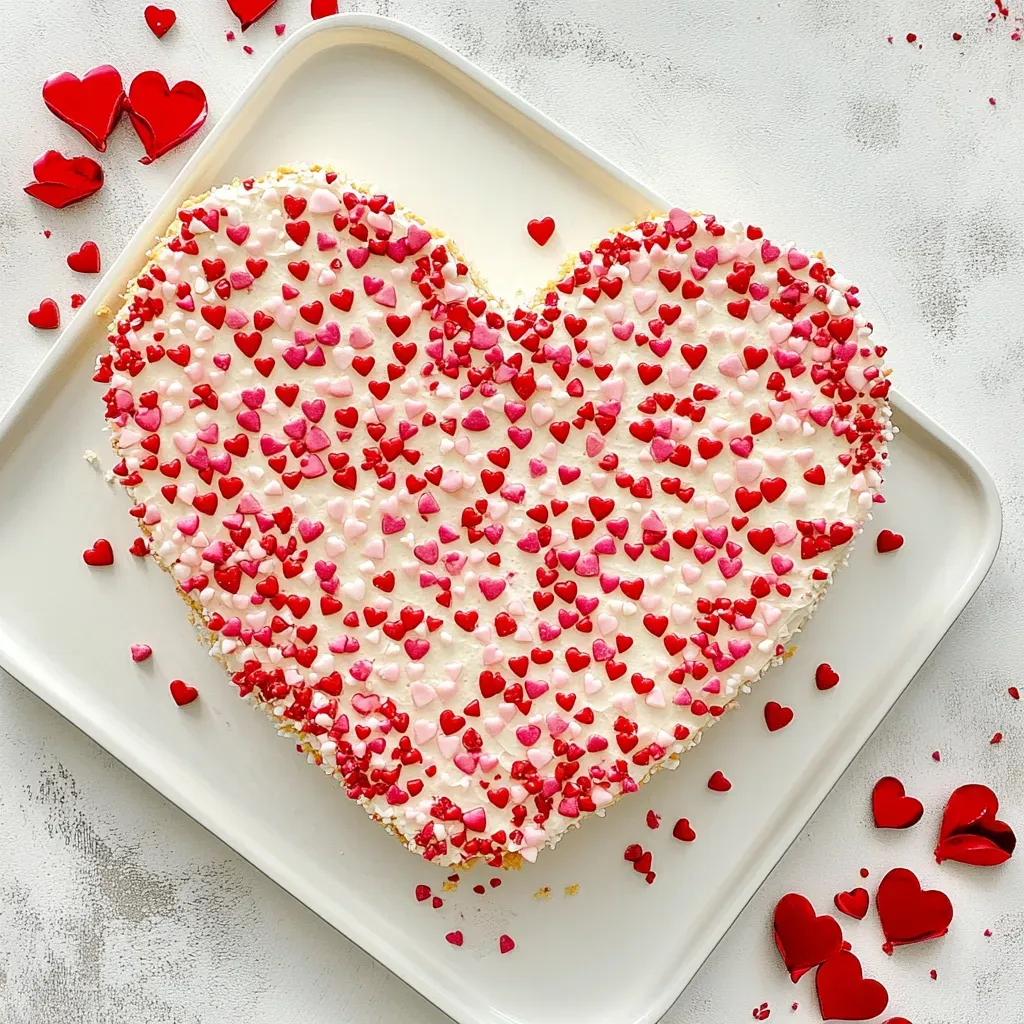
- Create a crumb coat by smoothing a thin layer of frosting over the entire cake to hold in any loose crumbs. Once you are satisfied with the crumb coat, smooth a thicker layer of frosting over the entire cake. Feel free to add sprinkles and decorations of your choice to make it visually appealing.
- Refrigerate the cake for at least 30 minutes before serving. This helps the frosting set and makes it easier to slice.
Things Worth Knowing
- Oven Temperature: Always preheat your oven before baking to ensure even cooking.
- Room Temperature Ingredients: Using room temperature eggs and butter helps in achieving a smooth batter.
- Cooling Time: Allowing the cakes to cool completely prevents the frosting from melting.
- Frosting Consistency: If your frosting is too thick, add a splash of milk to reach your desired consistency.
Ways to Adapt This Recipe
There are countless ways to make the Heart Shaped Cake unique to your taste and occasion. Here are some tips to inspire your creativity:
- Storage: Store any leftover cake in an airtight container in the refrigerator to maintain freshness.
- Freezing: You can freeze the cake layers individually before frosting them. Wrap them tightly in plastic wrap and place them in a freezer-safe bag.
- Pairing: This cake pairs wonderfully with fresh berries or a side of whipped cream for added texture and flavor.
- Flavor Variations: Experiment with different flavors of frosting, such as chocolate or strawberry, to match the cake’s theme.
- Decoration Ideas: Use edible glitter or themed decorations for special occasions to make the cake even more festive.
Serving Suggestions
Serving the Heart Shaped Cake can be as delightful as baking it! Here are some ideas to elevate your presentation:
- Romantic Dinner: Serve it as the grand finale of a romantic dinner, paired with a glass of sparkling juice for a special touch.
- Festive Gatherings: For parties, slice the cake into heart-shaped pieces and serve on decorative plates.
- Birthday Celebrations: Add candles to the cake for birthdays, making it a memorable centerpiece.
- Seasonal Pairings: Consider serving with seasonal fruits like strawberries or raspberries to enhance flavors, especially during warmer months.
- Storage Tips: If you have leftovers, ensure to cover them properly, so they stay fresh for your next indulgence!
FAQ
Conclusion
The Heart Shaped Cake is truly special, offering a delightful blend of flavors and a stunning presentation that speaks volumes of your affection. It’s perfect for any occasion where love is in the air! I encourage you to try this recipe—a sweet way to share joy with those you love.
Heart Shaped Cake
Ingredients
Equipment
Method
- Preheat your oven to 350 degrees Fahrenheit. Prepare an 8-inch round pan and an 8-inch square pan by spraying them with pan spray and lining them with parchment paper. This step is crucial for ensuring that your cakes release easily.
- In a medium bowl, sift together the flour, cocoa powder, baking soda, and baking powder. This means all dry ingredients must be combined to ensure even distribution. Then, add the granulated sugar and salt, whisking everything together until well combined. Set aside.
- In a large mixing bowl, combine the buttermilk, vegetable oil, eggs, white vinegar, vanilla extract, and liquid red food coloring. Use a whisk to mix these wet ingredients thoroughly until they're well blended. The mixture should be smooth and vibrant.
- Gradually add the dry mixture to the wet ingredients, whisking consistently until you have a smooth batter. The batter should be thick and glossy, with no lumps visible. Be careful not to overmix.
- Divide the batter evenly between the two prepared pans. Bake them in the preheated oven for about 30 to 35 minutes. Keep an eye on them; you’ll know they’re done when a toothpick inserted into the center comes out clean or the cake springs back when lightly pressed.
- Once baked, allow the cakes to cool in the pans for about 10 to 15 minutes. After cooling, carefully turn them out onto a cooling rack to cool completely. This step is vital for achieving the right texture and preventing sogginess.
- While the cakes cool, prepare the cream cheese frosting. In a large mixing bowl or using a stand mixer, cream together the unsalted butter and cream cheese until they’re thoroughly mixed and creamy. This should take a few minutes; the mixture should be smooth.
- Add the vanilla extract and mix to combine. Make sure to scrape down the sides of the bowl to ensure everything is evenly mixed. After that, gradually add the powdered sugar, mixing slowly to incorporate it all.
- Once fully combined, increase the speed of the mixer and beat the frosting until it’s fluffy and light. This should create a delightful creamy texture that’s perfect for spreading.
- When the cakes are completely cool, take the round cake and slice it in half to create two equal half-circles. On your chosen serving platter, position the square cake in the center. Place the two half circles on the sides to form the rounded part of the heart.
- Create a crumb coat by smoothing a thin layer of frosting over the entire cake to hold in any loose crumbs. Once you are satisfied with the crumb coat, smooth a thicker layer of frosting over the entire cake. Feel free to add sprinkles and decorations of your choice to make it visually appealing.
- Refrigerate the cake for at least 30 minutes before serving. This helps the frosting set and makes it easier to slice.
Notes
- Storage: Store any leftover cake in an airtight container in the refrigerator to maintain freshness.
- Freezing: You can freeze the cake layers individually before frosting them. Wrap them tightly in plastic wrap and place them in a freezer-safe bag.
- Pairing: This cake pairs wonderfully with fresh berries or a side of whipped cream for added texture and flavor.
- Flavor Variations: Experiment with different flavors of frosting, such as chocolate or strawberry, to match the cake's theme.
- Decoration Ideas: Use edible glitter or themed decorations for special occasions to make the cake even more festive.