There’s something so refreshing and delightful about Frozen Yogurt Fruit Bites on a warm summer day. I remember the first time I decided to whip up a batch; it was a sunny afternoon, and the kids were running around, their laughter filling the air. I wanted to create something that was not only fun but also a healthier alternative to sugary snacks. With just a few simple ingredients, I turned our kitchen into a mini ice cream parlor. These bites quickly became a favorite, perfect for snacking and sharing. The best part? They are incredibly easy to make, and you’ll feel like a culinary genius with minimal effort!
Recipe Snapshot
10 mins
10 mins
0 mins
Easy
100 kcal
5 g
Keto, Gluten-Free, Low FODMAP
2 g
Mixing Bowl
What Sets This Frozen Yogurt Fruit Bites Apart
They’re a Healthy Treat
When making Frozen Yogurt Fruit Bites, you’re choosing a healthier option for snacking. Packed with nutrients and lower in sugar than traditional ice cream, these bites are a guilt-free indulgence.
Endless Flavor Combinations
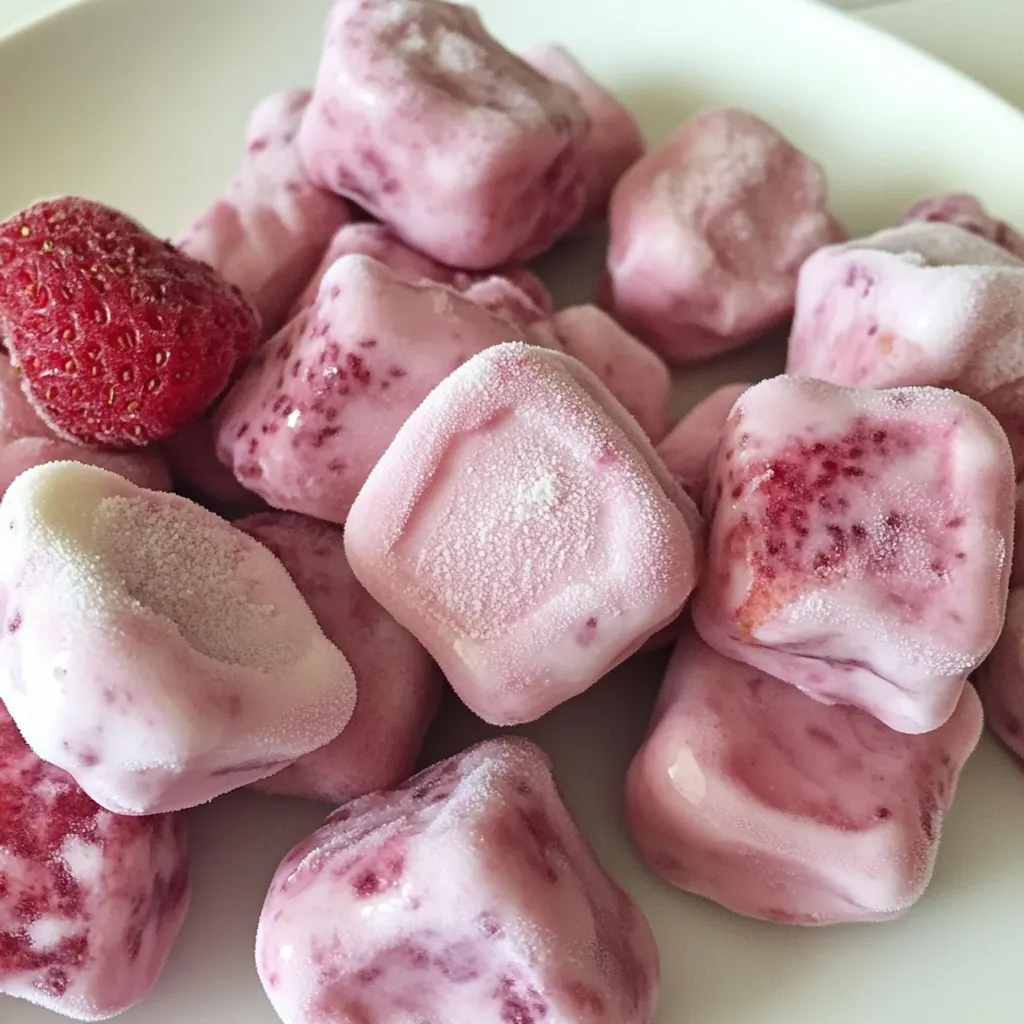
The beauty of these bites lies in their versatility. You can mix and match fruits like strawberries, blueberries, and kiwi to create your own unique flavor profiles. This makes them not just a one-time treat, but a snack that can be tailored to your preferences.
Perfect for All Ages
Whether you’re making them for kids or adults, Frozen Yogurt Fruit Bites appeal to everyone. They’re not only fun to eat but also a great way to introduce children to healthy eating habits. Watching them enjoy a nutritious snack is incredibly rewarding!
Easy to Make
With just a few simple steps, you can create these delightful bites. There’s no complicated process involved. This makes them a perfect choice for a last-minute treat or a fun activity with kids in the kitchen.
Great for Hot Days
On those sweltering summer days, nothing beats the heat like a cold treat. These Frozen Yogurt Fruit Bites are not just refreshing, they’re also satisfying and can curb those afternoon cravings.
What Goes Into Frozen Yogurt Fruit Bites
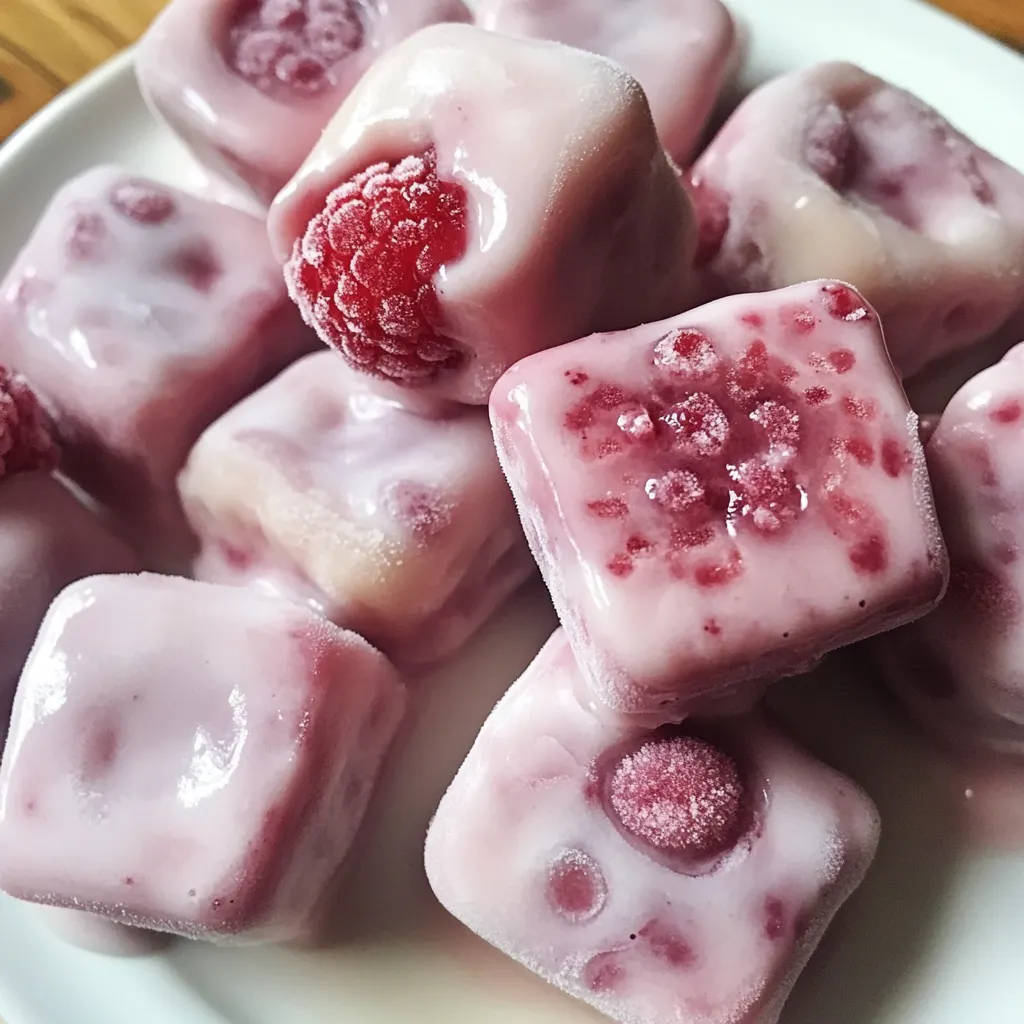
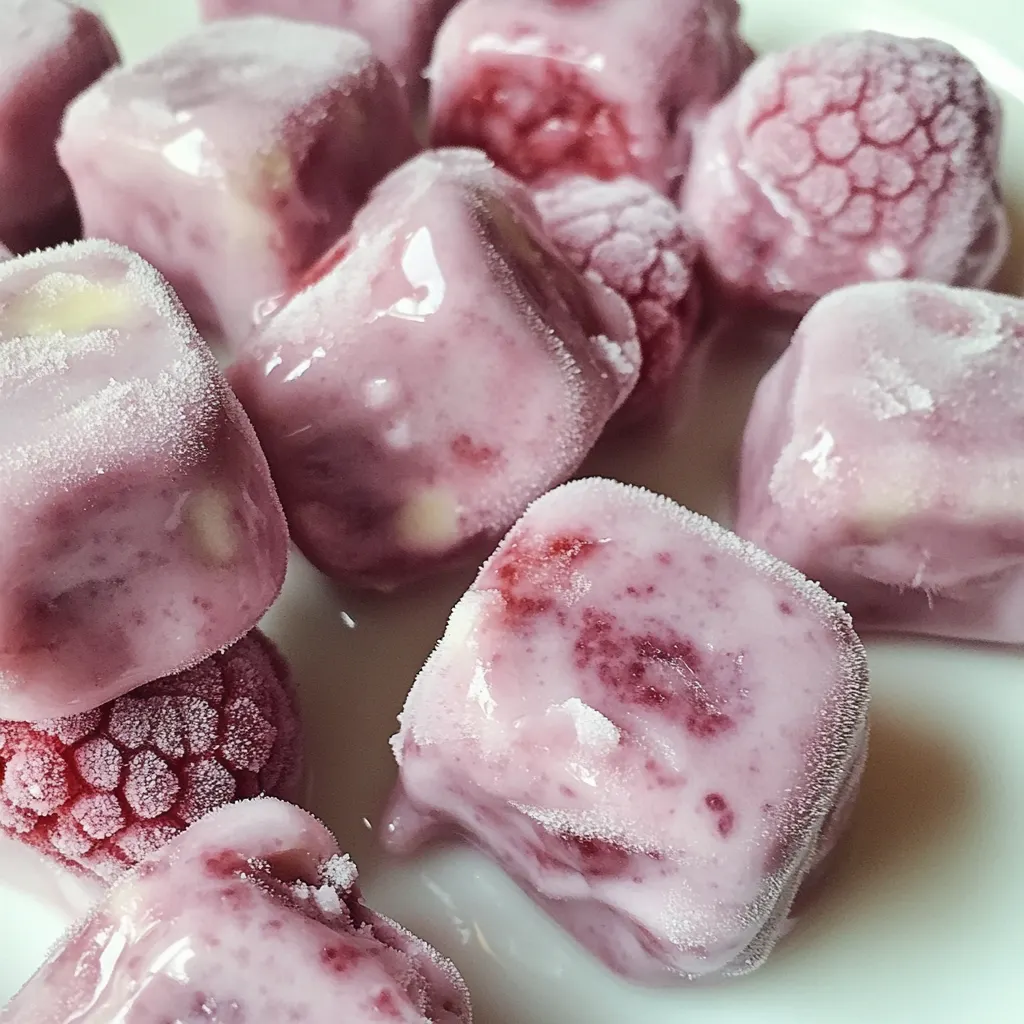
Choosing the right ingredients for your Frozen Yogurt Fruit Bites is essential for achieving that perfect flavor and texture. The key players here are the whole milk vanilla Greek yogurt and fresh raspberries. This combination not only tastes amazing but also provides a boost of protein and antioxidants, making your snacks both delicious and nutritious.
- Whole Milk Vanilla Greek Yogurt: This rich and creamy yogurt serves as the base for the bites, giving them a delightful texture and a touch of sweetness.
- Fresh Raspberries: These berries add a pop of color and flavor, providing a sweet and tangy contrast to the creamy yogurt.
The Method for Frozen Yogurt Fruit Bites
Making Frozen Yogurt Fruit Bites is a simple and enjoyable process. Let’s dive right into the steps!
- Start by placing the yogurt and raspberries in a mixing bowl. Use a fork to mash them together gently. If you want to keep some chunks of raspberries, be careful not to over-mash.
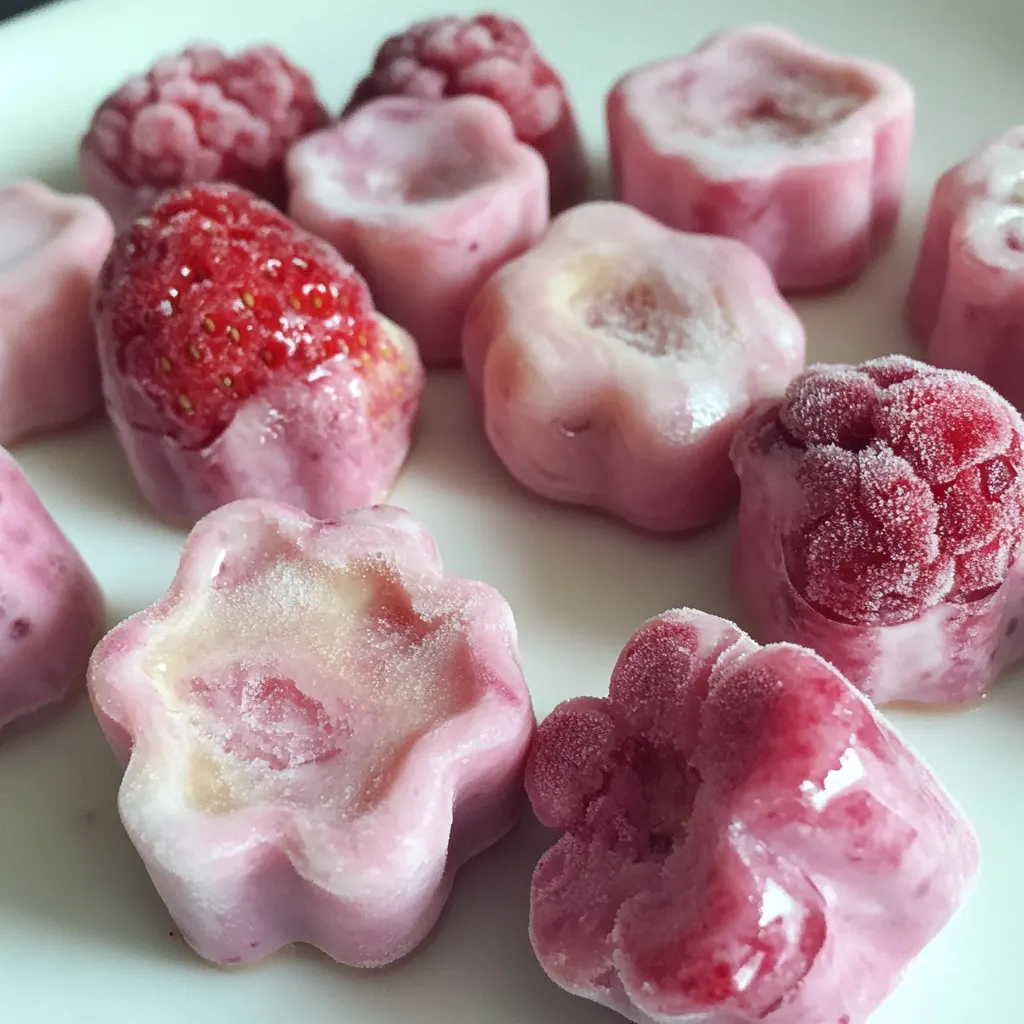
- Once you have your desired consistency, take a small spoon or spatula and scoop the mixture into silicone molds. These molds can be any fun shape you like!
- After filling the molds, tap them on the counter once or twice. This helps to remove any air bubbles that might be trapped in the mixture.
- Next, place the mold on a small baking sheet or directly in the freezer. You’ll want to freeze them for about 4 to 6 hours, or until the bites are solid.
- When they’re done freezing, carefully pop the bites out of the molds. They should come out easily if you’ve used silicone molds.
- Enjoy your Frozen Yogurt Fruit Bites immediately, or store them in an airtight container in the freezer for later!
Things Worth Knowing
- Use Silicone Molds: They make it easy to pop out the frozen bites without breaking them.
- Experiment with Flavors: Don’t hesitate to try different fruits or even a hint of honey for added sweetness.
- Storage: Keep your bites in an airtight container to maintain their freshness in the freezer.
- Serving Size: Consider serving these as part of a healthy snack platter at parties!
Recipe Tips about Frozen Yogurt Fruit Bites
Here are some helpful tips to ensure your Frozen Yogurt Fruit Bites turn out perfectly:
- Storage: Always store your leftover bites in an airtight container to prevent freezer burn.
- Freezing: These bites can be stored in the freezer for up to a month, making them great for meal prep.
- Pairing: Serve with a side of granola for added crunch and a more filling snack.
- Variations: Feel free to swap in other berries like blueberries or strawberries for different flavors.
- Presentation: Arrange the bites on a colorful platter for a fun, inviting snack display.
- Serving Size: These are great to share, but you might want to save a few for yourself!
What Goes Well With This Frozen Yogurt Fruit Bites
When it comes to serving Frozen Yogurt Fruit Bites, the options are endless. Here are some ideas:
- Refreshing Drinks: Pair these bites with a cool lemonade or iced tea to enhance the summer vibe.
- Healthy Snack Platters: Serve them alongside other healthy options like sliced fruits and nuts.
- Picnic Treats: These bites are perfect for outdoor gatherings. Just keep them in a cooler until you’re ready to serve.
- Birthday Parties: They make a fun, healthier alternative to traditional birthday cake treats.
- Meal Prep: Prepare a batch at the beginning of the week for easy snacks to grab on busy days.
- Seasonal Pairings: In summer, serve them alongside fresh fruits like watermelon or peaches for a delightful spread.
FAQ
Conclusion
These Frozen Yogurt Fruit Bites are not only a delicious treat but also a healthier choice for snacking. With their creamy texture and fruity goodness, they pack a flavorful punch that’s perfect for summer. I hope you give this recipe a try and enjoy making these delightful bites as much as I do. They’re a fun way to bring the family together in the kitchen, and it’s an easy way to enjoy a refreshing snack at any time!
Frozen Yogurt Fruit Bites
Ingredients
Equipment
Method
- Start by placing the yogurt and raspberries in a mixing bowl. Use a fork to mash them together gently. If you want to keep some chunks of raspberries, be careful not to over-mash.
- Once you have your desired consistency, take a small spoon or spatula and scoop the mixture into silicone molds. These molds can be any fun shape you like!
- After filling the molds, tap them on the counter once or twice. This helps to remove any air bubbles that might be trapped in the mixture.
- Next, place the mold on a small baking sheet or directly in the freezer. You’ll want to freeze them for about 4 to 6 hours, or until the bites are solid.
- When they’re done freezing, carefully pop the bites out of the molds. They should come out easily if you’ve used silicone molds.
- Enjoy your Frozen Yogurt Fruit Bites immediately, or store them in an airtight container in the freezer for later!
Notes
- Storage: Always store your leftover bites in an airtight container to prevent freezer burn.
- Freezing: These bites can be stored in the freezer for up to a month, making them great for meal prep.
- Pairing: Serve with a side of granola for added crunch and a more filling snack.
- Variations: Feel free to swap in other berries like blueberries or strawberries for different flavors.
- Presentation: Arrange the bites on a colorful platter for a fun, inviting snack display.
- Serving Size: These are great to share, but you might want to save a few for yourself!