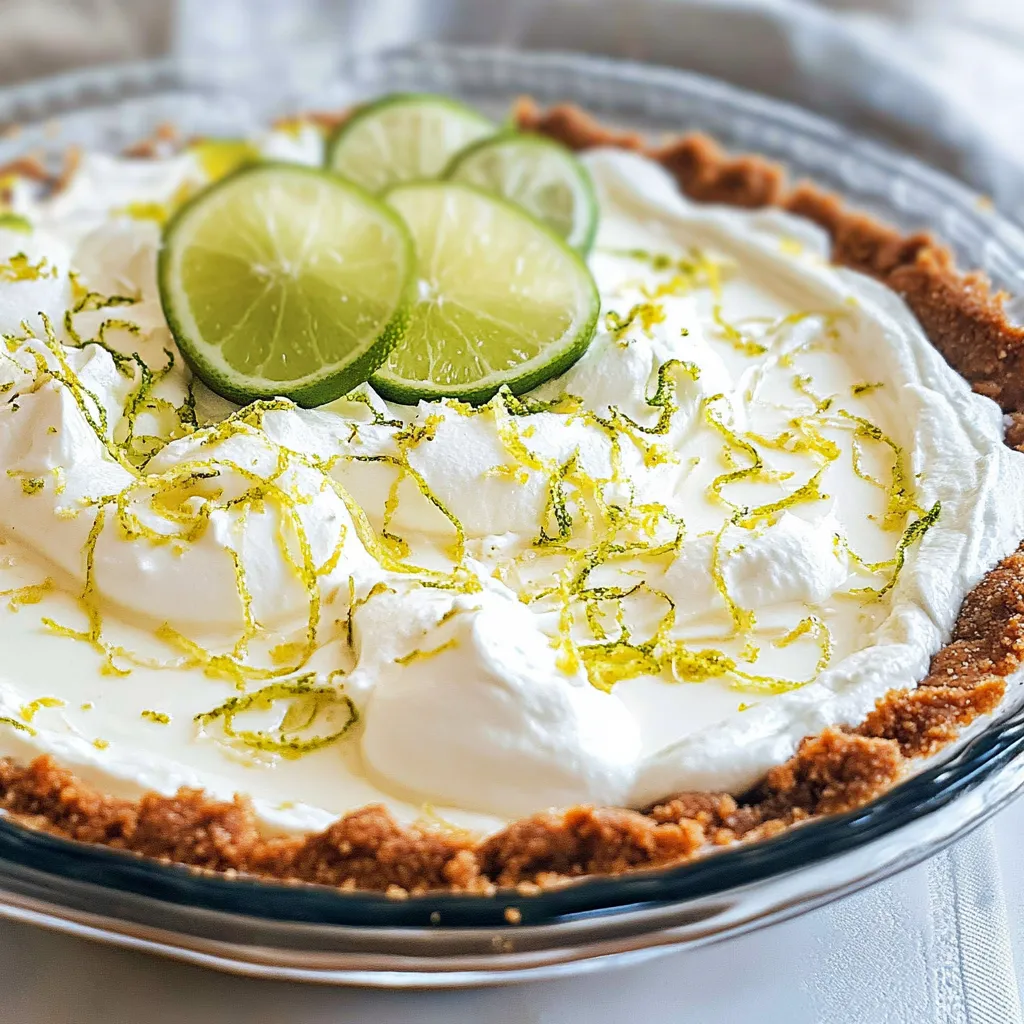
Nothing says summer quite like a slice of Easy Key Lime Pie. I remember the first time I had it, sitting on my grandmother’s porch, the sun shining down and that sweet, tangy flavor dancing on my tongue. It was our family’s go-to dessert; the kind that brings everyone together and makes you forget about your worries, even if just for a moment. Each bite is a celebration of bright lime zest and creamy goodness, topped with a cloud of whipped cream that invites you to come back for more. Making it at home? It’s easier than you might think! Let me take you through this delightful journey of creating the perfect Easy Key Lime Pie. You’ll want to keep this recipe close, as it’s sure to impress at summer gatherings, barbecues, or just for a cozy night in.
Recipe Snapshot
1 hr 9 mins
45 mins
24 mins
Medium
350 kcal
4g g
Gluten-Free, Low FODMAP
16g g
Kitchen Scale (optional), Pie Pan, Stand Mixer
Why This Easy Key Lime Pie Hits Different
Fresh and Flavorful
The first thing that makes this recipe stand out is the vibrant freshness of the key limes. Their unique tartness is perfectly balanced by the sweetness of sweetened condensed milk. This combination creates a harmonious flavor profile that is both refreshing and satisfying. Using fresh juice instead of bottled ensures that you capture the true essence of key limes, which is crucial for a standout pie.
Simple Yet Spectacular
Despite its delicious flavor, the Easy Key Lime Pie is incredibly straightforward to make. With just a handful of ingredients, you can create a dessert that looks like it belongs in a fancy bakery. The simplicity of the process—mixing, pouring, and baking—makes it accessible even for novice bakers, allowing anyone to feel like a pro in the kitchen.
Perfect for Any Occasion
This pie is incredibly versatile. Whether it’s a hot summer day or a cozy winter evening, the Easy Key Lime Pie fits perfectly into any occasion. It’s light enough for a summer barbecue, yet comforting enough to serve after a hearty meal. Plus, it can be made ahead of time, allowing the flavors to meld beautifully while you focus on enjoying your time with loved ones.
Great for Sharing
There’s something special about sharing a homemade dessert with friends and family. The Easy Key Lime Pie evokes nostalgic feelings while being a crowd-pleaser that brings smiles to everyone’s faces. It’s also easy to cut into slices, making it ideal for serving at gatherings—everyone can enjoy their piece without fuss!
Customizable Toppings
You can get creative with the toppings on your Easy Key Lime Pie. While freshly whipped cream is a classic choice, consider adding a sprinkle of lime zest, a few fresh berries, or even a drizzle of lime glaze for a burst of extra flavor. This flexibility allows you to personalize each pie to suit different tastes or occasions.
Chefs Can Shine
Lastly, this recipe allows you to showcase your skills without requiring extensive baking experience. The rich flavor, creamy texture, and aesthetic appeal of the pie mean that you’ll receive compliments, and you can proudly say you made it yourself. It’s a true testament to the idea that great things come from uncomplicated processes.
Ingredients to Make Easy Key Lime Pie
In crafting the Easy Key Lime Pie, every ingredient plays a crucial role in bringing this dessert to life. The blend of tartness from the key limes, the sweetness from the sweetened condensed milk, and the buttery crunch of the crust all work together to create a symphony of flavors and textures. Each component is essential in creating that perfect slice that melts in your mouth. Below are the ingredients you’ll need:
- 1½ cups graham cracker crumbs (213 grams, about 12 cracker sheets): The base of our pie, adding a delightful crunch and sweetness.
- 6 tablespoons unsalted butter (85 grams, melted): This binds the crumbs and adds richness to the crust.
- ⅓ cup granulated sugar (67 grams): Sweetens the crust to balance the tangy filling.
- ¼ teaspoon sea salt (optional): Enhances the flavors and balances sweetness.
- 4 teaspoons grated lime zest (8 grams, from 2 Persian limes): Adds an aromatic citrus flavor that elevates the pie.
- 4 large egg yolks (56 grams): Provides richness and helps set the filling.
- 14 ounces sweetened condensed milk (396 grams, 1 can): The star ingredient that gives the pie its creamy texture and sweetness.
- ½ cup freshly squeezed lime juice (114 grams, from 10-12 key limes or 4 Persian limes): This is where the magic happens, bringing that signature tartness.
- stabilized whipped cream (or cool whip): For topping, adds a creamy, fluffy finish.
- lime slices/wheels: For garnish, adding a pop of color and flavor.
Cooking Method for Easy Key Lime Pie
Making the Easy Key Lime Pie is a delightful experience that allows you to engage with each ingredient and step. It’s not just about following a recipe; it’s about creating something beautiful and delicious that you’ll be proud to serve. Let’s dive into the process:
- Preheat your oven to 350°F (175°C). This step is crucial as it ensures that your crust bakes evenly and achieves that perfect golden brown color.
- In a medium bowl, combine 1½ cups of graham cracker crumbs, 6 tablespoons of melted unsalted butter, ⅓ cup of granulated sugar, and ¼ teaspoon of sea salt. Mix until the mixture resembles wet sand. This texture is ideal for forming your crust.
- Press the crust mixture evenly and firmly into the bottom and up the sides of your pie dish. Be careful not to cover the lip with crumbs; this will help you achieve a clean slice later. A measuring cup or flat-bottomed glass can help to pack the crumbs tightly.
- Bake the crust for 9 minutes. This step is essential as it helps to set the crust, making it more stable when you add the filling. Once baked, transfer the crust to a cooling rack and let it cool completely.
- Now for the filling! In a medium-sized mixing bowl, whisk together 4 teaspoons of grated lime zest and 4 large egg yolks for about 2 minutes. This whisking helps to aerate the mixture and infuse the egg yolks with that bright lime flavor.
- Next, whisk in the 14 ounces of sweetened condensed milk until well combined, then add in ½ cup of freshly squeezed lime juice. Mix until smooth. You’ll notice the mixture thickening slightly as you whisk.
- While your crust cools, allow the filling to sit at room temperature. This helps it to thicken further, ensuring a nice texture when baked.
- Carefully pour the filling into the cooled crust. Make sure it’s evenly distributed to ensure even baking.
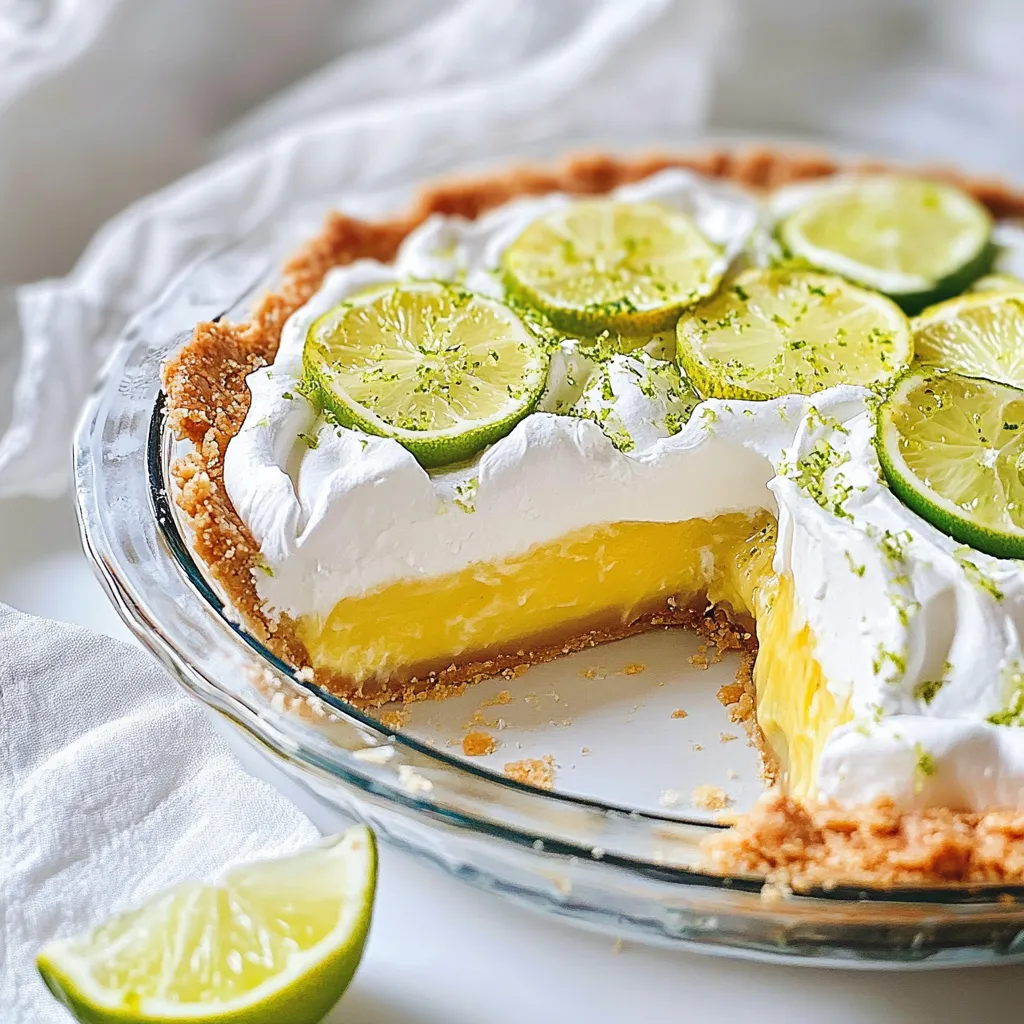
- Bake in the preheated oven for 15 to 17 minutes, just until the center is set but still slightly wiggly. You don’t want to overbake, as the pie will continue to cook as it cools.
- Transfer the pie back to the cooling rack and let it cool completely. Once cooled, cover tightly with plastic wrap and refrigerate for at least 3 hours or up to 24 hours to allow the flavors to meld.
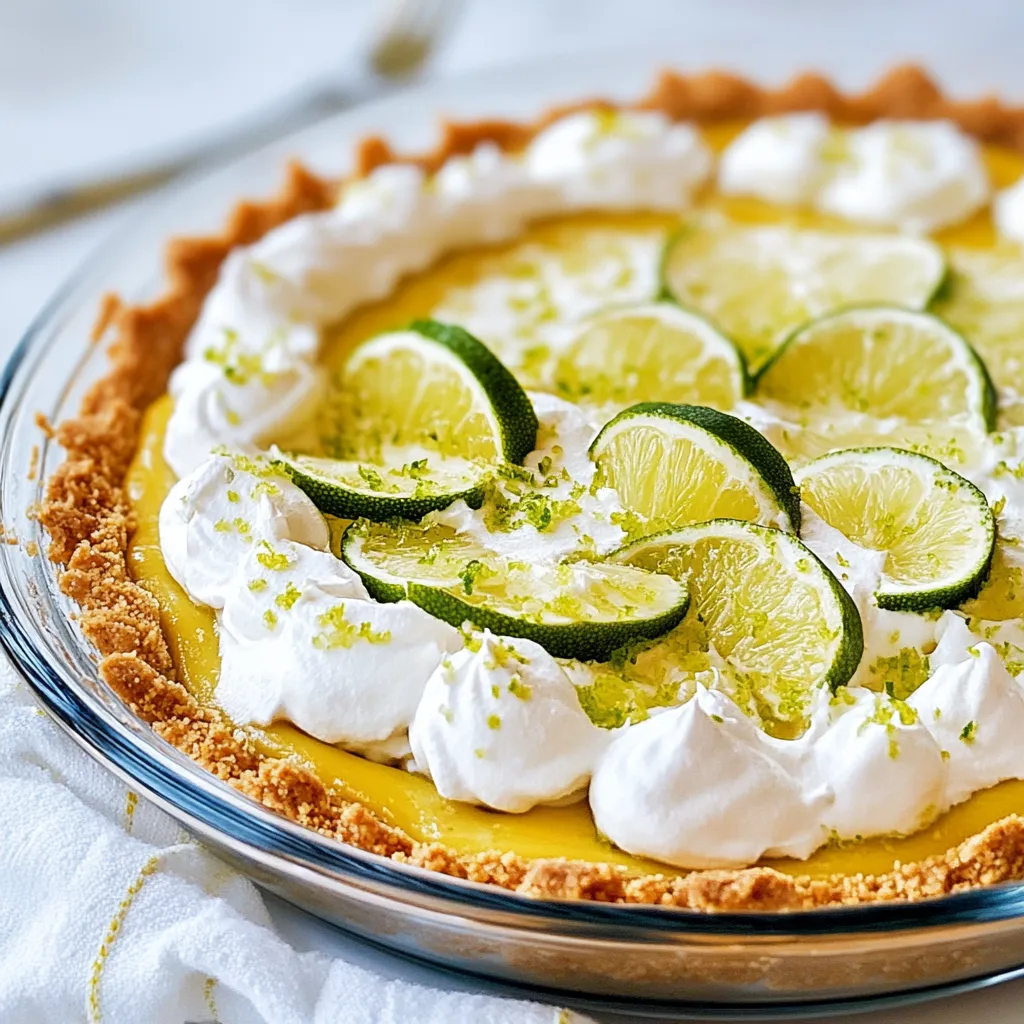
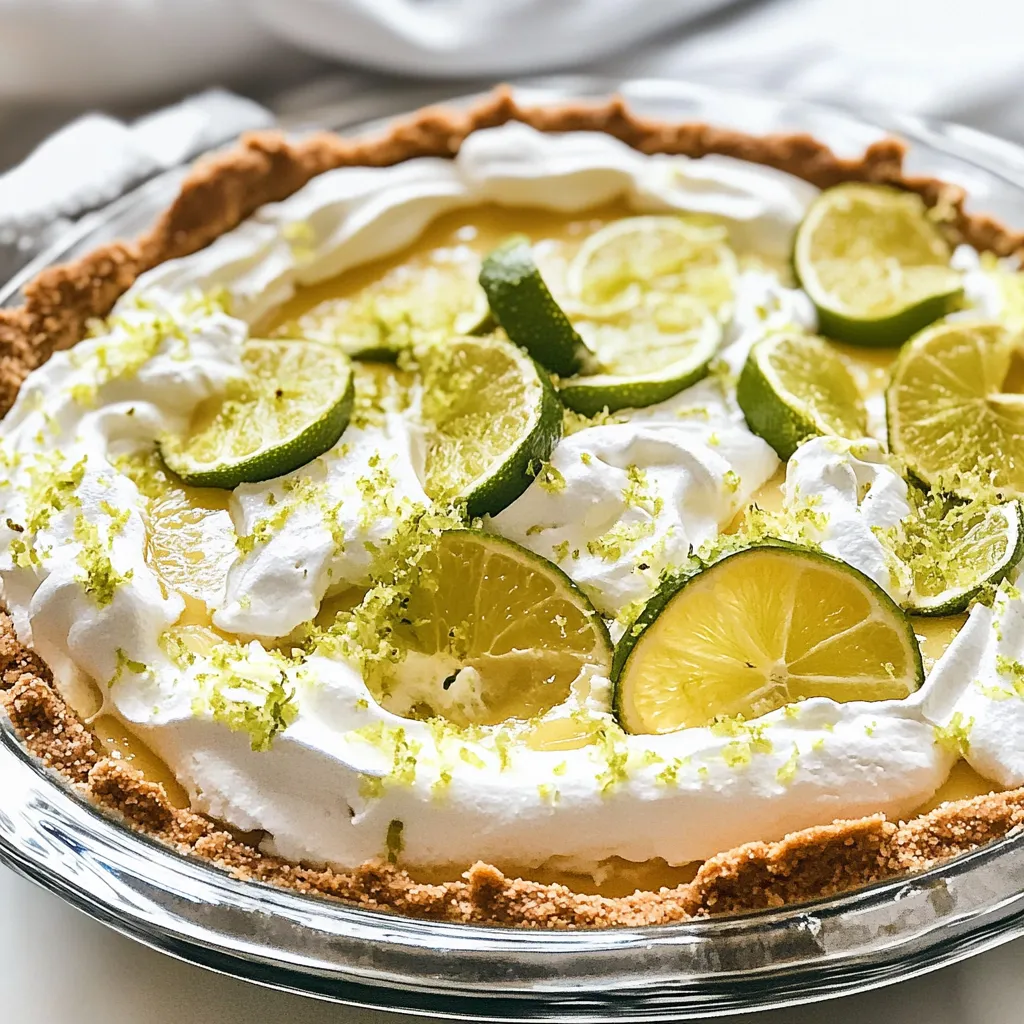
- Before serving, top the pie with stabilized whipped cream. You can get creative here with garnishes like twisted lime wheels or thin slices of lime for a touch of color and flair.
Things Worth Knowing
- Cooling Time Matters: Allow your pie to cool completely before refrigeration. This helps set the filling and enhances the flavor.
- Fresh Ingredients: Always opt for fresh lime juice. Bottled varieties can’t replicate the zing of freshly squeezed limes.
- Whipping Cream Tip: For the best results when making whipped cream, ensure your mixing bowl and beaters are cold. This helps the cream whip faster and achieve more volume.
- Crust Variations: If you want to switch things up, consider using crushed cookies like Oreos for a chocolate twist on the crust.
Recipe Tips about Easy Key Lime Pie
In making the Easy Key Lime Pie, there are several tips that can enhance your experience and results. Here are some valuable suggestions:
- Storage: Keep any leftovers covered in the refrigerator. The pie can last for about 3 days, but it’s best enjoyed fresh.
- Freezing: You can freeze the pie for up to a month. Make sure to wrap it well in plastic wrap and foil to prevent freezer burn.
- Pairing: This pie pairs beautifully with fresh berries like strawberries or blueberries. They add a lovely contrast to the tartness of the pie.
- Serving: Serve the pie chilled for the best texture. Cold slices are refreshing, especially on a warm day.
- Variations: Consider adding a layer of coconut cream on top for a tropical twist!
Perfect Matches for Easy Key Lime Pie
Serving your Easy Key Lime Pie is an opportunity to get creative while enhancing the experience. Here are some ideas for how to enjoy this delightful dessert:
- Summer Parties: Perfect for outdoor gatherings, your pie can be the star of any summer barbecue or picnic. Its refreshing flavor complements grilled foods beautifully.
- Family Gatherings: Whether it’s a holiday or a casual get-together, this pie is an ideal dessert that everyone will remember.
- After Dinner Treat: Serve it after a hearty meal; its lightness contrasts wonderfully with heavier dishes.
- Garnishes: Adding fresh fruits not only makes the dish aesthetically pleasing but also enhances the flavor profile.
- Picnic Delight: Slice it up and take it along for a picnic; it’s easy to transport and sure to impress your friends!
- Seasonal Serve: Don’t limit this pie to summer; its bright flavors can liven up any winter dinner, too.
FAQ
Conclusion
The Easy Key Lime Pie is a delightful treat that perfectly combines the tangy brightness of key limes with a creamy filling, all nestled in a buttery graham cracker crust. It’s a dessert that not only satisfies the sweet tooth but also brings joy to any occasion. I encourage you to try this recipe and share it with your friends and family; it’s sure to become a favorite!
Easy Key Lime Pie
Ingredients
Equipment
Method
- Preheat your oven to 350°F (175°C). This step is crucial as it ensures that your crust bakes evenly and achieves that perfect golden brown color.
- In a medium bowl, combine 1½ cups of graham cracker crumbs, 6 tablespoons of melted unsalted butter, ⅓ cup of granulated sugar, and ¼ teaspoon of sea salt. Mix until the mixture resembles wet sand. This texture is ideal for forming your crust.
- Press the crust mixture evenly and firmly into the bottom and up the sides of your pie dish. Be careful not to cover the lip with crumbs; this will help you achieve a clean slice later. A measuring cup or flat-bottomed glass can help to pack the crumbs tightly.
- Bake the crust for 9 minutes. This step is essential as it helps to set the crust, making it more stable when you add the filling. Once baked, transfer the crust to a cooling rack and let it cool completely.
- Now for the filling! In a medium-sized mixing bowl, whisk together 4 teaspoons of grated lime zest and 4 large egg yolks for about 2 minutes. This whisking helps to aerate the mixture and infuse the egg yolks with that bright lime flavor.
- Next, whisk in the 14 ounces of sweetened condensed milk until well combined, then add in ½ cup of freshly squeezed lime juice. Mix until smooth. You’ll notice the mixture thickening slightly as you whisk.
- While your crust cools, allow the filling to sit at room temperature. This helps it to thicken further, ensuring a nice texture when baked.
- Carefully pour the filling into the cooled crust. Make sure it’s evenly distributed to ensure even baking.
- Bake in the preheated oven for 15 to 17 minutes, just until the center is set but still slightly wiggly. You don’t want to overbake, as the pie will continue to cook as it cools.
- Transfer the pie back to the cooling rack and let it cool completely. Once cooled, cover tightly with plastic wrap and refrigerate for at least 3 hours or up to 24 hours to allow the flavors to meld.
- Before serving, top the pie with stabilized whipped cream. You can get creative here with garnishes like twisted lime wheels or thin slices of lime for a touch of color and flair.
Notes
- Tip 1: I use a 9-inch pie pan for this pie, but an 8-inch pie pan or a 9-inch tart pan work just as well.
- Tip 2: If your crust seems to be sticking to the pie plate when you’re ready to serve, one trick that works like a charm is filling a large bowl with warm water and dipping the bottom of the pie plate into the water for a bit to loosen the crust. Do not submerge the pie, you’re just putting the bottom of the pie plate in the water to add some heat; release the crust.
- Tip 3: You can also use store bought graham crust.