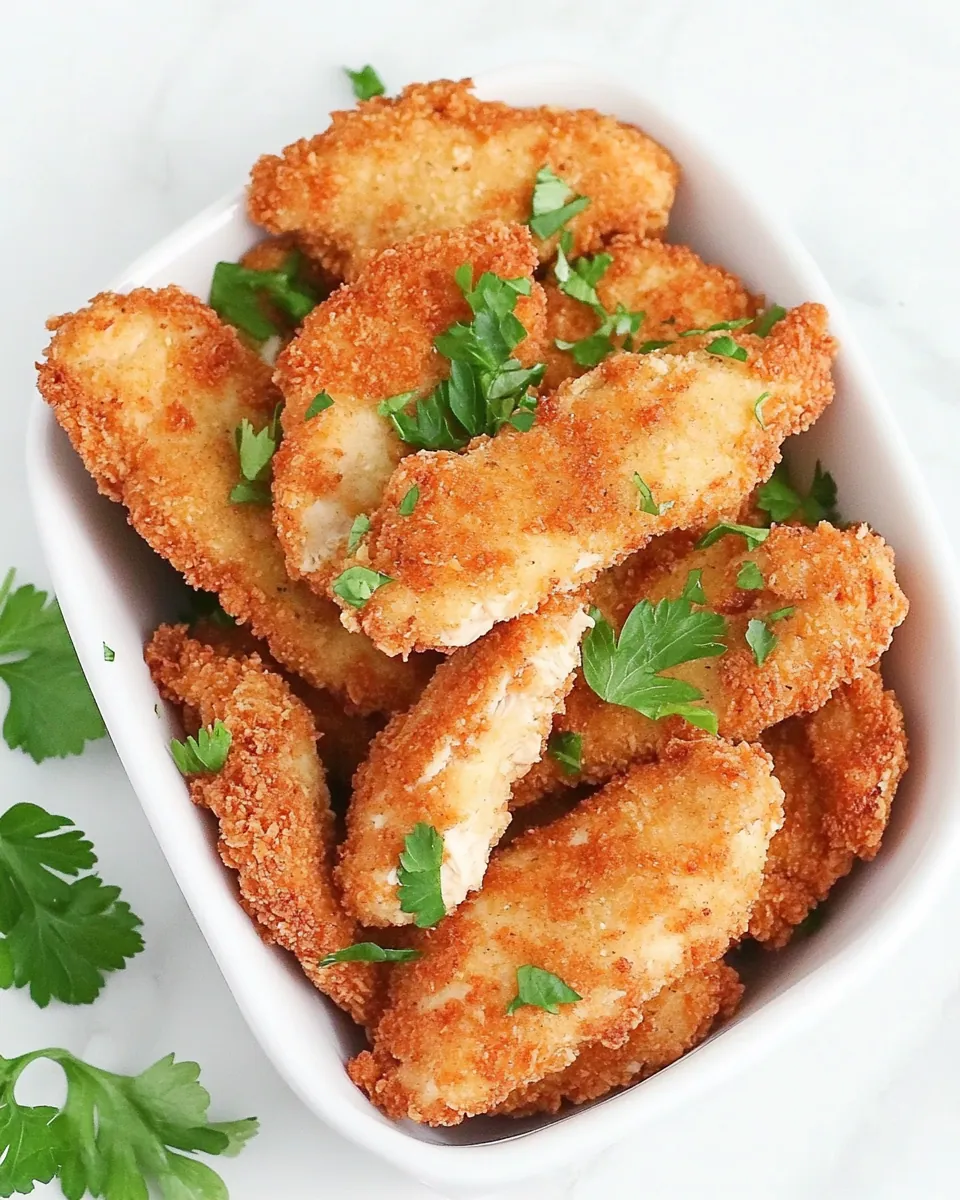
When I think of comfort food, Easy Chicken Strips Recipe always comes to mind. Picture a cozy evening at home, the aroma of freshly cooked chicken wafting through the air. These tender, juicy strips bring back memories of family gatherings and laughter-filled dinners. Whether it’s a casual weeknight meal or a fun weekend snack, they never fail to satisfy. Plus, they’re a hit with kids and adults alike! I can still hear my little ones begging for seconds, their faces smeared with crumbs, grinning from ear to ear. The best part? You can whip them up in no time, making them perfect for busy days. So, let’s dive into the magic of Easy Chicken Strips Recipe and discover why they deserve a spot on your dinner table.
Recipe Snapshot
30 mins
15 mins
15 mins
Medium
320 kcal
28 g
Paleo, Whole30, Gluten-Free
15 g
Chef’s Knife, Frying Pan, Whisk
What Sets This Easy Chicken Strips Recipe Apart
They’re Incredibly Versatile
One of the things I love about Easy Chicken Strips Recipe is their versatility. You can serve them as a main dish, toss them in a salad, or even enjoy them as a snack with your favorite dipping sauce. They adapt to any meal occasion, making them a great choice for any time of day. Want to spice things up? Add some cayenne pepper to the breading for an extra kick!
Perfectly Crispy Every Time
Let’s talk about that crunch! The combination of flour and bread crumbs creates a golden, crispy coating that contrasts beautifully with the tender chicken inside. It’s that satisfying crunch that keeps everyone coming back for more. And trust me, the aroma alone will have your family gathered around the kitchen, eager to dig in!
Kid-Friendly and Fun
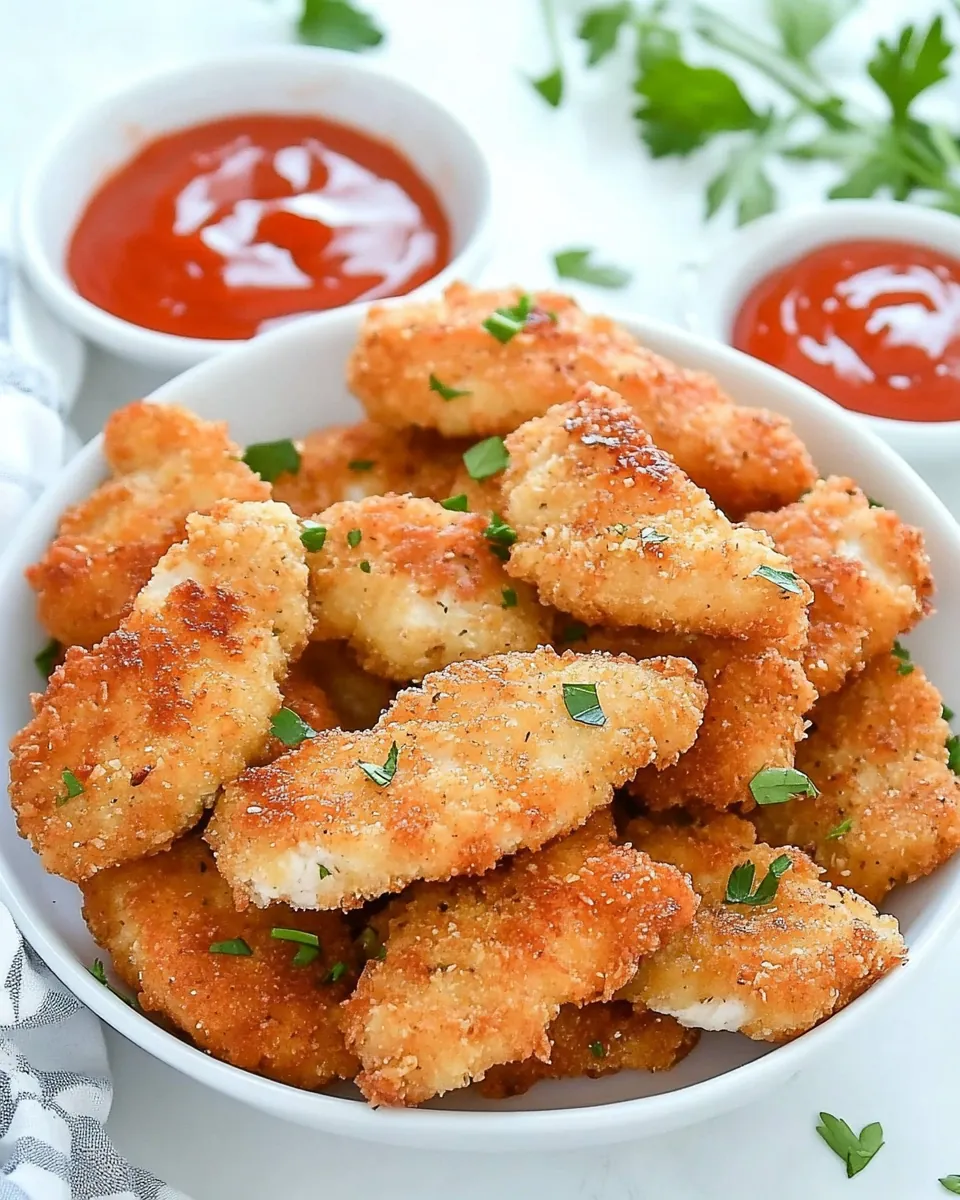
Kids adore eating with their hands, and Easy Chicken Strips Recipe makes that even more enjoyable. They’re perfect for dipping in ketchup, barbecue sauce, or homemade ranch dressing. You can even let the kids help with the breading process, turning dinner into a fun activity. Just imagine the joy on their faces as they create their own tasty strips!
Meal Prep Friendly
If you’re someone who enjoys meal prepping, you’ll appreciate how well these chicken strips freeze. You can make a big batch ahead of time and store them for busy weeknights. Just reheat them in the oven or air fryer, and you’ve got a quick, delicious meal ready to go!
Simple Ingredients
The ingredients for this recipe are a pantry staple. With just a few items like chicken, flour, and eggs, you can easily whip these up without a trip to the grocery store. It’s comforting to know you can create something so delicious with what you already have at home.
Ingredients for Easy Chicken Strips Recipe
When it comes to the ingredients for Easy Chicken Strips Recipe, simplicity is key. The magic lies in how these ingredients work together to create a flavorful, crispy dish. Each component plays a vital role, from the juicy chicken to the crunchy bread crumbs. Let’s break down what you’ll need:
- 2 large chicken breasts: The heart of this dish, offering tenderness and flavor. Cutting them thin ensures even cooking.
- 1/2 cup all-purpose flour: This creates the initial coating that helps the other layers stick.
- Salt & pepper: Essential for enhancing the flavors of chicken.
- 2 large eggs: The binding agent that helps the bread crumbs adhere to the chicken.
- 3/4 cup bread crumbs: Provides that crucial crunch. I prefer using Italian Style for an extra burst of flavor.
- Oil to sauté: Necessary for frying and achieving a golden-brown crust.
How to Cook Easy Chicken Strips Recipe

Cooking up Easy Chicken Strips Recipe is a straightforward process, and I promise you’ll be amazed by the results! Follow these simple steps, and you’ll have a delicious meal ready in no time.
- Start by slicing the chicken breasts in half horizontally. This will create thinner pieces for quicker cooking. Next, cut each piece again so you end up with a total of 8 smaller strips. This ensures even cooking and makes them perfect for dipping.
- Once sliced, place the chicken strips on a cutting board and cover them with plastic wrap. Using a meat mallet, gently pound them to a uniform thickness of about 1/4 inch. This step helps the chicken cook evenly and makes it tender.
- Now, set up three shallow dishes: in the first, combine the flour with salt and pepper. In the second dish, whisk the eggs. In the third, add the bread crumbs.
- To coat the chicken, grab a piece by piercing a corner with a fork. This keeps your hands clean. First, dip it into the flour, shaking off the excess. Then, dip it into the beaten eggs, ensuring both sides are coated.
- Finally, roll the chicken in the bread crumbs, pressing gently to ensure an even coating. This is where the magic happens, so make sure each piece is well-covered!
- Heat a large non-stick pan over medium heat and add enough oil to generously coat the bottom. About 3 tablespoons should do the trick. Once the oil is hot, carefully slide in a piece of the coated chicken.
- Cook each piece for about 3 to 4 minutes per side, flipping them once. You’re aiming for a beautiful golden brown color and cooked-through chicken. Trust your instincts here; the sizzle is a good sign!
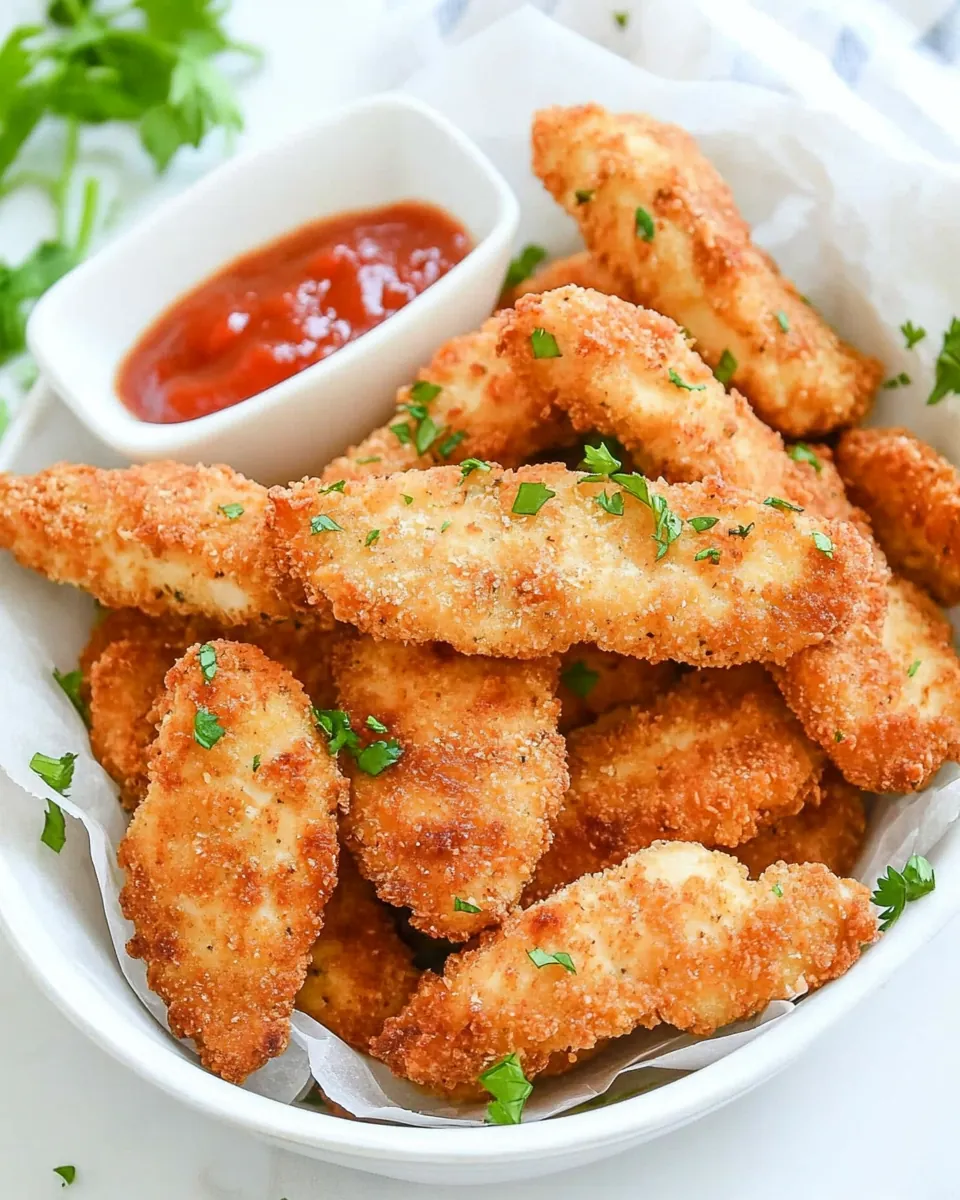
- Once cooked, transfer the chicken strips to a plate lined with paper towels. This helps absorb any excess oil, keeping them crispy. Repeat the process with the remaining chicken, adding more oil as needed.
- After all the chicken is cooked, serve them hot! Enjoy with your favorite dipping sauces and watch them disappear!
Things Worth Knowing
- Ensure Even Cooking: Pounding the chicken to an even thickness is crucial for even cooking. Thicker pieces may remain raw inside.
- Oil Temperature: Make sure the oil is hot enough before adding the chicken. If it’s not, the coating may become soggy instead of crispy.
- Batch Cooking: If cooking in batches, keep the cooked strips warm in a low oven while you finish the rest.
- Checking Readiness: The internal temperature of the chicken should reach 165°F for it to be fully cooked.
Pro Tips and Tweaks
To elevate your Easy Chicken Strips Recipe, here are some helpful tips and tweaks. Whether you’re looking to enhance the flavors or improve your technique, these suggestions will make a difference.
- Storage: Store any leftovers in an airtight container in the fridge. They’ll stay fresh for up to three days.
- Freezing: For longer storage, freeze the cooked chicken strips. Place them in a single layer on a baking sheet to freeze, then transfer to a freezer bag.
- Pairing: Serve your chicken strips with a side of fresh vegetables or a light salad for a balanced meal.
- Variations: Experiment with spices in the flour mixture, such as paprika or garlic powder, to add an extra flavor dimension.
- Cooking Method: For a healthier option, try baking or air frying the strips instead of pan-frying.
- Make It a Meal: To create a complete meal, serve the chicken strips with rice or mashed potatoes and your choice of steamed vegetables.
What to Pair With Easy Chicken Strips Recipe
Serving Easy Chicken Strips Recipe opens up a world of delicious pairing options! Here are some ideas for what to serve alongside this fantastic dish:
- Fresh Salads: A crisp garden salad drizzled with vinaigrette balances the richness of the chicken strips beautifully.
- French Fries: You can’t go wrong with classic fries! Their salty crunch makes them a perfect companion.
- Vegetable Sticks: Serve with an array of colorful vegetable sticks and a dipping sauce for a refreshing touch.
- Pasta Salad: A light pasta salad can provide a refreshing contrast to the warm chicken strips.
- Dipping Sauces: Offer a variety of sauces like ranch, barbecue, or honey mustard for guests to choose from.
- Seasonal Sides: During the summer, consider pairing with grilled corn or a fruit salad for a seasonal twist!
- Casual Gatherings: These chicken strips are perfect for casual get-togethers. Set up a DIY chicken strip bar with various toppings and sauces.
FAQ
Conclusion
The Easy Chicken Strips Recipe is a delightful dish that combines simplicity with incredible flavor. Whether you’re cooking for a family dinner or a casual gathering, these chicken strips are sure to impress. I encourage you to give this recipe a try; you won’t be disappointed with the crispy coating and juicy chicken inside. It’s a meal that evokes memories and creates new ones around the dinner table.
Easy Chicken Strips Recipe
Ingredients
Equipment
Method
- Slice the chicken breasts in half so they are half their thickness then cut each piece again so you will have a total of 8 pieces.
- Place chicken pieces on a cutting board, cover with plastic wrap and use a meat mallet to pound it into uniform 1/4"-thickness.
- Set up 3 shallow dishes. In the first, combine 1/2 cup flour with 1/2 tsp salt and 1/4 tsp black pepper.
- In the second dish, whisk together 2 eggs. In the third dish, place 3/4 cup bread crumbs.
- Lift a piece of chicken by piercing a corner with a fork (this keeps your hands clean and allows for easy dipping/turning).
- Dip chicken into flour, shaking off excess then dip both sides into beaten eggs and finally into the breadcrumbs, turning a couple times to coat well.
- Heat a large non-stick pan over medium heat. Add enough oil to generously coat the bottom of the pan (about 3 Tbsp).
- Once oil is hot, slide in a piece of chicken and saute for 3-4 minutes per side, turning once.
- Chicken should be cooked through with a golden brown crust. Remove chicken to a plate lined with paper towels. Repeat with remaining chicken adding more oil as needed.
Notes
- You can cut them into strips or nuggets if you wish, but smaller pieces will take a little longer to bread.
- You can use panko instead of Italian breadcrumbs if you want a crispier crust.
- If you don't have a meat mallet, use the back of a small sauce pan.