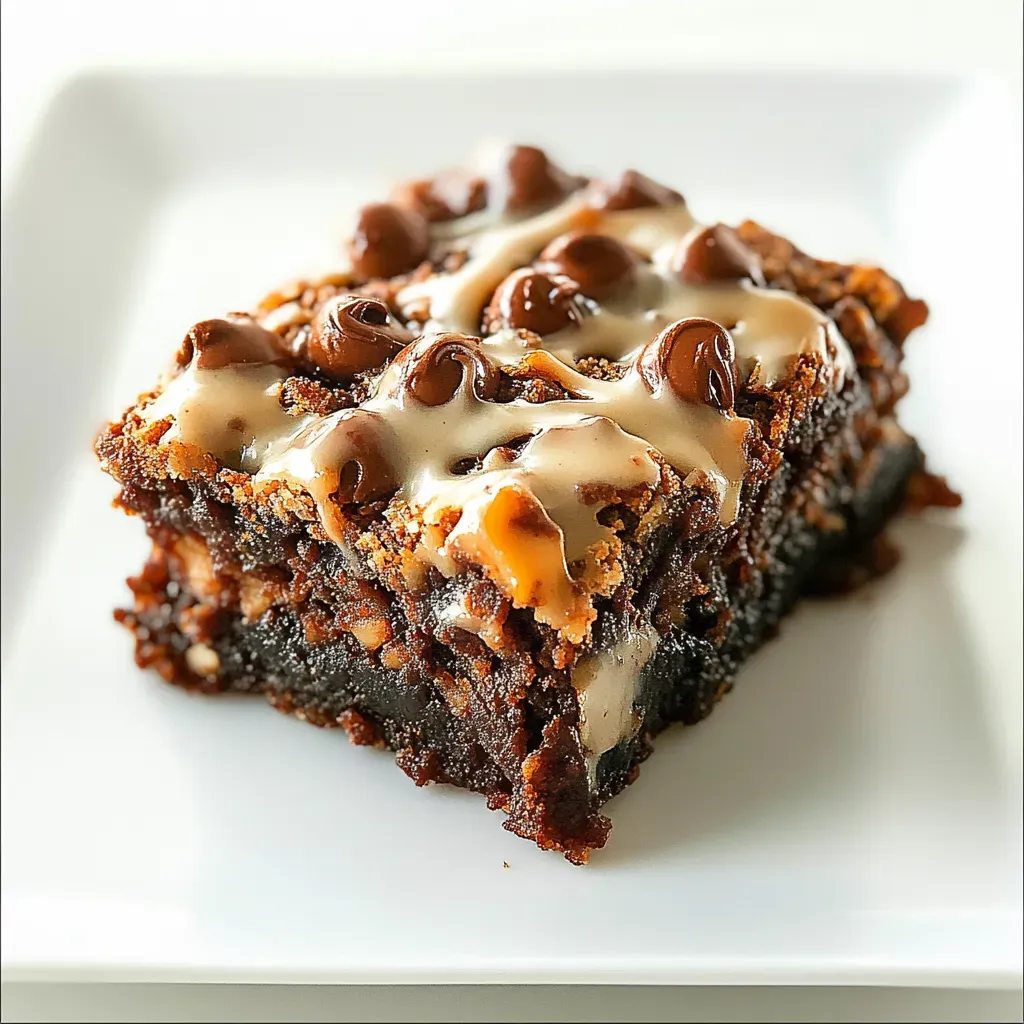
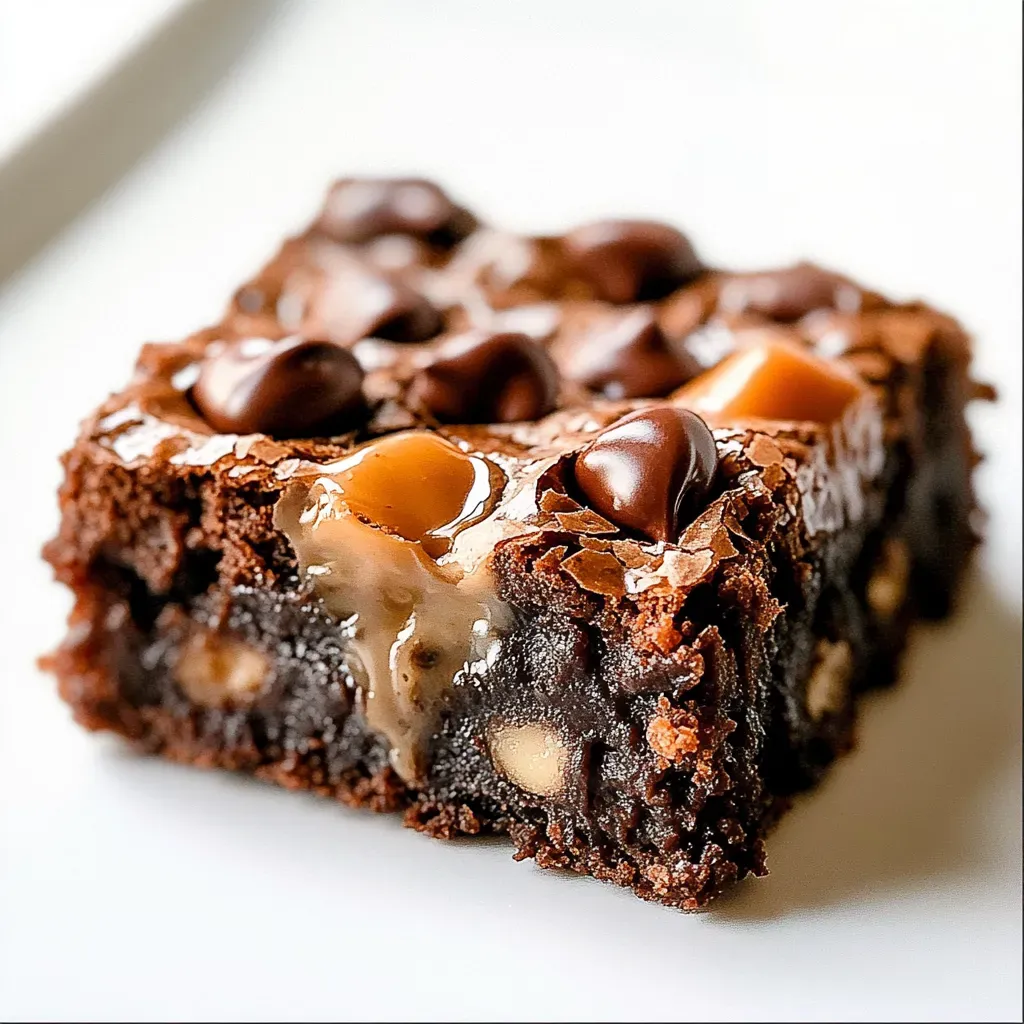
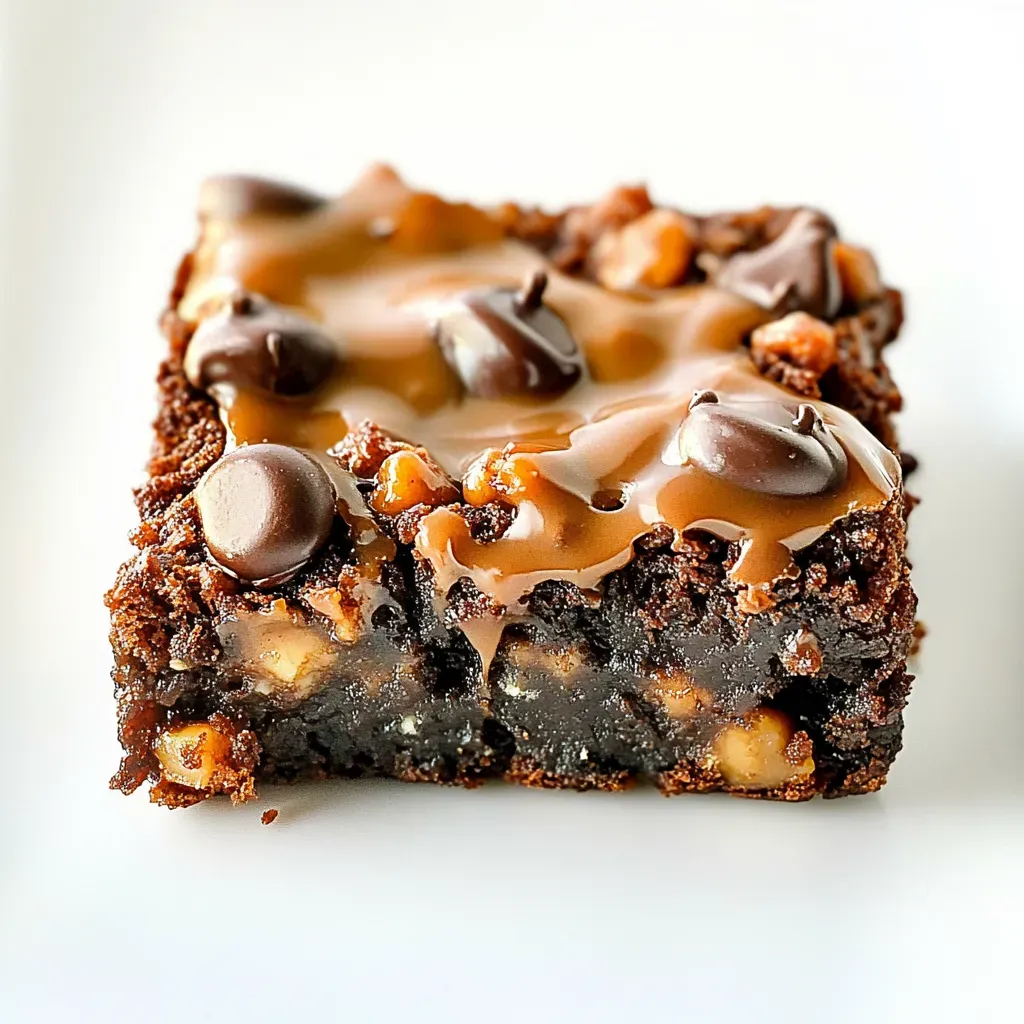
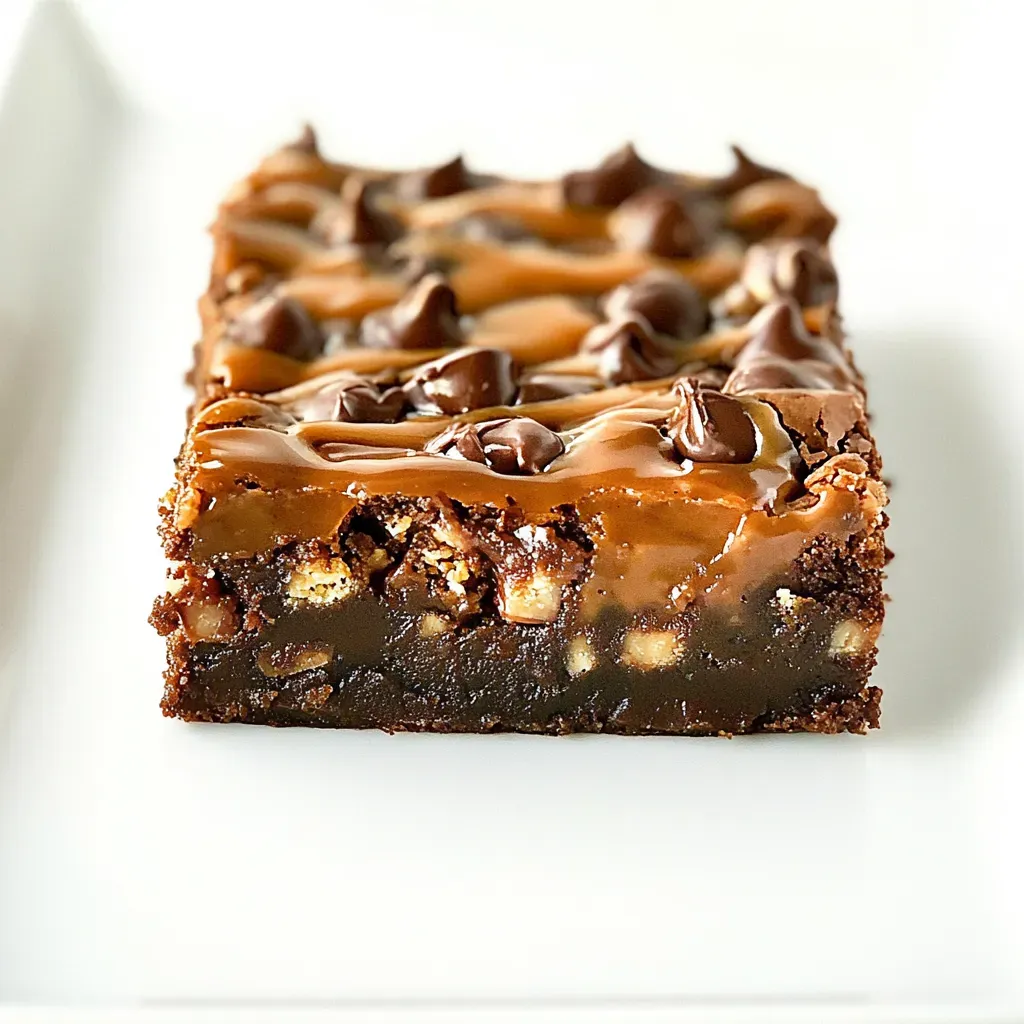
When I think of comfort desserts, Chocolate Turtle Brownies always come to mind. I remember the first time I baked them for a gathering with friends, the aroma of melting chocolate filled my kitchen, inviting everyone in. As I pulled the pan out of the oven, I could hardly wait for them to cool before I cut into those rich, fudgy squares topped with gooey caramel. Every bite is a delightful combination of flavors; the sweetness of chocolate mingles with the depth of butter and the satisfying crunch of nuts. It’s a dessert that brings smiles and sparks conversations, making every moment spent together feel even more special.
These brownies are perfect for any occasion, from cozy family nights to festive celebrations. The layers of chocolate and caramel create a decadent experience that few can resist. Each time I bake a batch, I am reminded of those sweet memories and the joy they bring to everyone who tries them. Whether you’re sharing them with loved ones or indulging all by yourself, Chocolate Turtle Brownies are a treat to cherish.
Recipe Snapshot
40 mins
10 mins
30 mins
Medium
320 kcal
3 g
Vegan, Gluten-Free, AIP
18 g
Frying Pan, Wooden Spoon, Oven, Chef’s Knife, Baking Sheet
Why This Chocolate Turtle Brownies Works
A Sweet Indulgence
What I truly love about Chocolate Turtle Brownies is how they combine the best of both worlds: chewy brownie texture with a rich topping. You get a burst of chocolate in every bite, and the addition of caramels gives it that signature “turtle” flair that makes it feel extra special.
Customizable Delights
Another reason to adore this recipe is its versatility. You can easily customize the toppings according to your preference. Whether you want to sprinkle more nuts on top or even add a drizzle of chocolate sauce, the possibilities are endless. You can make it your own!
Perfect for Sharing
These brownies are ideal for gatherings. They cut beautifully into squares, making them easy to share. When I take them to potlucks or bake sales, they never last long. Watching friends and family enjoy them is one of the greatest joys of baking!
Rich and Fudgy
The texture of these brownies is genuinely to die for. They are rich and fudgy, providing a delightful chewiness that contrasts with the warm, melted caramel on top. When you bake them just right, they’ll have a slightly crusty top while remaining soft and gooey inside.
Simple Ingredients
The ingredients for Chocolate Turtle Brownies are simple and usually found in any pantry. This ease of access makes it a go-to recipe for anyone looking to whip up a quick yet delicious treat. Plus, the combination of milk chocolate chips, butter, and caramels creates taste harmony that’s hard to resist.
Shopping List for Chocolate Turtle Brownies
Choosing the right ingredients is crucial for making the best Chocolate Turtle Brownies. Each element plays a significant role in achieving the rich, fudgy texture and delightful flavor we all love. The combination of chocolate, butter, and caramel creates a delicious symphony of sweetness that will have you coming back for more.
- Milk chocolate chips – The star of the show, these chips melt beautifully and enhance the brownie’s flavor.
- Butter – Adds richness and moisture to the brownies, ensuring a soft texture.
- Eggs – Essential for binding the ingredients and giving the brownies structure.
- All-purpose flour – Provides the necessary bulk and texture to the brownies.
- Granulated sugar – Sweetens the batter; balance is key to enhance the chocolate flavor.
- Baking soda – Helps the brownies rise slightly, creating a perfect crumb.
- Chopped walnuts or pecans – A delightful crunch that adds texture and complements the chocolate.
- Kraft caramels – The magic ingredient that turns ordinary brownies into Chocolate Turtle Brownies.
- Milk – Used for melting the caramels smoothly.
Cooking Instructions for Chocolate Turtle Brownies
Now that you’ve gathered your ingredients, let’s get to the fun part—baking! Follow these steps closely, and you’ll have a batch of delicious Chocolate Turtle Brownies ready to devour.
- Start by greasing a 9 x 13 inch pan with non-stick cooking spray. Preheat your oven to 350 degrees. This step ensures your brownies bake evenly and don’t stick to the pan.
- In a large bowl, melt 1½ cups of milk chocolate chips along with the butter. Use a microwave in 30-second increments, stirring in between to avoid burning. You want a smooth, creamy mixture.
- Add in the eggs one at a time, mixing well after each addition. This helps incorporate air into the batter, giving your brownies a lovely texture.
- Next, stir in the all-purpose flour, granulated sugar, baking soda, and vanilla. Mix until just combined, being careful not to overmix. The batter should be thick and fudgy.
- Spread the batter evenly into the greased pan. Sprinkle the remaining milk chocolate chips and chopped nuts on top before baking. This adds extra flavor and a nice texture contrast.
- Place the pan in the preheated oven and bake for 30 to 35 minutes. Test doneness by inserting a toothpick into the center—if it comes out clean, they’re ready!
- Meanwhile, prepare the caramel topping. In a separate small bowl, microwave the Kraft caramels and milk together for about 1 minute. Stir and continue heating in 15-second intervals until melted and smooth.
- Once the brownies are baked, take them out of the oven, and while they’re still warm, drizzle the melted caramel mixture over the top.
- Let the brownies cool completely in the pan before cutting them into squares. This ensures the caramel sets nicely.
Things Worth Knowing
- Switching Up the Nuts: Feel free to use almonds or pecans instead of walnuts. Each nut brings a unique flavor that can change the brownies’ profile.
- Don’t Overmix: Mixing the batter too much can lead to a dense brownie. Mix just until combined for that perfect texture.
- Caramel Variations: Experiment with different types of caramel. You can use homemade caramel for a gourmet touch!
- Storage Tips: Store your brownies in an airtight container at room temperature to keep them fresh.
Substitutions and Tips
Every baker has their own unique style, and these tips will help you make the best Chocolate Turtle Brownies for your taste!
- Storage: Store leftover brownies in an airtight container at room temperature for up to 3 days.
- Freezing: You can freeze these brownies for up to 3 months. Just wrap them tightly in plastic wrap and then foil.
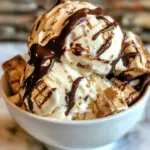
- Pairing: Serve with a scoop of vanilla ice cream for a classic dessert experience.
- Texture Check: For fudgier brownies, bake for less time; for cake-like brownies, bake a little longer.
- Flavor Enhancements: Add a pinch of sea salt on top of the caramel for a sweet and salty contrast.
What Complements This Chocolate Turtle Brownies
These Chocolate Turtle Brownies are versatile and can be paired with various sides and beverages:
- Vanilla Ice Cream: A scoop of vanilla ice cream complements the sweet chocolate and caramel perfectly.
- Fruit Salad: Serve with a fresh fruit salad for a refreshing contrast to the richness of the brownies.
- Chocolate Sauce: Drizzle more chocolate sauce on top for chocoholics!
- Milk or Coffee: Pair with a cold glass of milk or a warm cup of coffee to balance the sweetness.
- Great for Parties: These brownies are a hit at birthdays, family gatherings, and holidays!
FAQ
Conclusion
In conclusion, Chocolate Turtle Brownies are the perfect blend of rich chocolate, gooey caramel, and crunchy nuts, making them a go-to dessert for any occasion. I encourage you to gather the ingredients and give this recipe a try. You’ll be amazed at how easy it is to create such an indulgent treat right at home!
Chocolate Turtle Brownies
Ingredients
Equipment
Method
- Spray a 9 x 13 inch pan with non stick cooking spray and preheat oven to 350 degrees.
- Melt 1½ cups chocolate chips and butter in a large bowl in the microwave in 30 second increments, stirring in between.
- Stir in eggs, then add in flour, sugar, baking soda and vanilla. Stir together well.
- Spread batter into the greased pan, then sprinkle with chocolate chips and chopped nuts.
- Bake for 30-35 minutes or until a toothpick inserted in the center comes out clean.
- Microwave caramels and milk in a small bowl for about 1 minute. Stir and then continue to microwave, stirring every 15 seconds until all is melted and smooth. Drizzle over warm brownies.
- Cool brownies before cutting and serving.
Notes
- Storage: Store leftover brownies in an airtight container at room temperature for up to 3 days.
- Freezing: You can freeze these brownies for up to 3 months. Just wrap them tightly in plastic wrap and then foil.
- Pairing: Serve with a scoop of vanilla ice cream for a classic dessert experience.
- Texture Check: For fudgier brownies, bake for less time; for cake-like brownies, bake a little longer.
- Flavor Enhancements: Add a pinch of sea salt on top of the caramel for a sweet and salty contrast.