There’s something undeniably magical about a dessert that combines the rich, indulgent flavor of chocolate with the refreshing zing of peppermint. That’s exactly what you get with Chocolate Peppermint Mousse. I remember the first time I made this delightful treat for a holiday gathering; the aroma of melting chocolate wafted through the air, and the excitement was palpable. Friends and family gathered in the kitchen, eager to see what I was creating. As I whipped up the mousse, I felt the festive spirit come alive, and I knew I had discovered a recipe that would become a cherished tradition. Every bite of this luscious mousse is like a warm hug, reminding us of cozy winter nights and joyful celebrations.
Recipe Snapshot
25 mins
20 mins
5 mins
Medium
360 kcal
3 g
Keto, Gluten-Free, Low FODMAP
25 g
Large Pot, Frying Pan, Wooden Spoon, Chef’s Knife, Whisk, Mixing Bowl
What Sets This Chocolate Peppermint Mousse Apart
Decadent Flavor
The combination of dark and milk chocolate creates a rich, creamy base that’s simply irresistible. It’s a dessert that feels luxurious and indulgent, perfect for special occasions.
Refreshing Peppermint Twist
The hint of peppermint adds a refreshing twist that brightens the rich chocolate flavors. It makes each bite feel festive and invigorating, making it a great choice for holiday gatherings.
Easy to Prepare
Despite its fancy appearance, Chocolate Peppermint Mousse is surprisingly easy to make. With just a few simple steps, you can create a dessert that looks and tastes like it came from a high-end restaurant.
Versatile Serving Options
Whether you serve it in elegant glasses, pipe it into fancy shapes, or layer it with whipped cream, this mousse is a versatile dessert that can be customized to suit any occasion.
Make-Ahead Convenience
This mousse can be made ahead of time, allowing you to enjoy your time with guests instead of being stuck in the kitchen. Just whip it up and let it chill in the fridge until you’re ready to serve.
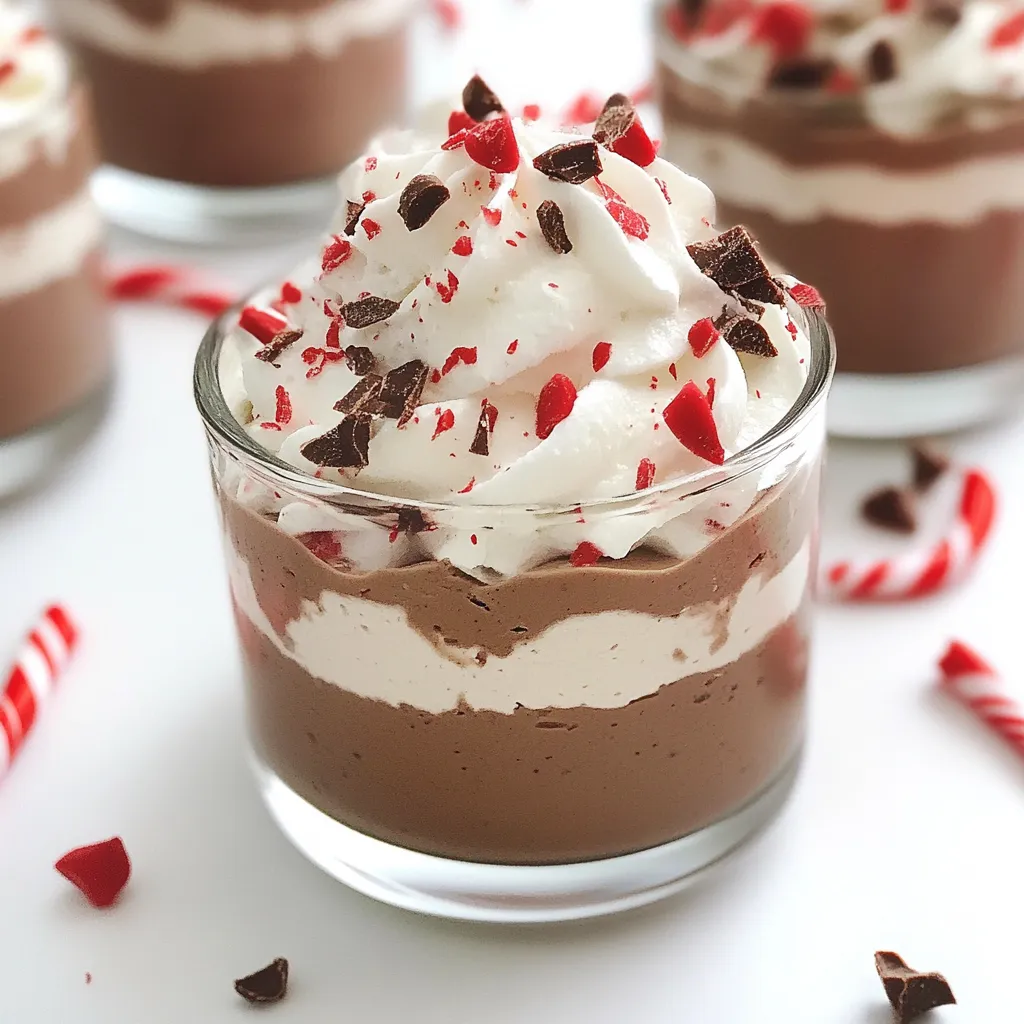
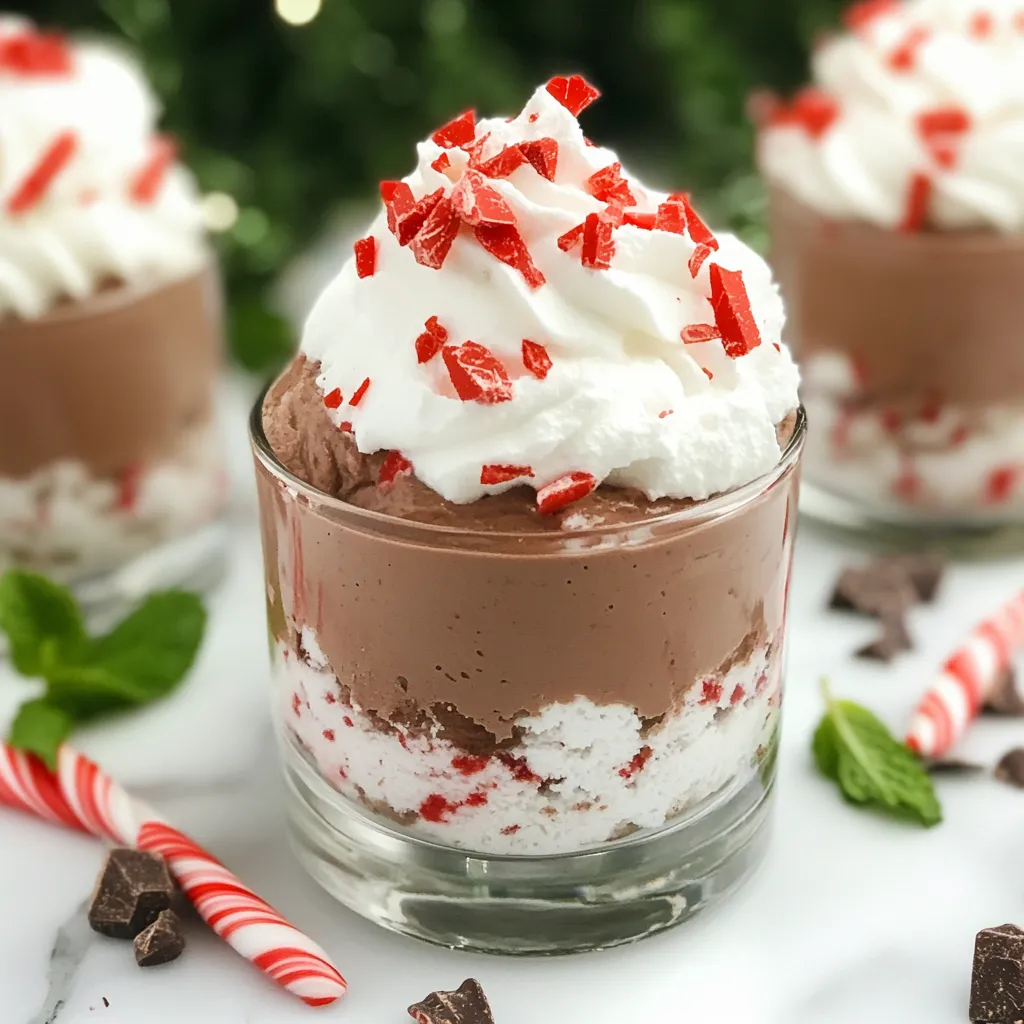
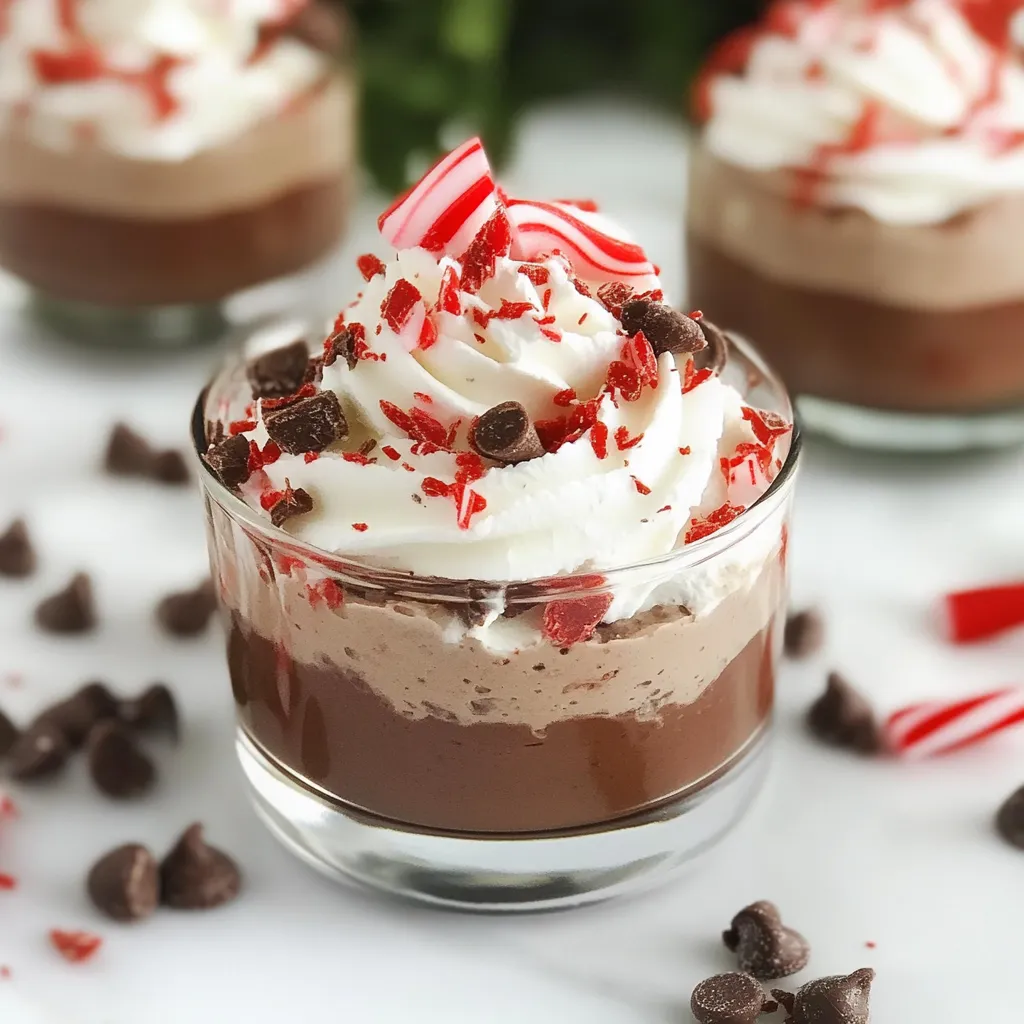
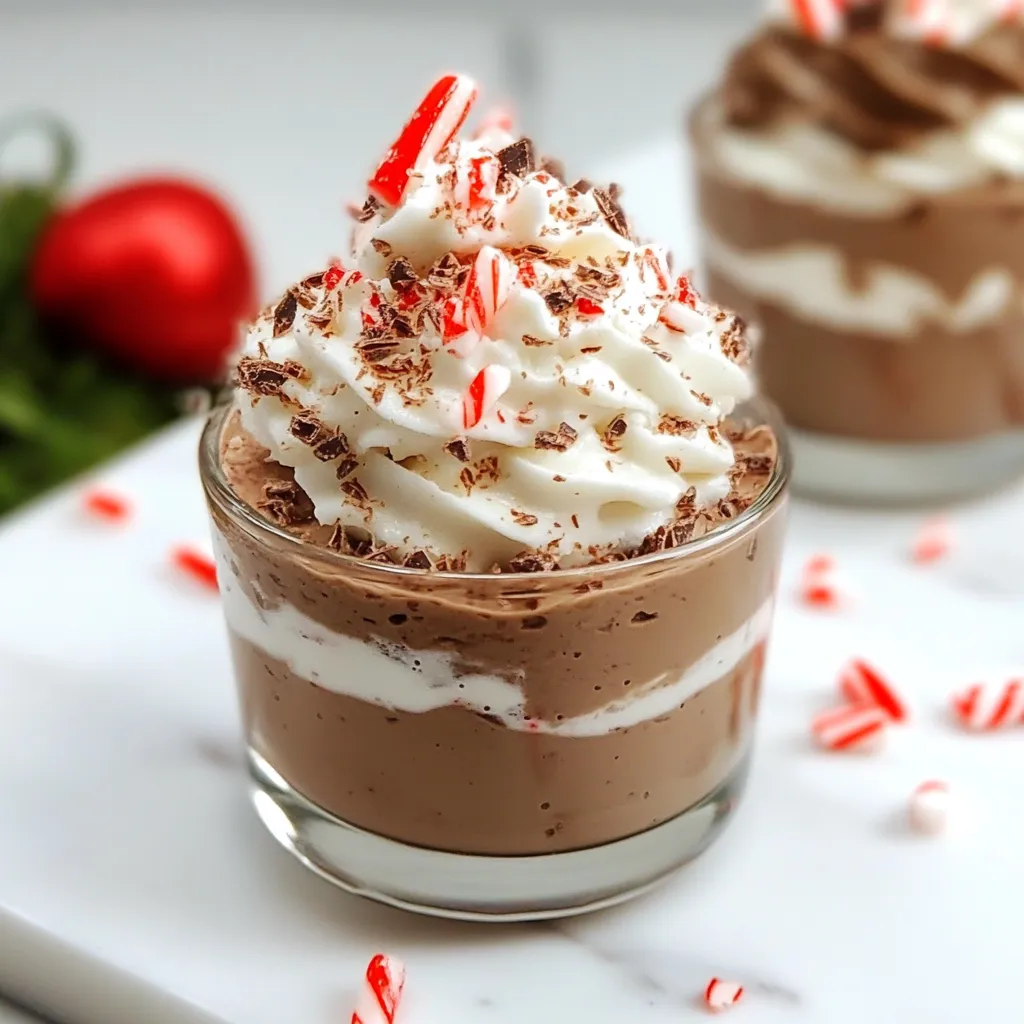
Delightful Presentation
With its smooth texture and the option to garnish with crushed peppermint candies, Chocolate Peppermint Mousse is not only delicious but also visually appealing, making it a perfect centerpiece for your dessert table.
What to Gather for Chocolate Peppermint Mousse
Gathering the right ingredients is essential for crafting the perfect Chocolate Peppermint Mousse. Each component plays a significant role in building the flavors, from the rich chocolate to the airy cream. Let’s explore the key players that come together to make this dessert a standout.
- 1 cup dark chocolate bar – Roughly chopped to enhance melting.
- 1/2 cup milk chocolate bar – Adds sweetness and creaminess.
- 1 14-ounce can coconut milk – Full-fat for a rich texture.
- 1/4 teaspoon peppermint extract – Provides a refreshing minty flavor.
- 1/2 cup heavy cream – Whipped for a light and airy texture.
- 5 peppermint candies – Crushed for garnish and added crunch.
Chocolate Peppermint Mousse Instructions
Making Chocolate Peppermint Mousse is a delightful journey of flavors and textures. Grab your mixing bowls and let’s create this luscious treat step by step!
- Start by finely chopping the dark chocolate and milk chocolate. Place them into a medium mixing bowl. This step is crucial as it allows the chocolate to melt evenly.
- In a small saucepan, heat the coconut milk over medium heat until it’s very hot, but be careful not to let it boil. You’ll notice steam rising, and small bubbles forming around the edge, which indicates it’s ready!
- Pour the hot coconut milk over your chopped chocolate. Immediately whisk until everything is combined and the chocolate has melted into a smooth mixture. At this point, stir in the peppermint extract for that signature flavor.
- Cover the bowl and chill this mixture in the fridge for about 4 to 5 hours, or until it’s completely cooled and thickened. This is a good time to relax or prepare other dishes.
- Once chilled, it’s time to whip it up! Take the chilled mixture and beat it with a hand mixer or a stand mixer with a whisk attachment. Beat until the mousse becomes light, airy, and fluffy. This could take about 10 minutes, so don’t rush!
- If it seems like the mixture isn’t thickening, just keep beating. Trust me, it will achieve that perfect texture! You’ll see it transform into a beautiful, fluffy mousse.
- In a separate bowl, whip the heavy cream and sweeten it to your liking with confectioners sugar. This whipped cream will complement our mousse perfectly.
- Now comes the fun part! You can either spoon the mousse into bowls or use a piping bag to pipe it into fancy glasses. Layer it with the whipped cream as you go for a stunning presentation.
- For an added touch, sprinkle bits of crushed peppermint candies in between the layers or just on top as a garnish. It’s the finishing touch that makes this dessert irresistible.
- Keep the assembled mousse in the fridge until you’re ready to serve. Enjoy every rich and refreshing bite!
Things Worth Knowing
- Be patient while whipping: It may take some time to achieve that airy texture, but persistence pays off!
- Temperature matters: Ensure your coconut milk is hot enough to melt the chocolate but not boiling.
- Chill properly: Letting the mousse sit in the fridge for several hours is key to achieving the right consistency.
- Mixing bowls: Use a large mixing bowl to give yourself plenty of room to whisk and fold ingredients without spilling.
Customization Ideas
There are countless ways to put your own spin on Chocolate Peppermint Mousse. Here are some fun ideas to get you started!
- Flavored layers: Experiment with different flavored extracts like almond or hazelnut for a unique twist.
- Vegan option: Substitute heavy cream with a coconut whipped cream for a dairy-free alternative.
- Chocolate varieties: Try using different types of chocolate, like white chocolate, for a sweeter, creamier mousse.
- Garnishing: Top with fresh mint leaves or chocolate shavings for an elegant touch.
- Layering: Incorporate layers of crushed cookies or cake for added texture.
- Serving styles: Serve in individual jars for a delightful presentation at parties.
- Seasonal variations: Add seasonal spices like cinnamon or nutmeg for a holiday flair.
Serve This Chocolate Peppermint Mousse With
When it comes to serving Chocolate Peppermint Mousse, there are endless possibilities to enhance your dessert experience. Here are some ideas:
- Festive gatherings: This mousse is perfect for Christmas parties or winter holidays, adding a touch of elegance to your dessert spread.
- Pairing with coffee: Serve alongside a rich cup of coffee or hot chocolate for a delightful after-dinner treat.
- Accompanying fruits: Fresh berries or a fruit compote can add a refreshing contrast to the rich chocolate.
- Chocolate lovers’ platter: Create a dessert board with various chocolate treats and pair them with the mousse for a chocolate feast.
- Seasonal events: Ideal for Valentine’s Day or anniversaries, this mousse brings love to the table.
FAQ
Conclusion
The Chocolate Peppermint Mousse truly embodies the spirit of the holidays with its rich flavors and delightful texture. It’s a dessert that not only satisfies the palate but also creates cherished memories around the table. I encourage you to try this recipe and experience the joy it brings to your gatherings. You won’t be disappointed!
Chocolate Peppermint Mousse
Ingredients
Equipment
Method
- Finely chop the dark chocolate and milk chocolate and put in a medium mixing bowl.
- In a small saucepan, heat the coconut milk until it is very hot, but do not bring to a boil. It will start to steam and small bubbles will form around the edge of the pot.
- Pour the hot coconut milk over the chopped chocolate and whisk until combined and the chocolate is melted. Stir in the peppermint extract.
- Chill in the fridge for 4-5 hours or until it has cooled completely and thickened.
- Once the mixture has chilled and thickened, beat with a hand mixer (or in a stand mixer with a whisk attachment) until light, airy and fluffy. This could take up to 10 minutes to achieve the right texture.
- Whip the heavy cream and sweeten to your desired sweetness with confectioners sugar.
- You can now either spoon the chocolate mousse into bowls, or transfer into a piping bag and pipe into fancy glasses. Alternate the mousse and whipped cream layers.
- Optionally, add bits of crushed peppermint candies in the layers, or just sprinkle it on top as a garnish.
- Keep in the fridge until ready to serve. Enjoy!
Notes
- Storage: Store leftovers in an airtight container in the fridge for up to 3 days.
- Freezing: You can freeze the mousse, but it's best enjoyed fresh.
- Pairing: Serve with fresh berries for a delightful contrast.
- Decoration: Enhance visual appeal with chocolate shavings on top.
- Variations: Try adding a layer of crushed cookies for added texture.