The first time I made Chocolate Covered Strawberries, it was for a last-minute Valentine’s surprise. I remember how I rushed to the store, my heart racing with excitement and a bit of panic. Would the strawberries be fresh enough? Would I mess up the melting chocolate? I had no idea how magical those simple ingredients could turn into something so delightful. As I dipped each strawberry into the warm, glossy chocolate, I was amazed by how such a simple treat could evoke smiles and happiness. It became a tradition to make them for special occasions, from anniversaries to birthdays, and it never fails to impress. You don’t need a culinary background to create this treat; just a bit of love and patience.
There’s something so satisfying about preparing Chocolate Covered Strawberries. Watching the chocolate melt and transform into a silky coating is truly mesmerizing. Plus, you can customize them with toppings like sprinkles or crushed nuts for an extra flair. Each bite is a burst of sweet, juicy strawberry paired with rich chocolate, making it a perfect treat for anyone with a sweet tooth. So, let’s dive into this sumptuous recipe and create some memorable moments together.
Recipe Snapshot
20 mins
20 mins
0 mins
Easy
150 kcal
1 g
Keto, Paleo, Whole30
10 g
Sheet pan (15″ x 10″)
Why Try This Chocolate Covered Strawberries
1. A Classic Treat
There’s a reason Chocolate Covered Strawberries are a classic. They embody romance and indulgence, making them perfect for sharing with loved ones. Each bite offers a delightful contrast between the juicy strawberry and the smooth chocolate.
2. Simple Ingredients
This recipe features just a few ingredients: fresh strawberries, chocolate melting wafers, and a touch of coconut oil. The simplicity makes it accessible to everyone, regardless of culinary experience. You can easily find these ingredients at your local store.
3. Customizable
One of the best parts about making Chocolate Covered Strawberries is the ability to customize them. From drizzling with white chocolate to rolling in nuts or sprinkles, you can create unique treats that suit any occasion. Let your creativity shine!
4. Perfect for Any Occasion
Whether it’s Valentine’s Day, an anniversary, or just a treat for yourself, Chocolate Covered Strawberries fit perfectly into any setting. They’re impressive yet easy to make, ensuring that you can wow your guests without spending hours in the kitchen.
5. A Sweet Surprise
Imagine the look on someone’s face when you present them with a box of homemade Chocolate Covered Strawberries. This delightful gift is perfect for expressing love and appreciation, making it one of the best gifts you can give.
Main Ingredients for Chocolate Covered Strawberries
When it comes to Chocolate Covered Strawberries, the ingredients are straightforward yet essential for creating a delicious treat. The key players are fresh strawberries, which provide a juicy burst of flavor, and chocolate melting wafers, which offer a smooth, melt-in-your-mouth coating. The addition of coconut oil helps achieve the perfect chocolate consistency.
- Chocolate melting wafers: These are specially formulated for melting and coating, ensuring a smooth finish. They come in various flavors and types, such as milk, dark, or white chocolate.
- Coconut oil: This ingredient is added to the chocolate to achieve a glossy finish and a smoother texture, making it easier to coat the strawberries.
- Strawberries: Fresh, ripe strawberries are the star of this recipe. Look for bright red, firm berries without any soft spots for the best results.
Step by Step Guide for Chocolate Covered Strawberries

Making Chocolate Covered Strawberries is easier than you might think! With just a few simple steps, you can create a stunning and delicious treat. Follow along as we guide you through this sweet process.
- Gently wash the strawberries in cool water. Be careful to avoid bruising them. Pat them dry using paper towels. Allow them to sit at room temperature for about 30 minutes to ensure they are completely dry. This is crucial, as water can cause the chocolate to become cloudy.
- Prepare your workspace by lining a large sheet pan with parchment paper, wax paper, or a silicone baking mat. This will prevent the strawberries from sticking once coated.
- If you’re using chocolate bars, coarsely chop them to facilitate melting. If you have chocolate melting wafers, you can skip this step.
- Add all but 2 tablespoons of the chocolate melting wafers to a large microwave-safe bowl. Add 1 teaspoon of coconut oil to help with the melting process.
- Microwave the chocolate in 15-second intervals. After each interval, stir vigorously for 15 seconds. Continue this process until the chocolate is fully melted and smooth. Be patient and avoid overheating, as this can ruin the chocolate.
- Once the chocolate is melted, stir in the reserved 2 tablespoons of wafers. This helps cool the chocolate slightly, making it easier to work with.
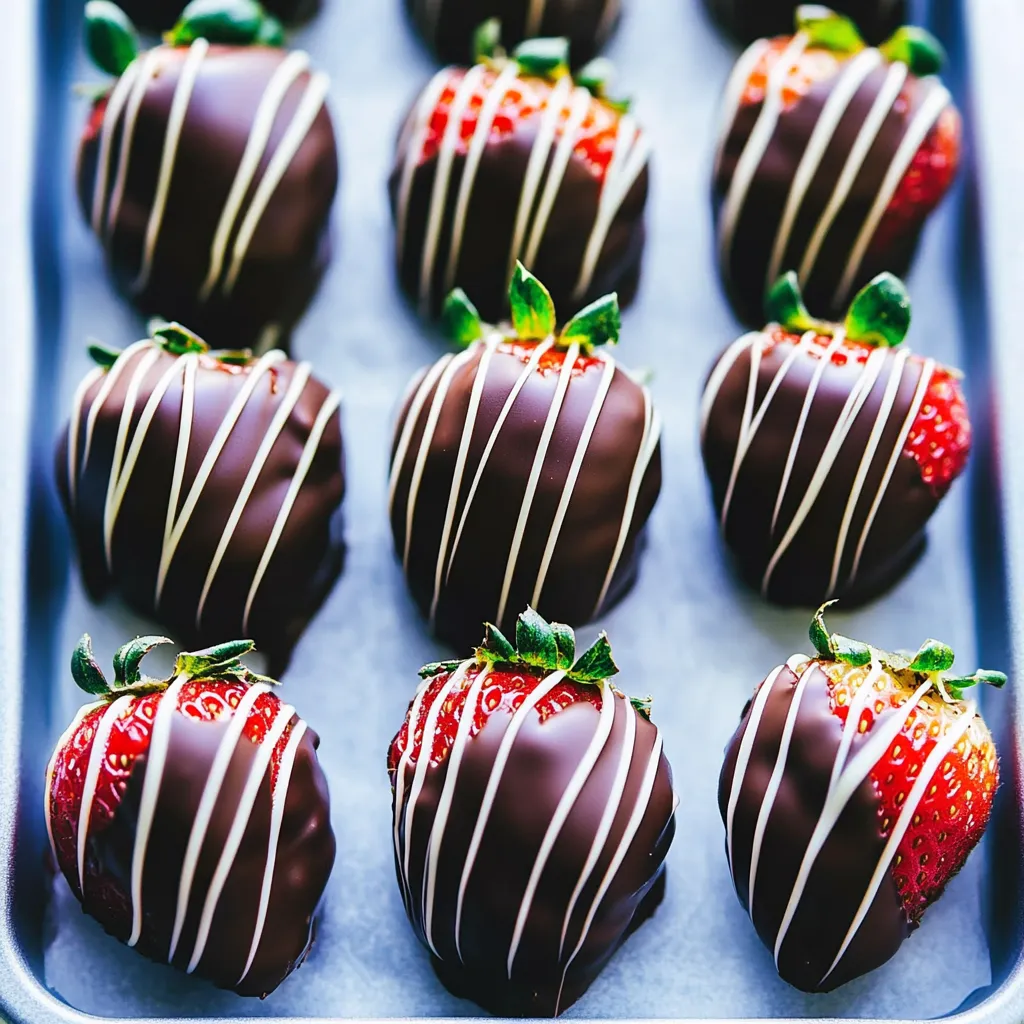
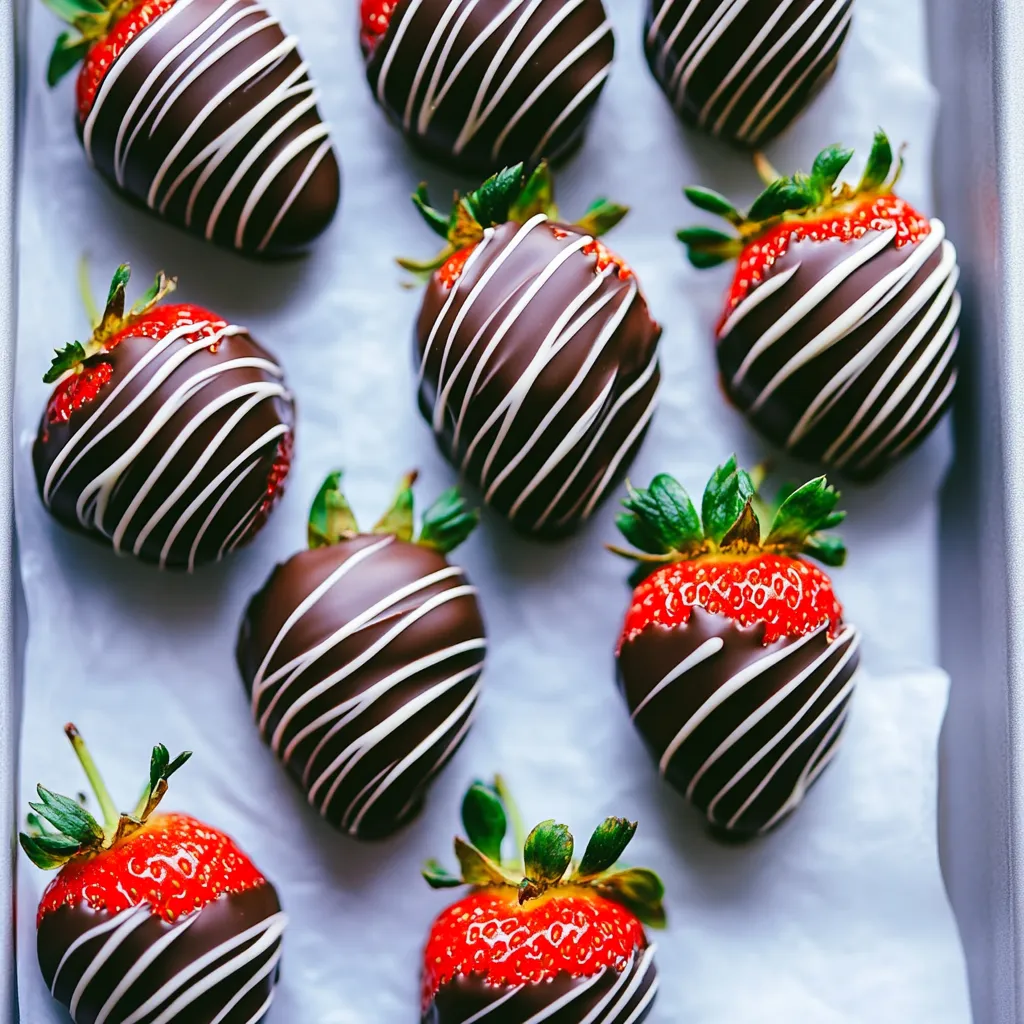
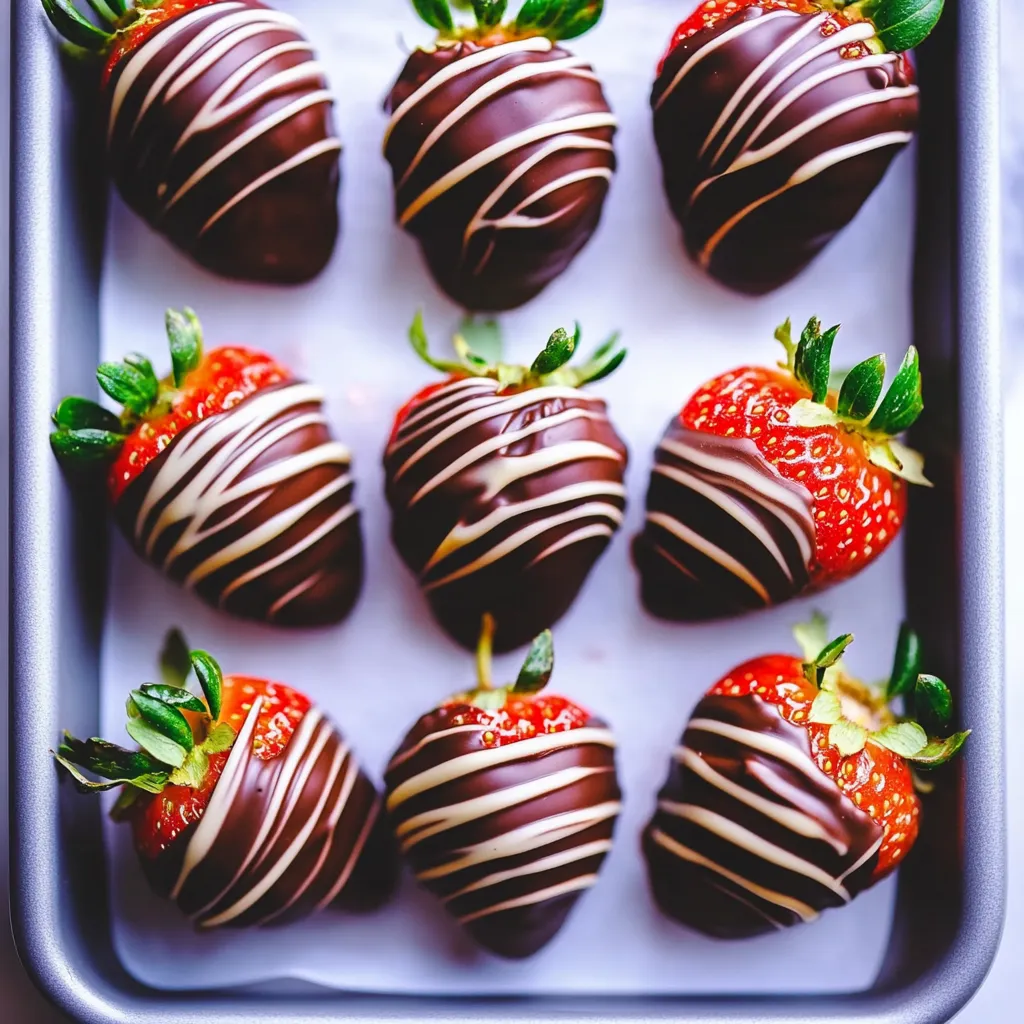
- Hold a strawberry by the stem and dip it into the melted chocolate, swirling gently to coat it evenly. Make sure to cover it well for maximum flavor.
- Carefully slide the bottom of the strawberry against the edge of the bowl to remove any excess chocolate. This will help keep the coating neat.
- Place the coated strawberry on the lined sheet pan. Repeat this process with the remaining strawberries until they are all coated. If the melted chocolate starts to harden, simply reheat it in the microwave for another 15 seconds and stir.
- To add a decorative drizzle, melt 2 ounces of white chocolate with 1/2 teaspoon of coconut oil. Transfer it to a small plastic bag, seal it, and snip off a tiny corner to drizzle over the coated strawberries.
- If you wish to add toppings such as sprinkles or crushed Oreos, do so before the chocolate sets to ensure they stick.
- Allow the strawberries to cool at room temperature. Avoid refrigerating them, as this can create condensation and ruin the chocolate coating.
Things Worth Knowing
- Ensure strawberries are dry: It’s essential that the strawberries are completely dry before dipping. Any moisture can cause the chocolate to seize and not adhere properly.
- Quality chocolate matters: Using high-quality chocolate will significantly enhance the flavor and texture of your Chocolate Covered Strawberries. Look for good baking chocolate.
- Patience is key: When melting chocolate, take your time. Heating it too quickly can cause it to seize, leading to a grainy texture.
- Let them cool properly: Cooling the strawberries at room temperature will help maintain the chocolate’s integrity and keep it from becoming cloudy.
Tips and Tricks about Chocolate Covered Strawberries
Making Chocolate Covered Strawberries is a delightful experience, but a few tips can elevate your results. Here are some tricks to ensure your strawberries turn out perfectly every time.
- Storage: Store your Chocolate Covered Strawberries in a cool, dry place. They are best enjoyed the same day but can last about 8 to 10 hours before they start to break down.
- Freezing: While not recommended, if you must freeze them, make sure they are placed in an airtight container. However, this can change the texture of the strawberries.
- Pairing: These strawberries pair beautifully with a glass of sparkling water or herbal tea for a refreshing treat.
- Experiment with chocolate types: Try using different types of chocolate like milk, dark, or white chocolate to see which one you prefer.
- Add toppings: Before the chocolate hardens, you can sprinkle on toppings like crushed nuts, coconut flakes, or colorful sprinkles for added texture and flavor.
Side Dish Ideas for Chocolate Covered Strawberries
When serving Chocolate Covered Strawberries, consider these delightful options to enhance your experience:
- Fruit Platter: Serve them alongside a colorful fruit platter with assorted berries, melon, and pineapple for a vibrant spread.
- Cheese Board: Pair them with a cheese board featuring creamy cheeses, crackers, and nuts. The contrast of sweet and savory is delightful.
- Chocolate Fondue: For an interactive dessert, consider serving them with a chocolate fondue pot, allowing guests to dip their own strawberries.
- Special Occasions: These strawberries are perfect for romantic dinners, anniversaries, or any celebration that calls for sweetness.
- Coffee or Tea: Offering a warm beverage like coffee or herbal tea complements the sweetness of the strawberries, making for a comforting treat.
FAQ
Conclusion
In conclusion, Chocolate Covered Strawberries are a timeless treat that brings joy and sweetness to any occasion. Their appealing combination of fresh strawberries and rich chocolate makes them irresistible. I encourage you to try making this recipe for your next gathering or special moment. You’ll be amazed at how easy and rewarding it is to create something so delicious. Enjoy the smiles you’ll bring to those you share them with!
Chocolate Covered Strawberries
Ingredients
Equipment
Method
- Wash strawberries very gently in cool water and carefully dry with paper towels. Let stand at room temperature for about 30 minutes to ensure the strawberries are completely dry. Don’t dip strawberries unless they are completely dry, otherwise chocolate will become cloudy or won’t stick to the berries.
- Line a large sheet pan with parchment paper, wax paper, or a silicone baking mat and set it aside. If using baking bars, coarsely chop the chocolate. Be patient when melting the chocolate and avoid rapid temperature changes. Do not microwave for too long or too many times; stir the chocolate frequently as it melts. Allow the coated strawberries to harden at room temperature instead of refrigerating or freezing them.
- Add all but 2 tablespoons of the chocolate melting wafers to a large microwave-safe bowl. Add 1 teaspoon oil. Microwave for 15 seconds, then stir vigorously for 15 seconds. Continue to do this until the chocolate is melted. Once chocolate is melted, add the reserved 2 tablespoons of chocolate and stir until it melts.
- Once chocolate is fully melted and smooth, hold a berry by the stem and dip it into the melted chocolate. Gently swirl to cover in the chocolate. Carefully slide the bottom of the strawberry against the edge of the bowl to remove any excess chocolate. Place the strawberry on the lined sheet pan. Repeat with remaining strawberries. If the melted chocolate is getting too hard to dip, heat it in the microwave for another 15 seconds and remix. You may need to add 1/2 teaspoon or more of oil too.
- To drizzle chocolate on top, melt 2 ounces of white chocolate with 1/2 teaspoon of oil. Transfer the melted chocolate to a small plastic bag, seal it without air, and cut off a tiny tip. Drizzle over the strawberries. For a raised drizzle, wait until the chocolate has hardened; for a melted effect, drizzle right after coating the strawberries. You can also sprinkle on toppings like sprinkles or crushed Oreos before the chocolate sets. Let the strawberries cool at room temperature.
Notes
- Tip 1: Chocolate chips contain stabilizers that prevent them from melting smooth. For best results, use high-quality baking bars like Baker’s, Lindt, or Ghirardelli, or look for melting wafers, which are often easier to work with. You can choose any type of chocolate—milk, semi-sweet, dark, or white.
- Tip 2: Choose the freshest strawberries you can find! Look for bright red, firm, and plump berries with no soft spots. A 2-pound container is ideal, giving you enough strawberries in case some aren’t perfect. You’ll typically coat about 25–30 strawberries, but you might have a few extra depending on their size and how much chocolate you use.
- Tip 3: To prevent scorching the chocolate, melt it in very short bursts and stir frequently. The goal is to keep the chocolate warm enough to melt gradually, but not hot; it should reach a smooth, room temperature consistency.
- Tip 4: Melting chocolate slowly while stirring frequently helps it cool and harden before the cocoa butter rises to the surface, preventing streaks. Adding unmelted chocolate toward the end cools the mixture, encouraging it to set for a smooth, firm finish. This process stabilizes the chocolate, giving it a glossy appearance and ensuring it won’t easily melt on your fingers.
- Tip 5: Chocolate Covered Strawberries are best eaten the same day. They last about 8–10 hours in a cool, dry place before they break down and start to leak and become sticky. I don’t recommend refrigerating; it will create condensation on the outside of the chocolate and cause it to break apart when you bite into them.