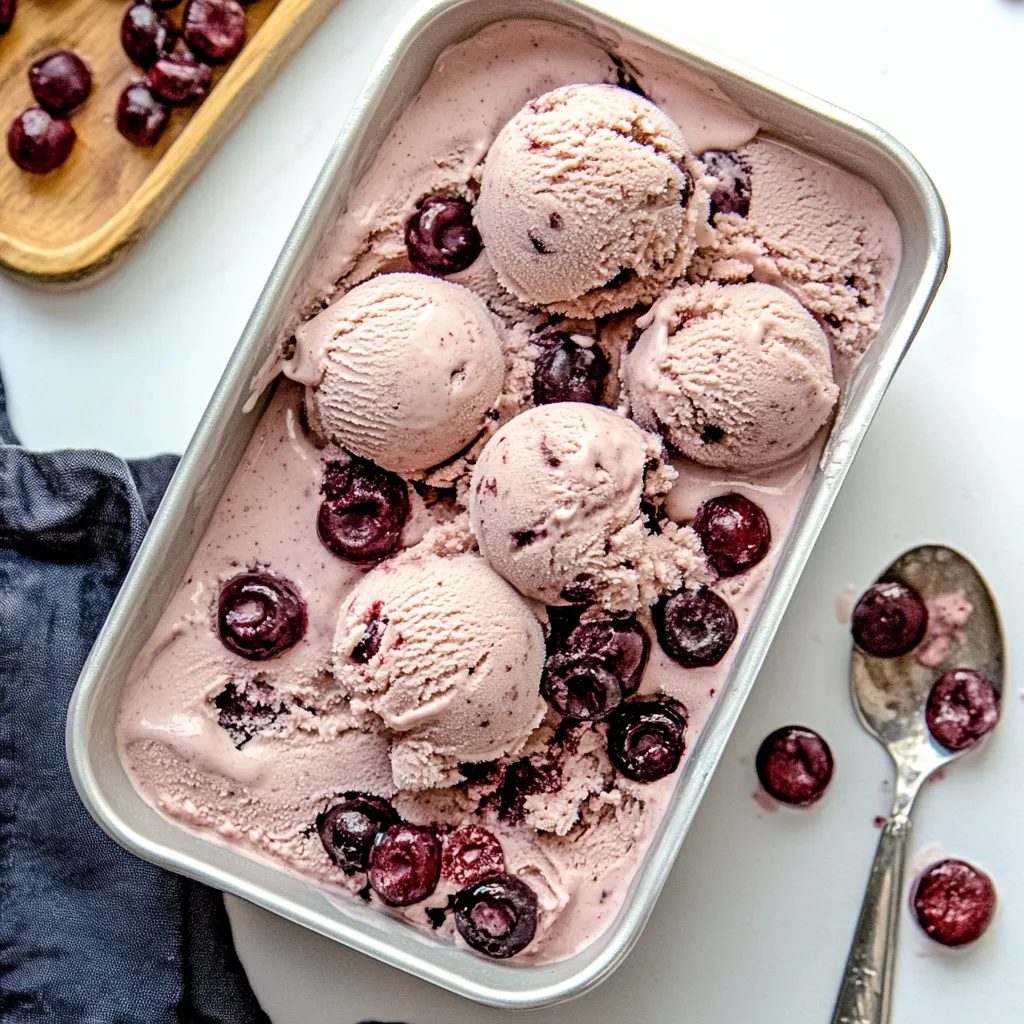
As the summer sun starts to warm the days, nothing beats the refreshing taste of Cherry Cheesecake Ice Cream. I can still remember the very first time I made this delightful treat; it was a sweltering afternoon, and I craved something cool and creamy. I decided to whip up a batch, and the moment I took my first bite, I was transported to a blissful state of happiness. The combination of sweet cherries and creamy cheesecake flavors creates an indulgence that feels like a luxurious dessert but is surprisingly easy to make at home. This recipe has become a staple at my summer gatherings, always eliciting smiles and requests for seconds. Whether you’re celebrating a special occasion or just looking to cool off, Cherry Cheesecake Ice Cream is the perfect companion for warm summer days.
Recipe Snapshot
55 mins
25 mins
30 mins
Medium
250 kcal
4 g
Gluten-Free, Low FODMAP
12 g
Large Pot, Food Processor, Saucepan, Frying Pan, Wooden Spoon, Chef’s Knife, Whisk, Mixing Bowl
Why This Cherry Cheesecake Ice Cream Stands Out
It’s a Crowd-Pleaser
Whenever I bring out a tub of Cherry Cheesecake Ice Cream, I know I’ll have a hit on my hands. It’s one of those desserts that everyone loves. Whether it’s a family gathering or a BBQ with friends, people can’t get enough of that rich, sweet flavor mixed with the tartness of cherries. The smiles on their faces say it all.
Versatility at Its Best
This ice cream isn’t just a dessert; it’s incredibly versatile! You can serve it in cones, in bowls, or even as a topping on a warm slice of pie. Plus, it pairs beautifully with a variety of cakes and pastries, making it an excellent addition to any dessert table.
Simple Yet Impressive
One of my favorite things about making Cherry Cheesecake Ice Cream is how simple the process is. With just a few ingredients and a little bit of time, you can create something that looks and tastes gourmet. You’ll feel like a culinary expert when your friends ask how you made such a delicious treat!
Fresh Ingredients Make a Difference
I believe the secret to the best Cherry Cheesecake Ice Cream lies in using fresh, high-quality ingredients. When I use ripe, sweet cherries and creamy, rich cheese, the flavors come alive in a way that store-bought ice creams can’t compete with. It’s a delightful reminder of why homemade is always better.
A Fun Activity
Making Cherry Cheesecake Ice Cream can also be a fun activity with kids or friends. I love having my nieces and nephews help me mix and pour the ingredients. It’s wonderful to see their excitement as they wait for the ice cream to freeze, and it creates lasting memories that go beyond just eating dessert.
Perfect for Any Occasion
Whether it’s a hot summer day, a birthday party, or simply a treat for yourself after a long week, Cherry Cheesecake Ice Cream fits the bill perfectly. It’s a delightful way to celebrate life’s little moments and enjoy the flavors of summer.
Cherry Cheesecake Ice Cream Shopping List
Creating Cherry Cheesecake Ice Cream revolves around choosing the right ingredients, each contributing to the final creamy, dreamy texture and flavor. The key players like fresh cherries, rich cream cheese, and a hint of sweetness come together beautifully to craft this frozen delight. Let’s dive into what you need to bring this treat to life!
- 2 cups granulated white sugar – This is the sweet foundation of your ice cream, balancing the tartness of the cherries.
- 6 ounces reduced-fat or regular cream cheese, at room temperature – The star ingredient that will give your ice cream its delicious cheesecake flavor.
- 4 large egg yolks – These add richness and custard-like texture to your ice cream.
- 3 cups 2% milk – A lighter alternative that keeps the ice cream creamy without being too heavy.
- 1 cup half and half – Creamy richness that enhances the mouthfeel of your dessert.
- 3 cups fresh or frozen pitted sweet cherries, chopped – These provide the fruity burst and beautiful color.
- ¼ cup powdered sugar – For a touch of added sweetness in your cherry mixture.
- ¼ cup water – To help cook down the cherry mixture.
- Graham cracker crumbs, for serving (optional) – A nod to the classic cheesecake crust, adding a delightful crunch.
Making This Cherry Cheesecake Ice Cream
When it comes to making Cherry Cheesecake Ice Cream, the process is both straightforward and fun! Once you gather your ingredients, you’ll find that it’s all about mixing, cooking, and freezing. Let’s break it down into simple steps to ensure you get that creamy, dreamy result.
In a large bowl, combine 2 cups of granulated white sugar, 6 ounces of cream cheese, and 4 large egg yolks. Using an electric mixer, beat these ingredients at high speed until smooth and creamy. You want to achieve a lovely, silky texture. Make sure to scrape down the sides of the bowl to incorporate everything well.
Now, in a medium saucepan, pour in 3 cups of 2% milk and 1 cup of half and half. Heat this mixture over medium heat until it comes to a gentle boil. Stir it frequently to prevent scorching. Once it starts bubbling, remove the saucepan from the heat to avoid boiling over.
Next, gradually add the hot milk mixture to your cream cheese mixture. Do this slowly, one spoonful at a time. As you pour, stir constantly with a whisk. This step is crucial because you don’t want to cook the egg yolks; you just want to temper them. Keep whisking until fully incorporated and smooth.
Return the milk mixture to the saucepan and cook over medium-low heat for about five minutes or until a thermometer registers 160°F. Stir constantly, allowing the mixture to thicken slightly. You’ll notice it becoming custard-like.
Once thickened, scrape the mixture into a bowl and place that bowl over another bowl filled with ice to cool it completely. Stir it occasionally to help the cooling process.
While that cools, let’s prepare the cherry mixture. In a small saucepan, combine 3 cups of cherries, ¼ cup of powdered sugar, and ¼ cup of water. Bring this mixture to a boil, then reduce the heat and let it simmer for about ten minutes. Stir frequently until it thickens slightly. Once thickened, remove it from the heat and let it cool completely.
Stir the cooled cherry mixture into your chilled milk mixture. Make sure to mix it well, so you get that beautiful cherry flavor throughout. Then cover the bowl and refrigerate it for several hours or until it’s very cold.
Once the mixture is cold, pour it into the freezer container of your ice-cream machine. Process according to the manufacturer’s instructions. This step is where the magic happens, turning your mixture into creamy ice cream.
After processing, spoon the ice cream into a freezer-safe container. Cover and freeze for at least one hour or until firm. Waiting is the hardest part!
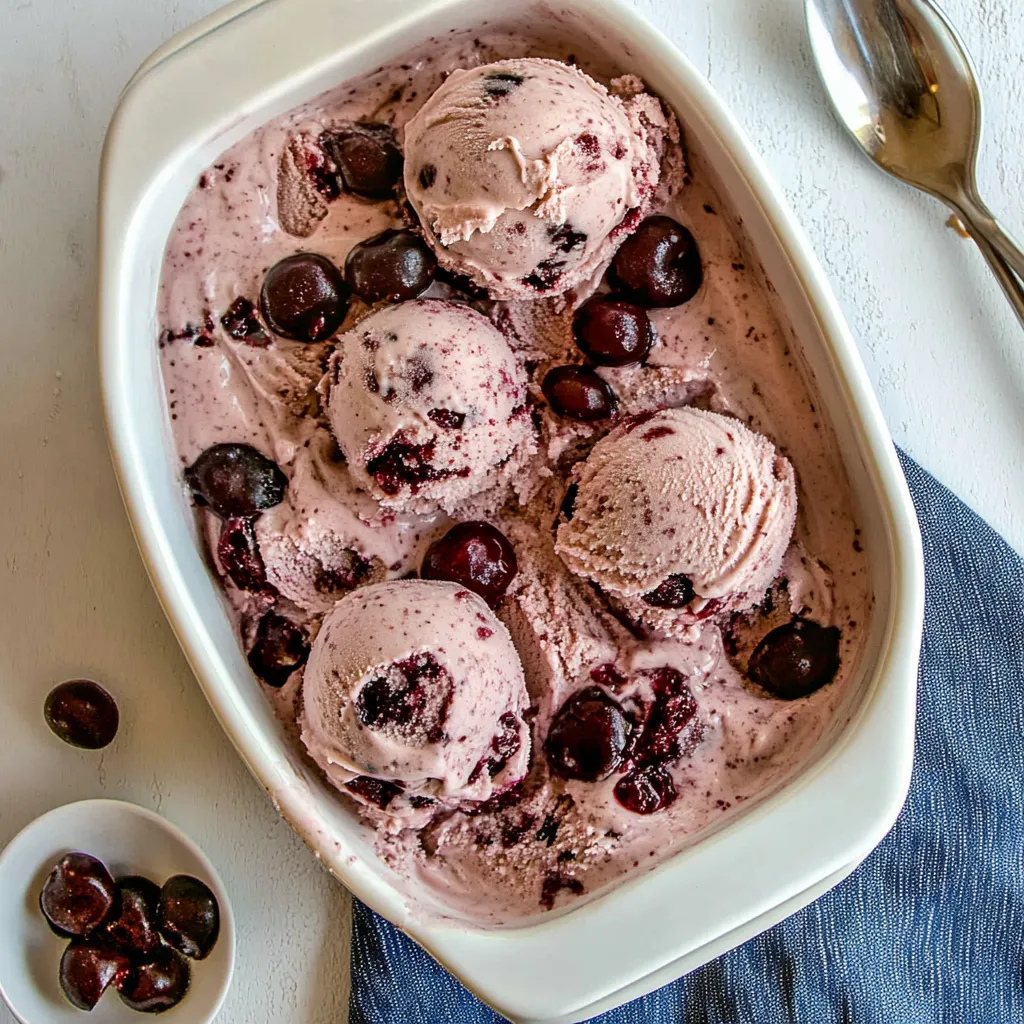
To serve, sprinkle some graham cracker crumbs on top of individual servings for added texture and flavor. Enjoy your homemade Cherry Cheesecake Ice Cream!
Things Worth Knowing
- Cooling: Ensure the milk mixture is completely cooled before churning; this helps achieve a smoother texture.
- Cherries: Fresh cherries are preferred, but frozen ones can work just as well; just be sure to thaw and drain excess water.
- Churning Time: Don’t rush the churning process; it’s essential for incorporating air and creating a light texture.
- Storing: Store your ice cream in an airtight container to prevent ice crystals from forming and keep it creamy.
Recipe Variations about Cherry Cheesecake Ice Cream
If you’re excited about making Cherry Cheesecake Ice Cream, you’ll be thrilled to know that there are plenty of fun variations and tips to consider. Here are some ideas to inspire your next batch!
- Storage: Store leftovers in an airtight container in the freezer. It can last for up to two weeks, but it’s so delicious, it probably won’t last that long!
- Freezing: You can freeze the base mixture before churning. Just let it thaw slightly before pouring into the ice cream maker, so it churns evenly.
- Pairing: Try serving it with a drizzle of chocolate syrup, or add some crushed nuts for extra texture and flavor!
- Flavor Additions: Experiment with other fruits like strawberries or blueberries, or even add chocolate chips for a twist.
- Graham Cracker Swirl: Add a swirl of crushed graham crackers into the mix during the last few minutes of churning for a fun texture.
Perfect Pairings for Cherry Cheesecake Ice Cream
When it comes to serving Cherry Cheesecake Ice Cream, the options are endless, and it can perfectly complement various dishes and occasions. Here are some wonderful ideas:
- Light Lunch: Pair it with a fresh fruit salad for a refreshing and light dessert to close a summer lunch.
- BBQ Gatherings: Serve alongside grilled burgers or hot dogs as a sweet end to a savory meal.
- Birthday Parties: It’s a fantastic addition to birthday celebrations—why not make a sundae bar with various toppings?
- Outdoor Picnics: Pack it in a cooler for a delightful treat during outdoor picnics or beach days.
- Cold Beverages: Pair it with iced tea or lemonade for a refreshing summer treat.
FAQ
Conclusion
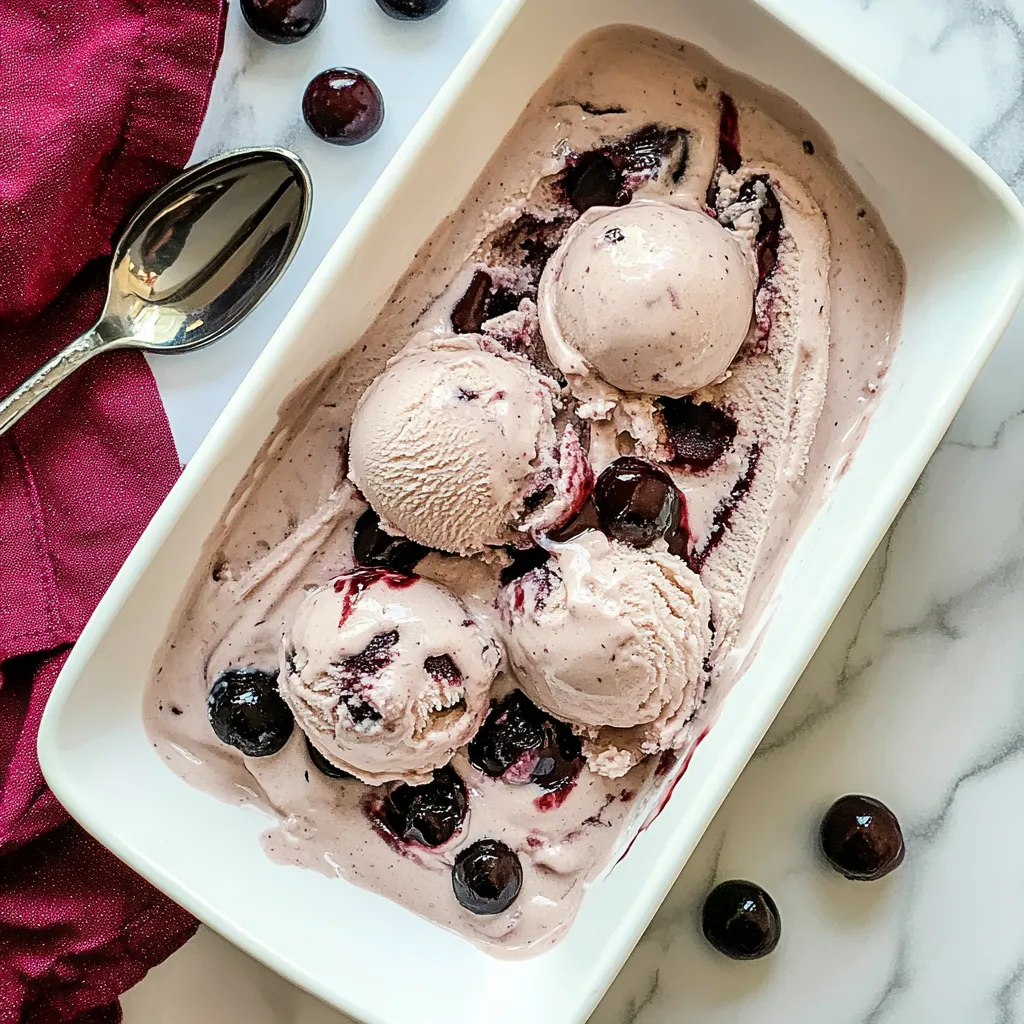
Cherry Cheesecake Ice Cream is a delightful treat that combines the best of two worlds—rich cheesecake flavor and refreshing cherry sweetness. It’s easy to make and perfect for summer gatherings or just to enjoy at home. I encourage you to try this recipe; you won’t be disappointed! Enjoy every creamy, fruity bite!

Cherry Cheesecake Ice Cream
Ingredients
Equipment
Method
- In a large bowl, combine 2 cups of granulated white sugar, 6 ounces of cream cheese, and 4 large egg yolks. Using an electric mixer, beat these ingredients at high speed until smooth and creamy.
- Now, in a medium saucepan, pour in 3 cups of 2% milk and 1 cup of half and half. Heat this mixture over medium heat until it comes to a gentle boil. Stir it frequently to prevent scorching.
- Next, gradually add the hot milk mixture to your cream cheese mixture. Do this slowly, one spoonful at a time. As you pour, stir constantly with a whisk.
- Return the milk mixture to the saucepan and cook over medium-low heat for about five minutes or until a thermometer registers 160°F. Stir constantly, allowing the mixture to thicken slightly.
- Once thickened, scrape the mixture into a bowl and place that bowl over another bowl filled with ice to cool it completely. Stir it occasionally to help the cooling process.
- While that cools, prepare the cherry mixture. In a small saucepan, combine 3 cups of cherries, ¼ cup of powdered sugar, and ¼ cup of water. Bring this mixture to a boil, then reduce the heat and let it simmer for about ten minutes.
- Stir the cooled cherry mixture into your chilled milk mixture. Make sure to mix it well, so you get that beautiful cherry flavor throughout.
- Once the mixture is cold, pour it into the freezer container of your ice-cream machine. Process according to the manufacturer’s instructions.
- After processing, spoon the ice cream into a freezer-safe container. Cover and freeze for at least one hour or until firm.
- To serve, sprinkle some graham cracker crumbs on top of individual servings for added texture and flavor.