The experience of baking bread is one of the most beautiful forms of culinary expression. Every time I embark on Baking At Home, I’m reminded of the first time I stood in my grandmother’s kitchen, enveloped in the warm, yeasty aroma of freshly baked bread. It was magical watching her knead the dough, the rhythmic movements of her hands creating something so simple yet profoundly satisfying. Now, when I bake at home, I channel that same spirit, creating my own loaves and sharing them with friends and family. There’s something about the process of making bread that transcends the act of cooking; it’s about tradition, love, and comfort.
As we dive into this Baking At Home adventure, I want to share not just the ingredients and steps, but the joy and fulfillment that comes from creating something from scratch. Whether you’re a seasoned baker or trying it for the first time, this recipe promises to fill your home with warmth and delight. So, let’s roll up our sleeves, dust our counters with flour, and get started on this delicious journey!
Recipe Snapshot
60 mins
0 mins
0 mins
Hard
200 kcal
6g g
Paleo, Whole30, Vegan
1g g
Oven, Baking Sheet, Mixing Bowl
The Charm of This Baking At Home
Crafting Your Own Bread
One of the most rewarding aspects of Baking At Home is the ability to craft your own bread. Unlike store-bought options, homemade bread allows you to control the ingredients and flavors, ensuring a loaf that is both delicious and wholesome.
Therapeutic Process
Baking can be incredibly therapeutic. There’s something calming about kneading dough or watching it rise. It’s a form of mindfulness, allowing you to be present in the moment and focus on the task at hand.
Creating Memories
Baking bread at home is not just about the final product; it’s also about creating memories. Whether it’s baking with your children or friends, these shared experiences become cherished moments filled with laughter and joy.
Fresh Ingredients Make a Difference
Using fresh ingredients significantly elevates the quality of your bread. With flour and water as the base, adding fresh sourdough starter and yeast creates a complex flavor that you simply cannot achieve with pre-packaged mixes.
Endless Variations
One of the best parts about baking at home is the endless possibilities for variations. From adding herbs, spices, or cheese, to experimenting with different flours, your creativity can run wild!
Healthy Living
Baking at home encourages healthier eating habits. You can experiment with whole grains and natural sweeteners, creating a loaf that is not only delicious but nourishing.
Main Ingredients for Baking At Home
The ingredients for Baking At Home are simple yet essential. The beauty of each element shines through in the final product. Starting with flour, the foundation of any great bread, followed by water, which activates the dry ingredients, you’ll also need sourdough starter for that unique flavor. Yeast is crucial for the rise, while salt not only enhances flavor but also strengthens the dough. Together, these ingredients create magic in your oven.
- Flour: 500g (4 cups) of all-purpose flour is the backbone of your bread, providing structure and texture.
- Water: 325g (scant 1 1/3 cups) of water at 68°f (20°c) activates the yeast and hydrates the flour.
- Sourdough Starter: 100g (scant 1/2 cup) of liquid sourdough starter brings a tangy flavor and improves fermentation.
- Fresh Yeast: 3g (1 teaspoon) of fresh baker’s yeast helps the dough rise, contributing to a light and airy texture.
- Salt: 10g (2 teaspoons) of salt enhances flavor and regulates yeast activity, ensuring a perfect rise.
How to Make Baking At Home
Making your own bread at home might seem daunting, but it’s a wonderfully rewarding experience. Follow these steps closely as we guide you through the process of making delicious bread from scratch. Let’s get started!
- Begin by placing the flour and water into a mixing bowl. Mix these ingredients for 4 minutes at low speed until they form a shaggy dough. This initial mixing helps to hydrate the flour.
- After mixing, remove the bowl from the machine and cover it with a damp cloth. This resting period is crucial as it allows the dough to relax for 1 hour.
- Once rested, add the sourdough starter, fresh yeast, and salt to the mixture. Knead the dough with the dough hook on low speed for 4 minutes, then increase to high speed for 7 minutes. The dough will become smooth and elastic.
- Transfer the dough to a lightly floured surface or a mixing bowl, and shape it into a ball. Cover it with a damp cloth again and let it rise for 1 hour and 30 minutes, until it doubles in size. You’ll notice a lovely, airy texture developing.
- After the dough has risen, dust the work surface lightly with flour. Divide the dough into 3 equal pieces for shaping.
- For each piece of dough, fold it over itself gently, stretching it into a longish log. This creates tension in the dough, which is essential for a good rise.
- Once shaped, cover the logs with a damp cloth and allow them to rest for 30 minutes. This rest is important for the gluten to relax.
- With one piece of dough, use the palm of your hand to flatten it gently. Fold the long side towards the center and press down to seal the edge.
- Turn the dough 180 degrees and repeat the folding process on the other side. Fold one half over the other and seal the edges using the heel of your hand. This is how you form the baguette shape!
- With lightly floured hands, roll the shaped dough into a 21 inches (55 cm) long baguette, pinching the ends to a point.
- Carefully lift the baguettes onto a lightly floured baker’s cloth with seams underneath. Make sure to separate them by creating folds in the cloth.
- Cover the baguettes with a damp cloth and let them proof for 1 hour and 40 minutes, allowing them to rise again.
- While the baguettes are proofing, place a baking sheet on the bottom shelf of your oven and preheat it to 450°f (230°c). This creates a steamy environment for the bread.
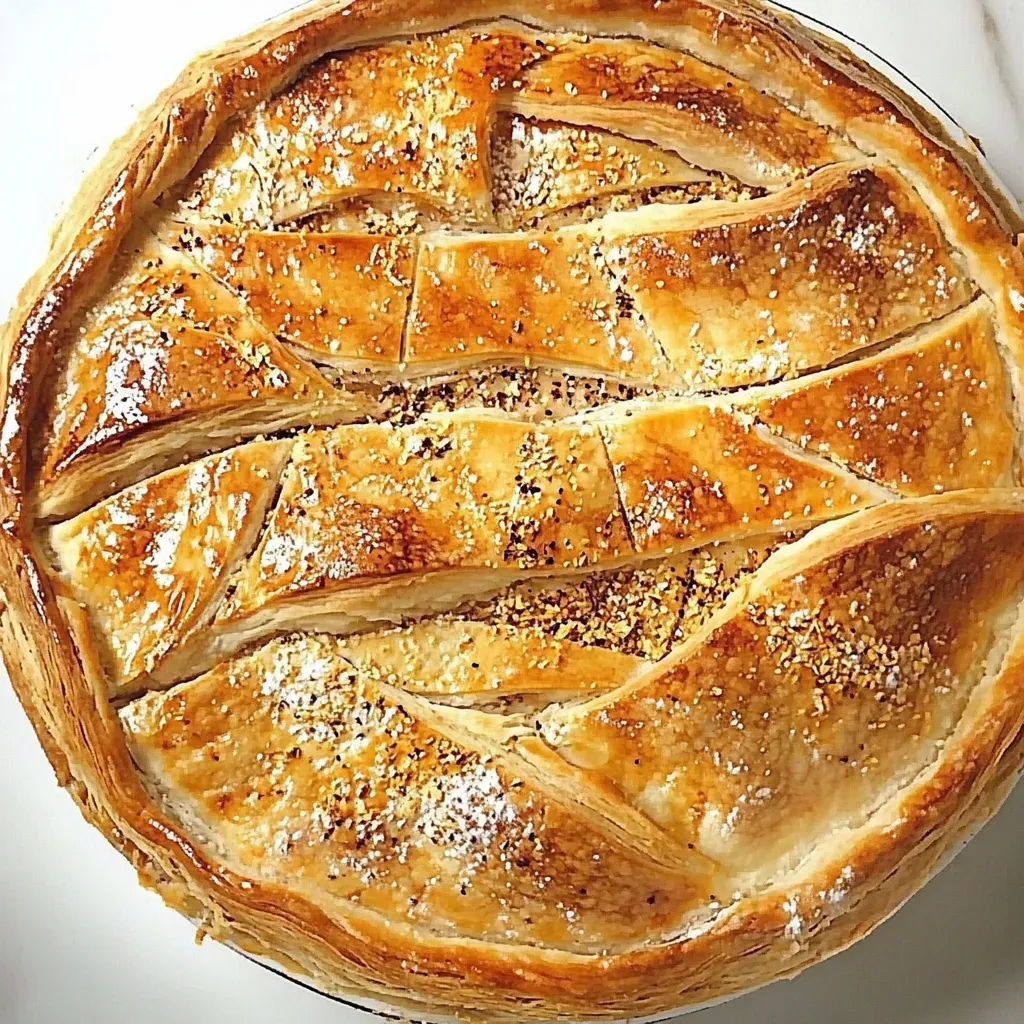
- Gently place the baguettes seam side down on another baking sheet lined with parchment paper. Dust them with flour and make 4 evenly spaced slashes along the length of each loaf.
- Just before baking, pour 50g (scant 1/4 cup) of water onto the preheated baking sheet. This will generate steam while the bread bakes, creating a crusty exterior.
- Lastly, bake the baguettes for 20 minutes until golden brown. Remove from the oven and let them cool on a wire rack, allowing the crust to crisp up.
Things Worth Knowing
- Temperature Matters: Make sure your water temperature is around 68°f (20°c) for optimal yeast activation.
- Resting is Key: Don’t rush the resting periods; they’re essential for gluten development and flavor.
- Steam for Crust: Adding steam to the oven at the start of baking gives your bread a beautiful crust.
- Kneading Technique: Knead until the dough is smooth and elastic. This will ensure a good structure in your bread.
Change It Up
There are many ways to personalize your Baking At Home experience. Here are some tips to help you adapt the recipe to your taste:
- Storage: To keep your bread fresh, store it in a paper bag at room temperature or freeze it for longer storage.
- Freezing: This bread can be frozen. Slice it first and store it in an airtight container.
- Pairing: Serve your baguette with a variety of dips, cheeses, or even as the base for a delicious sandwich.
- Flavor Variations: Consider adding herbs, seeds, or nuts to the dough for extra flavor and texture.
- Different Shapes: Experiment with different shapes – try rolls, focaccia, or even a braided loaf!
Pairing Suggestions for Baking At Home
When it comes to enjoying your freshly baked bread, the possibilities are endless. Here are some delightful pairings and occasions to consider:
- Breakfast: Enjoy your warm baguette with butter and homemade jam for a delightful start to your day.
- Lunch: Create a savory sandwich with fresh veggies and your favorite spreads to make a satisfying midday meal.
- Dinner: Serve slices alongside a hearty soup or salad, allowing the bread to soak up all the delicious flavors.
- Special Occasions: Use your freshly baked bread as a centerpiece for gatherings, serving it with cheese and charcuterie.
- Seasonal Pairing: During colder months, enjoy your bread with warm, comforting dishes like stews or casseroles.
- Storage Tips: Keep your baguette in a paper bag to maintain its crust, or freeze for longer preservation.
FAQ
Conclusion
Baking At Home offers a unique blend of tradition and creativity. It’s a chance to connect with your culinary roots and enjoy the satisfaction of creating something delicious from scratch. I encourage you to try this recipe and experience the joy of making your own bread at home. It’s a gratifying process that fills your kitchen with warmth and love, and I believe you will cherish the results.
Baking At Home
Ingredients
Equipment
Method
- Put the flour and water in the bowl and mix for 4 minutes at low speed.
- Remove the bowl from the machine and cover it with a damp cloth.
- Leave to rest for 1 hour, then add the sourdough starter, fresh yeast, and salt.
- Knead with the dough hook for 4 minutes at low speed, then for 7 minutes at high speed.
- Put the flour on a work surface or in a mixing bowl and make a large well in the center.
- Pour in two-thirds of the water and mix until all the flour has been incorporated.
- Leave to rest for 1 hour under a damp cloth, then incorporate the rest of the water, the sourdough starter, fresh yeast, and salt.
- Knead the dough until it becomes smooth and elastic.
- Shape into a ball and cover with a damp cloth.
- Let rise for 1 hour 30 minutes. It will have increased in volume by the end of the rising time.
- Dust the work surface. Divide the dough into 3 equal pieces.
- Fold each piece over on itself, pulling gently to stretch into a longish log.
- Cover with a damp cloth and leave to rest for 30 minutes.
- Working with 1 piece of dough at a time, use the palm of your hand to flatten it gently.
- With the long side facing you, fold in a third towards the center and press along the edge with your fingertips.
- Swivel the dough 180 degrees.
- Fold in the other long edge so that it overlaps in the center and press with the heel of your hand.
- Fold one half on top of the other, and seal the edges together with the heel of your hand.
- With lightly floured hands, roll the baguette out to 21 inches (55 cm) long, then pinch each end into a point.
- Shape the other 2 baguettes the same way.
- Carefully lift the baguettes onto a lightly floured baker’s cloth, seams underneath.
- Separate them by making folds in the cloth.
- Cover with a damp cloth and leave to proof for 1 hour 40 minutes, by which time the baguettes will have increased in volume.
- Place a baking sheet on the bottom shelf of the oven and preheat to 450°f (230°c).
- Gently place the baguettes, seam down, on another baking sheet lined with parchment (baking) paper.
- Dust with flour and make 4 evenly spaced oblique slashes along the length of each baguette.
- Just before putting the baguettes in the oven, pour 50 g (scant 1/4 cup) of water onto the preheated baking sheet.
- Bake for 20 minutes. Remove from the oven and leave to cool on a wire rack.
Notes
- Tip 1: To keep your bread fresh, store it in a paper bag at room temperature or freeze it for longer storage.
- Tip 2: This bread can be frozen. Slice it first and store it in an airtight container.
- Tip 3: Serve your baguette with a variety of dips, cheeses, or even as the base for a delicious sandwich.
- Tip 4: Consider adding herbs, seeds, or nuts to the dough for extra flavor and texture.
- Tip 5: Experiment with different shapes – try rolls, focaccia, or even a braided loaf!