There’s something about Honey Garlic Chicken that brings warmth to my kitchen and joy to my table. I remember the first time I tried making it; the kitchen filled with the sweet and savory aroma of honey and garlic simmering together. It was a rainy day, and I wanted something comforting yet exciting. My family gathered around as I plated the chicken, and that first bite was a moment of pure bliss. The balance of flavors in this dish is nothing short of magic, and it quickly became a weekly favorite in our home. Whether I’m making it for a casual weeknight dinner or a special gathering, Honey Garlic Chicken never fails to impress.
Recipe Snapshot
20 mins
8 mins
12 mins
Medium
400 kcal
30 g
Whole30, Gluten-Free, Low FODMAP
18 g
12-inch skillet with a lid
What We Adore About This Honey Garlic Chicken
It’s Incredibly Flavorful
One of the standout features of Honey Garlic Chicken is its flavor profile. The combination of sweet honey and savory garlic creates a dish that tantalizes your taste buds. It’s the kind of meal where every bite makes you want to come back for more.
Quick and Easy to Prepare
This recipe is perfect for busy weeknights. With minimal prep and cooking time, you can have a delicious meal on the table in no time. I love how easy it is to prepare—just a few simple steps, and you’re done!
Great for Meal Prep
If you’re someone who likes to meal prep, Honey Garlic Chicken is a fantastic option. It keeps well in the fridge and can also be frozen. You can whip up a big batch on the weekend and enjoy it throughout the week.
Kid-Friendly
Kids love this dish! The sweetness from the honey makes it appealing to little ones, while the garlic adds just the right amount of flavor. It’s a great way to introduce them to different tastes without overwhelming them.
Perfect for Any Occasion
Whether it’s a cozy family dinner or a gathering with friends, Honey Garlic Chicken fits right in. Its beautiful presentation and mouthwatering aroma will have everyone gathering around the table in no time.
Versatile Pairings
This dish pairs well with a variety of sides. From rice to steamed vegetables, you can mix and match to create the perfect meal. I love serving it with fluffy rice to soak up the delicious sauce!
Ingredient List for Honey Garlic Chicken
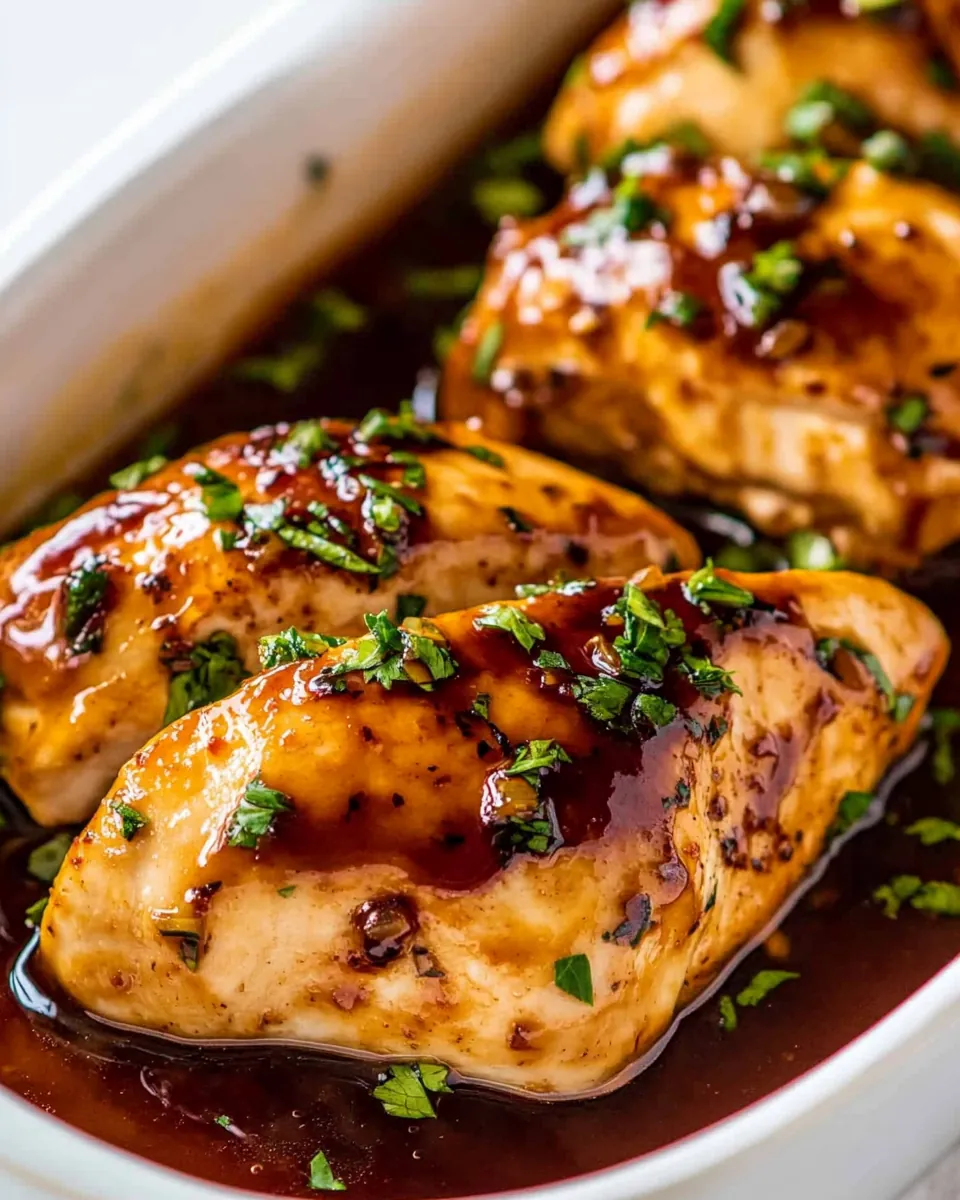
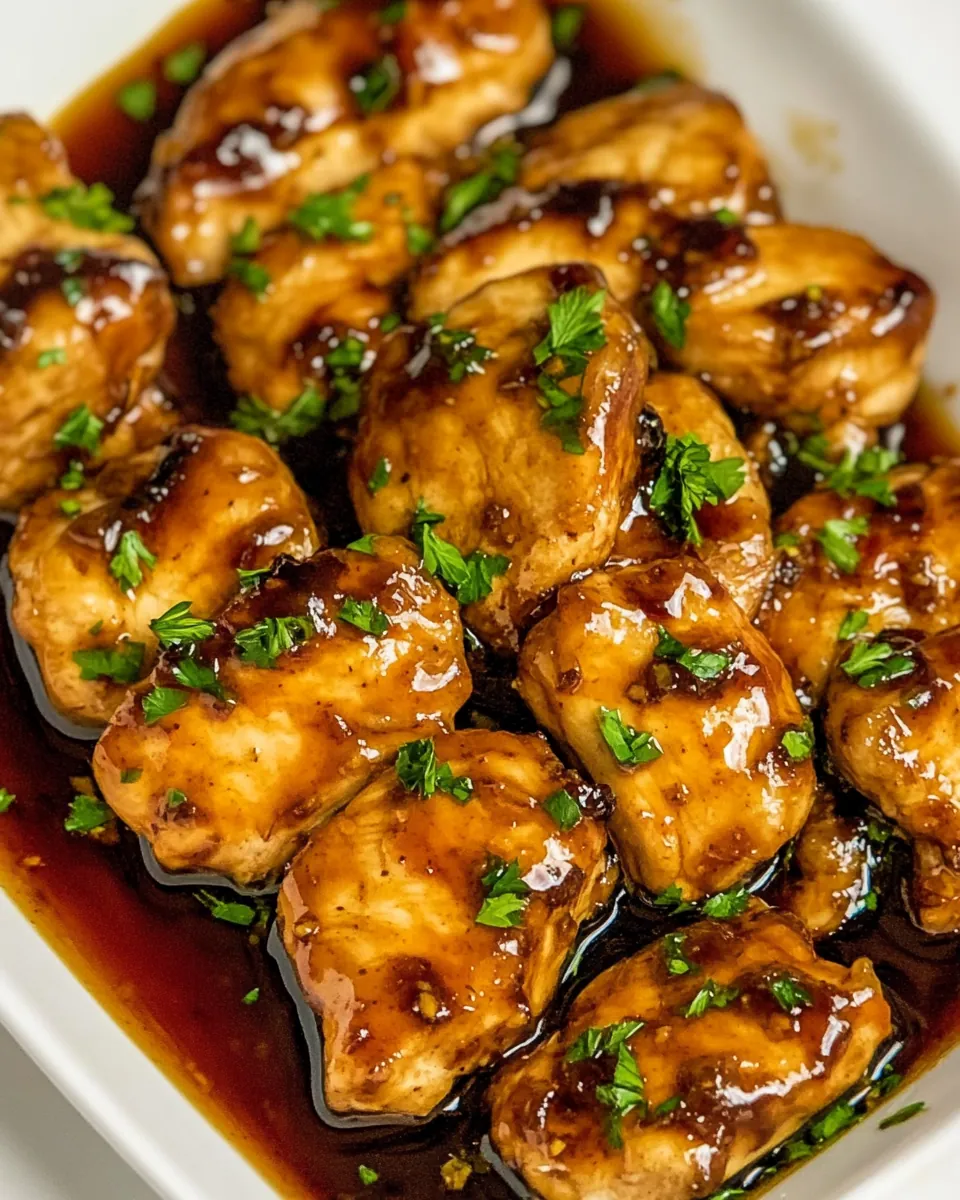
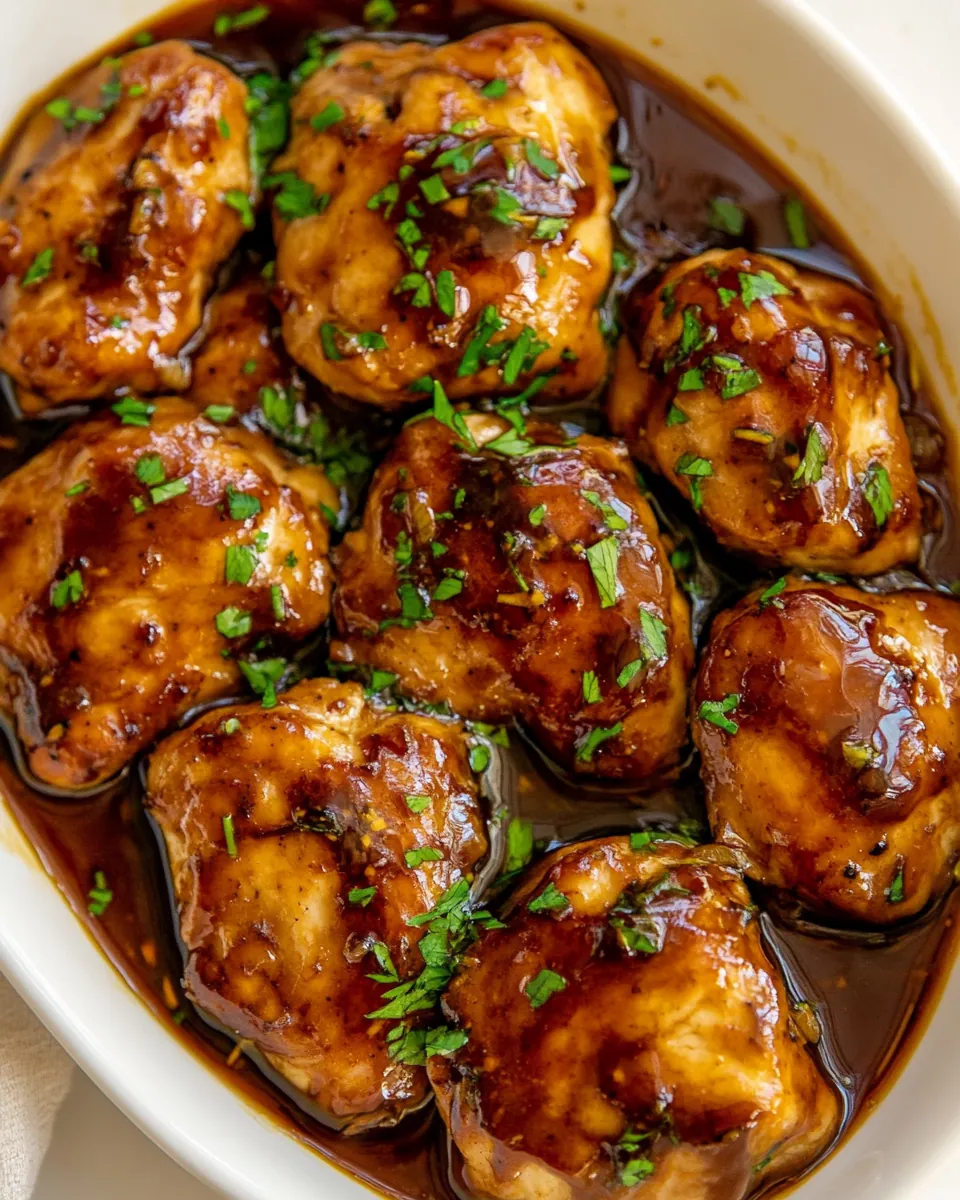
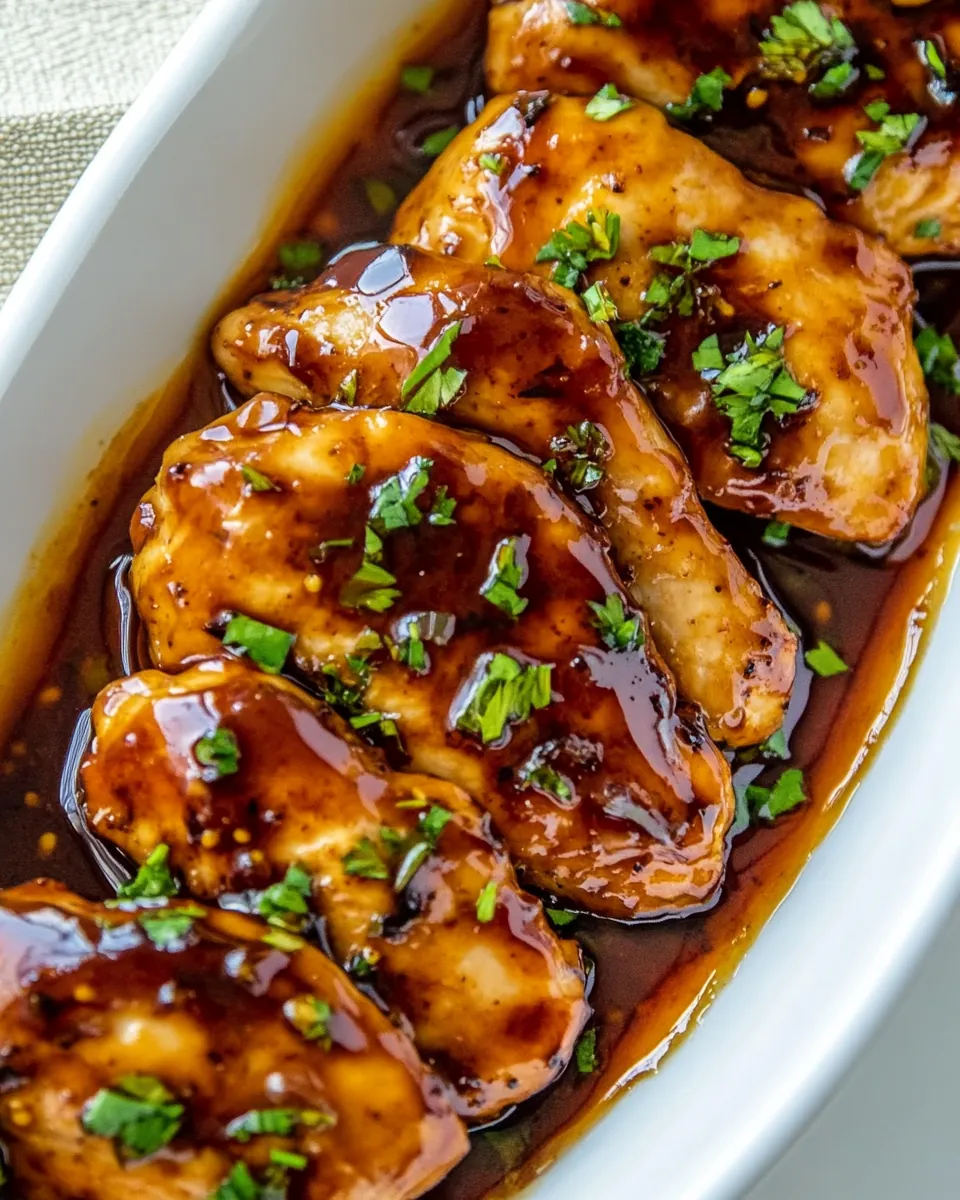
The ingredients for Honey Garlic Chicken are simple yet effective, showcasing a beautiful harmony of flavors. At the heart of this dish is the star ingredient—the chicken. Tender and juicy, it serves as the perfect canvas for the sweet and savory sauce. The honey brings a delightful sweetness, while the garlic adds depth and richness. Together, they create a dish that’s not just a meal, but an experience.
- 2 medium (about 1 to 1½ pounds) boneless, skinless chicken breasts: The main protein, juicy and tender, perfect for absorbing flavors.
- ⅓ cup (40g) all-purpose flour: Helps create a light coating for the chicken, giving it a nice texture when cooked.
- ¼ teaspoon salt: Enhances the natural flavors of the ingredients.
- 1 tablespoon extra virgin olive oil: Used for cooking the chicken, adding richness and taste.
- 1 tablespoon (14g) butter: Adds a creamy texture and flavor to the sauce.
- 3 cloves garlic, crushed or minced: Provides the signature garlic flavor that complements the sweetness of honey.
- Pinch of red pepper flakes (optional): A touch of heat to balance the sweetness, if desired.
- ⅓ cup honey: The sweet element that makes this dish irresistible.
- ¼ cup water: Helps to create the sauce’s desired consistency.
- 3 tablespoons soy sauce: Adds umami depth and saltiness to the dish.
- 2 tablespoons white vinegar: Balances the sweetness of the honey.
- 1 teaspoon cornstarch whisked with 1 tablespoon of water: Acts as a thickening agent for the sauce.
The Process for Making Honey Garlic Chicken
Making Honey Garlic Chicken is a rewarding experience that brings not only a delicious meal but also the joy of cooking into your home. You’ll find the process straightforward and enjoyable, allowing you to create something truly special. Let’s dive into the steps!
- Start by slicing each piece of chicken into two cutlets. Lay your hand on top of the chicken breast and use a sharp knife to slice horizontally through the breast, creating two thin, even pieces. This ensures they’ll cook evenly.
- In a bowl or container large enough to fit the chicken pieces, stir together the flour and salt. This mixture will help to create a light coating on the chicken as it cooks.
- Dredge each cutlet in the flour mixture until lightly coated. Shake off any excess flour—you want a thin layer that will crisp up nicely when cooked.
- In a 12-inch skillet with a lid, heat the olive oil over medium-high heat. Once the oil is hot, add the coated chicken cutlets and cook for 2 to 3 minutes until they’re well-browned. Flip them over and repeat with the second side, ensuring a nice golden color all around.
- Once browned, transfer the chicken to a plate. We’re going to make the sauce next!
- Turn the heat down to medium and add the butter to the pan. Once the butter is melted, throw in the crushed garlic and optional red pepper flakes. Cook until the garlic is lightly golden, about 1 minute. This step builds that wonderful garlic aroma.
- Next, add the honey, water, soy sauce, white vinegar, and the cornstarch/water mixture to the pan. Bring it all to a simmer, using a wooden spoon to scrape any cooked-on bits from the bottom. This is where the magic happens!
- Carefully return the browned chicken to the pan. Cover and let it cook, stirring occasionally, until the chicken is cooked through, about 5 to 8 minutes. If at any point the sauce becomes too thick, add a couple tablespoons of water to keep it from burning.
- Once the chicken is done, transfer it to a clean plate and let it rest for 5 minutes. If the sauce isn’t thick enough yet, you can simmer it uncovered while the chicken rests until it reaches your desired consistency. This gives you a chance to develop those flavors even more.
- Serve the chicken topped with the luscious sauce and a side of rice. Enjoy the explosion of flavors in your mouth!
Things Worth Knowing
- Check your Chicken: Always ensure the internal temperature of the chicken reaches 165°F (74°C) for safe consumption.
- Thickening the Sauce: If the sauce isn’t thickening as desired, mix a bit more cornstarch with cold water and add it to the pan, then simmer.
- Flavor Boost: For added depth, consider sautéing some diced onions along with the garlic at the start.
- Serving Suggestions: This dish pairs beautifully with steamed broccoli or sautéed green beans for a complete meal.
Recipe Variations about Honey Garlic Chicken
There’s always room for creativity in the kitchen! While I adore the classic version of Honey Garlic Chicken, here are some variations that can add a fun twist.
- Spicy Honey Garlic Chicken: Add more red pepper flakes or a dash of Sriracha for those who enjoy an extra kick.
- Honey Garlic Tofu: For a vegetarian option, substitute the chicken with firm tofu, following the same cooking process.
- Vegetable Stir-Fry: Toss in a variety of vegetables like bell peppers and snap peas during the last few minutes of cooking for added nutrition and color.
- Honey Garlic Shrimp: Swap the chicken for shrimp and reduce the cooking time accordingly. Shrimp cooks quickly and pairs well with the sauce.
- Sweet and Sour Variant: Incorporate pineapple chunks in the sauce for a delicious sweet and sour flavor that’s a hit among kids.
- Marinate Before Cooking: For deeper flavor, marinate the chicken in the honey and soy sauce for a couple of hours before cooking.
- Slow Cooker Version: Transform this into a slow cooker meal by layering the ingredients in a slow cooker and cooking on low for 4 to 6 hours.
Great Combinations for Honey Garlic Chicken
When it comes to serving Honey Garlic Chicken, there are plenty of delightful combinations that can elevate your meal.
- Serve with Rice: A bed of fluffy rice is perfect for soaking up the delicious sauce.
- Pair with Steamed Vegetables: Bright green veggies like broccoli or green beans complement the dish beautifully.
- Include a Salad: A light garden salad can provide a refreshing contrast to the rich flavors of the chicken.
- Perfect for Weeknight Dinners: This dish is quick to prepare, making it an ideal choice for busy nights.
- Special Occasions: Serve it during family gatherings or festive dinners to impress your guests.
- Leftover Storage: Store leftovers in an airtight container in the fridge for up to three days. Reheat gently on the stove.
- Seasonal Pairings: In spring, serve with asparagus; in fall, consider roasted root vegetables for a seasonal touch.
FAQ
Conclusion
Honey Garlic Chicken is a delightful dish that perfectly balances sweet and savory flavors, making it a true crowd-pleaser. The ease of preparation and delicious taste make it an excellent choice for both busy weeknights and special gatherings. I encourage you to try it; your family and friends will be begging for seconds! Cooking this dish will not only satisfy your dinner cravings but also bring joy and warmth to your table.
Honey Garlic Chicken
Ingredients
Equipment
Method
- Slice each piece of chicken into 2 cutlets by placing your hand on top of the chicken breast and running a sharp knife horizontally through the breast, slicing the top and bottom into two thin, even pieces.
- In a bowl or container large enough to fit a chicken breast, stir together flour and salt. Dredge each chicken breast piece in the mixture until lightly coated.
- In a 12-inch skillet with a lid, heat olive oil over medium-high heat. Once hot, add chicken breasts and cook until well-browned, 2-3 minutes. Flip and repeat with the second side. Transfer chicken breasts to a plate.
- Turn heat down to medium and add the butter to the pan. Once the butter is melted, add garlic and optional red pepper flakes and cook until garlic is lightly golden, about 1 minute.
- Add honey, water, soy sauce, vinegar, and cornstarch/water mixture and bring to a simmer, using a wooden spoon to scrape any cooked-on bits from the bottom of the pan. Carefully add chicken back to the pan. Cover and cook, stirring occasionally, until chicken is cooked through, 5 to 8 minutes. If at any point the sauce becomes too thick and looks like it might burn, add a couple tablespoons of water to the pan.
- Transfer chicken breasts to a clean plate and allow them to rest for 5 minutes. If sauce is not quite thick enough, you can allow it to continue simmering uncovered while your chicken rests until it reaches your desired consistency.
- Serve the chicken topped with the sauce and a side of rice.
Notes
- Storage: Store leftovers in an airtight container in the fridge for up to three days. Reheat gently on the stove.
- Freezing: This dish can be frozen. Just make sure to store it in a freezer-safe container and consume within three months.
- Pairing: This dish pairs wonderfully with a variety of sides like steamed vegetables or fluffy rice.
- Marination: Consider marinating the chicken in the honey and soy sauce for a couple of hours for deeper flavor.
- Leftover Ideas: Use leftovers in salads or sandwiches for a tasty twist!