When I think of comfort food, my mind instantly drifts to Baked Chicken. It’s not just a meal; it’s a memory wrapped in golden, crispy skin, the aroma wafting through the kitchen, beckoning everyone to the table. I remember the first time I tried making it on a chilly evening, craving something warm and hearty. The anticipation of that first bite, where the tender, juicy chicken met my taste buds, was indescribable. It was a simple dish, yet it felt special. That’s the magic of Baked Chicken—it transforms an ordinary day into something memorable.
Recipe Snapshot
35 mins
5 mins
30 mins
Medium
250 kcal
46 g
Keto, Paleo, Whole30
7 g
Baking Sheet, Frying Pan, Oven
Why Try This Baked Chicken
It’s Incredibly Easy
One of the best parts about Baked Chicken is its simplicity. You don’t need to be a gourmet chef to whip up a delicious meal. With just a few ingredients, you can create a flavorful dish that impresses family and friends. It’s a perfect choice for those busy weeknights or when you’re just not sure what to make.
Versatile Flavoring
The flavor combinations are endless! Whether you prefer a classic seasoning mix or something more adventurous, Baked Chicken can adapt to any palate. You can experiment with different herbs, spices, and marinades, making each batch unique. The ability to switch it up keeps this dish from becoming monotonous.
Health Benefits
Chicken is a fantastic source of lean protein, making Baked Chicken a healthy meal option. When baked, rather than fried, it helps to retain its nutrients without adding unnecessary fats. You can enjoy a satisfying meal while staying mindful of your dietary choices.
Leftovers for Days
One of my favorite things about making Baked Chicken is the leftovers! The flavors tend to deepen after a day in the fridge, making the next day’s meal even better. You can use the chicken in salads, sandwiches, or even stir-fries, making it a versatile addition to your weekly meal prep.
Perfect for Any Occasion
Whether you’re hosting a family dinner or just craving a cozy night in, Baked Chicken fits any occasion perfectly. It’s comforting and satisfying and sure to be a crowd-pleaser at any gathering. Serve it alongside your favorite sides for a complete meal that feels special.
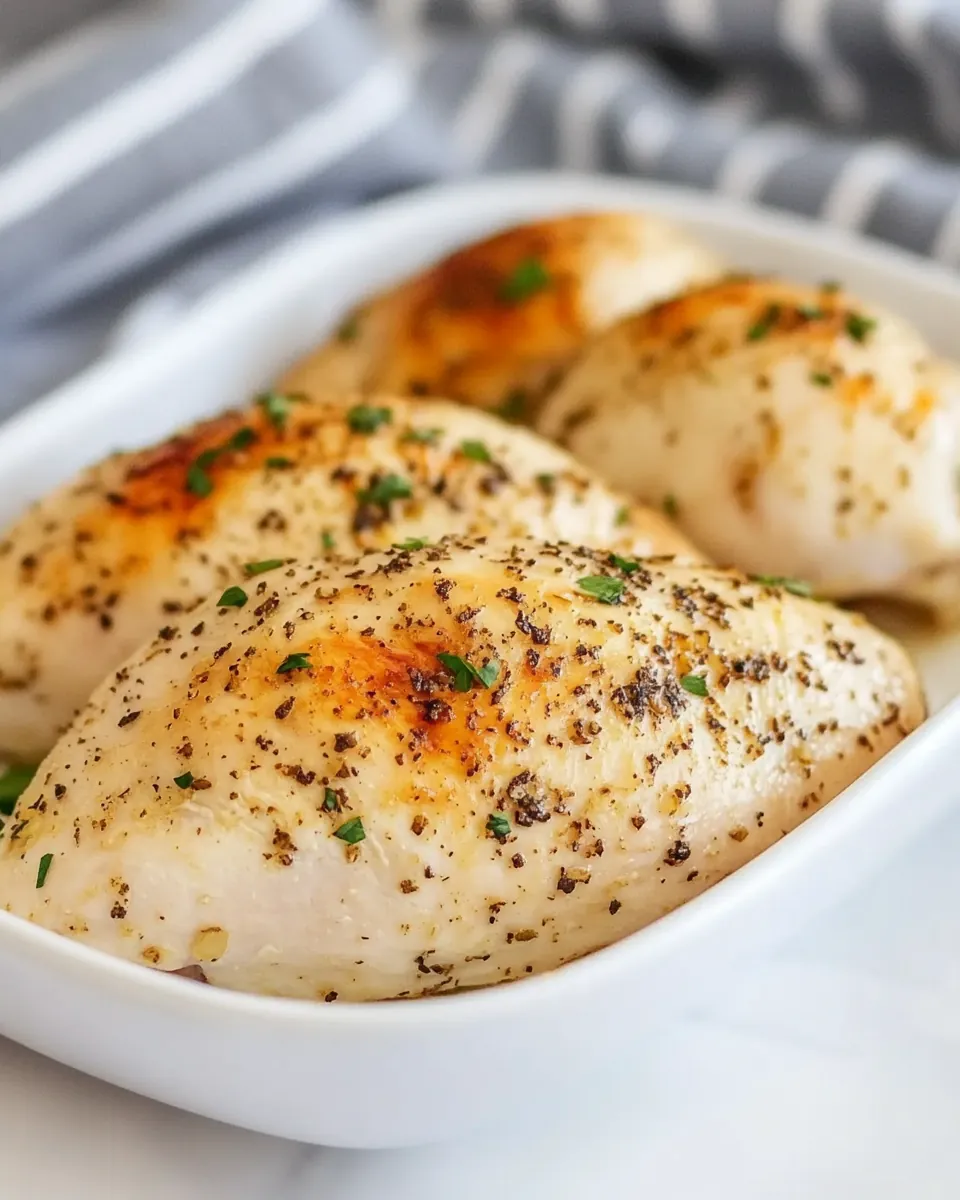
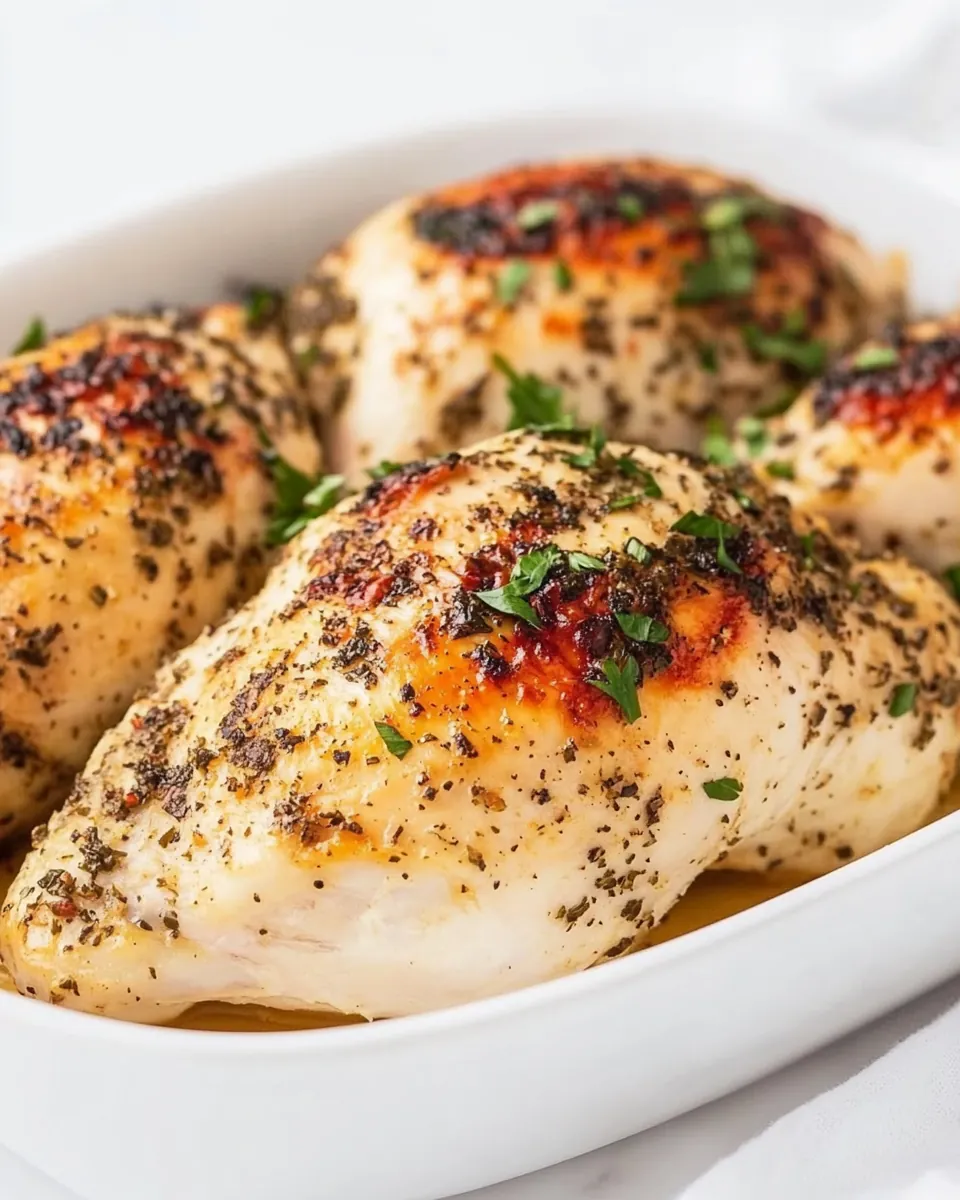
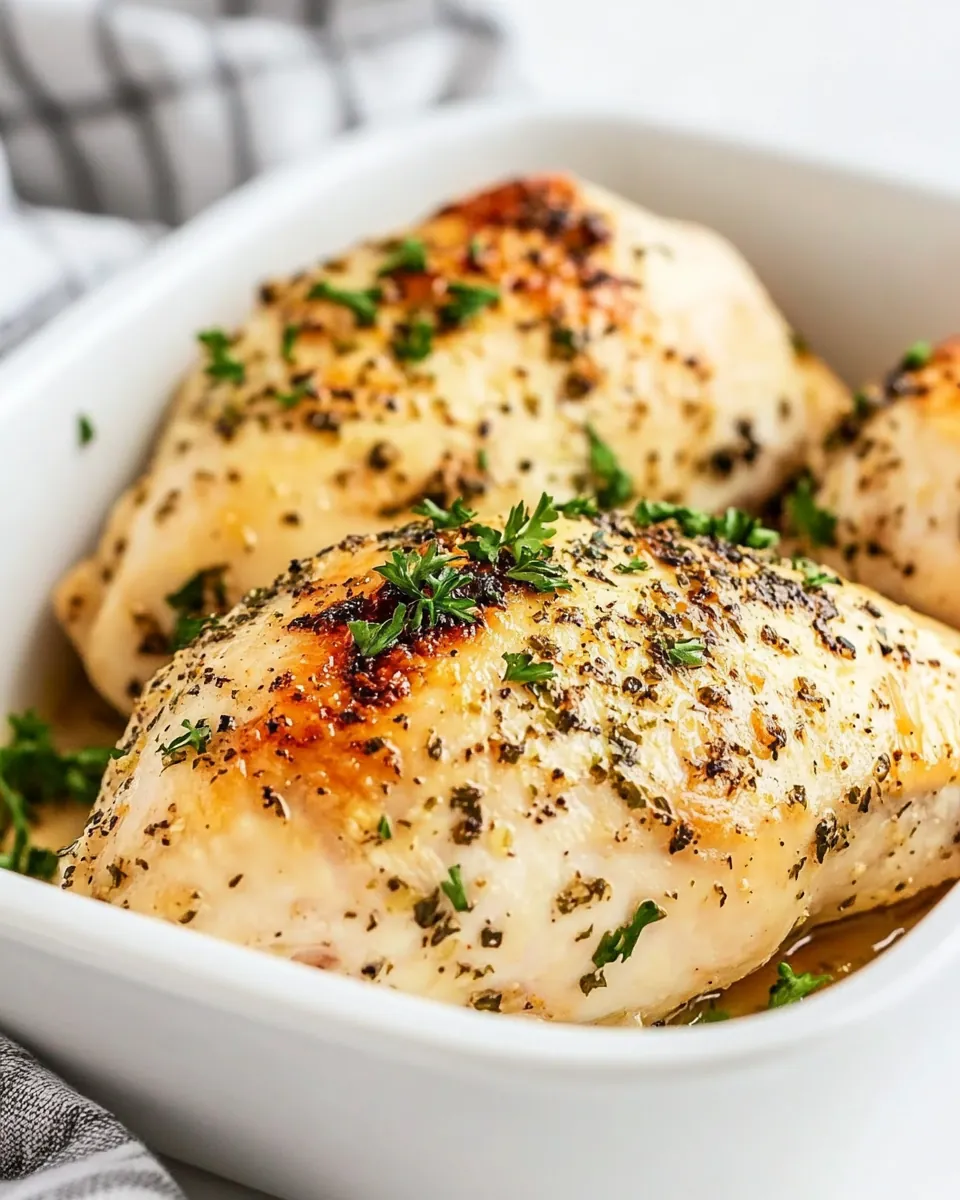
Baked Chicken Ingredients

Understanding the ingredients is key to mastering the art of Baked Chicken. The beauty of this dish lies in its simplicity, using just a few core ingredients that work together harmoniously. From the juicy, tender chicken to the aromatic seasonings, each component plays a vital role in elevating the dish.
- 4 chicken breasts
- 1-2 tablespoons olive oil
- 1 teaspoon garlic salt, with parsley flakes
- ½ teaspoon pepper
- ½ teaspoon Italian seasoning
Making Baked Chicken
Making Baked Chicken is a straightforward process that yields delightful results. Let’s dive into the steps to create this dish. You’ll enjoy the journey, from preheating the oven to savoring that first bite.
- First, preheat your oven to 450°F (232°C). This high temperature ensures that the chicken cooks evenly while providing a nice, crispy exterior. Your kitchen will soon fill with the mouthwatering aroma of roasting chicken!
- Next, take the chicken breasts and place them in a bowl. Drizzle the olive oil over the chicken, coating each piece generously. The oil not only adds flavor but also helps keep the chicken moist during baking.
- Now it’s time to season! Sprinkle the garlic salt, pepper, and Italian seasoning over the chicken. Don’t be shy—make sure each piece is well-coated. This seasoning blend will infuse the chicken with a delicious taste that enhances its natural flavor.
- Once seasoned, transfer the chicken breasts to a greased sheet pan. If you’d like, you can line it with foil for easy cleanup. Spacing the chicken out properly allows it to roast evenly, giving you that perfect texture.
- Now, slide the pan into your preheated oven and bake for 16 to 20 minutes. You’ll know it’s done when the juices run clear, and the thickest part of the chicken reaches at least 165°F (74°C) on a meat thermometer. This step is crucial for ensuring your chicken is fully cooked.
- If you crave a little extra crispiness, you can broil the chicken for an additional 2 to 3 minutes at the end of the baking time. This will give the chicken a beautiful golden finish that’s hard to resist!
- Once out of the oven, let the chicken rest for a few minutes. This allows the juices to redistribute throughout the meat, ensuring it remains tender and juicy when you slice or cube it. Trust me, the wait is worth it!
- After resting, slice the chicken or cube it as desired. Serve it hot, and enjoy the fruits of your labor!
Things Worth Knowing
- Resting Time: Letting the chicken rest after baking allows the juices to redistribute, resulting in a moist and tender bite.
- Use a Meat Thermometer: To ensure your chicken is cooked perfectly, always check the temperature at the thickest part. Aim for at least 165°F (74°C).
- Season Generously: Don’t skimp on the seasoning! It enhances the natural flavors of the chicken and brings your dish to life.
- Batch Cooking: Consider making extra chicken to use in different recipes throughout the week. It’s a great time saver!
Tips and Variations
If you’re looking to elevate your Baked Chicken, here are some essential tips and variations to consider:
- Storage: Store leftover Baked Chicken in an airtight container in the fridge for up to four days. Reheat in the oven or microwave until warmed through.
- Freezing: You can freeze the baked chicken. Make sure it’s well-wrapped to prevent freezer burn, and it can last for up to three months.
- Pairing: This chicken pairs beautifully with roasted vegetables or a fresh salad. Think about serving it with garlic mashed potatoes or quinoa for a complete meal.
- Marinade: For added flavor, marinate the chicken in your favorite spices or a homemade marinade for a few hours before baking.
- Herb Variations: Experiment with different herbs like rosemary, thyme, or paprika to change up the flavor profile of your chicken.
- Citrus Boost: Add a splash of lemon or lime juice before baking for a refreshing twist that brightens the dish.
- Stuffing: Consider stuffing your chicken breasts with spinach and cheese for an indulgent, flavorful alternative.
Serve This Baked Chicken With
Serving Baked Chicken can be just as enjoyable as preparing it. Here are some fantastic ideas to complement your meal:
- Seasonal Vegetables: Pair your chicken with a medley of roasted seasonal vegetables such as carrots, zucchini, and bell peppers for a beautiful plate.
- Herbed Rice: Serve it over a bed of herbed rice or pilaf to soak up the juices and flavors from the chicken.
- Fresh Salad: A crisp garden salad with vinaigrette makes a perfect side, providing a refreshing balance to the warm chicken.
- Potato Dishes: Creamy mashed potatoes or garlic roasted potatoes can be an excellent side to complement the chicken.
- Pasta Dishes: You can serve it with a light pasta dish, such as angel hair tossed with olive oil and lemon zest.
- Sandwiches: Use leftover chicken to create hearty sandwiches with your favorite toppings, perfect for lunch!
- Occasional Pairings: Think about serving this dish for dinner parties, family gatherings, or even a cozy meal during the colder months.
FAQ
Conclusion
In conclusion, Baked Chicken is a simple yet satisfying dish that can easily become a staple in your kitchen. With its juicy, tender meat and endless flavor possibilities, it is a delightful option for any meal. I encourage you to try making it soon and experience the comfort and warmth it brings to the table. Don’t hesitate to experiment with your favorite seasonings and sides to make it your own!
Baked Chicken
Ingredients
Equipment
Method
- First, preheat your oven to 450°F (232°C). This high temperature ensures that the chicken cooks evenly while providing a nice, crispy exterior. Your kitchen will soon fill with the mouthwatering aroma of roasting chicken!
- Next, take the chicken breasts and place them in a bowl. Drizzle the olive oil over the chicken, coating each piece generously. The oil not only adds flavor but also helps keep the chicken moist during baking.
- Now it’s time to season! Sprinkle the garlic salt, pepper, and Italian seasoning over the chicken. Don't be shy—make sure each piece is well-coated. This seasoning blend will infuse the chicken with a delicious taste that enhances its natural flavor.
- Once seasoned, transfer the chicken breasts to a greased sheet pan. If you’d like, you can line it with foil for easy cleanup. Spacing the chicken out properly allows it to roast evenly, giving you that perfect texture.
- Now, slide the pan into your preheated oven and bake for 16 to 20 minutes. You’ll know it’s done when the juices run clear, and the thickest part of the chicken reaches at least 165°F (74°C) on a meat thermometer. This step is crucial for ensuring your chicken is fully cooked.
- If you crave a little extra crispiness, you can broil the chicken for an additional 2 to 3 minutes at the end of the baking time. This will give the chicken a beautiful golden finish that’s hard to resist!
- Once out of the oven, let the chicken rest for a few minutes. This allows the juices to redistribute throughout the meat, ensuring it remains tender and juicy when you slice or cube it. Trust me, the wait is worth it!
- After resting, slice the chicken or cube it as desired. Serve it hot, and enjoy the fruits of your labor!
Notes
- Tip 1: You can use a meat mallet or rolling pin to pound the chicken so that it has an even thickness throughout, about ½-¾ inch thickness.
- Tip 2: To avoid dry chicken coat the chicken in olive oil which creates a barrier that helps retain moisture, and, of course, do not overbake it.
- Tip 3: Let the chicken rest for 10-15 minutes before slicing or cubing so the juices can be distributed evenly through the breast.
- Tip 4: Bake up a large batch and freeze it to use in recipes.