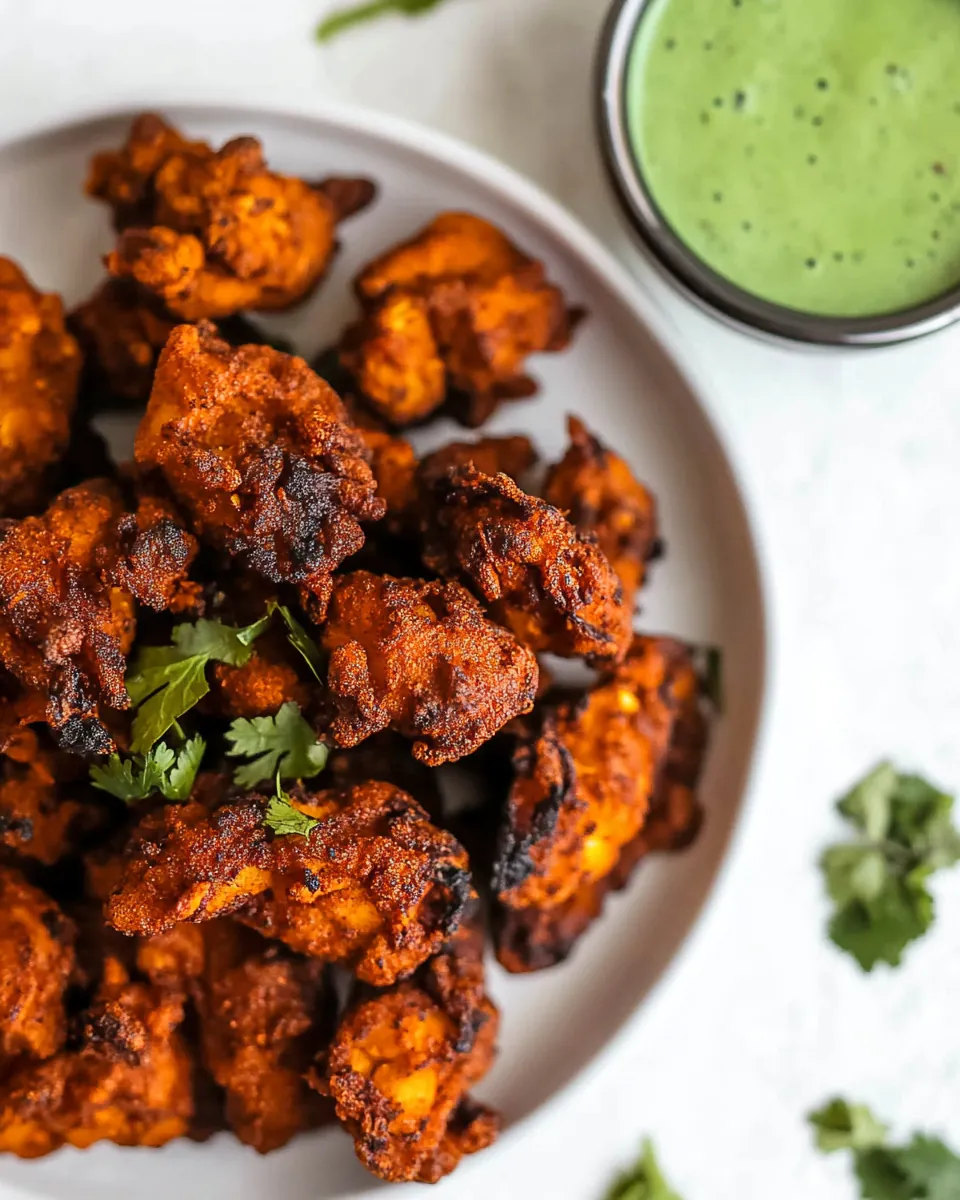
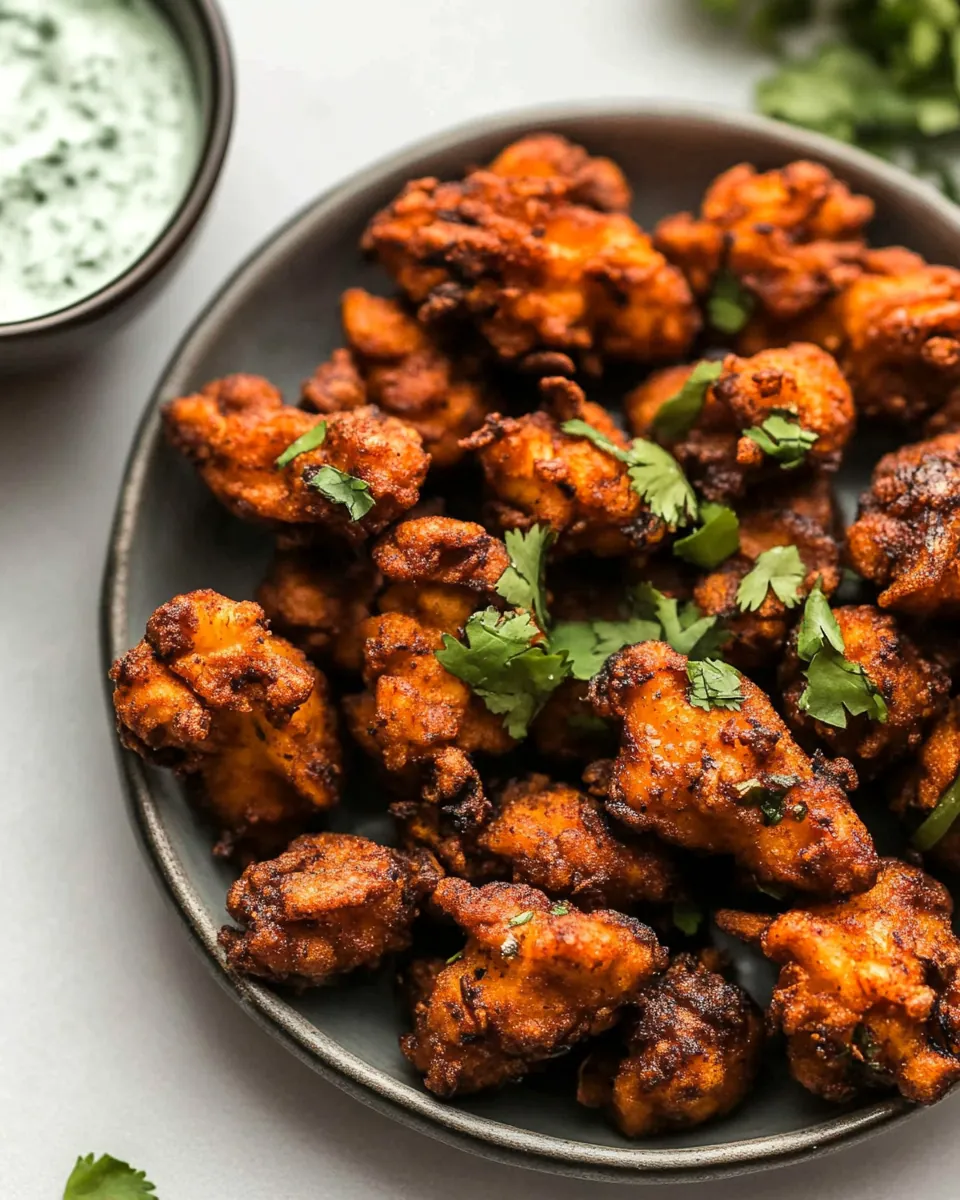
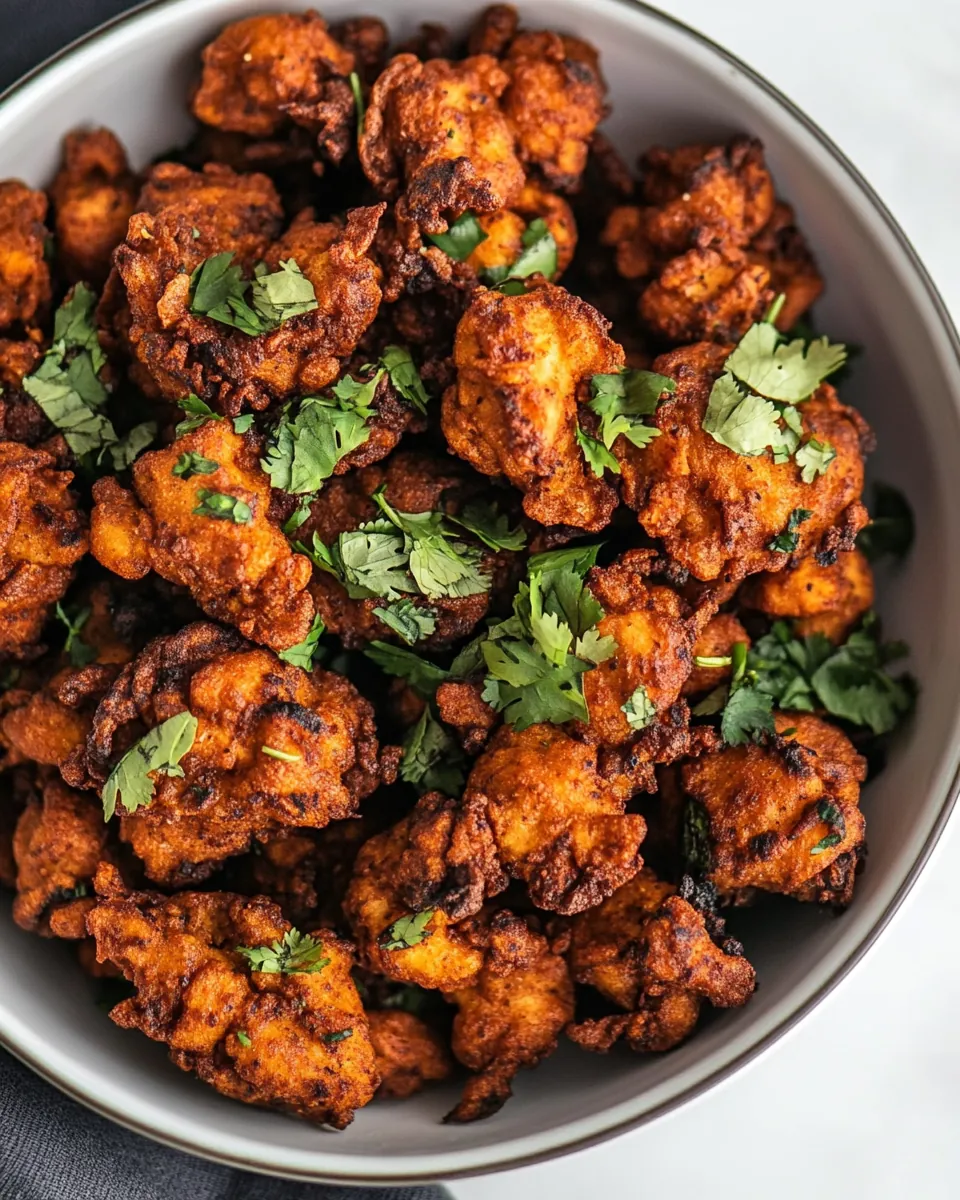
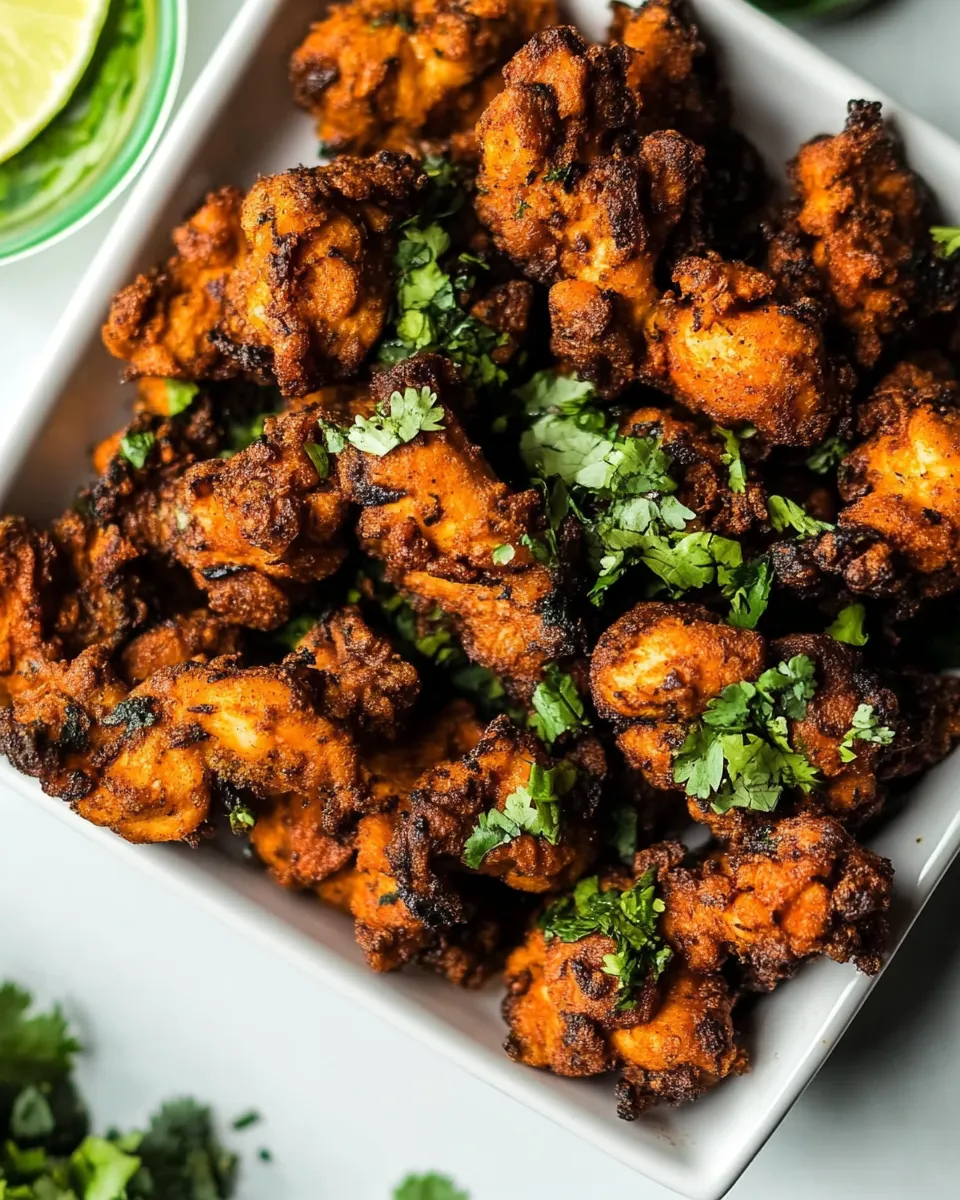
Whenever I’m in the mood for a snack that truly satisfies, I turn to Easy Chicken Pakora. This dish has been a staple in my kitchen for years, reminding me of festive family gatherings and lively evenings with friends. The crunch of each pakora paired with a spicy dipping sauce is something I crave often, and it never fails to impress anyone who tries it. I still remember the first time I made them, the aroma of the spices filling my home, making everyone eagerly await the first bite. The beauty of Easy Chicken Pakora lies in its simplicity and flavor; it’s not just food, it’s an experience. Whether it’s game night or just a cozy evening at home, these bite-sized delights are always a hit.
Recipe Snapshot
32 mins
20 mins
12 mins
Medium
320 kcal
25 g
Gluten-Free
15 g
Chef’s Knife, Mixing Bowl, Skillet, Blender
The Appeal of This Easy Chicken Pakora
Perfect Crunch
The texture of Easy Chicken Pakora is what truly sets it apart. The chickpea flour coating gets wonderfully crispy, while the chicken inside remains juicy and tender. Each bite gives you that satisfying crunch that makes it hard to stop at just one!
Spices that Sing
What I love most about this dish is the medley of spices that come together to create a flavor explosion. From the earthy tones of ground cumin to the warm heat of kashmiri chile, each spice complements the others perfectly. It’s like a little dance of flavors on your palate, making every bite exciting.
Versatile Dipping Sauces
Pairing Easy Chicken Pakora with the right dipping sauces elevates the dish even further. The coolness of a yogurt raita balances the spices beautifully, while a tangy green chutney adds a fresh kick. You can even mix and match, creating a dipping station that caters to everyone’s taste!
Make Ahead Convenience
Another reason I adore Easy Chicken Pakora is its make-ahead potential. You can prepare the chicken and marinate it a day in advance, making it perfect for entertaining. Just fry them up right before your guests arrive for that fresh-out-of-the-oil experience.
Gluten-Free Goodness
This dish is also a great option for those following a gluten-free diet. Since it’s made with chickpea flour instead of wheat, everyone can enjoy it without worry. It’s a great way to ensure that all your guests feel included during meal times.
All-Year Enjoyment
Lastly, Easy Chicken Pakora is a dish that can be enjoyed year-round. Whether it’s a summer barbecue or a cozy winter gathering, these pakoras will always find their way to the table. They are the ultimate comfort food that brings people together, no matter the season.
Easy Chicken Pakora Shopping List
The ingredients for Easy Chicken Pakora are not only accessible but also bring a balance of flavors and textures that work harmoniously together. At the heart of this recipe is chicken, which serves as the protein base. The chickpea flour provides the perfect coating that gives these pakoras their signature crunch while being gluten-free. Fresh herbs like cilantro and mint add vibrancy, while the spices layer on complexity and warmth. Together, they create a winning combination that’s sure to impress.
- 1.25 pounds chicken breast (cut into 1 inch pieces) – Tender and juicy, it’s the main ingredient that absorbs all the wonderful spices.
- 2 teaspoons salt – Essential for enhancing the flavors of the chicken and spices.
- 2 teaspoons ground cumin – Adds a warm, earthy flavor that complements the chicken beautifully.
- 1 1/2 teaspoons ground kashmiri chile (or 1 tsp paprika + 1/2 tsp cayenne) – Provides a mild heat and gorgeous color to the dish.
- 1 teaspoon garlic powder – A must-have for that aromatic flavor that pairs well with chicken.
- 1 teaspoon onion powder – Enhances the overall savory profile of the dish.
- 1 teaspoon garam masala – A blend of spices that adds depth and warmth.
- 1 teaspoon ground ginger – Offers a slight spiciness and warmth that balances the dish.
- 1/2 teaspoon ground turmeric – Not only adds color but also a subtle earthiness.
- 2 egg whites – Helps bind the coating to the chicken for that perfect crunch.
- 1/3 cup fresh lemon juice – Brightens up the flavors and adds acidity.
- 1/4 cup chopped cilantro – Fresh and aromatic, it elevates the dish.
- 1 cup chickpea flour (gram or besan flour) – The gluten-free coating that makes these pakoras so special.
- oil for frying (I like peanut oil for this recipe) – Necessary for frying, giving the pakoras their crispy texture.
- 1 cup plain greek-style yogurt – Creamy and rich, perfect for dipping.
- 1/4 cup chopped onion – Adds crunch and flavor to the dipping sauce.
- 2 tablespoons lemon juice – Adds acidity to balance the richness of the yogurt.
- 1-2 tablespoons granulated sugar – A hint of sweetness to offset the spices.
- 1 tablespoon chopped cilantro – Freshness for the dipping sauce.
- 1/4 teaspoon salt – Enhances the flavor of the sauce.
- 1/4 teaspoon ground cumin – Complements the yogurt with its warm flavor.
- 1 large bunch cilantro (stems and leaves) – The star of the green chutney!
- 1/4 cup chopped onion – Adds crunch and flavor to the chutney.
- 3 tablespoons fresh mint leaves – Adds a refreshing layer to the chutney.
- 3 tablespoons fresh lemon juice – Brightens up the chutney.
- 3 tablespoons plain greek-style yogurt – Adds creaminess to the green chutney.
- 1/2 – 1 whole serrano pepper (stem removed) – For a spicy kick!
- 2 cloves garlic – Aromatic base for the chutney.
- 1 inch piece fresh ginger – Adds warmth and spiciness to the chutney.
- 1/4 teaspoon salt – Essential for enhancing the flavors of the chutney.
Directions for Easy Chicken Pakora
Cooking Easy Chicken Pakora is a fun and rewarding process. You’ll love how the aroma fills your kitchen as you prepare this delicious dish. Let’s dive into the steps to create these crispy delights!
Marinate the Chicken Pakora: Start by setting out a large mixing bowl. Add the chicken pieces, salt, all the spices, egg whites, lemon juice, and cilantro. Use your hands to mix everything together, ensuring that the chicken is well coated. Let this mixture sit for at least ten minutes to allow the flavors to meld. If you’re sensitive to spice, you can reduce the amount of kashmiri chile to half a teaspoon.
Heat the Oil: While the chicken marinates, set a large saucepot over medium heat. Attach a cooking thermometer to the side of the pot for accuracy. Pour in one and a half to two inches of high-heat cooking oil, such as peanut oil, and wait until the temperature rises to between 350 and 360 degrees Fahrenheit. It’s important to maintain this temperature for perfect frying.
Make the Dipping Sauces: As the oil heats, prepare your dipping sauces. Start with the Raita by placing all the ingredients in a blender. Begin with one tablespoon of sugar, adding more to taste later. Blend until smooth and pour it into a bowl, then refrigerate it until you’re ready to serve. Next, add all the Green Chutney ingredients into the blender. No need to wash the jar between sauces. Blend until smooth as well, adding a quarter cup of water to help it mix. Set this aside for serving.
Prep the Chicken for Frying: When the oil reaches the desired temperature, take the marinated chicken and mix in the chickpea flour thoroughly. This will help create that signature crispy coating. You may need to add a quarter to a third cup of water to adjust the batter’s thickness. Be cautious not to add too much; it should be thick enough to adhere well to the chicken.
Fry the Chicken: Prepare a holding plate lined with paper towels to catch the excess oil. Working in small batches of three to four pieces, carefully drop the coated chicken into the hot oil, one at a time. Use a spider skimmer to flip each piece gently to prevent sticking. Fry for about three to four minutes or until each piece turns a rich golden-brown color. Once done, transfer the chicken pakora to the prepared plate and repeat the process for the remaining batches.
Serve Warm: Enjoy your Easy Chicken Pakora warm, served with both the yogurt Raita and green chutney on the side. They make for an irresistible snack or appetizer that’s sure to impress your guests!
Things Worth Knowing
- Maintain Oil Temperature: Keeping the oil at the right temperature is crucial for achieving that perfect crispy texture. Too low, and the pakoras will absorb oil; too high, and they’ll burn quickly.
- Use Fresh Ingredients: Always opt for fresh herbs and spices to enhance the flavor of your pakoras. Freshness leads to a more vibrant and aromatic dish.
- Batter Consistency: The batter should be thick enough to coat the chicken evenly. Adjust with water carefully to get the right consistency.
- Don’t Overcrowd the Pot: Fry in small batches to maintain the oil temperature and ensure that each piece cooks evenly.
Customization Ideas
There are many ways to customize Easy Chicken Pakora. Here are some ideas to make it your own!
- Spice Level: Adjust the heat according to your taste. If you prefer it milder, reduce the amount of kashmiri chile or omit the serrano pepper in the chutney.
- Vegetarian Option: Substitute the chicken with firm vegetables like cauliflower or paneer for a delicious vegetarian version.
- Herbs Variation: Experiment with different herbs in the batter; parsley or basil can provide interesting flavors.
- Experiment with Flours: If desired, you can combine chickpea flour with a bit of rice flour for an extra crispy texture.
- Mix and Match Dips: Serve with a variety of dips such as spicy mayo, sweet chili sauce, or even a mango chutney for a twist.
- Make a Meal: Serve the chicken pakora in pita bread or wraps with fresh veggies for a satisfying meal.
- Garnish: Top your pakoras with a sprinkle of chopped cilantro or pomegranate seeds for a burst of color and flavor.
What to Serve With Easy Chicken Pakora
When it comes to serving Easy Chicken Pakora, the options are endless!
- Crispy Salad: A fresh salad with crunchy vegetables like cucumbers and radishes balances the richness of the pakoras.
- Rice Dishes: Serve with fragrant basmati rice or a flavorful pilaf for a complete meal.
- Perfect for Gatherings: These pakoras are great for parties, movie nights, or even as an elegant appetizer at dinner.
- Seasonal Pairings: In summer, enjoy them with a refreshing beverage; in winter, pair with a warm soup.
- Storage Tips: Store any leftovers in an airtight container in the fridge. They can be reheated in the oven to retain their crispiness.
- Great for Meal Prep: Make a big batch and freeze them for quick snacks on busy days.
- Festive Occasions: Perfect for celebrations like Ramadan or Diwali, bringing people together with delicious flavors.
FAQ
Conclusion
Easy Chicken Pakora is a dish that brings comfort and joy to any gathering. Its crispy exterior and flavorful filling make it a snack everyone loves. I encourage you to try making it tonight and experience the deliciousness for yourself!
Easy Chicken Pakora
Ingredients
Equipment
Method
- Marinate the Chicken Pakora: Set out a large mixing bowl. Add the chicken pieces, salt, all spices, egg whites, lemon juice, and cilantro. Mix well to coat and set aside for at least 10 minutes. (If you are sensitive to spice, use only 1/2 – 1 teaspoon kashmiri chile.)
- Meanwhile, set a large saucepot over medium heat. Add a cooking thermometer to the side of the pot. Then pour in 1 1/2 – 2 inches of high-heat cooking oil. Wait until the temperature rises to 350-360 degrees F.
- Make the dipping sauces: Set out a blender. Starting with the Raita, place all the ingredients in the blender. (Start with 1 tablespoon of sugar, then add more if needed.) Cover and puree until smooth. Pour the Raita in a bowl and refrigerate until ready to use.
- Next, add all the Green Chutney ingredients to the blender. (No need to wash the blender jar in between.) Add the entire bunch of cilantro, stems and all. If you are sensitive to spice, use only half of the serrano pepper and remove the seeds. Pour in 1/4 cup water. Cover and puree until smooth. Pour the green chutney into a bowl and set aside.
- Prep the Chicken for Frying: When the oil is close to 350-360 degrees F, use a spoon to mix the chickpea flour into the chicken and marinade. Mix well. Then mix in 1/4 – 1/3 cup water to loosen the batter. Be careful not to add too much water. It should be thick and pasty, so it sticks to the chicken well.
- Fry The Chicken: Set out a holding plate lined with paper towels. Working in 3-4 small batches, carefully drop the coated chicken pieces in the hot oil, one at a time. Use a spider skimmer to immediately flip each piece over so it doesn't stick to the bottom of the pot. Once you have at least a quarter of the chicken in the pot, fry the chicken pakora for 3-4 minutes until it reaches a rich golden-brown color. Use the skimmer to move the chicken pakora to the holding plate. Then repeat with the remaining batches.
- Serve warm with both dipping sauces on the side.
Notes
- Make Ahead: Chicken Pakora is actually pretty amazing as a leftover. You can make and rewarm in the oven 1-2 days in advance.
- If you want to make it an hour or two before serving: you can turn the oven on the lowest heat (usually around 175-200) and place the chicken in the oven to keep it warm and crisp.
- Gluten-Free: Because chicken pakora is made with chickpea flour, instead of wheat flour, this recipe is completely gluten-free.