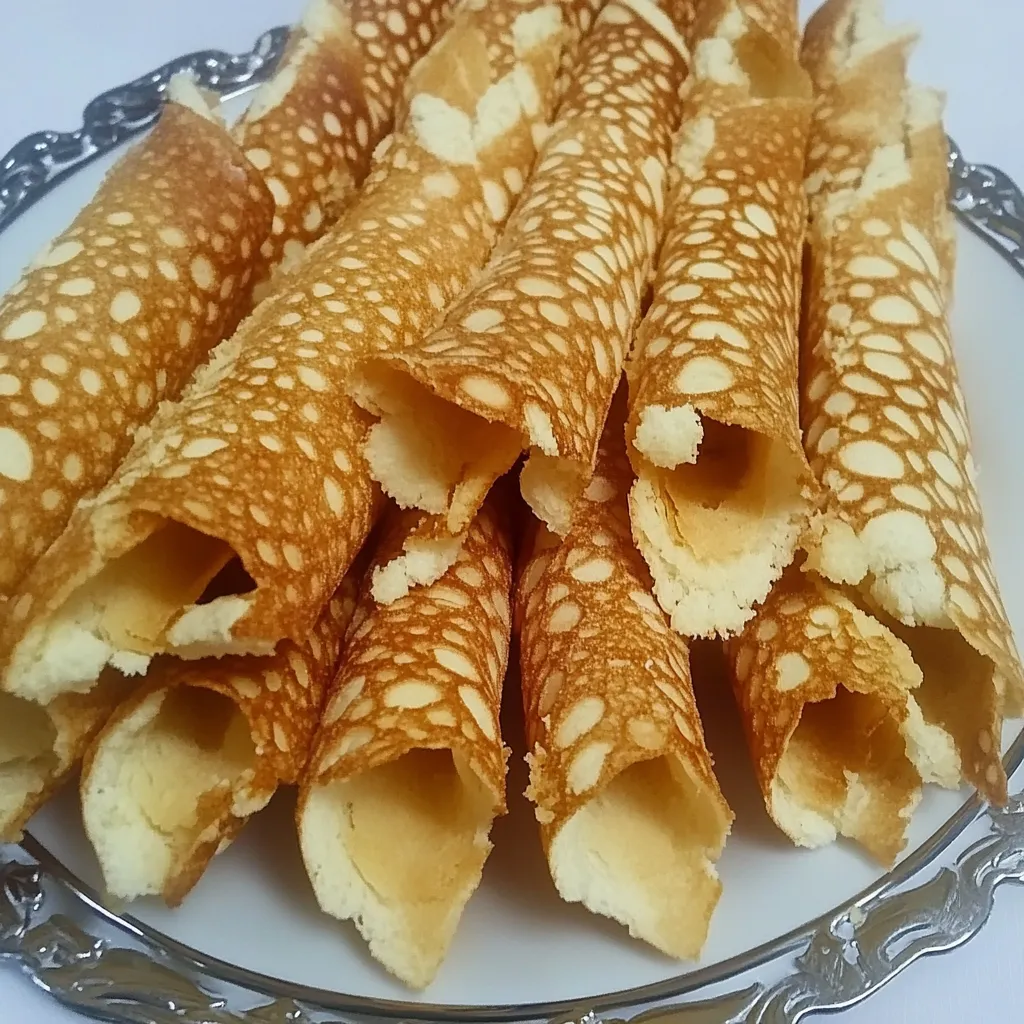
The first time I encountered Trubochki was during a family gathering in Ukraine. I can still recall the aroma wafting through the air, drawing everyone into the kitchen. These delightful wafer rolls were a staple at every celebration, their crispy exterior hiding a creamy, sweet filling that had my taste buds dancing. As I sat at the table, wrapped in laughter and stories, I promised myself I’d learn to make these little treasures. Now, every time I whip up a batch of Trubochki, it’s not just about tasting a beloved recipe; it’s also about sharing a piece of my heritage and the joy it brings to my loved ones.
Recipe Snapshot
40 mins
15 mins
25 mins
Medium
180 kcal
3 g
Gluten-Free, Low FODMAP
8 g
Baking Sheet, Mixing Bowl, Whisk
Why This Trubochki Hits Different
Tradition with Every Bite
Trubochki aren’t just a dessert; they’re a piece of Ukrainian culture. Growing up, they represented family gatherings and celebrations. It’s a joy to recreate that experience for my friends and family, sharing the same flavors that have been passed down through generations.
Endless Customization
One of the most delightful aspects of Trubochki is how versatile they are. While the traditional filling is divine, I love experimenting with different flavors. Whether it’s a hint of citrus zest or a swirl of cocoa, the options are endless, making every batch unique.
Perfect for Any Occasion
These wafer rolls are perfect for any occasion. Whether it’s a birthday party, a holiday gathering, or just a cozy night in, Trubochki will impress. They’re easy to share, making them an ideal treat for gatherings.
Simple Ingredients, Big Flavor
What’s truly remarkable is that the ingredients for Trubochki are simple and accessible. Combining everyday staples like eggs, sugar, and flour, these rolls transform into something extraordinary. It’s a perfect reminder that great food doesn’t have to be complicated.
A Family Activity
Making Trubochki can be a fun family activity. I often invite my kids to help whisk the batter or fill the rolls. It’s a great way to bond and create memories while teaching them about our culinary traditions.
Delightful Textures
The contrast between the crispy wafer and the velvety cream filling is what makes Trubochki so captivating. Every bite is a delightful combination of textures that keeps you coming back for more.
What Goes Into Trubochki
When it comes to Trubochki, the ingredients work harmoniously to create their signature taste. The combination of simple elements like fresh eggs, creamy cheese, and sweetened cream results in a delicious treat that’s both rich and satisfying.
- 4 large eggs (room temperature): Essential for creating a fluffy texture in the wafer batter.
- 1 oz granulated sugar: Adds the perfect amount of sweetness to balance the flavors.
- ¼ tsp fine salt: Enhances the overall flavor by balancing sweetness.
- 2 tbsp melted cooled butter: Gives the batter richness and helps with browning.
- ½ tsp vanilla extract: Adds a warm, aromatic flavor to the wafers.
- 4 oz all-purpose flour (sifted): The base of the wafer, providing structure and crispiness.
- 8 oz cream cheese (refrigerated): A creamy filling that gives Trubochki its unique texture.
- 2 ⅔ oz condensed milk/dulce de leche (refrigerated): Adds sweetness and a rich flavor to the filling.
- 8 oz cool whip (frozen): Lightens the filling and makes it airy.
- ¼ tsp vanilla extract: A touch more vanilla for flavor in the filling.
- 1 tbsp powdered sugar: For dusting the finished Trubochki, adding a sweet touch.
Putting Together Trubochki
Creating Trubochki is an enjoyable process. You’ll love watching the transformation from simple ingredients to delectable wafer rolls. Let’s dive into the steps that will lead you to these delightful treats.
- Preheat the wafer maker while you prepare the batter. This step is crucial as a hot maker ensures the wafers cook evenly and become crispy. Be patient and let it reach the right temperature.
- In a mixing bowl, whisk together 4 large eggs, 1 oz granulated sugar, and ¼ tsp fine salt on high speed. Continue whisking until the mixture is light in color and the sugar has dissolved. This will take about two minutes, and you should see the mixture become fluffy and airy.
- Next, add 2 tbsp melted cooled butter, ½ tsp vanilla extract, and 4 oz all-purpose flour to the egg mixture. Use a whisk to combine everything until the flour is fully incorporated, which should take about one minute. The batter should be smooth without any lumps.
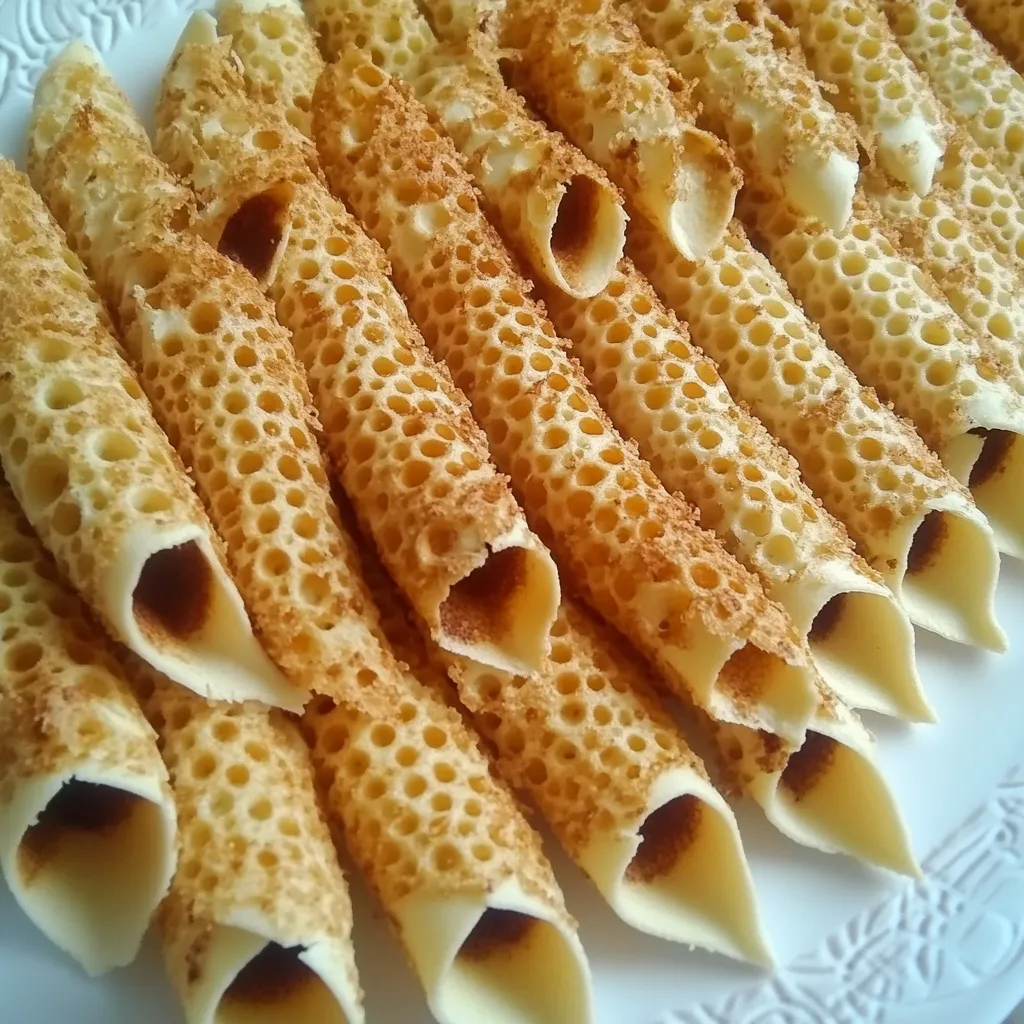
- Once the batter is ready, spoon it onto each section of the preheated wafer maker. Close the lid gently to ensure the batter spreads evenly. Bake for 18 to 20 seconds, or until the wafers turn a dark golden color. You’ll know they’re ready when they release a lovely aroma.
- Carefully remove the wafers with a spatula, taking care to avoid burns. The wafers are hot, so handle them with patience and attention.
- Quickly wrap each hot wafer around a wooden stick. This is important as the wafers need to be shaped while they are still warm. If they cool down, they’ll become too brittle to form.
- Repeat the process with the remaining batter, making sure to create enough wafers for everyone to enjoy. Place each rolled wafer on a baking sheet to dry and cool. Space them out to prevent sogginess.
- In a separate mixing bowl, whisk 8 oz cream cheese on high speed for about one minute until smooth. This should be creamy and ready to blend with other ingredients.
- Integrate 2 ⅔ oz condensed milk and ½ tsp vanilla extract into the cream cheese. Whisk for another minute until well combined.
- Add 8 oz cool whip into the mixture and continue beating until the filling thickens and is smooth, which should take about two to three minutes on high speed. You’ll notice it becoming light and fluffy.
- Fill a piping bag with the creamy filling and stuff each wafer tube thoroughly, making sure both ends are filled. This rich filling is what makes Trubochki truly indulgent.
- Finally, dust the tubes with 1 tbsp powdered sugar for a sweet finish that enhances both flavor and presentation.
- Refrigerate the filled Trubochki until you’re ready to serve. This chilling step allows the filling to set properly and enhances the enjoyment.
Things Worth Knowing
- Fresh Ingredients Matter: Always use room temperature eggs for a better batter consistency.
- Monitor the Wafer Maker: Ensure it’s hot enough before cooking; this prevents soggy wafers.
- Don’t Rush Cooling: Let the wafers cool completely before filling to avoid sogginess.
- Experiment with Flavors: Feel free to add different extracts or zest to the batter for variety.
Expert Tips about Trubochki
Making Trubochki can be a delightful experience when you have the right tips in hand. Here are some expert suggestions to elevate your wafer roll game.
- Storage: Keep leftover Trubochki in an airtight container in the refrigerator to maintain freshness. They can last for up to five days.
- Freezing: If you want to make a large batch, you can freeze unfilled wafers. Just ensure they are in a sealed bag to prevent freezer burn.
- Pairing: Serve Trubochki with a side of fresh fruit or a warm cup of tea for a delightful pairing.
- Make Ahead: Prepare the wafers a day in advance and fill them just before serving for the best texture.
- Serving Suggestion: These work great as a dessert at parties or as a sweet snack for gatherings.
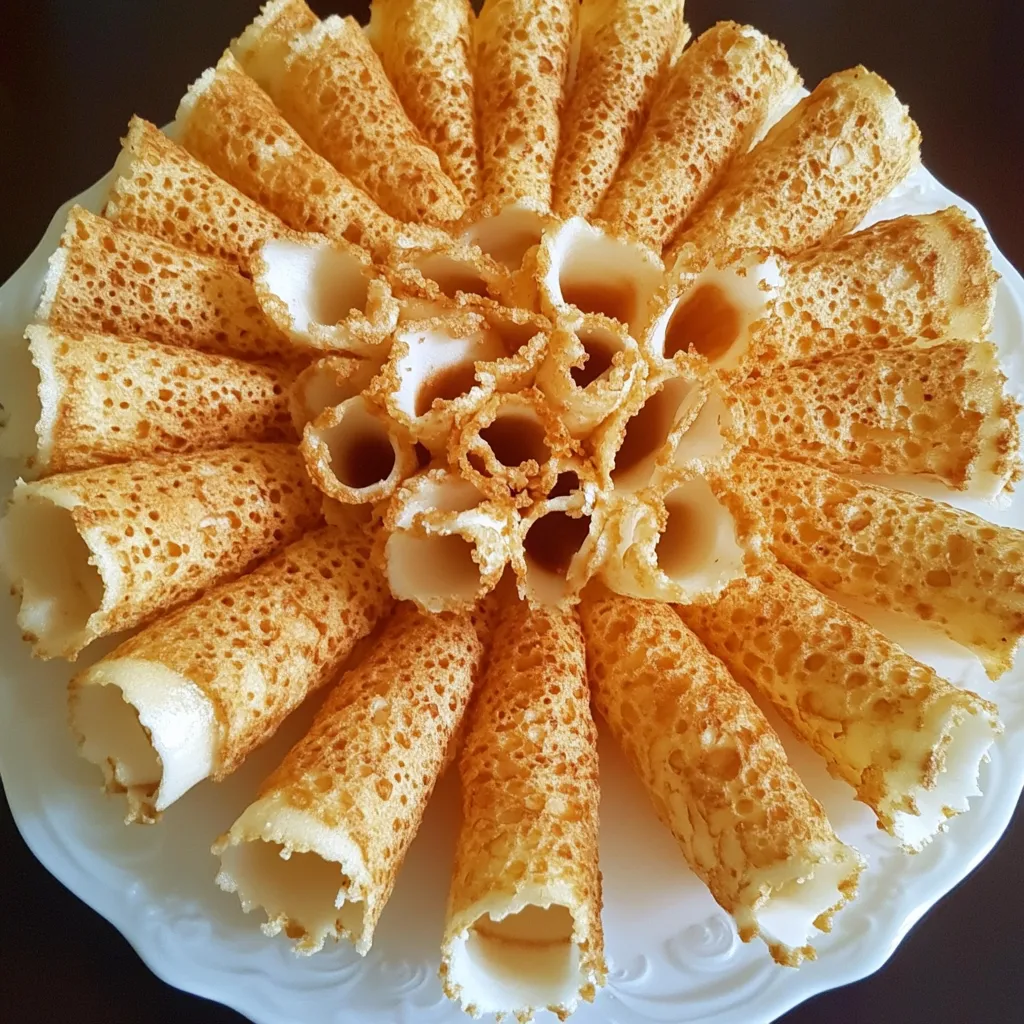
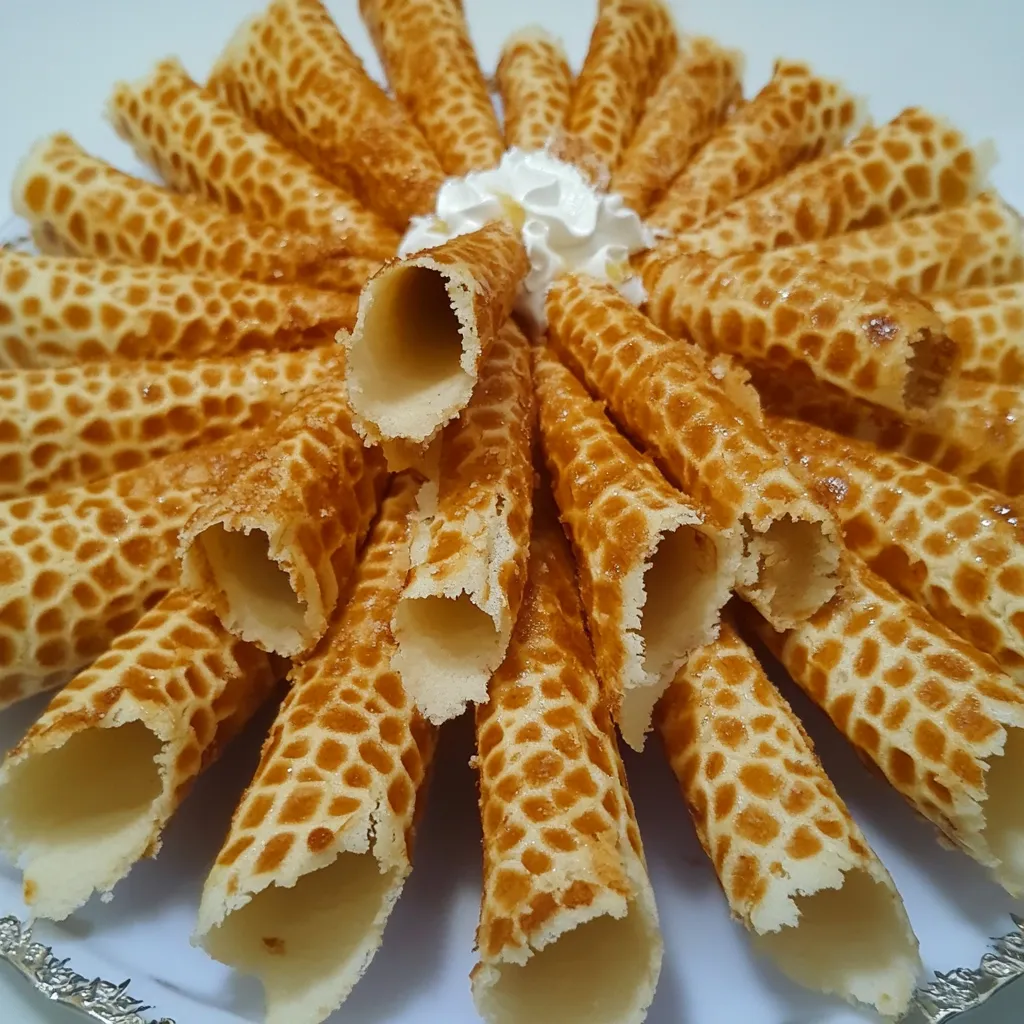
How to Serve Trubochki
Serving Trubochki can be as creative as the process of making them. Here are some suggestions to make your presentation shine:
- Presentation is Key: Arrange the Trubochki on a beautiful platter, dusted with powdered sugar, to impress your guests.
- Perfect Pairings: These rolls are wonderful alongside a scoop of vanilla ice cream or fresh fruit, adding contrast to the creamy filling.
- Occasions: Ideal for birthdays, holidays, or coffee gatherings, they’re a treat that everyone will love.
- Personal Touch: You can customize the filling for different occasions, perhaps using chocolate mousse for a birthday party.
- Make it a Family Event: Encourage your family to join in the fun, turning the serving into a shared experience.
- Storing for Later: If you have extras, store them in an airtight container in the fridge. They taste best when fresh, but can last a few days.
FAQ
Conclusion
Trubochki are more than just a dessert; they are a celebration of Ukrainian culture, offering a delightful combination of textures and flavors. I encourage you to try making these wafer rolls—whether for a special occasion or just a sweet treat at home. You’ll find that they not only satisfy your cravings but also bring a piece of tradition to your table.
Trubochki
Ingredients
Equipment
Method
- Preheat the wafer maker while you make the batter.
- Whisk the eggs, granulated sugar, and fine salt on high speed until the eggs are light in color and the sugar has dissolved (approx. 2 minutes).
- Add the melted cooled butter, vanilla extract, and all-purpose flour.
- Whisk everything until the flour is mixed in (approx. 1 minute).
- Spoon the batter onto each wafer section and close the lid. Bake for 18-20 seconds or until dark golden. Carefully remove the wafers with a spatula.
- Quickly wrap the hot wafers around a wooden stick (it usually comes with a wafer maker). Don’t let the wafers cool down.
- Repeat with the remaining batter.
- Place each tube on a baking sheet to dry and cool. Make sure there is enough space between them. Do not let them get soggy.
- Whisk the cream cheese on high speed (approx. 1 minute).
- Add the condensed milk and vanilla extract. Whisk for 1 minute.
- Add the frozen whip and continue beating until the filling becomes thick and smooth (approx. 2-3 minutes on high).
- Fill a piping bag with the cream and fully stuff each wafer tube (both ends).
- Dust the tubes with powdered sugar.
- Refrigerate until ready to serve.
Notes
- Tip 1: Store leftovers in an airtight container in the refrigerator.
- Tip 2: You can freeze unfilled wafers for later use.
- Tip 3: These rolls go well with a scoop of ice cream.
- Tip 4: Prepare the wafers in advance and fill them just before serving.
- Tip 5: Serve them at parties for a sweet treat.