There’s something truly magical about creating your own treats, especially when it comes to kids and holidays. The Baby Peeps recipe captures that joy perfectly! I remember the excitement in my kitchen as my children and I set out to make these adorable chocolate-covered marshmallow candies. It’s a simple project that turns into a delightful experience, where laughter and creativity reign supreme. Every nibble of these sweet creations brings back fond memories of family gatherings and fun-filled Easter mornings. Plus, there’s something undeniably satisfying about crafting something so cute and delicious right at home.
Recipe Snapshot
20 mins
10 mins
10 mins
Easy
150 kcal
1 g
Keto, Paleo, Whole30
5 g
Kitchen Knife, Cutting Board
Why You Need This Baby Peeps
1. A Perfect Combination of Sweetness
The first reason I absolutely adore making Baby Peeps is the perfect blend of flavors. The silky smoothness of the melted cocoa melts coupled with the sugary goodness of the marshmallow Peeps creates a delightful treat that’s hard to resist. Every bite is an explosion of sweetness that dances on the palate!
2. Fun for All Ages
Making Baby Peeps is not just a kitchen task; it’s an event! Whether you’re a parent, grandparent, or just a friend looking to share a fun activity, this recipe is a wonderful way to bond. Kids love helping with the decorating, while adults can take charge of the melting and molding. It’s a great way to get everyone involved and laughing!
3. Customization Galore
Another reason to love this recipe is the sheer potential for customization. You can switch up the colors of the cocoa melts, use different types of marshmallows, or even add sprinkles for that extra festive touch. This flexibility allows you to create unique treats that fit any occasion, from Easter to birthdays!
4. Quick to Make
Let’s face it; we all appreciate recipes that don’t take hours to whip up. The Baby Peeps come together relatively quickly, making them an ideal choice for last-minute gatherings or celebrations. You can go from idea to delicious treat in about twenty minutes!
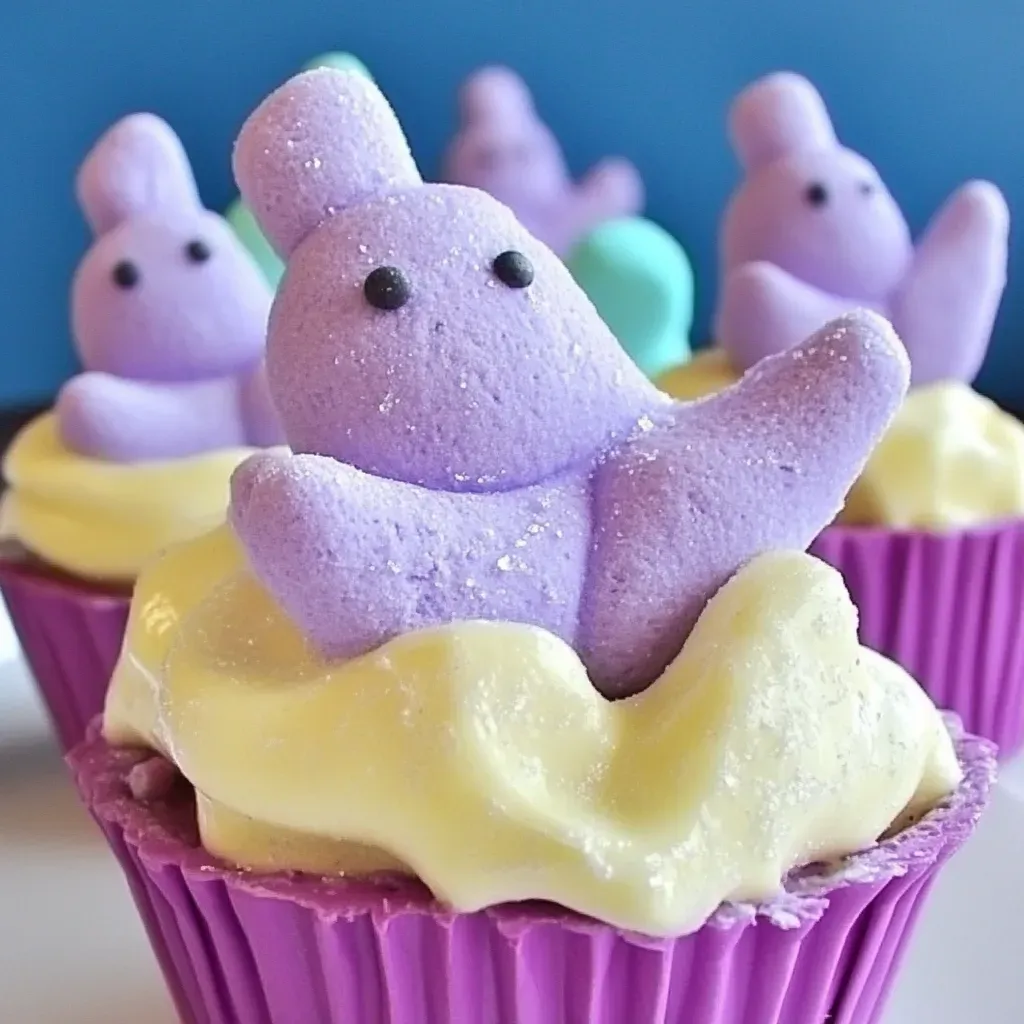
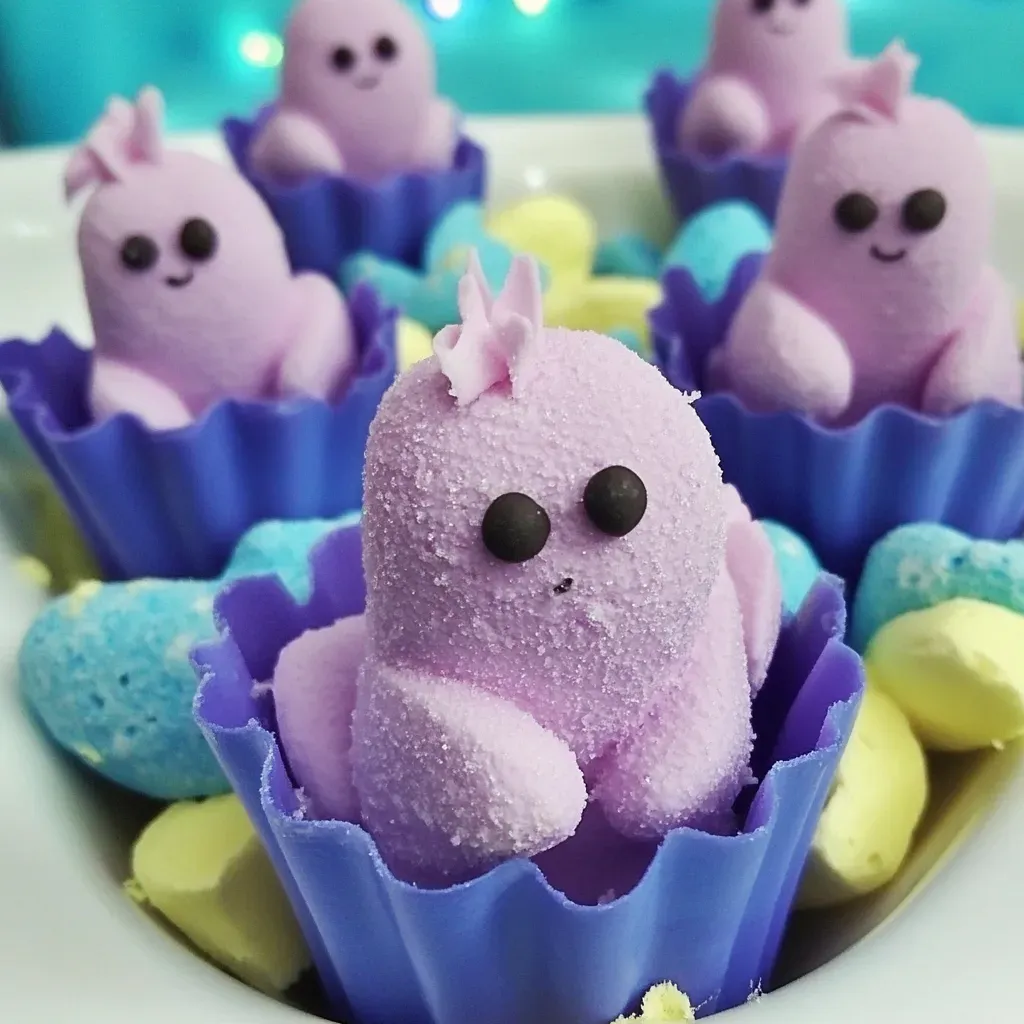
5. Eye-Catching Presentation
These treats are as pleasing to the eyes as they are to the taste buds! The vibrant colors and cute shapes make Baby Peeps an attractive addition to any dessert table. They are sure to impress your guests and make for great photo opportunities!
6. A Fun Way to Celebrate
Lastly, Baby Peeps are a fantastic way to celebrate holidays! Whether it’s Easter or Halloween, these treats can be tailored to fit the theme, making them a fun addition to any holiday festivity. Plus, they make great gifts!
Essential Ingredients for Baby Peeps
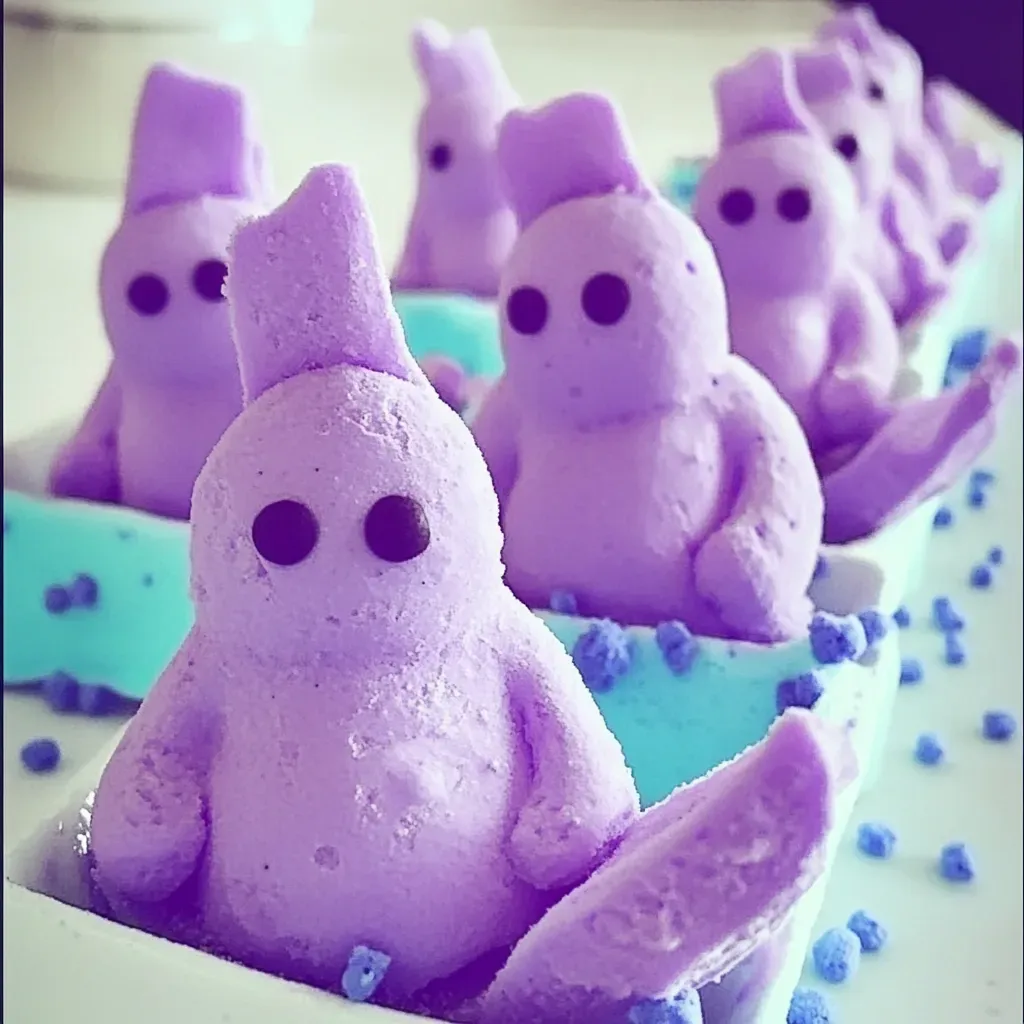
When it comes to making Baby Peeps, the ingredients are simple but essential. Each component plays a key role in crafting these fun treats that kids and adults alike will enjoy. The main stars are the colorful Wilton’s Light Cocoa Melts and the adorable marshmallow Peeps. Together, they create a sweet and satisfying combination that everyone loves.
- 1 bag Wilton’s Light Cocoa Melts: These melted chocolates are the perfect coating for your Peeps. Their smooth texture and rich flavor enhance the overall treat.
- About 10 Peeps: These iconic marshmallows are the heart of the recipe. Soft, fluffy, and sweet, they provide the perfect base for your chocolate-covered creations.
Baby Peeps Instructions

Making Baby Peeps is a delightful adventure that I can’t wait to share with you! Let’s get started with the steps to create these sweet treats. Follow along as we transform simple ingredients into a fun and tasty experience.
Begin by melting your cocoa melts according to the microwave directions on the back of the bag. Make sure to melt them gradually, stirring until you have a smooth consistency.
While the chocolate melts, heat an electric griddle to 200 degrees Fahrenheit. Cover the griddle with a kitchen towel; this will create a warm environment for your melted chocolate.
Once your chocolate is melted, place the bowl with the chocolate on the warm griddle to keep it nice and soft as you work.
Next, take your egg molds and fill them with melted chocolate, ensuring that each mold is filled to the top. Tap the molds gently to eliminate any air bubbles.
After filling the molds, carefully pour any excess chocolate back into the bowl. Use a butter knife or spatula to scrape the top of the mold for an even finish.
Now, it’s time to freeze the molds. Place them in the freezer for a few minutes until the chocolate is completely hardened.
Once set, pop the chocolate eggs out of the molds gently. They should come out easily if the molds are properly coated.
To prepare your marshmallow Peeps, cut off the tail around the bottom of each bunny or chick, creating a flat base. This will allow them to sit snugly in the chocolate.
Now, take half of each pair of chocolate eggs and place a Peep inside. This is where the fun begins!
Transfer some melted chocolate into a squeeze bottle. Pipe the chocolate all around the edges of the egg and place the top half back on. Press and hold to seal the halves together.
Lastly, hold the assembled egg in the freezer for about thirty seconds to one minute, then leave it in the freezer for a few minutes to fully harden. Just a tip: do not seal more than one egg at a time unless you’ve got six hands!
Things Worth Knowing
- Tip 1: Check your chocolate melts regularly while microwaving to prevent overheating.
- Tip 2: Use silicone molds for easy release of your chocolate eggs.
- Tip 3: Experiment with different colors of cocoa melts to match themes or occasions.
- Tip 4: Let the chocolate eggs cool completely before handling to avoid smudging.
Tips and Tricks about Baby Peeps
Creating Baby Peeps can be even more fun with a few extra tips! Here are some insights to enhance your experience while making these delightful treats.
- Storage: Store your Baby Peeps in an airtight container at room temperature to keep them fresh and tasty.
- Freezing: You can freeze these treats if you want to save some for later. Just make sure to wrap them individually!
- Pairing: Consider serving Baby Peeps alongside a warm cup of hot cocoa for a cozy treat.
- Creativity: Feel free to use sprinkles or edible glitter for a festive touch on top of your chocolate.
- Occasions: These treats are perfect for Easter baskets, birthday parties, or just a fun afternoon snack!
What Goes Well With This Baby Peeps
- Side Dishes: Pair your Baby Peeps with fruit skewers for a colorful and healthy contrast.
- Occasions: These little delights are ideal for Easter celebrations, children’s birthday parties, or family get-togethers.
- Storage Tips: Keep your Baby Peeps in a cool, dry place to maintain their deliciousness.
- Seasonal Pairings: Try making themed variations for other holidays, like Halloween or Christmas, with different colored chocolates.
FAQ
Conclusion
The Baby Peeps recipe is special because it combines fun, creativity, and deliciousness all in one delightful treat. Whether you’re making them for a holiday or simply for a sweet afternoon snack, these treats will surely bring joy to your family and friends. I encourage you to give this recipe a try and enjoy the happiness it brings to your kitchen!
Baby Peeps
Ingredients
Equipment
Method
- Melt your cocoa melts using the microwave directions on the back of the bag. Heat an electric griddle to 200 degrees and cover with a kitchen towel. Place the bowl with your melted chocolate on the griddle to keep it warm. Add chocolate to the egg molds, filling them to the top. Pour the excess chocolate back in the bowl, scraping the top of the mold with a butter knife or spatula. Freeze molds for a few minutes until chocolate is hardened. Pop out. To prepare your Peeps, cut off the tail around the bottom of the body. Place a Peep in half of each pair of eggs. Transfer some chocolate to a squeeze bottle. Pipe the chocolate all the way around the egg and place the top half on. Press and hold to seal. Hold the egg in the freezer for 30 seconds, then leave in freezer for a few minutes to harden. Do not seal more than one egg at a time. Unless you have 6 hands!
Notes
- Tip 1: Always store your chocolates in a cool place to prevent melting.
- Tip 2: Experiment with different flavors of Peeps for a unique twist!
- Tip 3: Consider using food-safe edible decorations to make your Peeps extra special.
- Tip 4: Make extra batches to share with friends and family; they make great gifts!
- Tip 5: Ensure your working area is clean to keep your treats hygienic.