The moment I think of the Chocolate Peppermint Cake, I’m transported back to cozy winter gatherings, where laughter fills the room and the aroma of baked goods wafts through the air. I remember the first time I made this cake; it was for a Christmas party, and the thrill of combining rich chocolate with the refreshing zing of peppermint was simply irresistible. Each layer of this cake tells a story of warmth, nostalgia, and sweet delight that can only come from sharing food with loved ones. The joy of watching friends and family dig in, their eyes lighting up with surprise as they savor the first bite, is what makes this cake a staple in my kitchen.
Recipe Snapshot
60 mins
30 mins
30 mins
Medium
350 kcal
5 g
Gluten-Free, Low FODMAP
18 g
Blender, Frying Pan, Wooden Spoon, Whisk, Mixing Bowl, Baking Sheet
What You’ll Enjoy About This Chocolate Peppermint Cake
It’s a Showstopper
The Chocolate Peppermint Cake isn’t just a dessert; it’s a centerpiece. The moment you place it on the table, it captures everyone’s attention. The rich chocolate layers paired with the vibrant green of peppermint frosting make it visually stunning.
Flavor Harmony
What truly makes this cake stand out is the perfect balance between chocolate and peppermint. The deep, rich flavor of chocolate melds beautifully with the refreshing mint, creating a taste experience that’s both comforting and invigorating.
Perfect for Celebrations
This cake is ideal for festive occasions, especially during winter holidays. Whether it’s Christmas, New Year, or a cozy family gathering, the Chocolate Peppermint Cake brings a sense of celebration to the table.
Easy to Make
Don’t be intimidated by its beauty; this cake is surprisingly easy to make. With simple ingredients and straightforward steps, you’ll find yourself whipping it up in no time, impressing everyone with your baking skills.
Versatile Frosting Options
While the peppermint frosting is delightful, you can always customize it! Experiment with different flavors or toppings to make it your own. Whether you love classic chocolate ganache or want to try something new, the possibilities are endless.
Memorable Leftovers
What’s better than indulging in a slice of Chocolate Peppermint Cake the next day? The flavors tend to settle and deepen, making leftovers just as delightful as the first serving. It’s the perfect treat for breakfast or an afternoon coffee break!
What You Need for Chocolate Peppermint Cake
Creating the perfect Chocolate Peppermint Cake begins with high-quality ingredients that work in harmony. Each component plays a vital role in building layers of flavor and texture, making it a truly delightful experience. From the richness of chocolate to the refreshing notes of peppermint, every bite brings joy.
- 1 1/2 cups semisweet chocolate chips: Essential for a rich, chocolatey base.
- 1/2 cup unsalted butter, softened: Adds moisture and richness.
- 2 cups light brown sugar, packed: Brings sweetness and depth to the flavor.
- 3 large eggs: Provides structure and helps with leavening.
- 2 cups all-purpose flour: Forms the cake’s structure.
- 1 teaspoon baking soda: Helps the cake rise.
- 1/2 teaspoon salt: Enhances the flavor of all ingredients.
- 1 teaspoon cinnamon: Adds warmth and spice.
- 2 tablespoons unsweetened cocoa powder: Intensifies the chocolate flavor.
- 18 oz container sour cream: Adds moisture and tang.
- 1 cup hot water: Helps to bring everything together smoothly.
- 2 teaspoons vanilla extract: Enhances flavor depth.
- 1/2 cup butter, room temperature: For frosting, ensures a creamy texture.
- 2 cups Powdered sugar: Sweetens the frosting.
- 1/4 cup heavy cream: Gives the frosting a luscious consistency.
- 1 teaspoon vanilla extract: For flavor in frosting.
- 1/4-1/2 teaspoon peppermint extract: Adds the essential minty freshness.
- 12 oz semisweet chocolate chips: For ganache, adds a rich, chocolate layer.
- 1 cup heavy whipping cream: Essential for a silky ganache.
- 3 tablespoons butter: Adds richness to the ganache.
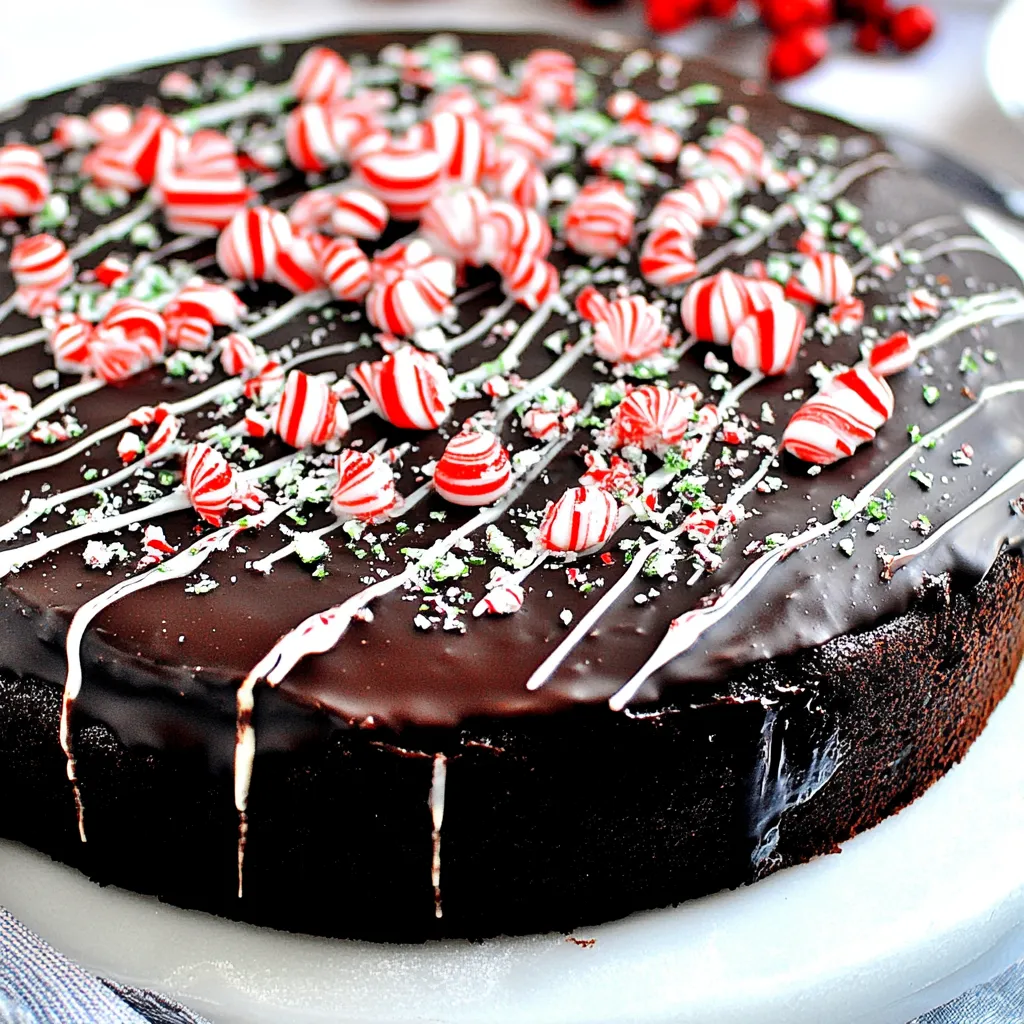
- 1/3 cup peppermint candy melts: For optional decoration.
- 1 teaspoon shortening: Helps with melting consistency.
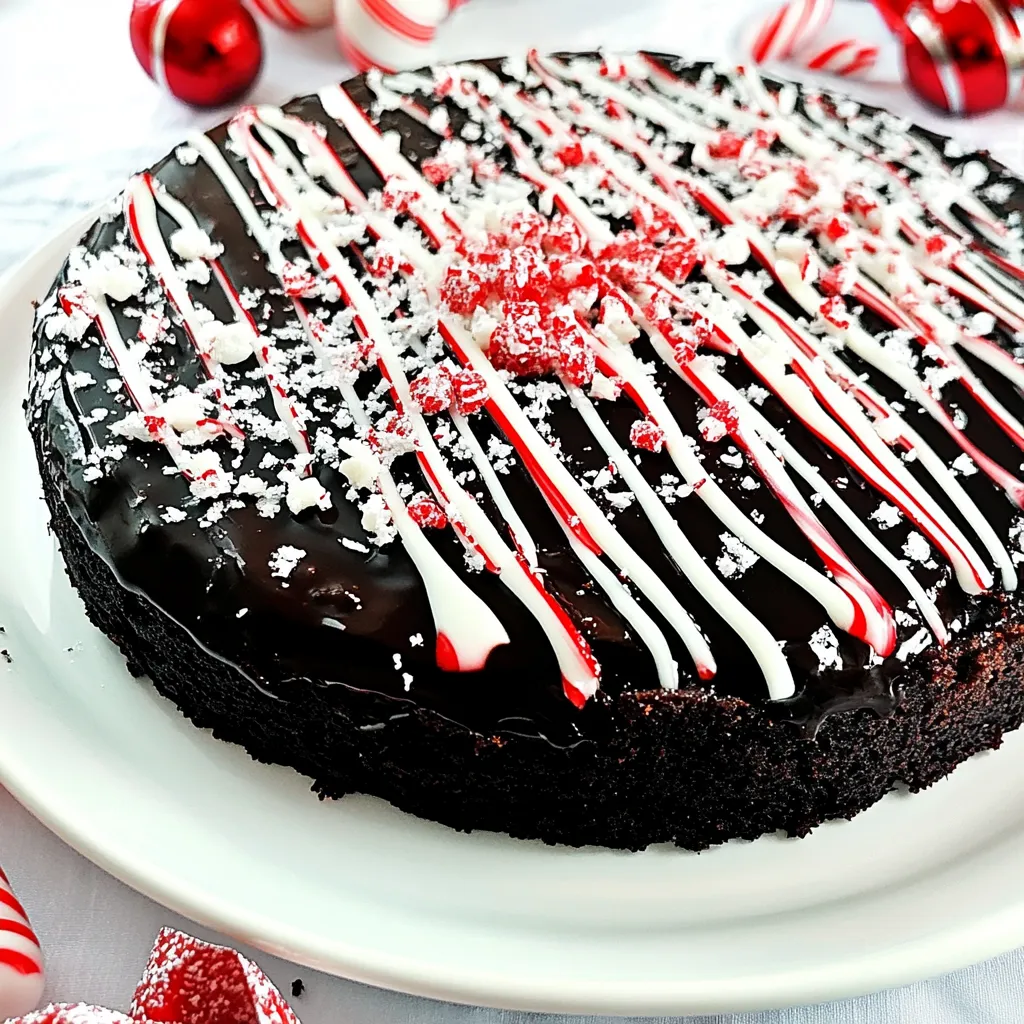
- 2-3 candy canes, crushed: Perfect for garnish and added crunch.
Cooking Instructions for Chocolate Peppermint Cake
Making the Chocolate Peppermint Cake is a delightful process that combines simple techniques with rich flavors. You’ll love each step as you create this beautiful dessert.
Start by melting the chocolate chips. Add them to a microwave-safe bowl and heat at medium (50% power), stirring every 30 seconds. You want it to be smooth and glossy, which usually takes about 1 to 1 ½ minutes in total.
Next, in a separate bowl, combine the butter and brown sugar. Beat with an electric mixer on medium speed for about 5 minutes until it’s light and fluffy. You should see a lovely pale color forming.
Now, add the eggs one at a time, beating just until blended after each addition. Incorporate the melted chocolate and mix until everything is well combined.
In another bowl, sift together the flour, baking soda, salt, cinnamon, and cocoa powder. Gradually add this dry mixture to your chocolate mixture, alternating with the sour cream. Start and end with the flour mixture; this keeps your batter nice and light.
While mixing on low speed, slowly incorporate the hot water until it’s just blended. It’s okay if there are a few lumps; they’ll smooth out during baking.
Prepare two 10-inch round cake pans by lining them with parchment paper and spraying with non-stick cooking spray that contains flour. Divide the batter evenly between the pans.
Bake at 350°F for 25 to 30 minutes. To check for doneness, insert a toothpick in the center; it should come out clean when the cakes are ready. Allow them to cool in the pans for 10 minutes before transferring to a wire rack to cool completely.
While the cakes cool, prepare the peppermint frosting. Beat the butter until creamy, about 1 minute. Gradually add the powdered sugar and mix until well combined. Pour in the heavy cream, vanilla extract, and peppermint extract. Mix on high for 3 to 4 minutes until fluffy.
Once the cakes are completely cool, frost the top of one cake layer with the peppermint frosting, leaving a ½ inch border around the edge. Place the other layer on top and refrigerate for about 30 minutes to set the frosting.
Next, make the chocolate ganache. In a microwave-safe bowl, combine the chocolate chips and heavy cream. Heat at medium (50% power) for 2 ½ to 3 minutes until the chocolate begins to melt. Whisk until smooth, then stir in the butter. Let it sit for about 20 minutes to thicken.
Beat the ganache with an electric mixer for 5 to 8 minutes until it forms soft peaks. This gives it a pudding-like consistency that holds its shape.
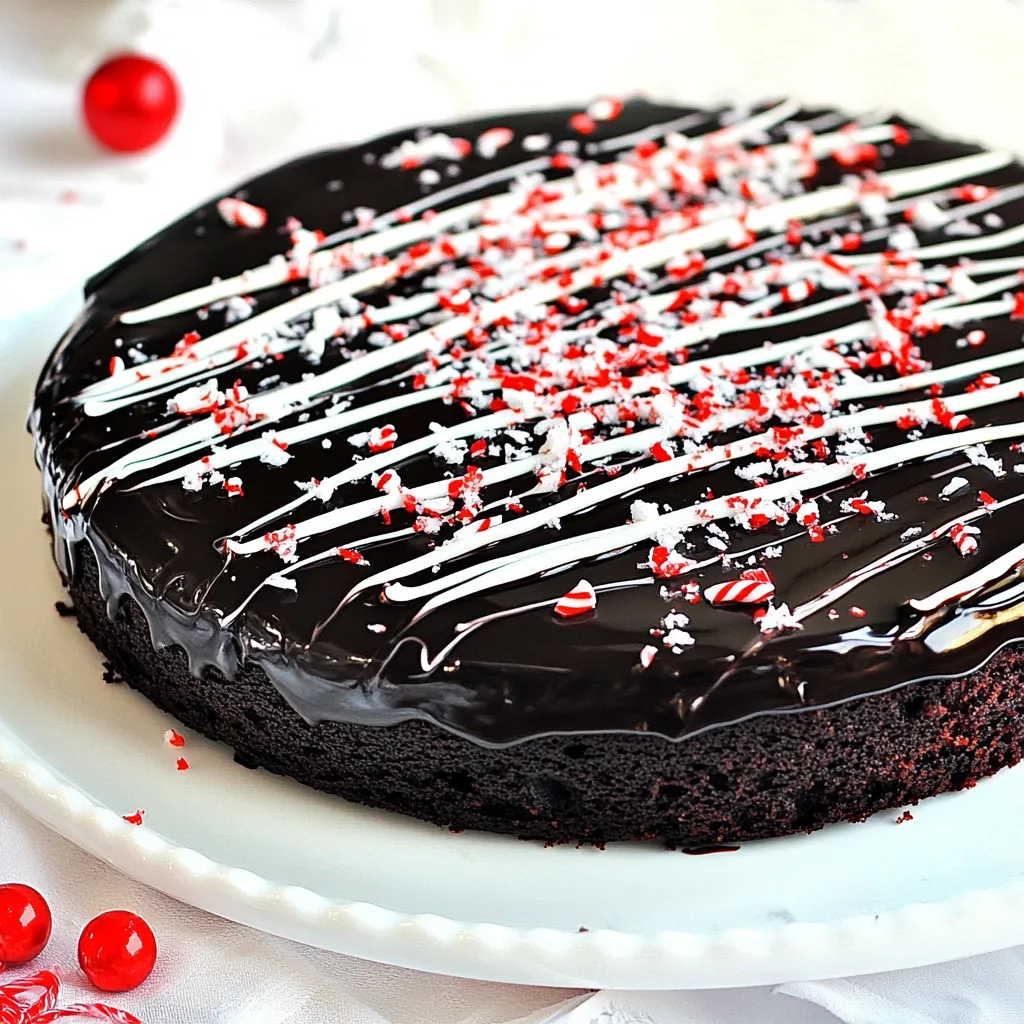
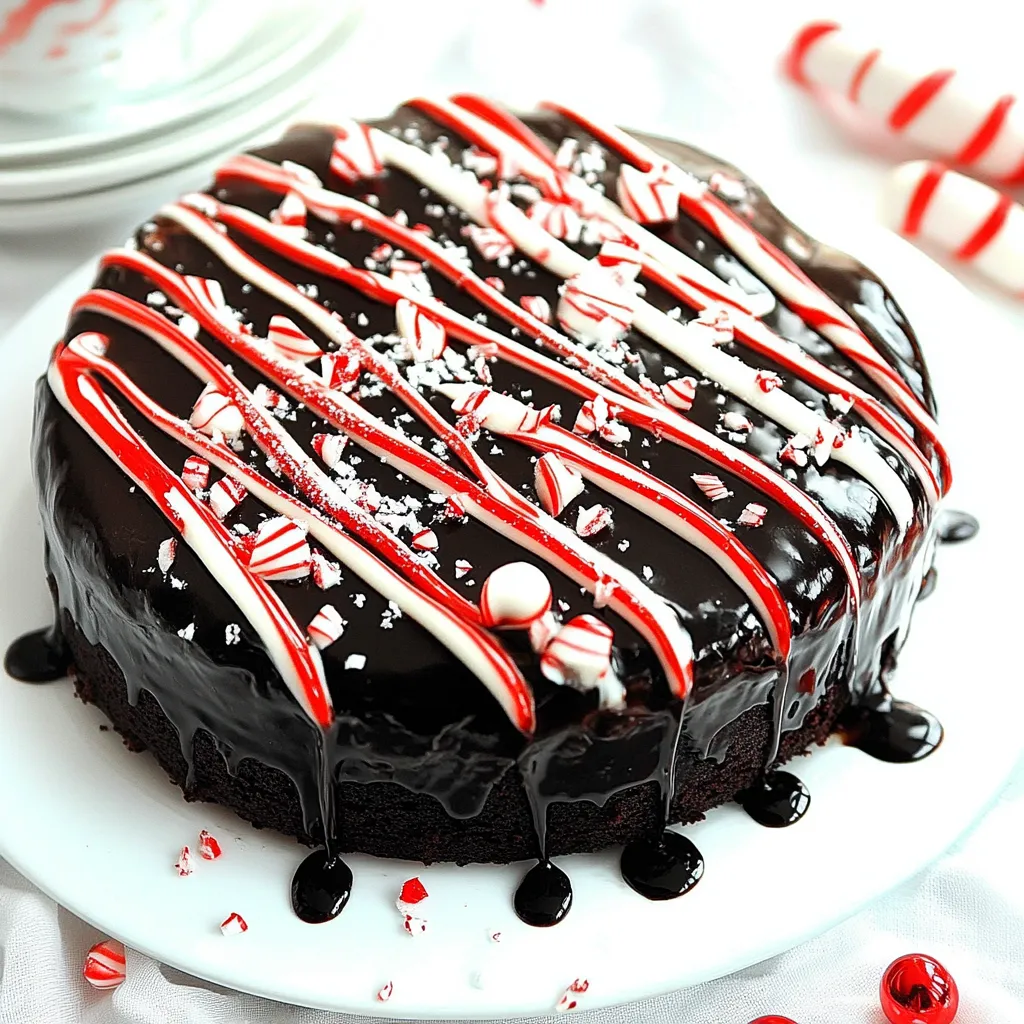
Finally, top the peppermint-frosted cake with the second layer, frosting the entire cake with the chocolate ganache. For an optional touch, melt the peppermint candy melts and drizzle over the top. Garnish with crushed candy canes for a festive finish.
Enjoy your masterpiece! For a warm treat, microwave individual slices for about 20 seconds.
Things Worth Knowing
- Cool Completely: Ensure your cakes are completely cool before frosting to prevent melting.
- Consistent Mixing: Always mix on low speed when adding dry ingredients to avoid overmixing.
- Check for Doneness: Use a toothpick to check if the cakes are done; they should spring back when lightly touched.
- Storing Tips: Keep the cake wrapped tightly to maintain freshness.
Tips for Success
To ensure your Chocolate Peppermint Cake turns out perfect, keep these tips in mind:
- Storage: Wrap the cake tightly in plastic wrap after it cools to keep it fresh for up to 3 days at room temperature, or refrigerate for up to 6 days.
- Freezing: You can freeze the cake for up to 3 months. Double-wrap it tightly in plastic wrap and thaw overnight in the refrigerator before serving.
- Serving Suggestions: This cake pairs wonderfully with a scoop of vanilla ice cream or a dollop of whipped cream for extra indulgence.
- Presentation: Consider using a cake stand to elevate your cake for a beautiful presentation at gatherings.
- Flavor Variations: Feel free to experiment with different flavored extracts in the frosting, like almond or orange, for a unique twist.
Great Combinations for Chocolate Peppermint Cake
Serving the Chocolate Peppermint Cake can be an occasion in itself. Here are some ideas to enhance your dessert experience:
- Perfect Pairings: Serve slices of cake alongside a cup of hot cocoa or peppermint tea for a warm, comforting treat.
- Holiday Gatherings: This cake shines during festive occasions like Christmas and New Year’s, making it a wonderful addition to any holiday dessert table.
- Celebratory Occasions: Whether it’s a birthday, anniversary, or any special celebration, this cake is sure to impress your guests.
- Seasonal Sides: Pair it with seasonal fruits like pomegranate or cranberry for a tart contrast to the sweet cake.
- Storage Tips: Remember, you can store leftovers for up to 6 days in the refrigerator or freeze them for later enjoyment.
FAQ
Conclusion
The Chocolate Peppermint Cake is a delightful blend of rich chocolate and refreshing peppermint that captures the essence of winter celebrations. Its stunning appearance and irresistible flavor make it the perfect dessert for any occasion. I encourage you to try this recipe and share it with loved ones; it’s sure to become a favorite!
Chocolate Peppermint Cake
Ingredients
Equipment
Method
- Start by melting the chocolate chips. Add them to a microwave-safe bowl and heat at medium (50% power), stirring every 30 seconds. You want it to be smooth and glossy, which usually takes about 1 to 1 ½ minutes in total.
- Next, in a separate bowl, combine the butter and brown sugar. Beat with an electric mixer on medium speed for about 5 minutes until it's light and fluffy. You should see a lovely pale color forming.
- Now, add the eggs one at a time, beating just until blended after each addition. Incorporate the melted chocolate and mix until everything is well combined.
- In another bowl, sift together the flour, baking soda, salt, cinnamon, and cocoa powder. Gradually add this dry mixture to your chocolate mixture, alternating with the sour cream. Start and end with the flour mixture; this keeps your batter nice and light.
- While mixing on low speed, slowly incorporate the hot water until it's just blended. It's okay if there are a few lumps; they’ll smooth out during baking.
- Prepare two 10-inch round cake pans by lining them with parchment paper and spraying with non-stick cooking spray that contains flour. Divide the batter evenly between the pans.
- Bake at 350°F for 25 to 30 minutes. To check for doneness, insert a toothpick in the center; it should come out clean when the cakes are ready. Allow them to cool in the pans for 10 minutes before transferring to a wire rack to cool completely.
- While the cakes cool, prepare the peppermint frosting. Beat the butter until creamy, about 1 minute. Gradually add the powdered sugar and mix until well combined. Pour in the heavy cream, vanilla extract, and peppermint extract. Mix on high for 3 to 4 minutes until fluffy.
- Once the cakes are completely cool, frost the top of one cake layer with the peppermint frosting, leaving a ½ inch border around the edge. Place the other layer on top and refrigerate for about 30 minutes to set the frosting.
- Next, make the chocolate ganache. In a microwave-safe bowl, combine the chocolate chips and heavy cream. Heat at medium (50% power) for 2 ½ to 3 minutes until the chocolate begins to melt. Whisk until smooth, then stir in the butter. Let it sit for about 20 minutes to thicken.
- Beat the ganache with an electric mixer for 5 to 8 minutes until it forms soft peaks. This gives it a pudding-like consistency that holds its shape.
- Finally, top the peppermint-frosted cake with the second layer, frosting the entire cake with the chocolate ganache. For an optional touch, melt the peppermint candy melts and drizzle over the top. Garnish with crushed candy canes for a festive finish.
- Enjoy your masterpiece! For a warm treat, microwave individual slices for about 20 seconds.