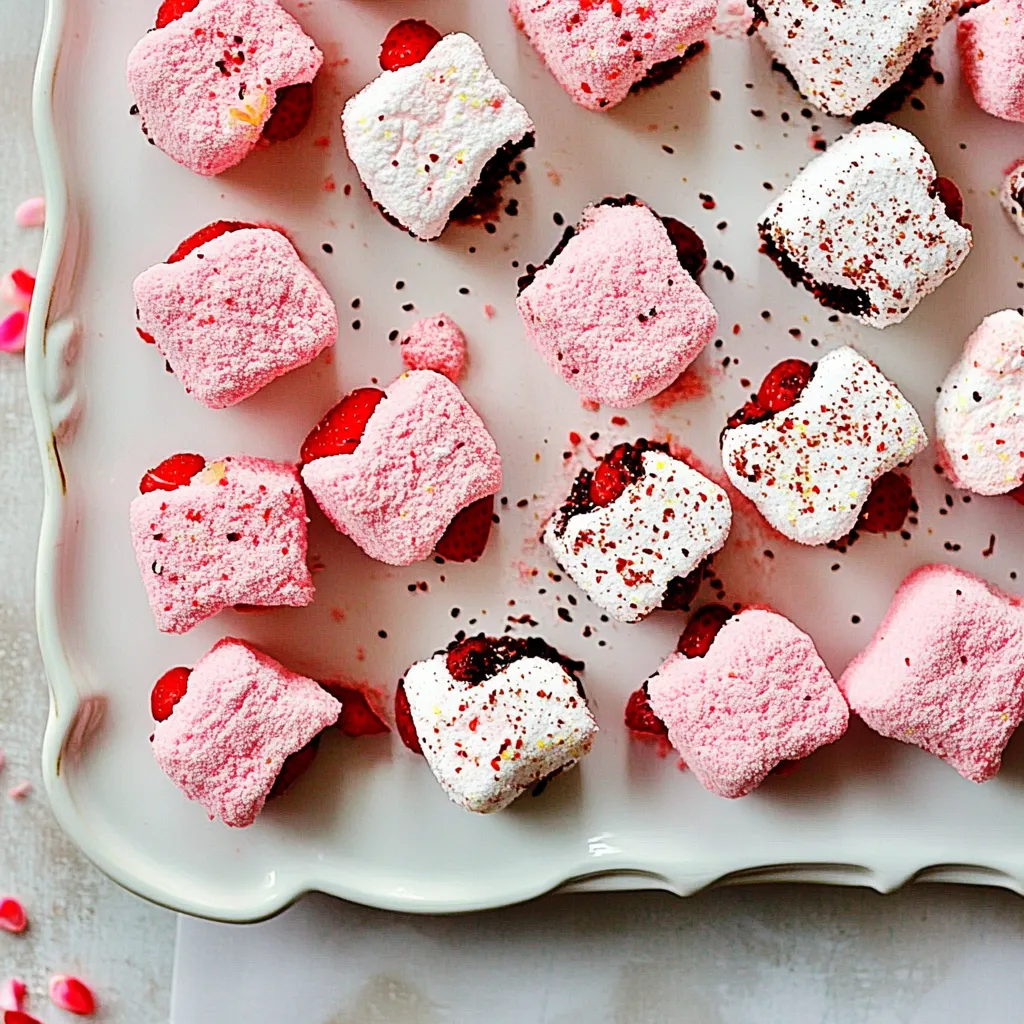
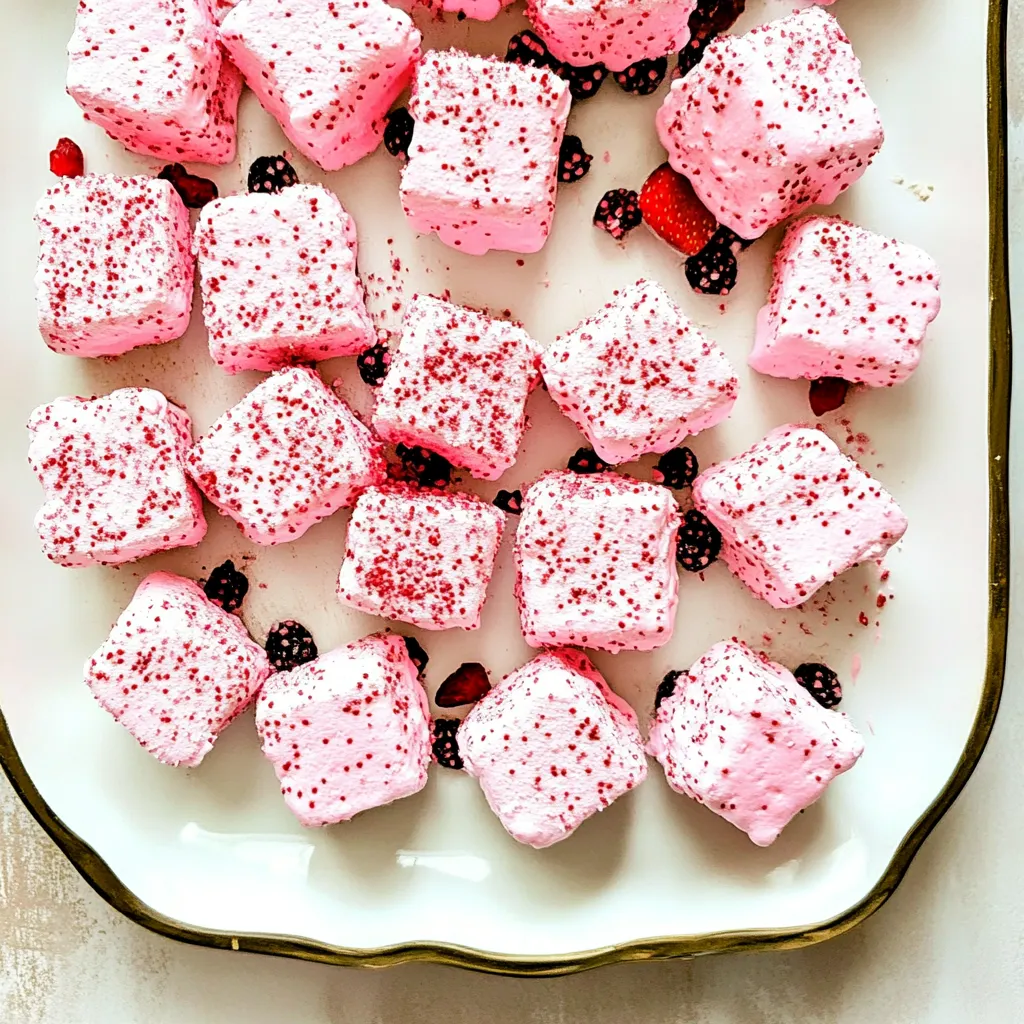
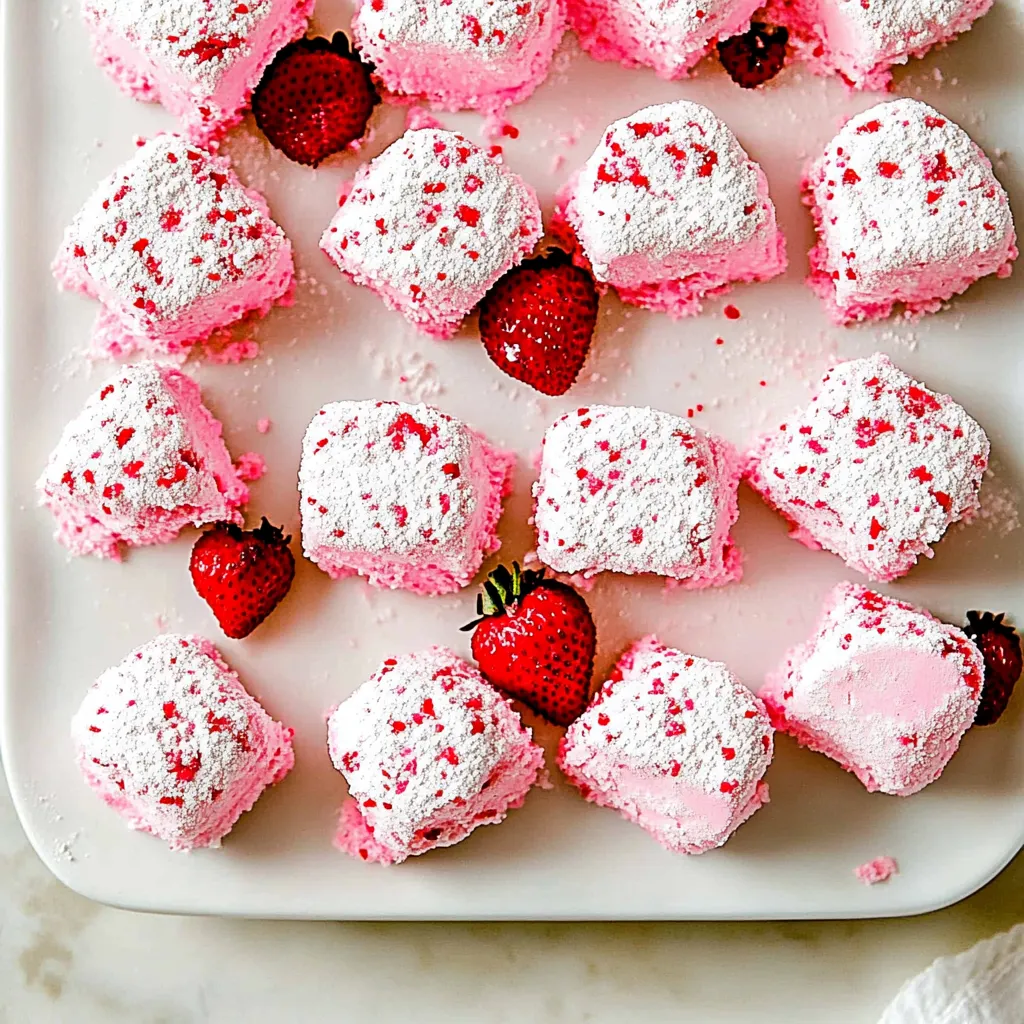
When I think of treats that bring a smile, Homemade Strawberry Marshmallows come to mind right away. It takes me back to those joyful afternoons in the kitchen, surrounded by laughter and the sweet, fruity aroma of fresh strawberries. I remember the first time I made these soft, fluffy delights. I was experimenting with new recipes and decided to blend the nostalgia of marshmallows with the fresh taste of strawberries. The result? A heartwarming dessert that captures the essence of summer in every bite. Not only are they a hit among friends and family, but they also offer a delightful way to showcase the vibrant flavors of strawberries. As they set up overnight, the anticipation builds, and the next day, I can’t wait to cut them into cute shapes and coat them in chocolate. Let’s dive into how you can create this dreamy treat!
Recipe Snapshot
30 mins
15 mins
15 mins
Medium
120 kcal
0 g
Vegan, Gluten-Free, AIP
2 g
Large Pot, Blender, Food Processor, Frying Pan, Wooden Spoon, Whisk, Mixing Bowl
Why This Homemade Strawberry Marshmallows Hits Different
Why You’ll Love Homemade Strawberry Marshmallows
There are so many reasons to adore Homemade Strawberry Marshmallows. First and foremost, they offer a unique twist on the classic marshmallow with their fruity flavor. The brightness of strawberries elevates the experience, making it a refreshing treat that stands out at any gathering.
Perfect for Every Occasion
These marshmallows are not just delicious; they’re incredibly versatile. Whether you’re hosting a summer barbecue, a birthday party, or just looking for a fun snack, they fit seamlessly into any occasion. You can serve them as part of a dessert platter or even as a sweet treat on their own.
Easy to Make at Home
Making Homemade Strawberry Marshmallows is surprisingly straightforward. With just a few simple ingredients and a little patience, you can create something that feels utterly gourmet. The joy of whipping up something from scratch is unparalleled, and the taste is worth every minute spent in the kitchen.
Kids’ Favorite Activity
If you have kids, they’ll love helping you in the kitchen! They can get involved by pureeing strawberries or sprinkling powdered sugar. These marshmallows are not only a treat but also a fun activity that creates lasting memories.
Endless Customization
Another delightful aspect is how easy it is to customize these marshmallows. You can choose to dip them in chocolate or coat them with sprinkles. The possibilities are endless! You can even experiment with other flavors if you’re feeling adventurous.
Guilt-Free Indulgence
For those who worry about the ingredients in store-bought marshmallows, making your own gives you control over what goes in. You can create a lighter version that still satisfies your sweet tooth without any preservatives or artificial flavors.
What You’ll Need for Homemade Strawberry Marshmallows
To create your own Homemade Strawberry Marshmallows, you’ll need a handful of fresh, high-quality ingredients. Each one plays an important role in building the delicious flavor and texture. The key players include vibrant strawberries, granulated sugar for sweetness, and powdered sugar for coating. These ingredients come together to make a treat that is not just enjoyable but also memorable.
- 1 cup whole frozen strawberries, thawed: These provide the fruity flavor and natural sweetness.
- 1 ¾ cups granulated sugar: This sweetens the marshmallows and contributes to their texture.
- 8 tablespoons cold water: Used to activate the gelatin.
- 2 packets unflavored gelatin (1/4 ounce each): This is what gives the marshmallows their fluffy structure.
- 2 teaspoons vanilla: Adds a warm, comforting flavor to balance the strawberries.
- 1/4 teaspoon salt: Enhances sweetness and balances flavors.
- about 1/4 cup powdered sugar: For dusting the pan and coating the finished marshmallows.
- 8 ounces semi-sweet chocolate chips: For a decadent coating.
- 1 teaspoon vegetable shortening: Helps to smooth out the chocolate when melting.
- Sprinkles (optional): To add a fun touch to your finished marshmallows.
Homemade Strawberry Marshmallows Instructions
Making Homemade Strawberry Marshmallows is a rewarding process that brings joy from start to finish. You’ll be amazed at how simple the steps are, and you’ll feel a sense of accomplishment as your creation comes to life. Let’s dive right into the steps!
- In a small bowl, stir together the gelatin and the 8 tablespoons of cold water. Set aside to allow the gelatin to bloom.
- Line a baking sheet (half-sheet size) with parchment paper and sprinkle powdered sugar all over the parchment. This will prevent sticking. Set aside.
- Using a food processor or blender, puree the thawed strawberries until smooth. This is the heart of your marshmallow flavor, so make sure to blend well.
- In a medium saucepan, combine the strawberry puree, granulated sugar, and salt. Stir together over medium heat until the sugar is completely dissolved.
- Add the bloomed gelatin to the sugar mixture. Raise the heat to medium-high and whisk together until the gelatin is fully incorporated and the mixture comes to a gentle boil.
- Once boiling, remove from heat and add the vanilla. Carefully pour the hot strawberry syrup into the bowl of an electric mixer fitted with the whisk attachment.
- Gradually increase the mixer speed to high, taking care to avoid splashing yourself with the hot syrup. Allow the mixture to whisk on high for about 15 minutes, until it has doubled in volume and is smooth and shiny.
- Immediately pour the mixture into the prepared pan, using a spatula to spread the marshmallow fluff into an even layer. Allow it to sit for at least several hours, preferably overnight, to set. The marshmallows are ready to cut when they are no longer sticky to the touch.
- When you’re ready to cut, sprinkle more powdered sugar on top of the marshmallows. Use a heart-shaped cookie cutter or a pizza cutter to cut them into your desired shapes. Use a metal spatula to lift them off the sheet carefully to retain their shape.
- For the chocolate coating, melt together the chocolate chips and vegetable shortening. You can do this on a double boiler or in the microwave in 15 to 20-second increments, stirring in between until the chocolate is completely melted and viscous.
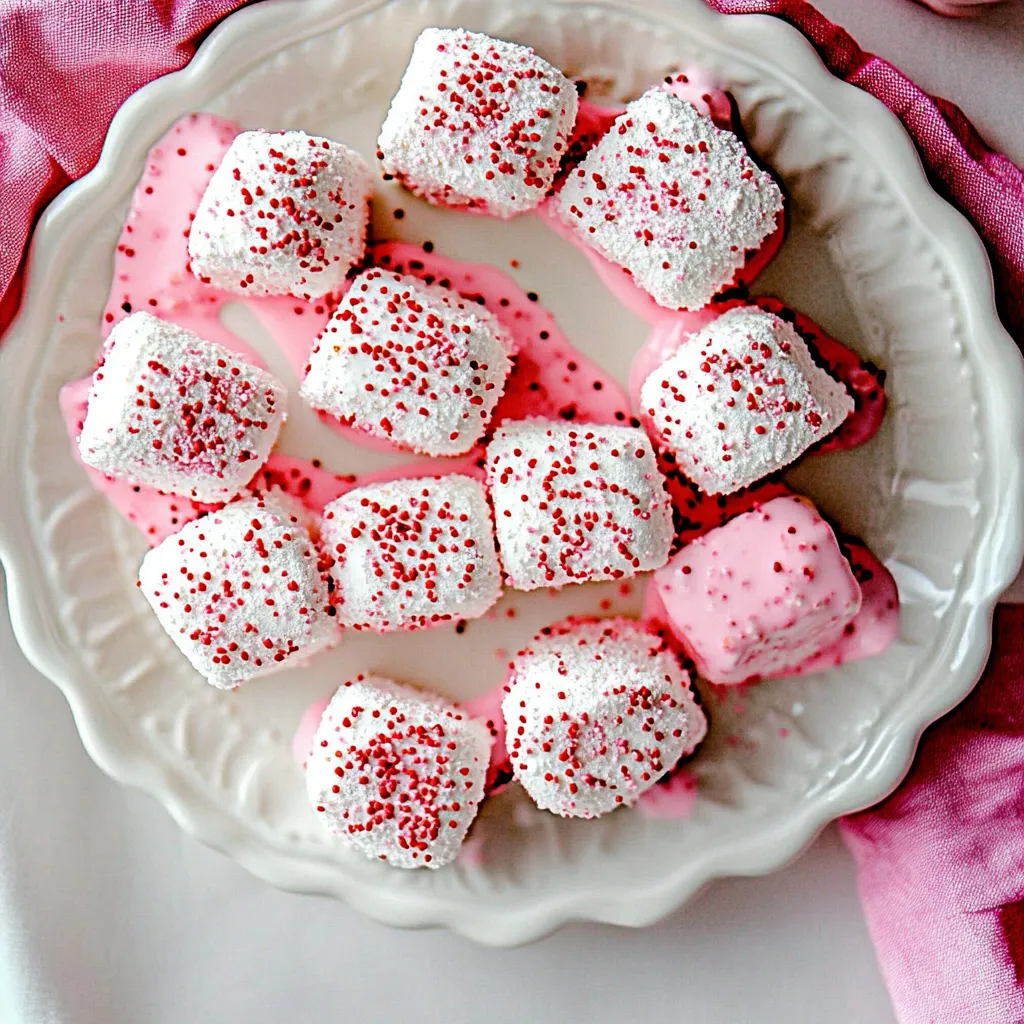
- Dip the marshmallows in the melted chocolate and lay them on a clean piece of parchment paper. Top with sprinkles if desired. Refrigerate for at least an hour to allow the chocolate to set up.
Things Worth Knowing
- Gelatin Blooming: Always allow the gelatin to bloom in cold water before adding it to your mixtures. This ensures the marshmallows will achieve the right texture.
- Temperature Control: Be cautious of the temperature when heating the sugar mixture. Boiling too long can affect the final texture of your marshmallows.
- Fluffiness Factor: Whipping the mixture for the full time is essential to achieving that light and fluffy texture we crave in marshmallows.
- Cutting Techniques: Use a sharp knife or a pizza cutter for clean edges when cutting the marshmallows. This helps maintain their shape.
- Storage Tips: Keep leftover marshmallows in an airtight container to maintain their freshness and softness.
Making Adjustments
When it comes to Homemade Strawberry Marshmallows, there’s always room for creativity. Whether you want to tweak the flavor or make them more festive, here are some adjustments you can consider:
- Storage: Store your marshmallows in an airtight container at room temperature for up to a week to keep them fresh.
- Freezing: These marshmallows can be frozen. Just ensure they’re well wrapped to prevent freezer burn.
- Pairing: Enjoy these marshmallows with hot chocolate, in s’mores, or simply as a sweet treat with coffee.
- Flavor Variations: Feel free to experiment with other fruit purees, like raspberry or peach, to create your unique marshmallow flavors.
- Coatings: Get creative with toppings, using crushed nuts or coconut flakes for a different texture.
- Presentation: Consider serving them in a fun way, like on skewers or in dessert cups, for parties.
Perfect Matches for Homemade Strawberry Marshmallows
Serving Homemade Strawberry Marshmallows opens up a world of delightful possibilities. Here are some great ideas to consider:
- At Parties: These marshmallows are perfect for birthday parties, bridal showers, or any festive gathering, bringing a touch of joy to the table.
- With Beverages: Pair them with a hot cup of chocolate or coffee. The sweetness of the marshmallows complements warm drinks beautifully.
- As Gifts: Package them in cute jars with ribbons for a thoughtful homemade gift that friends and family will surely appreciate.
- Seasonal Treat: They’re especially delightful during spring and summer, aligning perfectly with outdoor gatherings and picnics.
- On Desserts: Use them as a topping on cakes or cupcakes for an exciting texture and flavor boost.
- Storing: If you have leftovers, ensure they are stored properly in a cool, dry place to maintain their fluffiness.
FAQ
Conclusion
Homemade Strawberry Marshmallows are a delightful treat that combines the sweetness of strawberries with a fluffy texture, making them perfect for any occasion. I encourage you to try making these delightful marshmallows at home, as they are easy to prepare and will surely impress your friends and family. Enjoy the fun of creating something special, and don’t forget to share your sweet creations!
Homemade Strawberry Marshmallows
Ingredients
Equipment
Method
- 1. In a small bowl, stir together the gelatin and the 8 tablespoons of cold water. Set aside to allow the gelatin to bloom.
- 2. Line a baking sheet (half-sheet size) with parchment paper and sprinkle powdered sugar all over the parchment. This will prevent sticking. Set aside.
- 3. Using a food processor or blender, puree the thawed strawberries until smooth. This is the heart of your marshmallow flavor, so make sure to blend well.
- 4. In a medium saucepan, combine the strawberry puree, granulated sugar, and salt. Stir together over medium heat until the sugar is completely dissolved.
- 5. Add the bloomed gelatin to the sugar mixture. Raise the heat to medium-high and whisk together until the gelatin is fully incorporated and the mixture comes to a gentle boil.
- 6. Once boiling, remove from heat and add the vanilla. Carefully pour the hot strawberry syrup into the bowl of an electric mixer fitted with the whisk attachment.
- 7. Gradually increase the mixer speed to high, taking care to avoid splashing yourself with the hot syrup. Allow the mixture to whisk on high for about 15 minutes, until it has doubled in volume and is smooth and shiny.
- 8. Immediately pour the mixture into the prepared pan, using a spatula to spread the marshmallow fluff into an even layer. Allow it to sit for at least several hours, preferably overnight, to set. The marshmallows are ready to cut when they are no longer sticky to the touch.
- 9. When you're ready to cut, sprinkle more powdered sugar on top of the marshmallows. Use a heart-shaped cookie cutter or a pizza cutter to cut them into your desired shapes. Use a metal spatula to lift them off the sheet carefully to retain their shape.
- 10. For the chocolate coating, melt together the chocolate chips and vegetable shortening. You can do this on a double boiler or in the microwave in 15 to 20-second increments, stirring in between until the chocolate is completely melted and viscous.
- 11. Dip the marshmallows in the melted chocolate and lay them on a clean piece of parchment paper. Top with sprinkles if desired. Refrigerate for at least an hour to allow the chocolate to set up.
Notes
- Tip 1: If you don't want to cut them into heart shapes, use a pizza cutter to cut them into squares.
- Tip 2: Store your marshmallows in an airtight container to keep them fresh.
- Tip 3: These marshmallows can be frozen; just ensure they're well wrapped.
- Tip 4: Consider using other fruit purees to create unique flavors.
- Tip 5: Get creative with toppings, like crushed nuts or coconut flakes.