There’s something so nostalgic about the treats from our childhood, and Homemade Little Debbie Star Crunch is no exception. I remember the excitement of diving into a bag of these chewy, chocolate-covered delights after school. It was a ritual! Now, I love to recreate that experience in my own kitchen, and trust me, there’s a special kind of joy that comes with making your own version of this childhood favorite. With just a few simple ingredients, you can transport yourself back to those carefree days in no time. These treats are perfect for sharing with family and friends, or simply indulging after a long day. Plus, they’re so easy to make that it feels like a treat in itself to whip them up. So, let’s get started on this delightful journey into the world of Homemade Little Debbie Star Crunch.
Recipe Snapshot
30 mins
30 mins
0 mins
Medium
180 kcal
2 g
Gluten-Free, Low FODMAP
8 g
Mixing Bowl, Wooden Spoon
Why You’ll Love This Homemade Little Debbie Star Crunch
1. The Sweet Nostalgia
Every bite of Homemade Little Debbie Star Crunch takes me back to my childhood. The chewy, gooey mixture of caramel and marshmallows, combined with crunchy cereal, is reminiscent of simpler times. I love how this recipe brings the flavors of those iconic store-bought treats right to my table, allowing me to share those sweet memories with loved ones.
2. Simple Ingredients
With just a handful of ingredients, this recipe is not only quick but also incredibly satisfying. You probably already have most of them in your pantry! The combination of caramel bits, butter, and marshmallows creates a deliciously sticky base that holds everything together. It’s a reminder that delicious treats don’t need to be complicated.
3. Fun for Everyone
Making Homemade Little Debbie Star Crunch is a fantastic activity to do with kids or friends. The process of mixing, molding, and dipping is not only fun but creates lasting memories. I’ve had so many laughs and shared stories while creating these treats together. It’s a wonderful way to bond over something sweet!
4. Customizable Bliss
One of the best parts about this recipe is its versatility. You can easily swap out ingredients to suit your taste. Want to add some peanut butter? Go for it! Or perhaps some chocolate chips for an extra chocolatey bite. Each time I make Homemade Little Debbie Star Crunch, I discover a new twist that makes it even more enjoyable.
5. Perfect for Any Occasion
Whether it’s a birthday party, school bake sale, or just a fun treat for movie night, these chewy delights are a hit. Everyone loves the combination of textures and flavors, making them a go-to dessert for any gathering. You can even package them up as gifts for friends and family.
6. No Special Equipment Needed
You don’t need fancy tools to make Homemade Little Debbie Star Crunch. A simple microwave and a mixing bowl are all you need to whip up these treats. This makes it accessible for anyone to give it a try, regardless of their cooking experience.
What to Buy for Homemade Little Debbie Star Crunch
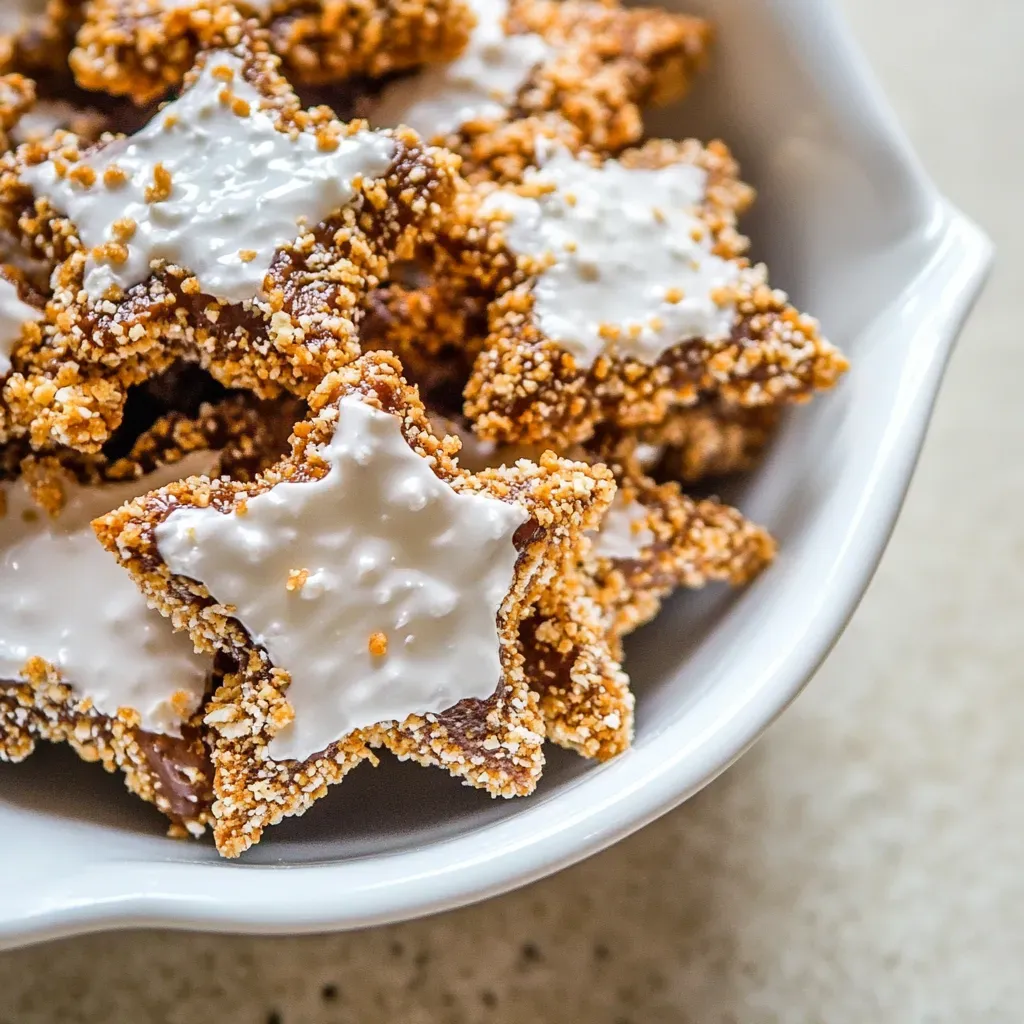
Choosing the right ingredients is crucial for creating that perfect Homemade Little Debbie Star Crunch. Each component plays a vital role in achieving the desired flavor and texture. The caramel bits provide a sweet and chewy base, while the marshmallows add fluffiness. The Rice Krispies bring a delightful crunch, making each bite irresistible. Together, these ingredients create a nostalgic treat that’s worth every moment spent in the kitchen.
- one 11-ounce bag Kraft Caramel Bits: These are a quick and easy way to achieve that gooey caramel texture without the hassle of unwrapping. They melt perfectly and blend seamlessly into the mixture.
- ¼ cup unsalted butter: Adds richness and helps bind the ingredients together. It also enhances the flavor profile, making the treats taste even more decadent.
- 2 cups mini-marshmallows: These fluffy delights add a lightness to the otherwise dense mixture. They melt beautifully and create a soft texture in every bite.
- 4 cups Rice Krispies cereal: The star ingredient that brings crunch and structure to the treats. They soak up the caramel, giving each piece a satisfying bite.
- one 12-ounce bag milk chocolate chips: For dipping, these make the treats irresistibly chocolaty. Melting them creates a smooth coating that elevates the overall flavor.
- 2 to 3 tablespoons vegetable shortening: Optional, but highly recommended for a smoother chocolate dip. It helps the chocolate stay silky and easy to work with.
Making Homemade Little Debbie Star Crunch
Now that we’ve gathered our ingredients, it’s time to bring the magic of Homemade Little Debbie Star Crunch to life. Follow these detailed steps for the perfect treat!
Line a baking sheet with a Silpat liner or parchment paper and set it aside. This will prevent your treats from sticking and make clean-up a breeze.
In a large microwave-safe bowl, add the caramel bits. Microwave on high power for about 2 minutes, stopping every 30 seconds to stir. The goal is to soften and melt the caramel bits; they should become the consistency of natural peanut butter, a bit loose and oily.
Add the butter to the melted caramel and return to the microwave for about 1 minute. Stir the mixture well to combine the melting butter with the caramel. It’s okay if the butter pools at the top; just give it a good mix!
Next, add the mini-marshmallows to the bowl and microwave for another 2 minutes, stirring every 30 seconds until they’re soft and fluffy. They will swell and puff up, so make sure to keep an eye on them!
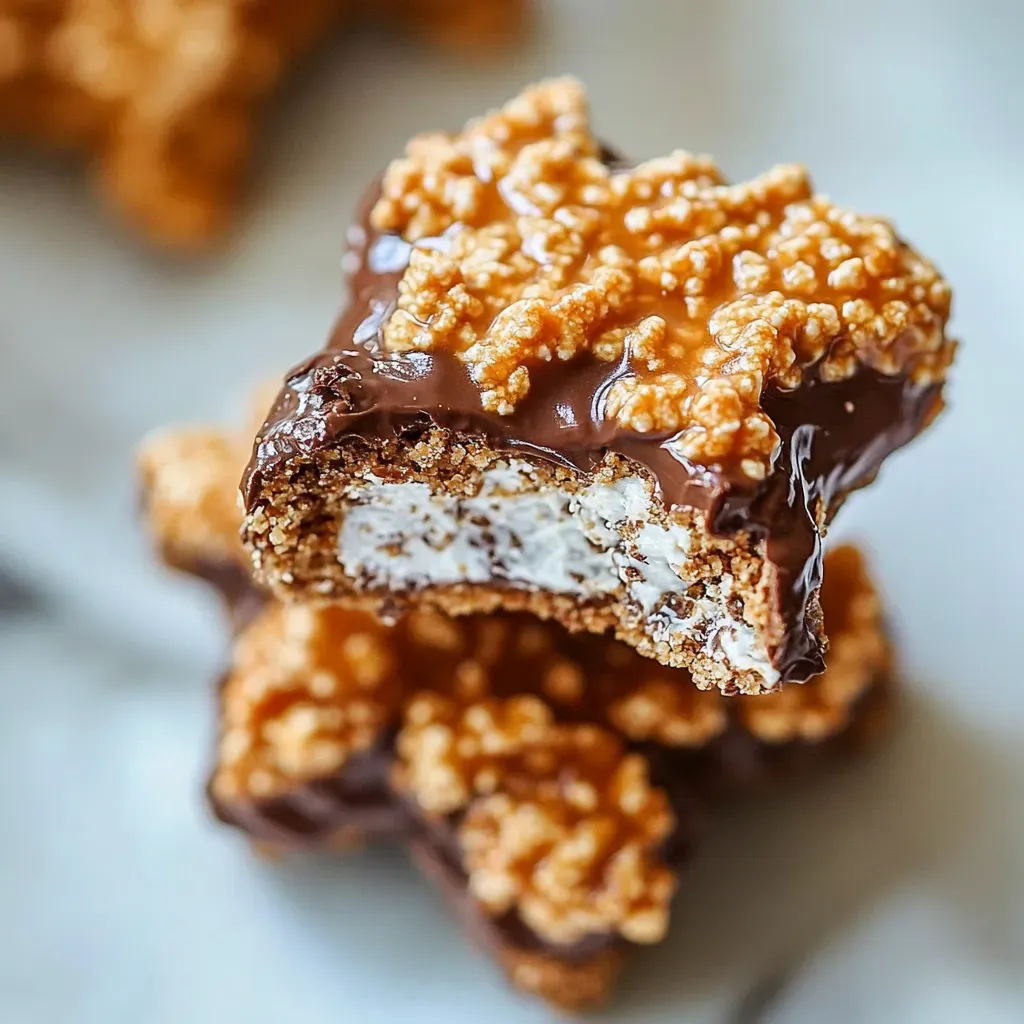
Once the marshmallows are melted, quickly fold them into the caramel mixture until combined. The marshmallows should still hold some of their shape but mix well with the caramel.
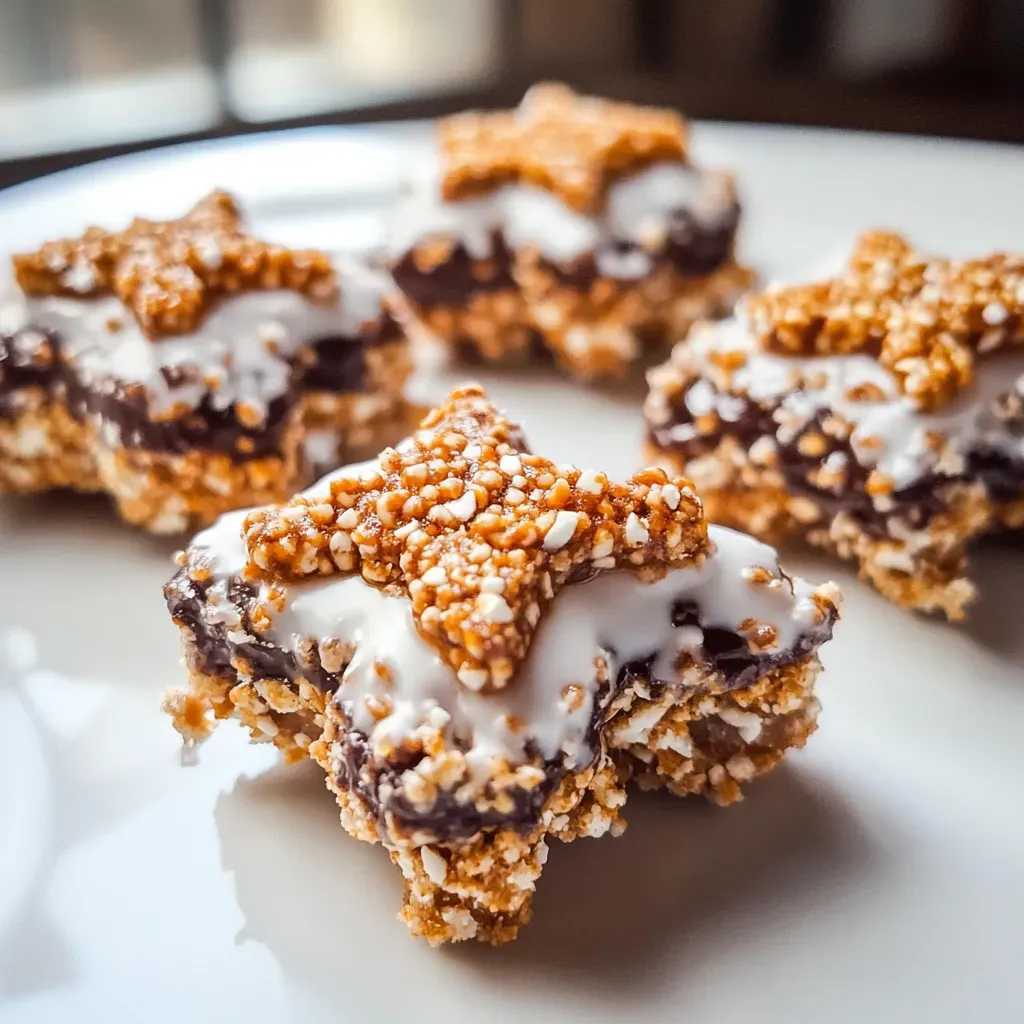
While the mixture is still warm, add in the Rice Krispies cereal. Stir everything together until well coated. Be gentle, as the mixture will cool and firm up quickly.
Lightly spray your hands with cooking spray or grease them with butter. Using your hands, form the mixture into 3-inch diameter discs that are about 1-inch tall. You should be able to make about 11 discs. If the mixture is too warm, let it cool for a few minutes before handling.
Place the discs on the prepared baking sheet and cover with plastic wrap. Allow them to firm up for at least 2 hours, or overnight if you can wait!
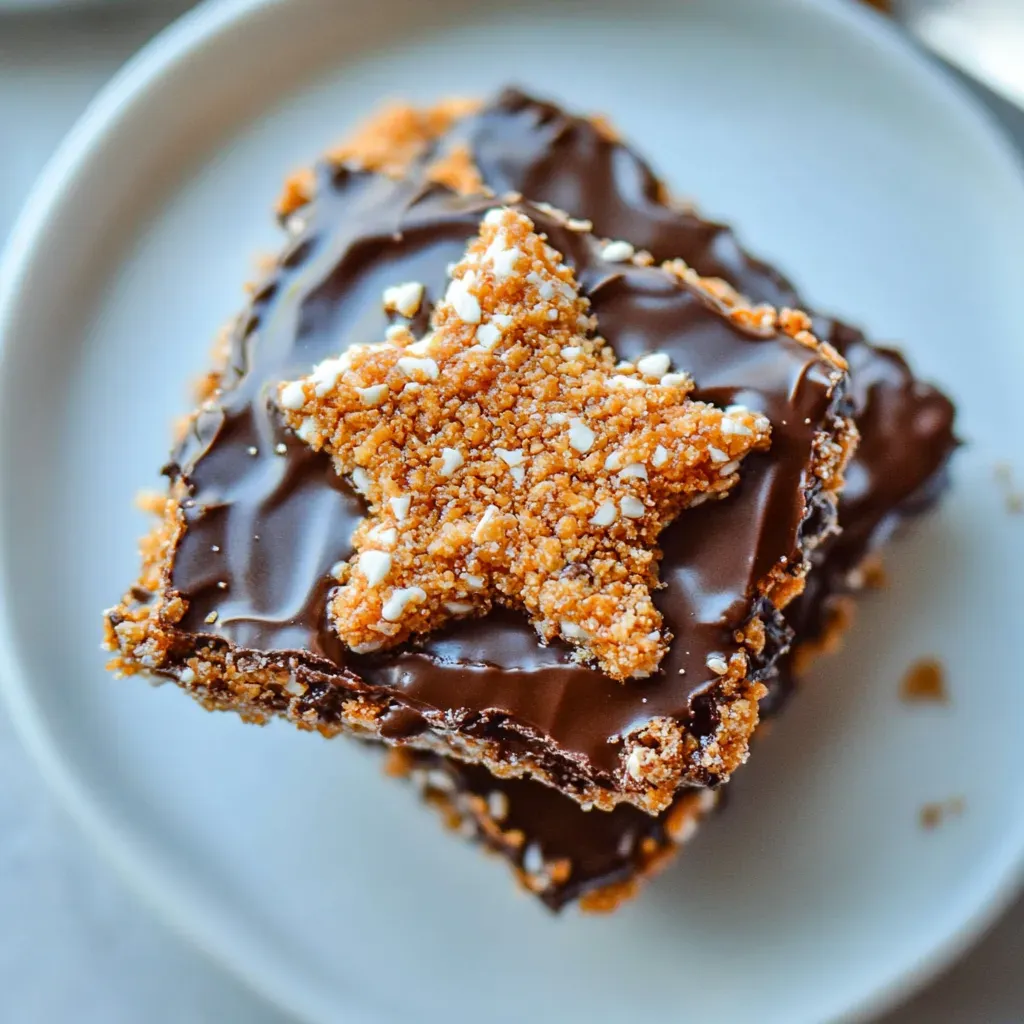
For the chocolate coating, add the chocolate chips and shortening to a microwave-safe bowl. Heat on high power for about 1 minute, stirring every 15 seconds until smooth. This step is crucial for achieving that silky chocolate texture.
Dip each disc into the melted chocolate one at a time, allowing the excess chocolate to drip off into the bowl. I like to use two forks for this step; it helps balance the discs and lets the chocolate drain easily.
Once coated, return the discs to the parchment-lined tray and allow them to set in the refrigerator for at least 30 minutes. This helps the chocolate harden, making your Homemade Little Debbie Star Crunch even more delightful!
Things Worth Knowing
- Storage: Once your treats have set, store them in an airtight container at room temperature or in the refrigerator. They’ll stay fresh for up to one week.
- Freezing: If you want to keep them longer, these treats can be frozen for up to three months. Just make sure to wrap them well to prevent freezer burn.
- Serving Size: Each disc is a perfect size for a sweet treat. I find that one is usually enough, but you might be tempted to go for more!
- Changing Flavors: Feel free to experiment! You can add in some chopped nuts or drizzle extra chocolate on top for a fancy touch.
- Perfect for Parties: These treats make a fantastic treat for birthday parties, potlucks, or just a fun family gathering.
Tips and Tricks about Homemade Little Debbie Star Crunch
We all love a good treat, and with Homemade Little Debbie Star Crunch, a few tips can help you nail this recipe every time. Here are some insights that will assist you in achieving the best results.
- Storage: Keep your treats in an airtight container to maintain freshness. They can be stored at room temperature for about a week, but if you want to keep them longer, refrigeration is best.
- Freezing: Don’t hesitate to freeze your treats! They can be stored in the freezer for up to three months. Just make sure to wrap them tightly.
- Serving Suggestions: These treats are great as a standalone dessert, but you can also serve them alongside a scoop of vanilla ice cream for an extra indulgent experience.
- Pairing Drinks: Consider pairing your Homemade Little Debbie Star Crunch with a glass of cold milk or a warm cup of coffee for a delightful contrast.
- Variations: Get creative! You can add in other ingredients like dried fruit or nuts to give your treats a unique twist.
Serving Suggestions
When it comes to serving your delicious Homemade Little Debbie Star Crunch, the possibilities are endless! Here are some creative ideas to elevate your serving experience:
- With Ice Cream: Serve your treats with a scoop of vanilla ice cream for a delightful dessert combo.
- Party Platters: Arrange them on a colorful platter for birthday parties. They’re sure to be a hit with kids and adults alike!
- Dessert Buffets: Include these treats in dessert buffets for events like weddings or family reunions. They’ll add a fun touch and appeal to all ages.
- Seasonal Occasions: Decorate with seasonal sprinkles for holidays. Red and green for Christmas or pastel colors for Easter can make them festive.
- Snack Time: These treats make a perfect afternoon snack alongside a warm cup of tea or coffee.
- As Gifts: Package them in decorative boxes and give them as homemade gifts for special occasions.
FAQ
Conclusion
Homemade Little Debbie Star Crunch is not just a recipe; it’s a trip down memory lane filled with sweet nostalgia. The combination of chewy caramel, fluffy marshmallows, and crunchy cereal makes each bite a delightful experience. I encourage you to gather your ingredients and give this recipe a try. You won’t just be making a treat; you’ll be creating memories that you and your loved ones will cherish for years to come!
Homemade Little Debbie Star Crunch
Ingredients
Equipment
Method
- Line a baking sheet with a Silpat liner or parchment paper, set aside.
- In a large microwave-safe bowl, add the caramel bits and microwave on high power to soften and melt, about 2 minutes, stopping every 30 seconds to check and stir.
- Add the butter to the caramels, and heat on high power to melt the butter, about 1 minute. Stir the butter and caramel together to combine.
- Add the marshmallows and heat to melt them, about 2 minutes, stopping every 30 seconds to check and stir to combine.
- While the mixture is still nice and hot, add the cereal and stir to combine.
- Spray your hands with cooking spray or grease them with butter and form 3-inch diameter discs that are about 1-inch tall.
- Place discs on prepared baking sheet sheet, cover with plastic wrap, and allow them to firm up for at least 2 hours, or overnight, before dipping them in chocolate.
- In a large microwave-safe bowl, add the chocolate and shortening and heat on high power to melt, about 1 minute.
- Dip discs into chocolate one by one, and let chocolate drain off over the bowl, before returning coated discs to a parchment-lined tray.
- Allow treats to set up and cool in the refrigerator for at least 30 minutes.
Notes
- Caramel bits: These are already unwrapped and convenient. You may also use regular caramels, probably 30 to 40+ unwrapped.
- Storage: After chocolate has set, treats can be stored in an airtight container at room temperature or in the refrigerator for up to 1 week, or in the freezer for up to 3 months.