The moment I first tasted Fudgy Brownie Balls, I was immediately transported to my childhood kitchen, where the air was filled with the rich aroma of freshly baked brownies. It was a rainy afternoon, and I remember my mother teaching me how to mix the ingredients with love and care. We would often sneak spoonfuls of the batter, relishing the sweetness of chocolate before it even made it to the oven. These little bites of heaven remind me of those carefree days, and now, I enjoy creating them for my family and friends. Every bite is a nostalgic reminder of the joy and warmth that comes from baking together.
Recipe Snapshot
1 hr 5 mins
30 mins
35 mins
Medium
150 kcal
2 g
Keto, Paleo, Vegan
6 g
Baking Dish, Large Bowl or Stand Mixer, Baking Sheet, Medium Cookie Scoop, Wide Mouth Glass
What Sets This Fudgy Brownie Balls Apart
Decadent Chocolate Experience
What sets these little treats apart is their rich, fudgy texture that melts in your mouth. The combination of the brownie mix and chocolate frosting creates a flavor sensation that is simply irresistible. Each bite is an explosion of chocolatey goodness that will satisfy even the strongest cravings.
Super Fun to Make
Making Fudgy Brownie Balls is a delightful process. From mixing the ingredients to rolling them into perfect little spheres, the whole experience is enjoyable. I love involving my kids, letting them dip the balls in melted chocolate and sprinkle them with their favorite toppings. It’s a great way to bond and create lasting memories in the kitchen!
Customizable Delights
These brownie balls are incredibly versatile. You can tailor them to your taste with different toppings and fillings. Want to add a hint of salt? Sprinkle sea salt on top. Craving some crunch? Mix in nuts or use crushed cookies as a coating. The possibilities are endless, which keeps the recipe fresh and exciting each time you make it!
Perfect for Any Occasion
Whether you’re hosting a party, celebrating a birthday, or just indulging in a quiet night at home, Fudgy Brownie Balls are the perfect treat. They’re easy to serve, and everyone loves them! Plus, you can prepare them in advance, making them a stress-free addition to any gathering.
Deliciously Addictive
Once you start snacking on these chocolate treats, it’s hard to stop! Their bite-sized nature makes them perfect for sharing (or not!). You might want to double the batch because they disappear quickly, especially when friends and family are around.
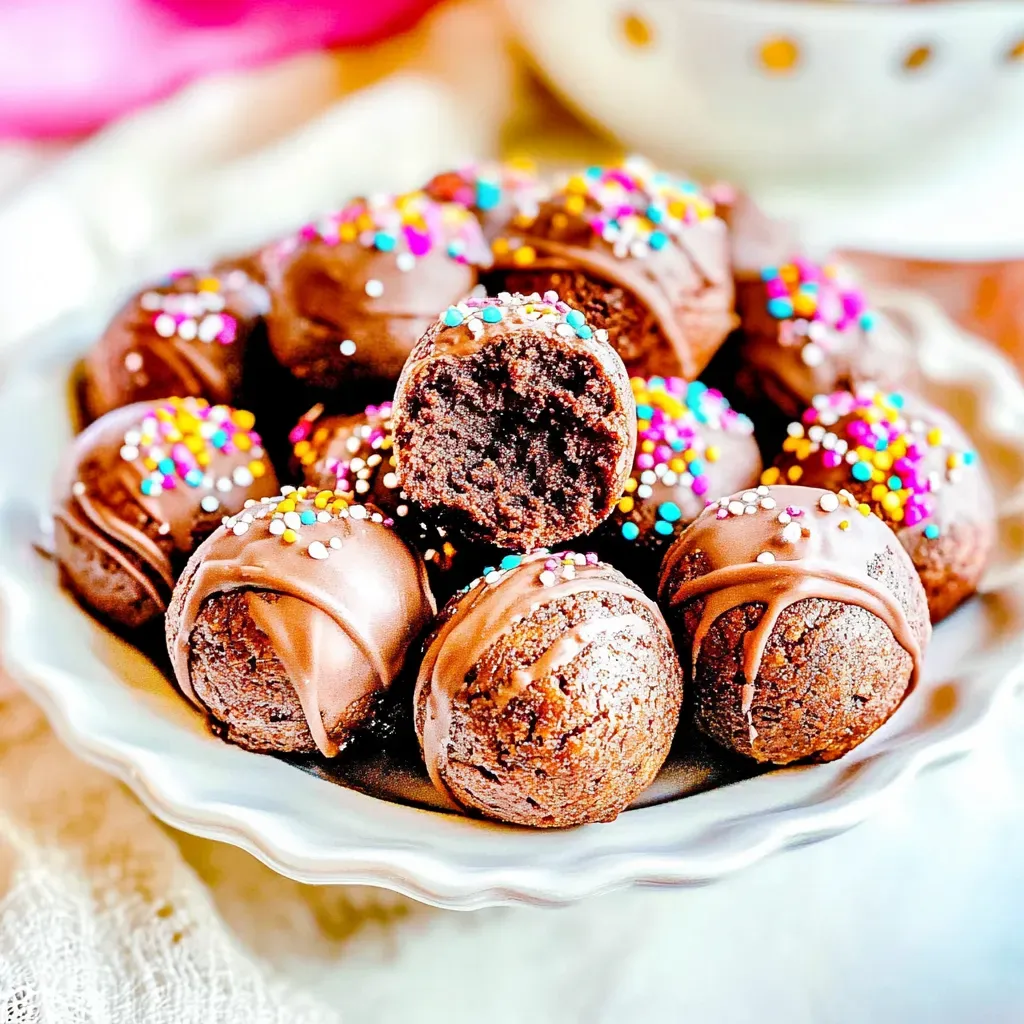
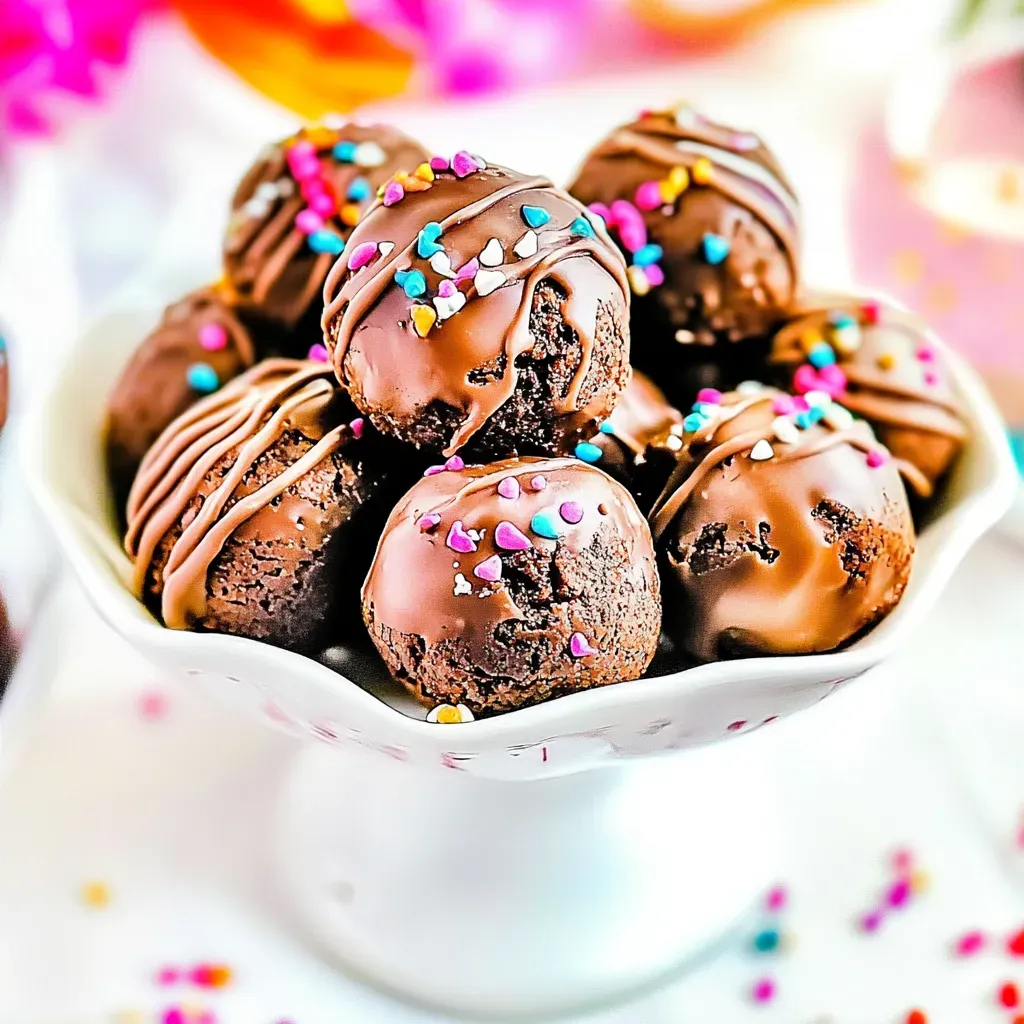
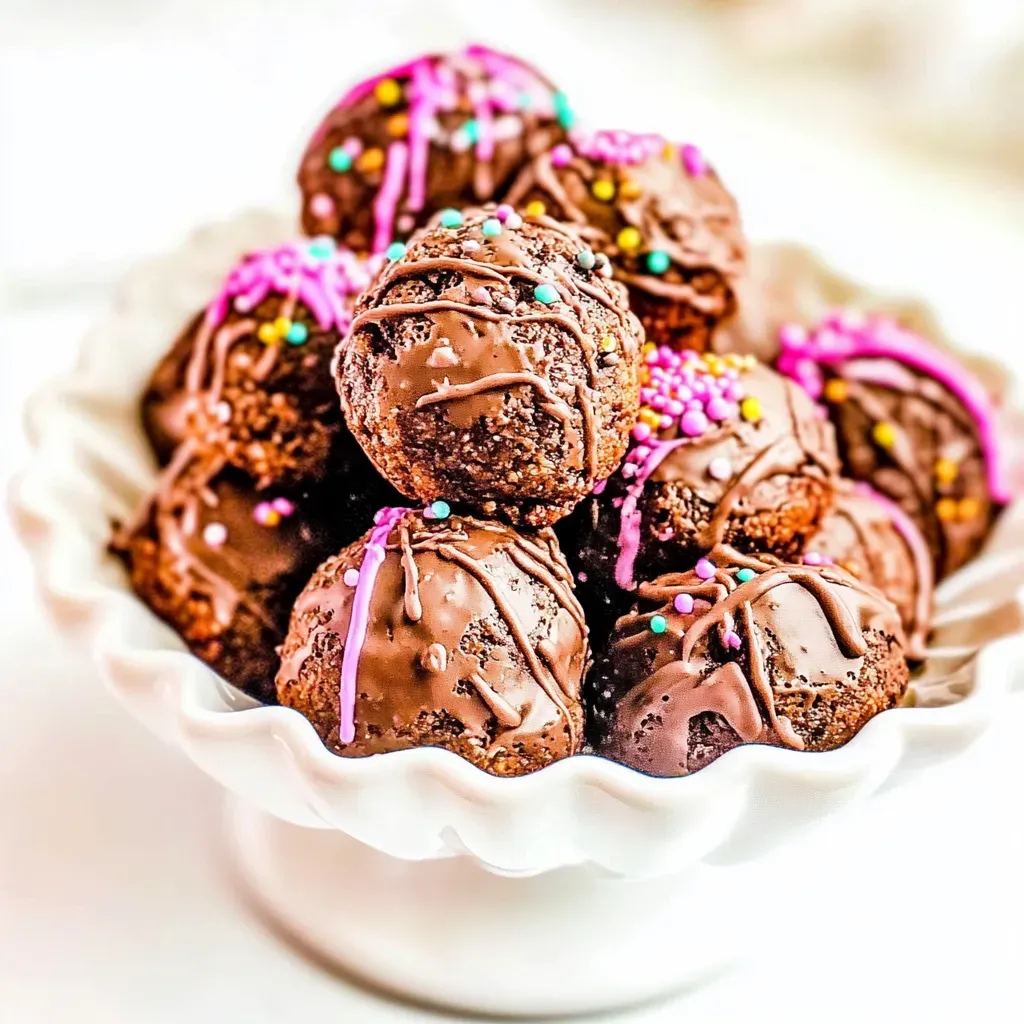
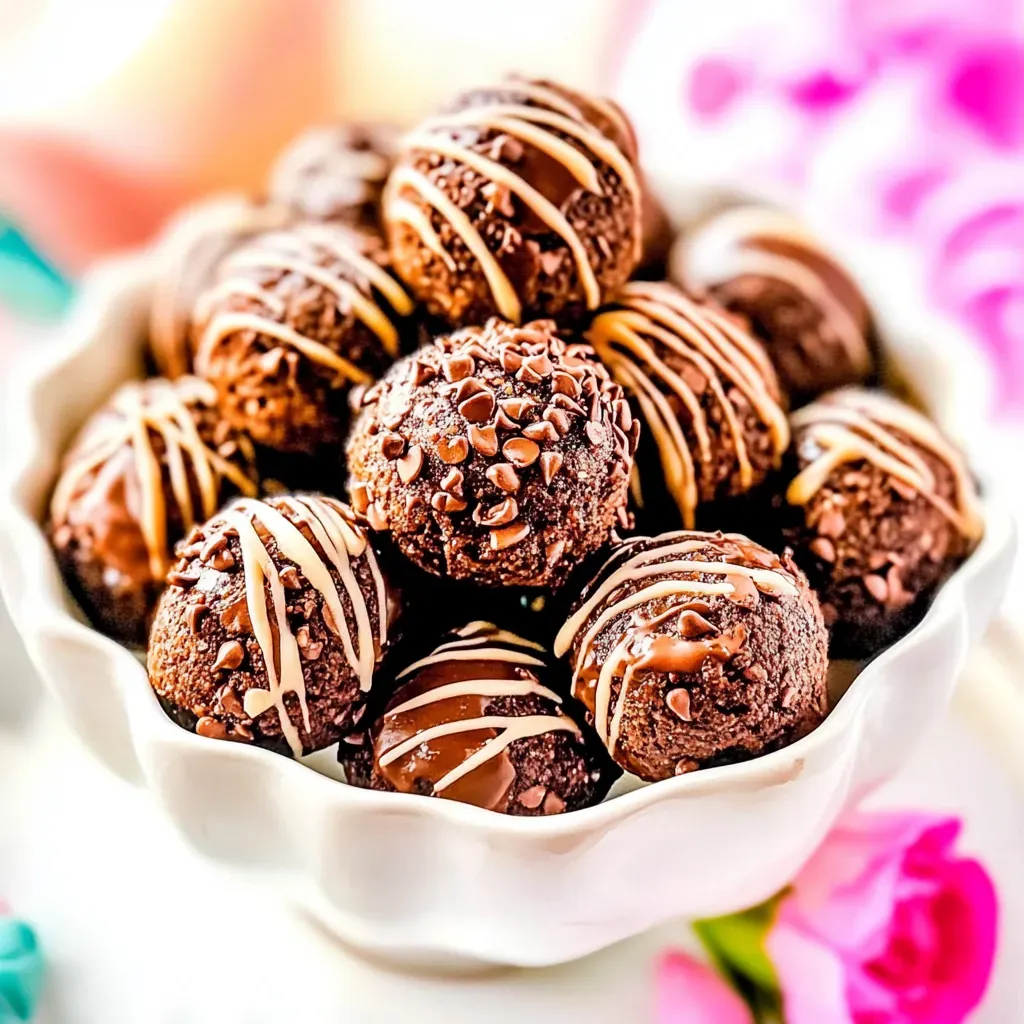
Visual Appeal
Lastly, Fudgy Brownie Balls are a feast for the eyes as well as the palate. Dipping them in melted chocolate and adding colorful sprinkles creates a fun and festive look. They’re not just delicious; they’re also stunning on a dessert platter!
What You Need for Fudgy Brownie Balls
For these Fudgy Brownie Balls, you’ll want ingredients that work harmoniously together to create that classic brownie flavor. The key players, such as the brownie mix and chocolate frosting, are essential for achieving that fudgy texture. Let’s dive into the specifics!
- One 18-ounce box fudge brownie mix: This is the foundation of your brownie balls, providing rich chocolate flavor and a sweet base.
- 1 cup chocolate frosting: Rich and creamy, the frosting adds moisture and helps bind the brownie balls together.
- 3 cups chocolate melting wafers: These are used for coating the brownie balls, giving them a smooth, glossy finish.
- Sprinkles (optional): A fun and colorful addition that adds visual appeal and a touch of whimsy.
Recipe Steps for Fudgy Brownie Balls
Preparing Fudgy Brownie Balls is a delightful journey, and I can’t wait to guide you through it! You’ll find that each step brings you closer to that delicious end product. Let’s get started!
- Prepare the brownie mix according to the package directions for an 8×8-inch baking dish. For the best results, allow the brownies to cool completely before using them. I usually like to bake them the day before to ensure they’re ready.
- Break the cooled brownies into large chunks and add them to a large bowl or a stand mixer fitted with a paddle attachment. Mix until the brownies crumble, and all larger pieces are gone. You want it to be a fine crumble for easier shaping.
- Next, add the chocolate frosting to the bowl and beat until fully incorporated. The mixture should be sticky and hold together well, making it easy to shape into balls.
- Line a large baking sheet with Silpat, parchment, or wax paper. This will prevent the brownie balls from sticking while they set.
- Using a medium cookie scoop, portion out the brownie mixture and roll each portion into balls between your hands. Briefly rolling helps smooth out any ridges from the scoop. The mixture should be soft and shapable but not sticky. If it’s too sticky, consider chilling it for 30 minutes to firm it up.
- Place your rolled balls on the prepared baking sheet, giving them ample space as they will be coated in chocolate.
- Now, melt the chocolate melting wafers in a wide-mouth glass. Heat them at 30-second intervals, stirring between each interval until fully melted. If you’re using chocolate chips, add 1 teaspoon of vegetable shortening like Crisco or 3 teaspoons of vegetable or coconut oil to improve the texture.
- Drop each ball, one at a time, into the melted chocolate. Use a spoon to coat them thoroughly. Carefully remove the ball with a fork, tapping to shake off any excess chocolate.
- Use a toothpick or another fork to slide the chocolate-coated ball back onto the baking sheet. Before the chocolate sets, sprinkle with desired toppings like sprinkles. If you prefer, you can allow the chocolate to set slightly before drizzling additional melted chocolate over the top.
- Lastly, allow the balls to set fully at room temperature for about 30 minutes before consuming or packing them up. Enjoy your homemade Fudgy Brownie Balls!
Things Worth Knowing
- Chill Your Mixture: If your brownie mixture is too sticky, chilling it for about 30 minutes can make it easier to roll into balls.
- Texture Matters: The texture of the brownie mix is crucial. You want it crumbly yet moist enough to hold together.
- Smooth Coating: Make sure to stir the chocolate melting wafers well to avoid lumps and achieve a smooth, glossy finish.
- Storage: Store the brownie balls in an airtight container to keep them fresh and chewy.
How to Switch It Up
If you want to get creative with your Fudgy Brownie Balls, there are plenty of ways to change things up! Here are some fun ideas to consider:
- Flavor Variations: Try using peanut butter or cream cheese frosting for a different flavor profile.
- Nutty Addition: Add crushed nuts to the brownie mixture for a delightful crunch.
- Chocolate Options: Experiment with different types of chocolate for coating, such as dark or white chocolate.
- Mini Versions: Make smaller balls for bite-sized treats that are perfect for parties.
- Seasonal Sprinkles: Change up your sprinkles to match the season or occasion!
How to Enjoy Fudgy Brownie Balls
When it comes to serving Fudgy Brownie Balls, there are so many delightful ways to enjoy them! Here are some suggestions:
- As a Sweet Treat: Perfect for dessert after dinner or as a sweet snack during the day.
- At Parties: Serve them on a platter at birthday parties or gatherings to share with friends and family.
- With Coffee: Pair these brownie balls with a nice cup of coffee or hot chocolate for a cozy afternoon.
- Seasonal Celebrations: They make excellent treats for holidays, adorned with festive sprinkles or colors.
- Gift Them: Package them in a cute box or jar for a thoughtful homemade gift.
FAQ
Conclusion
Fudgy Brownie Balls are not just a dessert; they are an experience filled with nostalgia and joy. The rich chocolate flavor and fudgy texture create a delightful treat that everyone loves. I encourage you to try making these brownie balls and share them with your loved ones. You won’t be disappointed!
Fudgy Brownie Balls
Ingredients
Equipment
Method
- Prepare the brownie mix according to the package directions for an 8×8-inch baking dish. For best results, let the brownies cool completely before using – I like to make them the day before.
- Break the brownies up into large chunks and add them to a large bowl or stand mixer fitted with a paddle attachment and mix until crumble and all of the larger pieces are gone.
- Add the chocolate frosting and beat in until fully incorporated.
- Line a large baking sheet with a Silpat, parchment, or wax paper.
- Use a medium cookie scoop to portion out the brownie mixture and roll into balls between your hands briefly to smooth out the ridges from the cookie scoop. The mixture should be soft and shapable but not leave a sticky residue on your hands. If it is sticky, try chilling for 30 minutes before shaping.
- Place the balls on the prepared baking sheet.
- Melt the chocolate melting wafers in a wide mouth glass at 30-second intervals, stirring between each, until fully melted. If using chocolate chips, add 1 teaspoon vegetable shortening such as Crisco or 3 teaspoons vegetable or coconut oil to the chocolate chips to provide a better texture and finished result.
- Drop the balls, one at a time, into the chocolate and use a spoon to coat. Use a fork to remove the ball from the chocolate and tap to remove any excess chocolate. Use a toothpick or another fork to help slide the ball off of the fork and back onto the baking sheet.
- Sprinkle with desired sprinkles before the chocolate sets, or allow the chocolate to set slightly before drizzle additional chocolate over the top.
- Allow the balls to set fully at room temperature for about 30 minutes before consuming or packing up.
Notes
- Tip 1: I used milk chocolate but semi-sweet or dark chocolate can also be used.
- Tip 2: Brownie Balls can be stored in an airtight container for up to 5 days at room temperature or in the fridge for up to 2 weeks.
- Tip 3: To freeze, place the balls in a freezer bag and squeeze out any excess air and freeze for up to 3 months. Let thaw at room temperature.