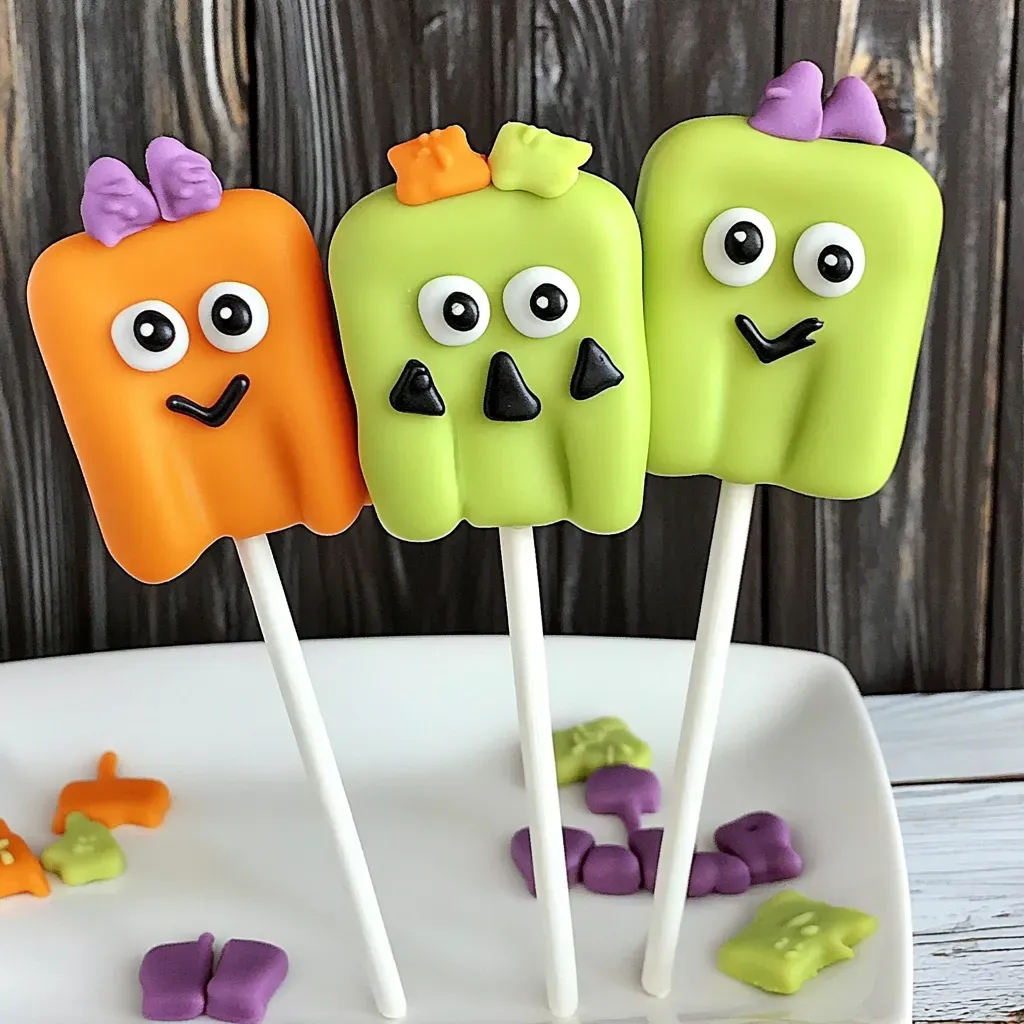
When it comes to Halloween, I always find myself returning to the same nostalgic treat: Easy Halloween Cookie Pops. These delightful creations bring a smile to anyone’s face, and they’re perfect for sharing with friends and family at spooky gatherings. Whether it’s a school party, a neighborhood get-together, or just a fun night in with the kids, making these cookie pops has become a cherished tradition in my home. The process of transforming simple cookies into whimsical monsters or jack-o’-lanterns is not only fun but also lets my creativity shine. Plus, they taste just as good as they look!
Recipe Snapshot
60 mins
0 mins
0 mins
Hard
180 kcal
2 g
Keto, Gluten-Free, Low FODMAP
8 g
Mixing Bowl, Food Processor
Why You’ll Love This Easy Halloween Cookie Pops
Why They’re So Fun
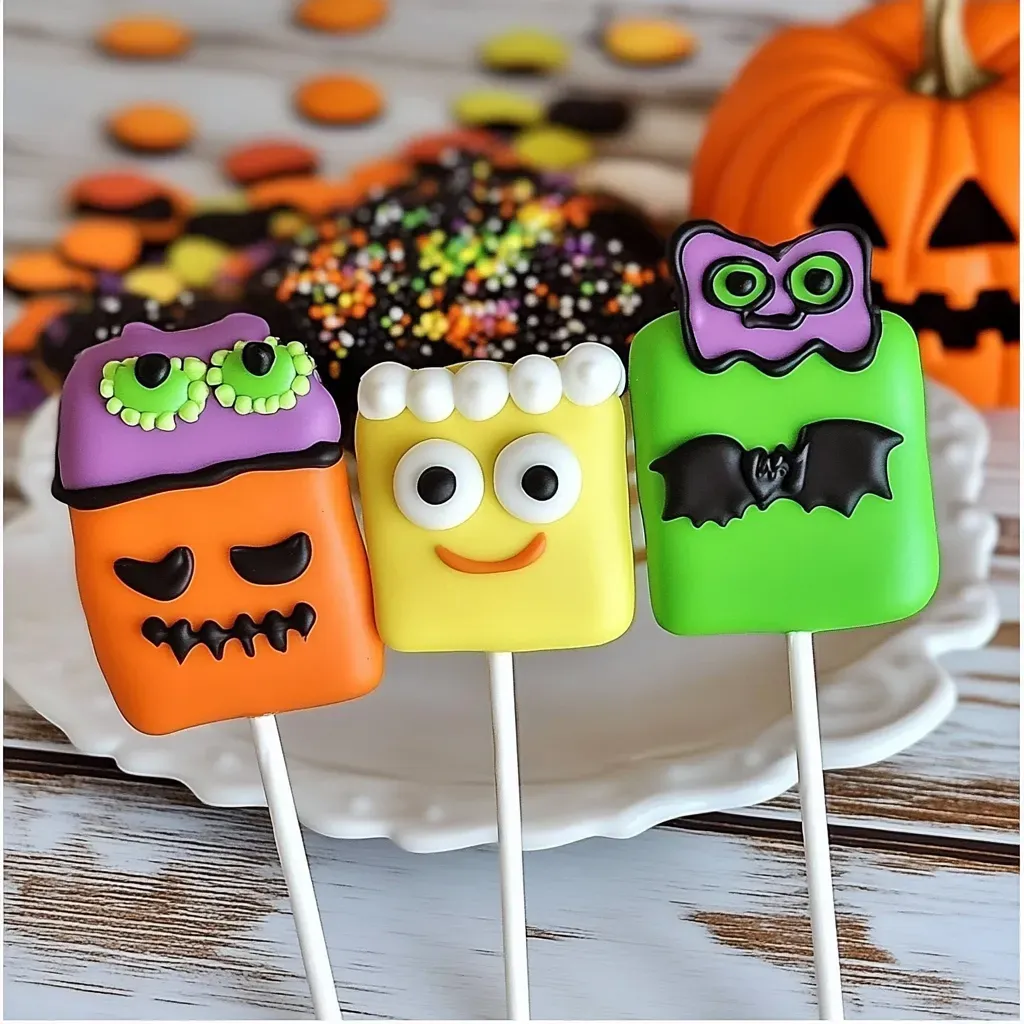
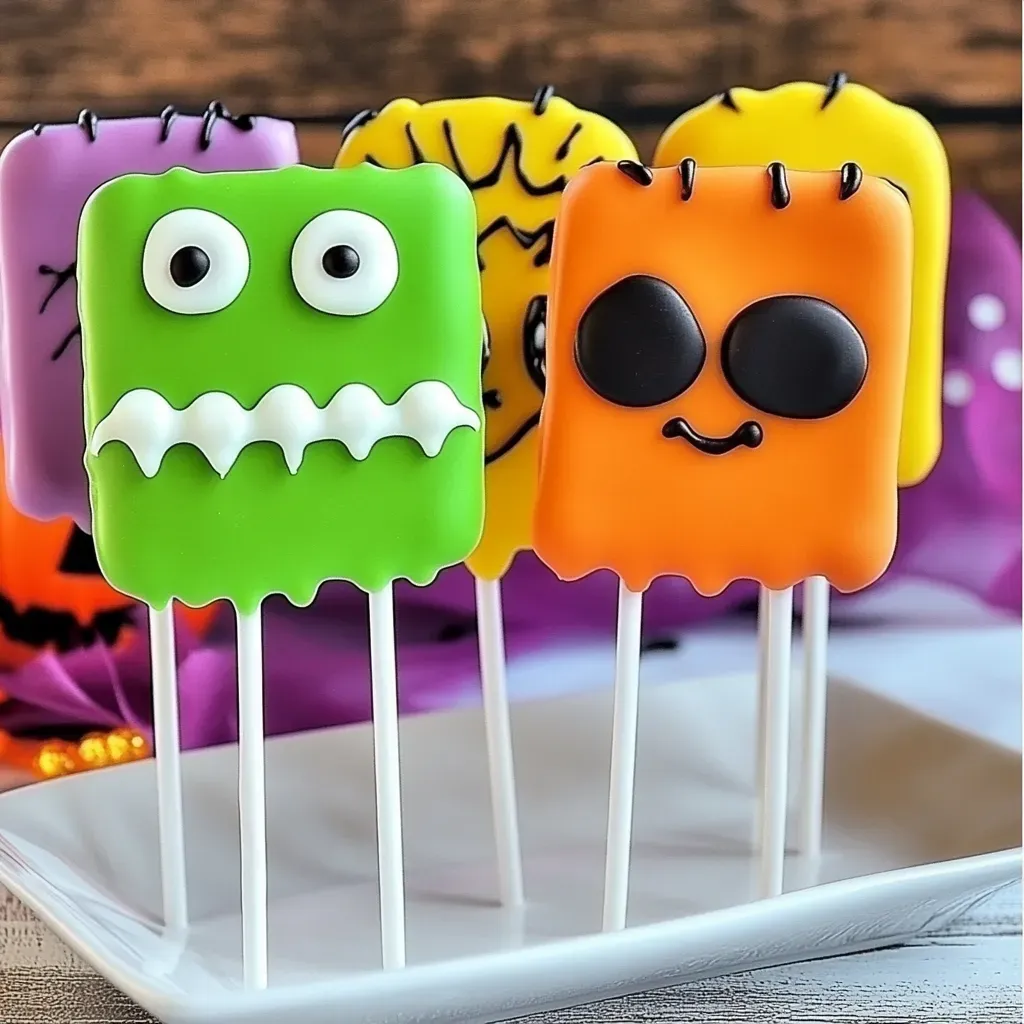
There’s something magical about Easy Halloween Cookie Pops. I love how they combine creativity with tasty treats. You can dress them up in endless ways, from goofy faces to spooky designs. This means every batch can be unique!
Perfect for Kids
Kids adore crafting their own cookie pops. The hands-on nature of decorating lets them unleash their imaginations. Plus, they get to enjoy the fruits of their labor afterward!
Great for Parties
These cookie pops are always a hit at Halloween parties. They’re easy to grab and eat, making them perfect for mingling. You’ll find guests of all ages flocking to the dessert table!
Creative Gift Idea
Want to share some Halloween spirit? Wrap these cookie pops in clear bags with festive ribbons and give them as gifts. They’re a delightful surprise that everyone will appreciate!
Customizable
One of the best parts? You can customize the flavors and colors. Use different types of candy coatings to reflect your favorite Halloween hues or flavors. The possibilities are truly endless!
Everything You Need for Easy Halloween Cookie Pops
For these Easy Halloween Cookie Pops, you’ll need a few simple ingredients. The beauty of this recipe lies in its versatility; the ingredients can easily be adjusted to fit your taste and creativity. Each component plays a crucial role in creating those delightful pops, both in flavor and visual appeal.
- Nutter Butter cookies: These iconic cookies form the base of your pops, offering a delicious peanut butter flavor that pairs wonderfully with candy coatings.
- White candy coating: This sweet coating adds a smooth, creamy layer to your cookie pops, making them look irresistibly tempting.
- Candy eyes: Nothing says “fun” like these playful candy eyes. They bring your cookie pops to life!
- Sandwich cookies: Used for the monster bodies, these cookies provide a sturdy structure and delicious taste.
- Light green candy coating: This coating can be mixed to achieve the perfect shade for your gooey monsters.
- Tootsie Roll® Chocolate Midgee candies: These candies are versatile for creating monster hair or other fun features.
- Kraft Jet-Puffed Mallow Bits: Perfect for adding extra texture and sweetness to your cookie pops.
- Black candy writer: Use this tool for detailing and adding fun expressions to your cookie pops.
- Mini chocolate chips: These can double as eyes or cute little accents on your designs.
- Black lace licorice: Ideal for creating hair or handles on your pops.
- Multi-colored sprinkles: Add these for a festive touch that everyone will love!
Making This Easy Halloween Cookie Pops
Let’s dive into the fun part: making your very own Easy Halloween Cookie Pops. The steps are straightforward, but the joy lies in the decorating! Gather your ingredients and let’s get started.
- Begin by preparing the white candy coating according to package directions. This coating will serve as the foundation for your cookie pops.
- Carefully twist apart the Nutter Butter cookies and lay them out on a baking sheet lined with waxed paper. The filling should be facing up.
- Using a lollipop stick or straw, create an indentation in the filling of each cookie. This will hold the stick securely later.
- Dip the end of a lollipop stick into the candy coating, covering about one inch of the stick. Gently press it into the indentation of a cookie.
- Add one to two teaspoons of extra candy coating on top of where the stick is pressed into the cookie. This will help hold the stick in place.
- Carefully place the top half of the cookie back onto the bottom half. This forms your cookie pop. Repeat this process for the remaining cookies.
- Now, place the cookie pops in the refrigerator to chill for at least fifteen minutes, which helps the candy coating set.
- If needed, reheat the candy coating according to the package directions. When ready, take a cookie pop from the fridge.
- Holding the stick, dip the cookie into the candy coating, ensuring it’s completely covered. Spoon extra coating over the cookie if necessary. Allow any excess coating to drip back into the container.
- Place the coated cookie on a wax paper-lined baking sheet. Immediately place two candy eyes onto the wet coating to give your monster some personality.
- Let your cookie pops sit for at least one hour to allow the coating to dry completely.
- Next, prepare the light green candy coating as you did before. Carefully twist apart the sandwich cookies and lay them on a baking sheet.
- Follow the same steps: make indentations, insert sticks, and place them in the fridge to chill.
- Unwrap the Tootsie Roll® Chocolate Midgee candies and roll them out to create fun shapes for hair. Use a knife to cut them into triangle shapes.
- Once again, dip each cookie pop into the coating, this time adding the chocolate hair before the coating dries.
- Prepare your black candy writer according to the package instructions, and use it to make monster mouths on your cookie pops.
- Use the orange candy coating to repeat the process with the sandwich cookies, creating jack-o’-lantern faces.
- For extra flair, add the mini chocolate chips to create noses and mouths!
- Finally, use the black candy writer to add some finishing touches and place them on a wax paper-lined sheet to dry completely.
How to Switch It Up
If you’re feeling adventurous, here are some fun ways to customize your Easy Halloween Cookie Pops. Each idea adds a unique twist to this already exciting treat!
- Storage: Store your cookie pops in an airtight container at room temperature for up to five days to keep them fresh.
- Freezing: You can freeze these cookie pops! Just wrap each one in plastic wrap and place them in a freezer-safe bag. They can last for up to three months in the freezer.
- Flavor Variations: Try using different flavored candy coatings, like strawberry or mint, to create new taste experiences.
- Different Shapes: Instead of traditional cookie shapes, use cookie cutters to create festive shapes like ghosts or bats.
- Gifting: Place these pops in colorful treat bags for Halloween giveaways. They make delightful party favors!
Accompaniments for Easy Halloween Cookie Pops
These Easy Halloween Cookie Pops can be enjoyed in various ways and are perfect for different occasions. Here are some ideas for serving:
- Halloween Parties: Serve these cookie pops on a festive dessert table alongside other Halloween treats like cupcakes and cookies.
- Classroom Treats: Pack them individually for school parties. Kids will love the fun and creativity!
- Home Movie Night: Enjoy these pops while watching your favorite Halloween movies with family and friends.
- Fall Festivals: Bring them to local fall festivals or pumpkin patches for a sweet snack on the go!
- Seasonal Decorations: Arrange them in a spooky vase or jar to use as a centerpiece for your Halloween decor.
FAQ
Conclusion
The Easy Halloween Cookie Pops are not just a treat but a fun-filled activity for everyone involved. They combine creativity, deliciousness, and a touch of Halloween magic in every bite. I encourage you to give them a try this spooky season. Gather your ingredients, get your friends or family involved, and enjoy the process of making these delightful cookie pops together!

Easy Halloween Cookie Pops
Ingredients
Equipment
Method
- Prepare the white candy coating according to package direction.
- Carefully twist apart Nutter Butter cookies and lay out on a baking sheet lined with waxed paper.
- Using a lollipop stick or straw, make an indentation into the filling of each cookie.
- Dip the end of a lollipop stick or straw into the candy coating, covering about 1” of the stick in the candy coating, and then gently press it into the indentation in the filling of a cookie.
- Place 1 to 2 teaspoons of additional candy coating onto the top of the stick where it is pressed into the filling.
- Place the top of the cookie back onto the cookie.
- Repeat with remaining cookies, then carefully place into the refrigerator to chill for at least 15 minutes.
- If needed, reheat candy coating according to package directions.
- Working one cookie at a time, remove cookie from refrigerator and holding the stick, dip the cookie into candy coating, completely covering cookie by dipping and spooning candy coating over cookie.
- Let excess candy coating drip off of cookie and back into container.
- Place cookie onto a baking sheet lined with wax paper. Immediately place two candy eyes onto candy coating covered cookie.
- Allow to dry for at least one hour.
- Prepare the light green candy coating according to package directions.
- Carefully twist apart sandwich cookies and lay out on baking sheet lined with waxed paper.
- The short sides of the cookies should be used as the top and bottom.
- Using a lollipop stick or straw, make an indentation into the filling of each cookie.
- Dip the end of a lollipop stick or straw into the candy coating, covering about 1” of the stick in the candy coating, and then gently press it into the indentation in the filling of a cookie.
- Place 1 to 2 teaspoons of additional candy coating onto the top of the stick where it is pressed into the filling. Place the top of the cookie back onto the cookie.
- Repeat with remaining cookies, then carefully place into the refrigerator to chill for at least 15 minutes.
- Unwrap Tootsie Roll® Chocolate Midgee candies. Using a small roller, roll out candies to roughly 1/4 inch thick to create the monster hair.
- Using either a small knife or cookie cutter, cut candy into rectangle shape the same width as the short side of the sandwich cookies. Cut out triangle shapes to create a jagged edge.
- Repeat process to create 12 pieces of candy hair for cookies.
- If needed, reheat candy coating according to package directions.
- Working one cookie at a time, remove cookie from refrigerator and holding the stick, dip the cookie into candy coating, completely covering cookie by dipping and spooning candy coating over cookie.
- Let excess candy coating drip off of cookie and back into container.
- Place cookie onto a baking sheet lined with wax paper. Immediately place two candy eyes and chocolate candy hair onto candy coating covered cookie. Allow to dry for at least one hour.
- Prepare black candy writer pen according to package directions. Squeeze a small jagged line of black candy coating onto cookie to create monster mouth.
- Squeeze a dollop of chocolate candy coating onto one side of the cookie pop approximately half way down the cookie, and immediately place a Jet-Puffed Mallow Bit onto the black candy coating. Hold Mallow Bit in place until candy coating starts to set.
- Repeat on other side of cookie, then place cookie onto a baking sheet lined with wax paper. Repeat with remaining cookies. Allow to dry for at least two hours.
- Prepare orange candy coating according to package directions. Carefully twist apart sandwich cookies and lay out on baking sheet lined with waxed paper.
- Using a lollipop stick or straw, make an indentation into the filling of each cookie. Dip the end of a lollipop stick or straw into the candy coating, covering about 1” of the stick in the candy coating, and then gently press it into the indentation in the filling of a cookie.
- Place 1 to 2 teaspoons of additional candy coating onto the top of the stick where it is pressed into the filling. Place the top of the cookie back onto the cookie.
- Repeat with remaining cookies, then carefully place into the refrigerator to chill for at least 15 minutes.
- Unwrap Tootsie Roll® Chocolate Midgee candies. Using a small roller, roll out candies to roughly 1/4 inch thick. Using either a small knife or cookie cutter, cut candy into 24 small triangle shapes to create jack o’ lantern eyes.
- If needed, reheat candy coating according to package directions. Working one cookie at a time, remove cookie from refrigerator and holding the stick, dip the cookie into candy coating, completely covering cookie by dipping and spooning candy coating over cookie.
- Let excess candy coating drip off of cookie and back into container. Place cookie onto a baking sheet lined with wax paper. Immediately place two chocolate triangle eyes onto cookie and place mini chocolate chips onto cookie to create a nose and mouth.
- Repeat with remaining cookies and allow to dry for at least one hour.
- Prepare black candy writer pen according to package directions. Squeeze a dollop of black candy coating, approximately the size of a penny, onto the top of a cookie pop.
- Sprinkle rainbow colored sprinkles over candy coating. Squeeze two additional small dollops of black candy coating onto both sides of the rainbow sprinkles.
- Place a piece of black licorice onto the top of the cookie, with ends in dollops of black candy coating, to create a handle. Hold in place until candy coating starts to set and can hold licorice on it’s own. Place on a baking sheet covered in wax paper to dry for at least two hours.
- Repeat with remaining cookies.
Notes
- Storage: Store your cookie pops in an airtight container at room temperature for up to five days to keep them fresh.
- Freezing: You can freeze these cookie pops! Just wrap each one in plastic wrap and place them in a freezer-safe bag. They can last for up to three months in the freezer.
- Flavor Variations: Try using different flavored candy coatings, like strawberry or mint, to create new taste experiences.
- Different Shapes: Instead of traditional cookie shapes, use cookie cutters to create festive shapes like ghosts or bats.
- Gifting: Place these pops in colorful treat bags for Halloween giveaways. They make delightful party favors!