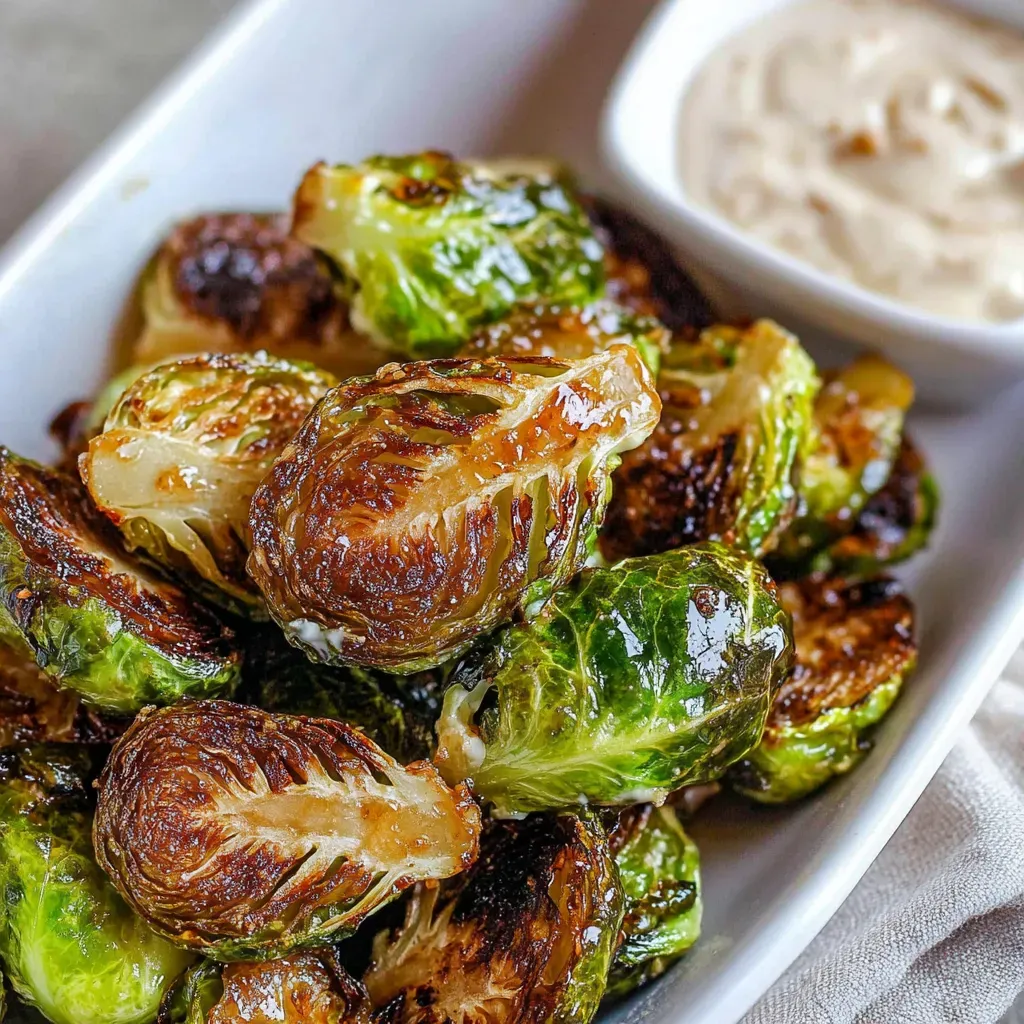
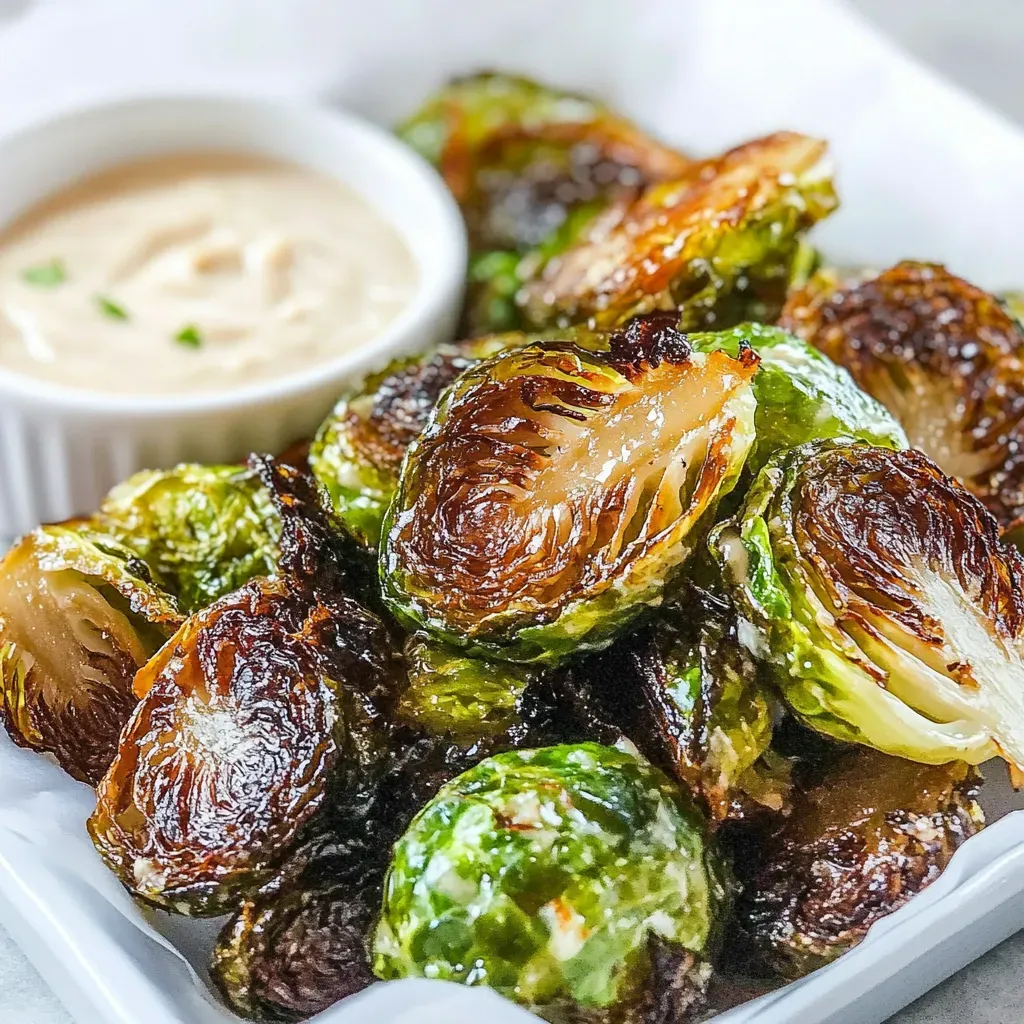
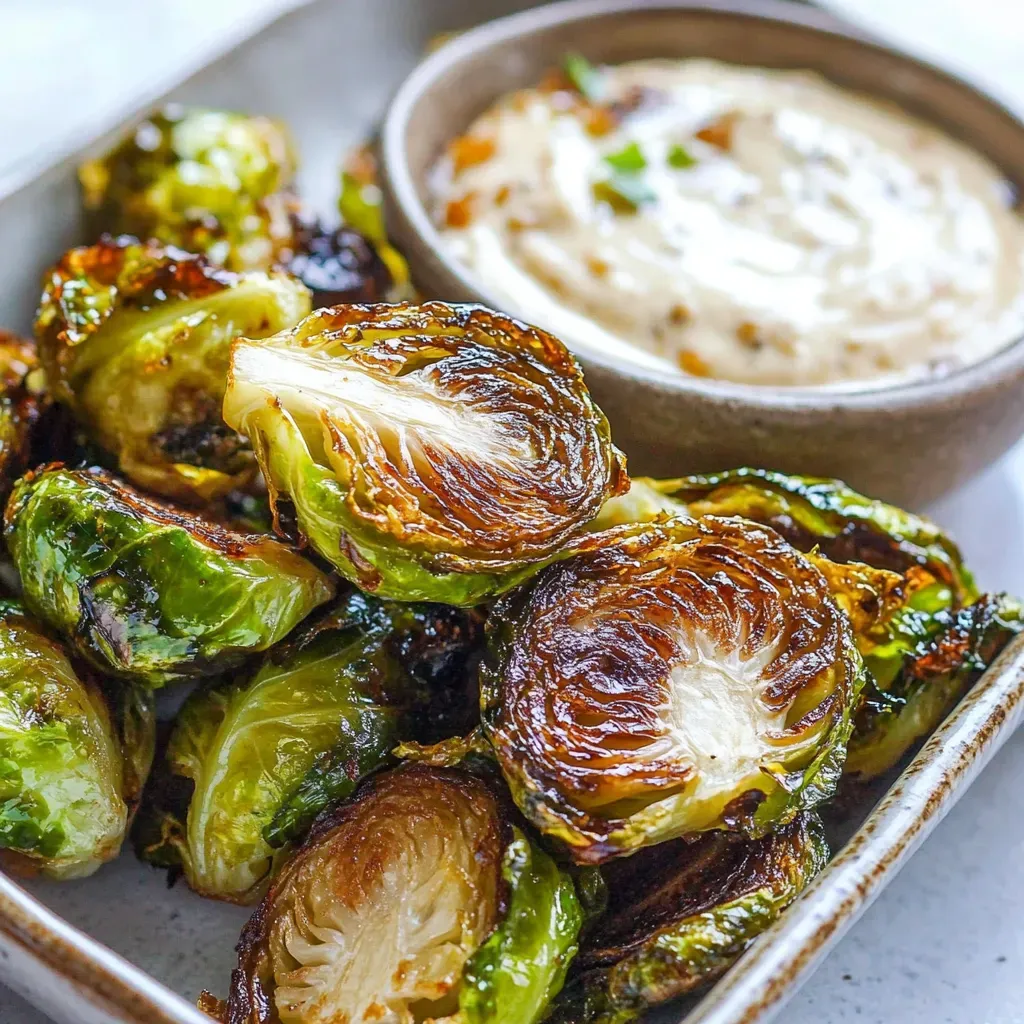
When I think of cozy fall evenings, Fried Brussels Sprouts always come to mind. There’s something magical about the way these little green gems transform when you fry them until they’re golden and crispy. I remember the first time I made them—my kitchen filled with the mouthwatering aroma of frying vegetables, and my family gathered around, drawn in by the scent. It was a moment filled with laughter and joy, as everyone dug into the crispy sprouts, dipping them into the creamy smoky honey aioli I whipped up. It felt like the perfect celebration of the season, and I’ve been making them ever since. These sprouts are not just a side dish; they’re a delightful experience that brings people together over good food. I love serving them at gatherings or just as a special treat for myself. Trust me, once you try these, they’ll become a fall staple in your home too.
Recipe Snapshot
60 mins
0 mins
0 mins
Medium
250 kcal
4 g
Keto, Whole30, Vegan
20 g
Skillet, Frying Pan, Whisk
What’s Great About This Fried Brussels Sprouts
1. Flavor Explosion
The combination of crispy textures and the rich, smoky flavor from the aioli creates a Fried Brussels Sprouts experience that’s hard to forget. Each bite is packed with taste, making it a dish that satisfies even the pickiest eaters.
2. Versatile Dish
This recipe isn’t restricted to just one occasion. Whether it’s a casual weeknight dinner or a holiday feast, Fried Brussels Sprouts fit perfectly. They’re a fantastic side for almost any main dish or can stand alone as a delightful appetizer.
3. Healthier Indulgence
While frying might sound indulgent, Brussels sprouts are packed with nutrients. This means you can enjoy a delicious treat without compromising on health. Dressed with a smoky aioli, they provide a balance of flavor and nutrition.
4. Easy to Make
Even if you’re new to cooking, you’ll find these Fried Brussels Sprouts quite simple to prepare. With just a few ingredients and straightforward steps, you’ll impress your friends and family without any fuss.
5. Perfectly Crispy
Achieving that ideal crispy exterior is a joy in itself. The frying process seals in the flavor while giving you that satisfying crunch. It’s hard to resist grabbing just one more of those delicious brussels!
Main Ingredients for Fried Brussels Sprouts
The ingredients for Fried Brussels Sprouts work harmoniously together to create a dish that’s not only delicious but also visually appealing. The key players in this recipe are the Brussels sprouts, which bring their unique flavor and nutritional value. The flour provides the perfect coating, helping achieve that crispy texture when fried. The honey in the aioli gives a delightful sweetness that complements the savory mayonnaise base, while the garlic adds a touch of robust flavor. Each ingredient plays a part in elevating the dish, making every bite a savory delight.
- 1 pound Brussels sprouts, stems removed and cut in half: Fresh and vibrant, these sprouts are the star of the dish, providing a slightly bitter yet earthy flavor that deepens when fried.
- 3 to 4 tablespoons flour: This is used to coat the sprouts, ensuring a crispy outer layer while they fry.
- Vegetable oil for frying: Essential for achieving that golden-brown color and crispy texture.
- Salt + pepper: Simple seasonings that enhance the flavor of the sprouts.
- 2/3 cup mayonnaise: The creamy base for the aioli that provides richness.
- 1 garlic clove, minced: Adds a sharp, aromatic flavor that elevates the dipping sauce.
- 1 tablespoon honey: A touch of sweetness that balances the savory elements.
- 1 tablespoon olive oil: This helps to thin the aioli for a perfect dipping consistency.
- 1/2 lemon, juiced: Freshens up the aioli and adds a zesty flavor.
- 1/2 teaspoon bourbon smoked paprika: This gives the aioli a subtle smokiness that enhances the overall flavor.
- 1/8 teaspoon salt: A small amount to round out the flavors.
- 1/8 teaspoon pepper: For an extra hint of heat.
Step by Step Instructions for Fried Brussels Sprouts
Making Fried Brussels Sprouts is a rewarding culinary adventure. As you follow these steps, you’ll find the process enjoyable and the results delicious! Let’s dive into the detailed instructions that will guide you to crispy perfection.
- Start by preparing the Brussels sprouts. If they’re large, cut them into quarters. You want to ensure that they’re not too big, as larger pieces tend to hold onto oil and won’t crisp up nicely.
- Toss the sprout halves in a bowl with flour. This will create a nice coating that helps achieve that desirable crunch when fried.
- Heat the vegetable oil in a large saucepan over medium heat. You want the oil to reach about 375 degrees F. This is the ideal temperature for frying, ensuring that your sprouts become golden brown.
- Once the oil has reached the right temperature, carefully add the Brussels sprouts in small batches to the hot oil. Fry them until they turn golden and crispy, which should take about 2 to 3 minutes depending on their size.
- Using a slotted spoon, remove the fried sprouts from the oil and let them drain on a paper towel. This will help absorb any excess oil and keep your sprouts crispy.
- While the first batch is frying, sprinkle the freshly fried sprouts with salt and pepper to taste. This step is crucial as it enhances the flavors.
- Repeat the frying process with the remaining batches. Don’t overcrowd the pan, as this can lower the oil temperature and result in soggy sprouts.
- Now it’s time to prepare the aioli. In a large bowl, whisk together mayonnaise, minced garlic, honey, olive oil, lemon juice, and bourbon smoked paprika until well combined. You’ll want a smooth and creamy consistency.
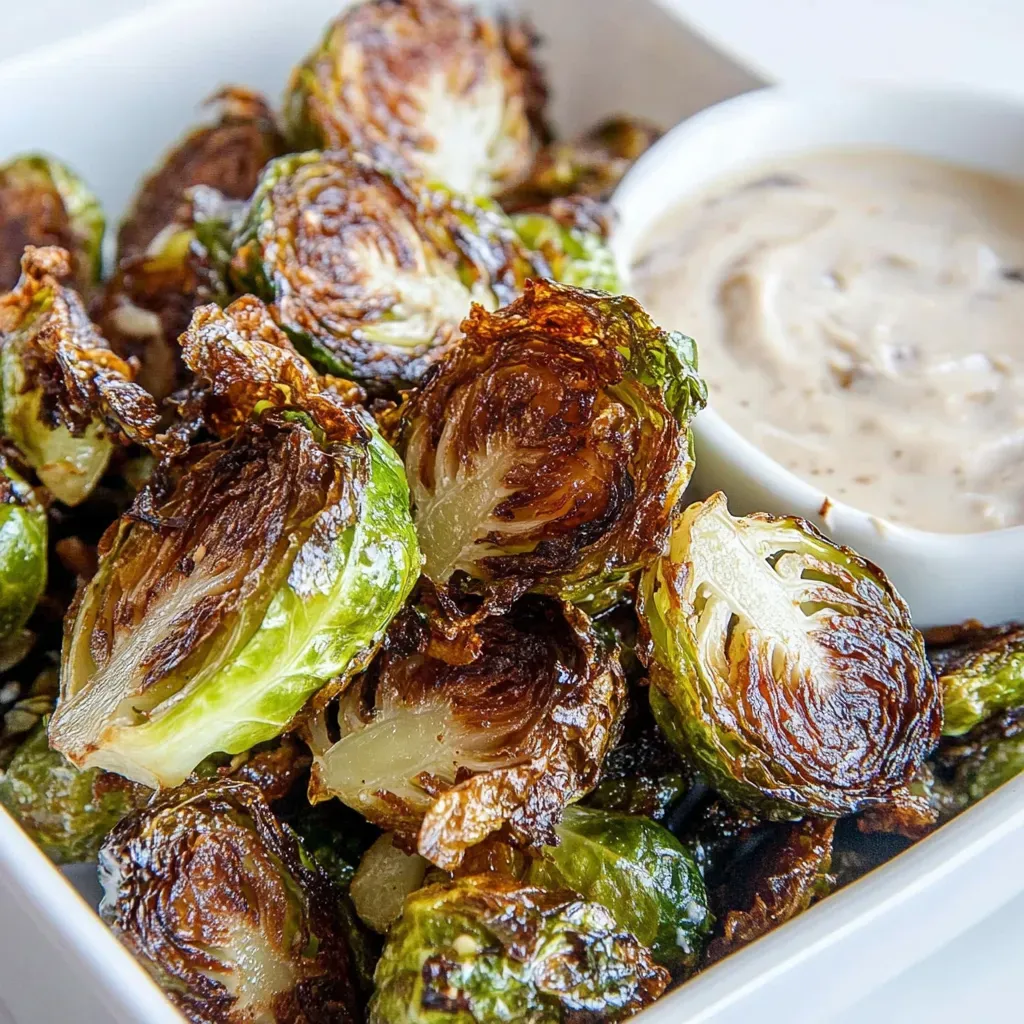
- Serve the crispy Brussels sprouts immediately with the smoky honey aioli on the side for dipping. This pairing is what makes the dish truly special!
Things Worth Knowing
- Frying at the right temperature is essential for achieving that nice crispy texture. Use a thermometer to check the oil temperature.
- Ensure the sprouts are dry before coating them in flour; moisture can make them soggy when frying.
- For even crispiness, make sure to fry the sprouts in small batches. Overcrowding the pan can lead to uneven cooking.
- Letting the fried sprouts drain on paper towels after frying helps maintain their crispiness by removing excess oil.
Pro Tips and Tweaks
Here are some tips to enhance your experience while making Fried Brussels Sprouts:
- Storage: Keep any leftover sprouts in an airtight container in the fridge for up to 2 days. However, they are best enjoyed fresh!
- Freezing: You can freeze uncooked sprouts, but it’s best to fry them fresh. Frozen and then fried sprouts might not have the same texture.
- Pairing: These sprouts pair wonderfully with grilled chicken or as a side to a hearty steak.
- Experiment: Feel free to experiment with different spices in the aioli for unique flavor profiles.
- Make Ahead: You can prepare the aioli in advance and store it in the refrigerator. Just give it a good stir before serving.
- Garnish: Add a sprinkle of fresh herbs, like parsley or chives, on top before serving for an extra touch of flavor and color.
- Serving Size: Adjust the serving size based on your crowd. This recipe can easily be doubled if you have more guests!
How to Enjoy Fried Brussels Sprouts
Serving Fried Brussels Sprouts can be just as exciting as making them. Here are some fantastic ways to enjoy this dish:
- As a side dish: These sprouts complement a variety of main courses, such as roasted chicken, grilled fish, or vegetarian pasta dishes.
- Appetizer: They make a great finger food for parties. Serve them with toothpicks and watch them disappear!
- Garnish: Consider adding a sprinkle of parmesan cheese or crispy fried onions on top for extra flavor and texture.
- Lunch Option: Toss them in a salad for a hearty lunch. They add a delightful crunch and flavor.
- Seasonal Serving: These are perfect for fall gatherings, Thanksgiving, or any festive occasion.
- Leftovers: If you have leftovers, reheat them in an air fryer for a few minutes to regain their crispiness.
- Storage Tip: If you want to keep the sprouts crispy, store them in a single layer on a plate covered with a paper towel.
FAQ
Conclusion
The Fried Brussels Sprouts are a delightful twist on a classic vegetable dish that everyone will love. Crispy on the outside and tender on the inside, they offer a flavor that’s hard to resist. I encourage you to try making these sprouts for your next gathering—they’re sure to impress your guests and become a new favorite.
Fried Brussels Sprouts
Ingredients
Equipment
Method
- Start by preparing the Brussels sprouts. If they’re large, cut them into quarters. You want to ensure that they’re not too big, as larger pieces tend to hold onto oil and won’t crisp up nicely.
- Toss the sprout halves in a bowl with flour. This will create a nice coating that helps achieve that desirable crunch when fried.
- Heat the vegetable oil in a large saucepan over medium heat. You want the oil to reach about 375 degrees F. This is the ideal temperature for frying, ensuring that your sprouts become golden brown.
- Once the oil has reached the right temperature, carefully add the Brussels sprouts in small batches to the hot oil. Fry them until they turn golden and crispy, which should take about 2 to 3 minutes depending on their size.
- Using a slotted spoon, remove the fried sprouts from the oil and let them drain on a paper towel. This will help absorb any excess oil and keep your sprouts crispy.
- While the first batch is frying, sprinkle the freshly fried sprouts with salt and pepper to taste. This step is crucial as it enhances the flavors.
- Repeat the frying process with the remaining batches. Don’t overcrowd the pan, as this can lower the oil temperature and result in soggy sprouts.
- Now it’s time to prepare the aioli. In a large bowl, whisk together mayonnaise, minced garlic, honey, olive oil, lemon juice, and bourbon smoked paprika until well combined. You’ll want a smooth and creamy consistency.
- Serve the crispy Brussels sprouts immediately with the smoky honey aioli on the side for dipping. This pairing is what makes the dish truly special!
Notes
- Storage: Keep any leftover sprouts in an airtight container in the fridge for up to 2 days. However, they are best enjoyed fresh!
- Freezing: You can freeze uncooked sprouts, but it’s best to fry them fresh. Frozen and then fried sprouts might not have the same texture.
- Pairing: These sprouts pair wonderfully with grilled chicken or as a side to a hearty steak.
- Experiment: Feel free to experiment with different spices in the aioli for unique flavor profiles.
- Make Ahead: You can prepare the aioli in advance and store it in the refrigerator. Just give it a good stir before serving.
- Garnish: Add a sprinkle of fresh herbs, like parsley or chives, on top before serving for an extra touch of flavor and color.
- Serving Size: Adjust the serving size based on your crowd. This recipe can easily be doubled if you have more guests!