The first time I made Cream Wafer Cookies, it was an adventure that led to a delightful mess in my kitchen. I remember it vividly; it was a chilly afternoon, and I was craving something sweet and nostalgic. Growing up, my grandmother used to whip up these delicate cookies filled with creamy goodness, and they always made our family gatherings feel special. I decided to recreate that memory, and let me tell you, the experience was as joyful as the taste itself! As the aroma of freshly baked cookies filled the air, I couldn’t help but feel a wave of warmth wash over me. These cookies are not just any treat; they encapsulate love, tradition, and a pinch of creativity.
Recipe Snapshot
24 mins
15 mins
9 mins
Medium
150 kcal
2 g
Gluten-Free, Low FODMAP
6 g
Oven, Baking Sheet, Frying Pan, Mixing Bowl
Why We Love This Cream Wafer Cookies
Perfect for Any Occasion
One of the best things about Cream Wafer Cookies is their versatility. They’re not just for the holidays; these cookies can brighten up any day. Whether it’s a birthday celebration, a casual get-together, or even a simple tea party, they’re always a hit!
Great for Sharing
These cookies are perfect for sharing with friends and family. Their charming appearance and delightful taste make them an excellent choice for gifting. Imagine wrapping them up in a pretty box and surprising someone special!
Easy to Customize
Another reason to love Cream Wafer Cookies is how easily you can customize them. From the colors of the filling to different flavor profiles, the possibilities are endless. Want a hint of lemon? Or maybe some cocoa in the buttercream? Go for it!
Fun to Make
Making these cookies is half the fun! It’s a great way to bond with kids or friends. Rolling the dough, cutting out shapes, and piping the filling can turn into a fun-filled afternoon of laughter and creativity.
Satisfying Texture
You simply can’t beat the contrast of the crispy wafer against the smooth, creamy filling. Each bite offers a delightful crunch followed by a melt-in-your-mouth experience that keeps you reaching for more.
What You’ll Need for Cream Wafer Cookies
For these Cream Wafer Cookies, the ingredients work in perfect harmony to create a delightful treat. The balance of flavors and textures is crucial. The key players include all-purpose flour, which forms the base, and good quality unsalted butter, which adds richness. The heavy whipping cream contributes to the melt-in-your-mouth texture, while the powdered sugar sweetens the filling perfectly. Let’s explore each ingredient:
- 2 cups All-Purpose Flour: The cornerstone of our cookie dough, providing structure and stability.
- 1 cup Good Quality Unsalted Butter: Adds richness and flavor; make sure it’s at room temperature for easy mixing.
- ⅓ cup Heavy Whipping Cream: Infuses the cookies with a silky texture and enhances the richness.
- ½ cup Granulated Sugar: Sweetens the cookie dough, balancing the flavors.
- ½ cup Unsalted Butter: This will be used in the filling, ensuring it’s smooth and creamy.
- 1½ cups Powdered Sugar: Sweetens and thickens the buttercream filling, making it decadently smooth.
- 2 teaspoons Pure Vanilla Extract: Adds a lovely aroma and flavor depth to the cookies.
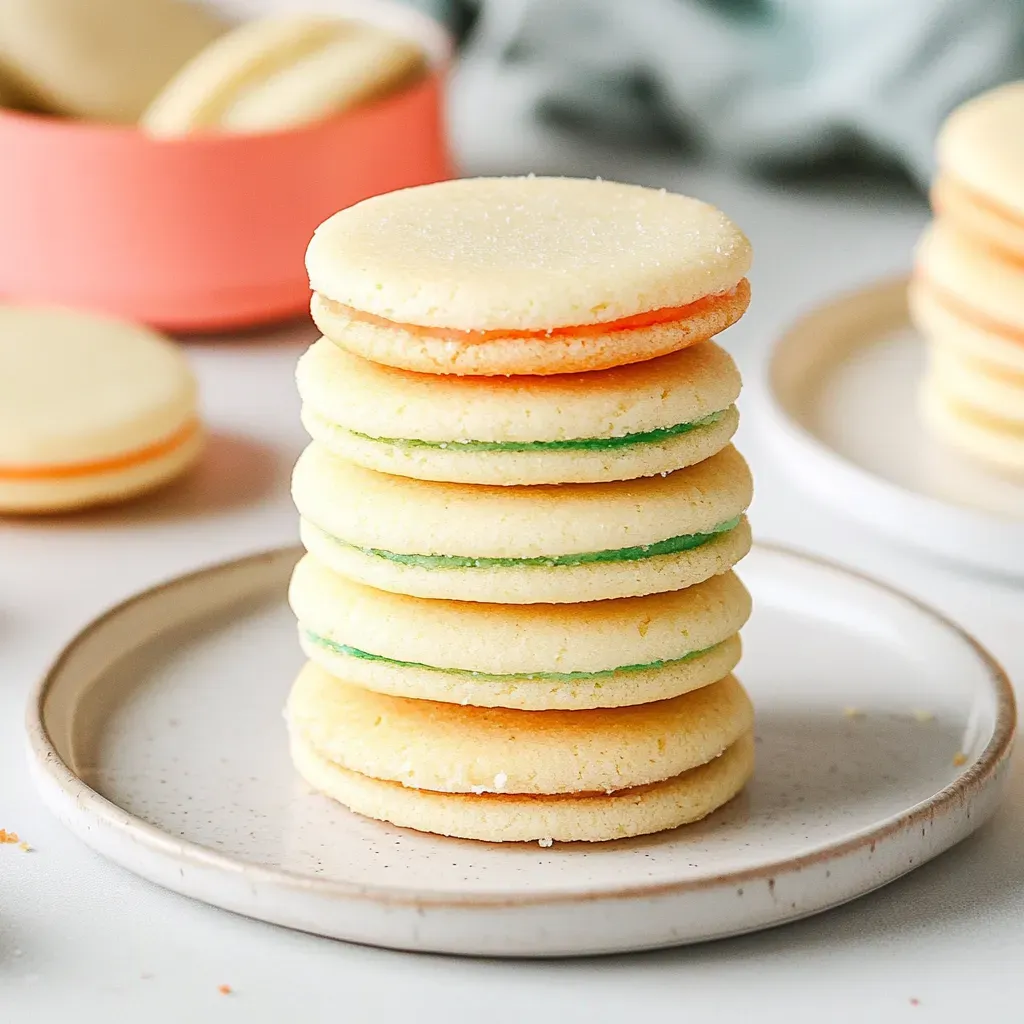
- Red and Green Food Coloring: These help create a festive touch, making the cookies visually appealing.
Step by Step Instructions for Cream Wafer Cookies
Making Cream Wafer Cookies is a delightful process that brings back fond memories. Trust me, the end result is worth every step! Let’s dive into the step-by-step instructions to create these wonderful cookies.
- In the bowl of a stand mixer, combine all-purpose flour, good quality unsalted butter, and heavy whipping cream. Mix until the ingredients are just combined into a soft dough. Cover the bowl tightly with plastic wrap and refrigerate the dough for at least 2 hours. This chilling step helps the dough firm up, making it easier to handle later.
- Preheat your oven to 375°F (190°C) while you wait for the dough to chill. Prepare a small bowl with granulated sugar and set it aside for later use.
- After the dough has chilled, take about one-third of it out of the refrigerator, keeping the remaining dough chilled. On a lightly floured surface, roll out the dough to a thickness of about 1/8 to 3/16 inches. The dough should be pliable and easy to work with but firm enough to hold its shape.
- Using a 1½-inch diameter circle cookie cutter, cut out circles from the rolled dough. Work swiftly to maintain the dough’s firmness, transferring the cut circles to the bowl of sugar. Gently turn each circle over to ensure sugar adheres to both sides.
- Place the sugared circles onto an ungreased cookie sheet, ensuring they are spaced about 1 inch apart. Use a fork to prick each circle about four times, which will help them bake evenly.
- Continue cutting and transferring more circles until all dough is used. If the dough becomes too warm, return it to the refrigerator for a few minutes.
- Bake the cookies in the preheated oven for 7 to 9 minutes, or just until they are set. Keep a close eye on them—don’t let them brown! Once done, allow them to cool on the pan for a few minutes before transferring them to a wire rack to cool completely.
- While the cookies cool, prepare the filling. In the bowl of a stand mixer, beat the remaining unsalted butter until smooth and fluffy, about 2 minutes. Gradually add in the powdered sugar and vanilla extract, beating until the mixture is smooth and fluffy again, which should take another minute or two.
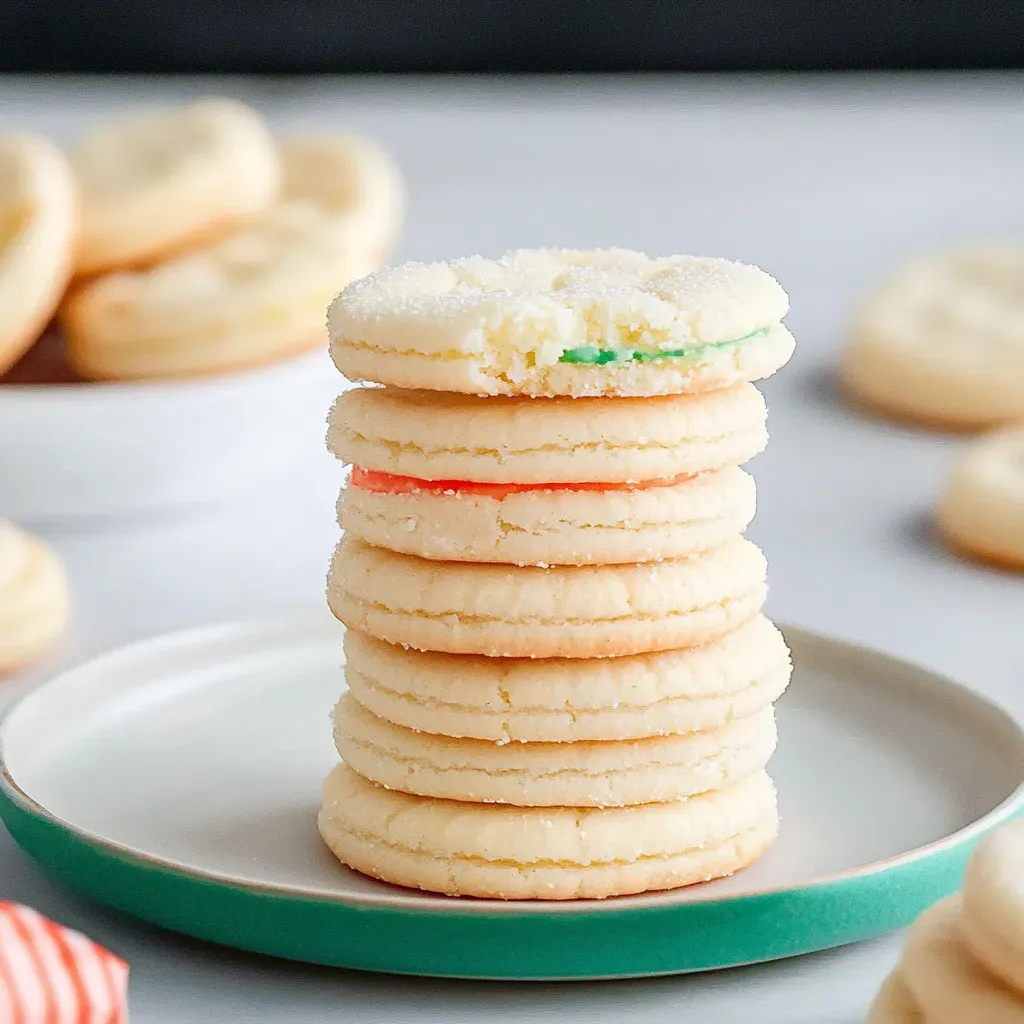
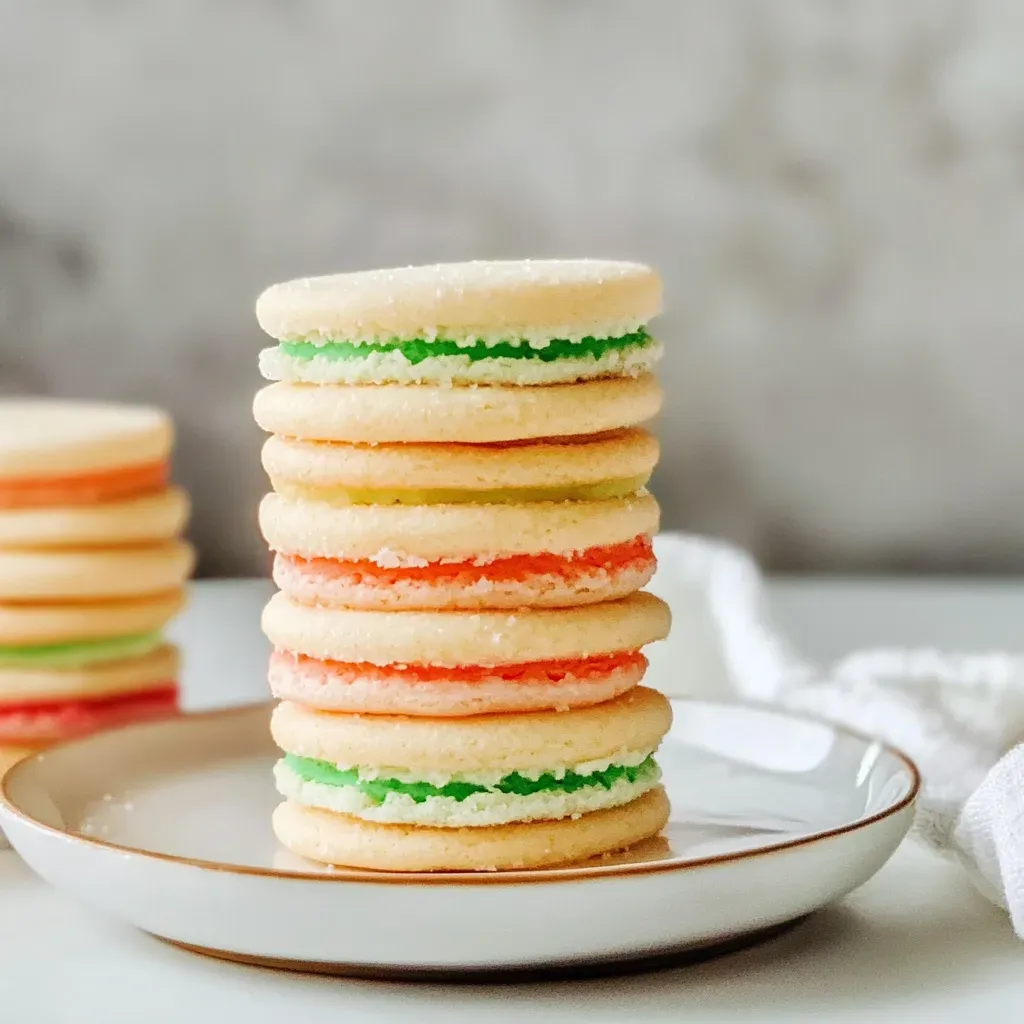
- Divide the buttercream filling into two bowls. Tint one bowl with a little bit of green food coloring and the other with red food coloring. Aim for pastel colors rather than bright shades.
- Transfer the buttercream filling into a piping bag fitted with a medium plain tip. If you don’t have a piping bag, simply cut off the end of a plastic bag to create an opening.
- Pipe a generous layer of the buttercream onto the back side of one cookie. Carefully top it with another cookie, pressing gently to secure. If you prefer a casual look, you can spoon the filling onto the cookie instead of piping it.
Things Worth Knowing
- Remember that the thickness of the dough affects the yield: rolling thicker circles yields fewer cookies but easier handling, while thinner circles provide more cookies but can be trickier to manage.
- If your dough becomes too soft while working, pop it back into the fridge for a few minutes. This will help maintain its shape.
- For an added flavor twist, try incorporating different extracts into the buttercream, such as almond or lemon.
- Ensure your butter is at room temperature; it mixes better and helps create a light, fluffy filling.
Recipe Variations about Cream Wafer Cookies
There are countless ways to make Cream Wafer Cookies your own! Here are some tips and variations to consider:
- Storage: Store leftover cookies in an airtight container at room temperature for up to a week. They can also be refrigerated for a longer shelf life.
- Freezing: You can freeze the baked cookies for up to three months. For best results, freeze them before frosting, then thaw and fill before serving.
- Flavor Variations: Experiment with flavored extracts such as mint or almond to give your buttercream a unique twist.
- Coloring: Use different food coloring to match seasonal themes; think pastels for Easter or vibrant colors for summer gatherings.
- Cookie Shapes: Instead of circles, try using different-shaped cookie cutters for a fun twist on presentation.
What to Serve With Cream Wafer Cookies
When it comes to serving Cream Wafer Cookies, the options are as delightful as the cookies themselves. Here are some creative ideas:
- Tea Parties: These cookies pair beautifully with a cup of tea. Their light texture complements both black and herbal teas.
- Birthday Celebrations: Serve them at birthdays as a fun dessert option along with cake. They can be a hit with kids and adults alike!
- Outdoor Gatherings: Bring them along to picnics or barbecues. They’re easy to transport and always a crowd-pleaser.
- Holiday Treats: Use them as festive treats during the holiday season. Their colors and flavors make them perfect for Christmas or other celebrations.
- Gifts: Package your cookies in decorative boxes or tins for a thoughtful homemade gift. They’re great for any occasion!
FAQ
Conclusion
Cream Wafer Cookies are a special treat that brings joy and nostalgia to any occasion. Their crispy texture paired with a creamy filling makes them irresistible. I encourage you to give this recipe a try—it’s a lovely way to create lasting memories with friends and family.
Cream Wafer Cookies
Ingredients
Equipment
Method
- In the bowl of a stand mixer, combine all-purpose flour, good quality unsalted butter, and heavy whipping cream. Mix until the ingredients are just combined into a soft dough. Cover the bowl tightly with plastic wrap and refrigerate the dough for at least 2 hours. This chilling step helps the dough firm up, making it easier to handle later.
- Preheat your oven to 375°F (190°C) while you wait for the dough to chill. Prepare a small bowl with granulated sugar and set it aside for later use.
- After the dough has chilled, take about one-third of it out of the refrigerator, keeping the remaining dough chilled. On a lightly floured surface, roll out the dough to a thickness of about 1/8 to 3/16 inches. The dough should be pliable and easy to work with but firm enough to hold its shape.
- Using a 1½-inch diameter circle cookie cutter, cut out circles from the rolled dough. Work swiftly to maintain the dough's firmness, transferring the cut circles to the bowl of sugar. Gently turn each circle over to ensure sugar adheres to both sides.
- Place the sugared circles onto an ungreased cookie sheet, ensuring they are spaced about 1 inch apart. Use a fork to prick each circle about four times, which will help them bake evenly.
- Continue cutting and transferring more circles until all dough is used. If the dough becomes too warm, return it to the refrigerator for a few minutes.
- Bake the cookies in the preheated oven for 7 to 9 minutes, or just until they are set. Keep a close eye on them—don’t let them brown! Once done, allow them to cool on the pan for a few minutes before transferring them to a wire rack to cool completely.
- While the cookies cool, prepare the filling. In the bowl of a stand mixer, beat the remaining unsalted butter until smooth and fluffy, about 2 minutes. Gradually add in the powdered sugar and vanilla extract, beating until the mixture is smooth and fluffy again, which should take another minute or two.
- Divide the buttercream filling into two bowls. Tint one bowl with a little bit of green food coloring and the other with red food coloring. Aim for pastel colors rather than bright shades.
- Transfer the buttercream filling into a piping bag fitted with a medium plain tip. If you don’t have a piping bag, simply cut off the end of a plastic bag to create an opening.
- Pipe a generous layer of the buttercream onto the back side of one cookie. Carefully top it with another cookie, pressing gently to secure. If you prefer a casual look, you can spoon the filling onto the cookie instead of piping it.
Notes
- If you roll the wafer cookie dough thicker: The dough circles will be easier to handle, and will also give you less wafer cookies. In general, this will yield around 24 fully assembled cream wafer sandwich cookies. And the buttercream amount listed in the recipe card will give you a nice amount of filling per cookie.
- If you roll the wafer cookie dough thinner: The dough circles will be a little more trying to handle as the dough warms up, and will also give you more wafer cookies. In general, this will yield around 40 fully assembled cream wafer sandwich cookies. This larger amount of cookies will have you wanting a bit more buttercream filling, though. If you like a thicker filling, I recommend doubling the buttercream filling amount. If you like a small/medium amount of filling, I recommend that you 1.5x the filling amount.