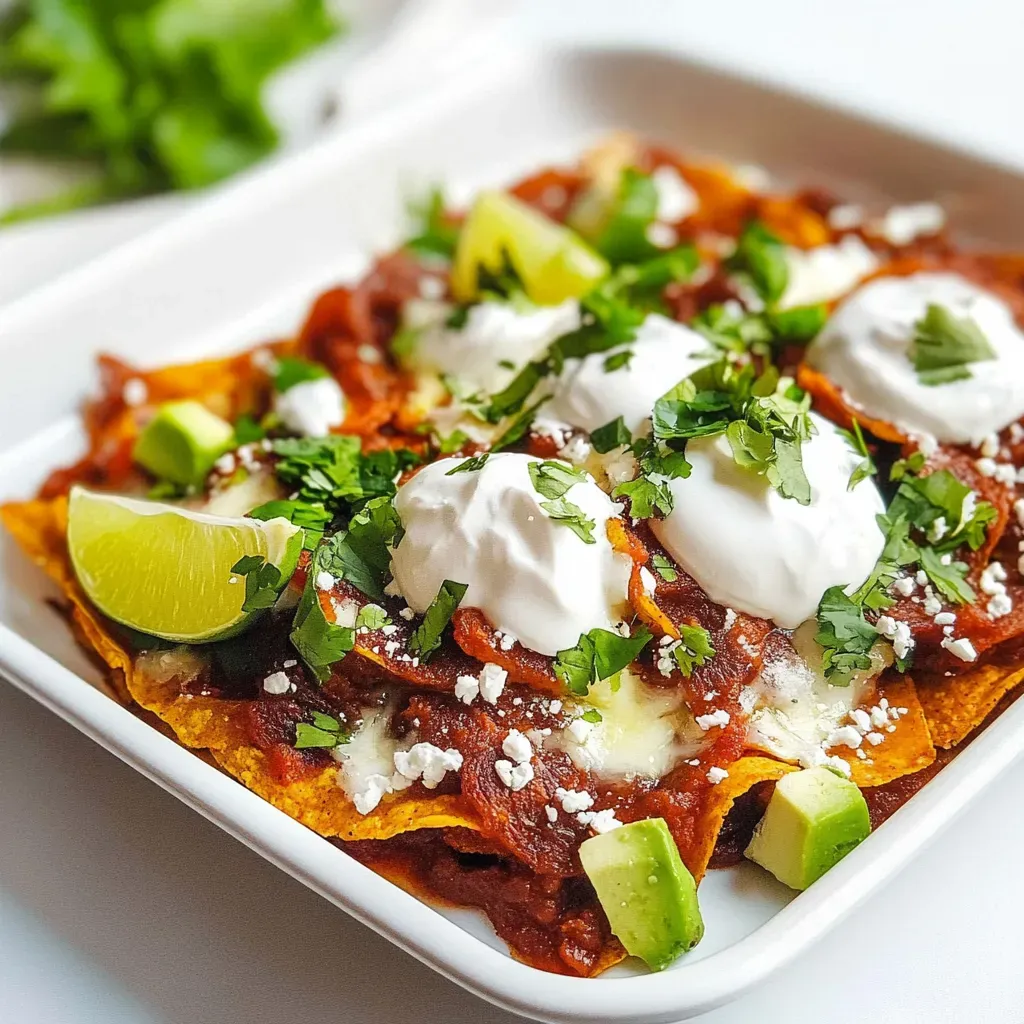
Chilaquiles is a dish that transports me to the vibrant streets of Mexico, where the aroma of sizzling tortillas fills the air. I remember the first time I tasted this delectable treat at a local eatery, the crunch of the tortilla chips coated in rich enchilada sauce was pure bliss. The way the runny yolk of a fried egg mingled with the sauce created a symphony of flavors that I couldn’t forget. Whenever I want to feel that warmth and comfort, I whip up a batch of Chilaquiles in my kitchen, and it instantly brightens my day.
The beauty of Chilaquiles lies not just in its taste, but in its versatility. You can top it with creamy avocado, sprinkle fresh cilantro, and drizzle with crema Mexicana for an authentic touch. Whether it’s a lazy weekend brunch or a quick weeknight dinner, this dish never disappoints. I often find myself experimenting with different toppings, yet the classic version remains my favorite. Every bite takes me back to those lively moments spent sharing meals with friends and family, making Chilaquiles more than just a dish, but a cherished memory.
Recipe Snapshot
20 mins
5 mins
15 mins
Medium
450 kcal
12 g
Vegan, Gluten-Free, Low FODMAP
28 g
Skillet, Wooden Spoon, Food Processor
Why This Chilaquiles Hits Different
It’s a Comfort Food Classic
Chilaquiles is more than just a meal; it’s a comfort food that brings people together. Each crispy chip soaked in flavorful sauce offers a nostalgic experience that resonates with so many of us. There’s something magical about gathering around the table to enjoy this dish, where every scoop feels like sharing memories and laughter.
Quick and Easy to Prepare
One of the reasons I love Chilaquiles is how effortlessly it comes together. With just a few simple ingredients, you can whip up a satisfying meal in no time. It’s perfect for those busy weeknights when you crave something delicious without spending hours in the kitchen.
Endless Customization Possibilities
The beauty of this dish lies in its adaptability. You can easily add your favorite toppings, whether it’s a sprinkle of feta cheese, or a handful of black beans for added protein. The versatility of Chilaquiles allows you to cater to your taste preferences, making every batch uniquely yours.
Perfect for Any Meal
Whether it’s breakfast, lunch, or dinner, Chilaquiles fits the bill. I love serving it for brunch topped with a poached egg, or as a hearty dinner option accompanied by a side of beans. This dish transitions beautifully at any hour of the day, making it a staple in my home.
A Beautiful Blend of Flavors
The combination of crunchy tortilla chips, savory enchilada sauce, and creamy toppings creates a delightful medley of flavors. Each bite is an explosion of texture and taste that keeps you coming back for more. I find that the balance of flavors in Chilaquiles is truly satisfying.
Family-Friendly Fun
Kids love Chilaquiles just as much as adults do! Its playful presentation is sure to entice even the pickiest eaters. I often involve my kids in the cooking process, letting them choose their favorite toppings, which makes mealtime an enjoyable family affair.
What to Buy for Chilaquiles
When assembling the ingredients for Chilaquiles, you’ll find that simplicity is key. The ingredients come together harmoniously to create a dish brimming with flavor and texture. Key players like crisp tortilla chips, savory enchilada sauce, and creamy toppings are essential for achieving that authentic taste.
- ½ cup vegetable oil: This is used for frying the tortilla wedges, giving them a crispy texture. The oil should be hot enough to not soak the chips but just right for that perfect crunch.
- 12 yellow corn tortillas, cut into 8 wedges: Fresh corn tortillas are the heart of Chilaquiles. They become a flavorful base once fried, soaking up all the sauce beautifully.
- 1½ to 2 cups red enchilada sauce: This adds the rich, tangy flavor that characterizes the dish. You can use store-bought or homemade sauce, whichever you prefer.
- 4 fried eggs: Sunny-side-up eggs add richness and protein, making the dish more filling and delicious.
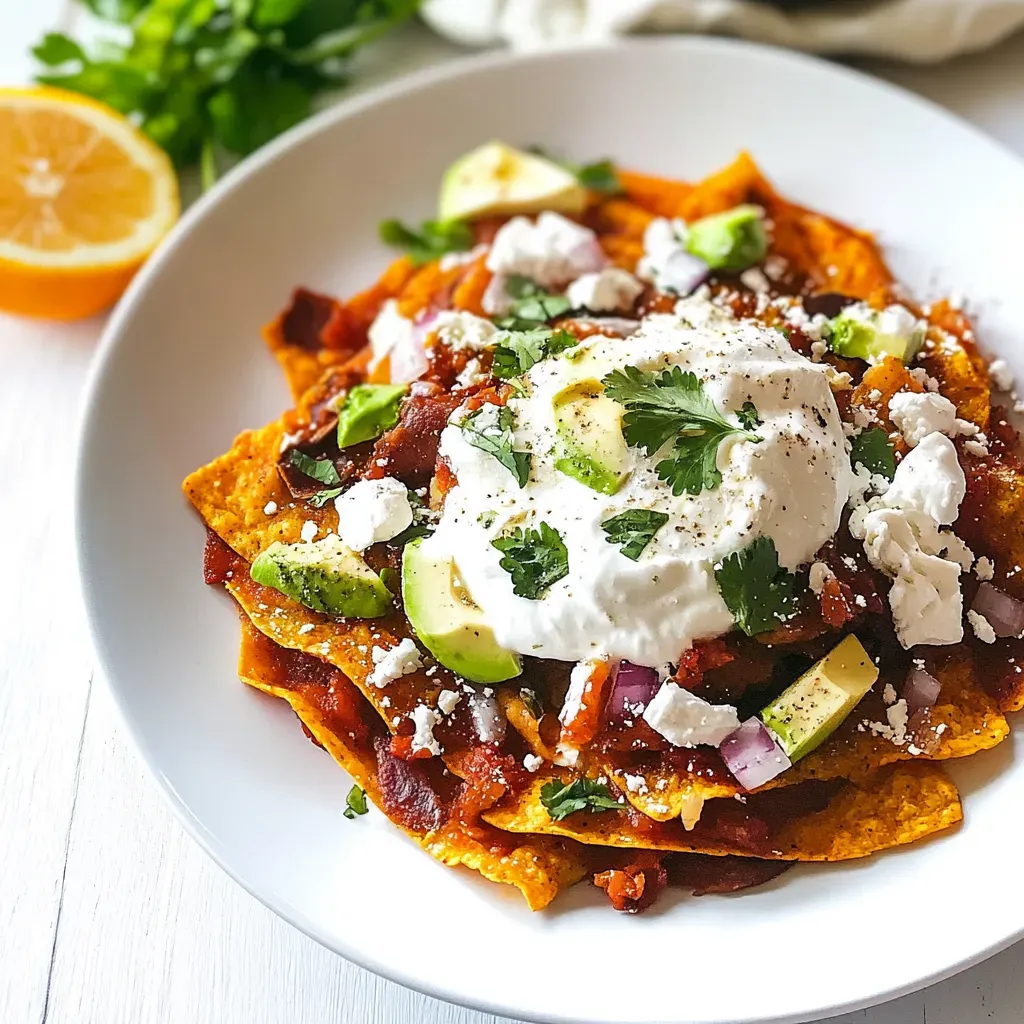
- Avocado: Sliced or diced, avocado brings creaminess and balances the heat of the sauce.
- Crema Mexicana: This creamy topping enhances the flavor and texture, providing a cool contrast to the spicy sauce.
- Queso fresco: Crumbled on top, this cheese adds a salty, milky flavor that complements the overall dish.
- Cilantro: Fresh cilantro not only adds a pop of color but also brightens up the dish with its herbal notes.
Cooking Method for Chilaquiles
Cooking Chilaquiles is an enjoyable process that comes together quickly. You’ll find the steps straightforward, allowing you to focus on the delicious flavors and textures. Let’s dive into how to create this mouthwatering dish.
- Heat the ½ cup vegetable oil in a large skillet over medium-high heat until shimmering. This means the oil is hot enough to fry the tortilla wedges, producing the perfect crunch. You’ll want to test the heat by dropping in a small piece of tortilla; if it sizzles immediately, you’re ready to go.
- Add about a quarter of the tortilla wedges to the hot oil. Cook them for a couple of minutes, flipping once, until they are lightly brown and crisp. Watch them closely to avoid burning and ensure they have a gorgeous golden color.
- Once the chips are fried, drain the freshly fried tortilla chips on a paper towel-lined baking sheet. This helps absorb excess oil and keeps them crispy. Repeat this process until all the tortilla wedges are fried, adding more oil if needed to maintain the frying temperature.
- After frying the chips, drain the oil from the skillet. It’s time to make the fried eggs! Heat ½ tablespoon butter over medium heat until melted, then add the eggs individually, ensuring they don’t touch. Cook for 2 to 3 minutes, until the whites are firm but the yolks remain runny.
- In another skillet, heat the enchilada sauce (or prepare it fresh). Once it’s warm, gently add the tortilla chips into the sauce. Carefully stir to coat the chips evenly, allowing them to soak up the sauce’s flavorful goodness.
- Cook the tortilla chips in the sauce until they are heated through, about 2 minutes. Taste and season with salt as needed. The sauce should cling to the chips, providing a perfect balance of flavors.
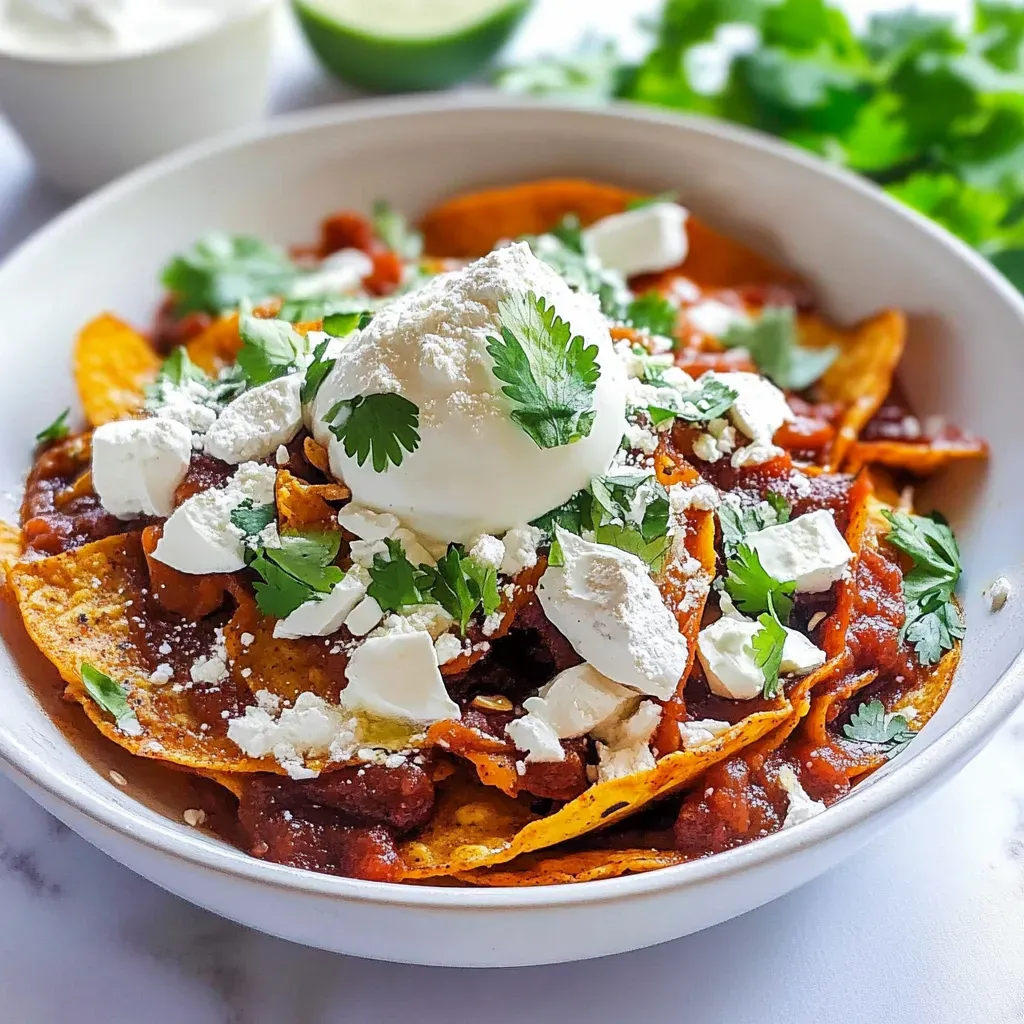
- Once everything is ready, add the chips to a plate, and top them with a fried egg. You can add any other toppings you desire, such as salt, pepper, or extra queso fresco. The combination of the runny yolk and the sauce is simply irresistible!
- Finally, don’t forget to sprinkle fresh cilantro and top with avocado slices. The freshness from the cilantro and the creaminess of the avocado elevate the dish to new heights.
Things Worth Knowing
- Frying Tip: Always ensure that the oil is hot enough before adding the tortilla wedges. If the oil is not hot enough, the chips will absorb too much oil and become soggy.
- Egg Cooking: For perfectly fried eggs, keep the heat medium. This allows the whites to cook through without overcooking the yolk.
- Serving Suggestion: Serve Chilaquiles immediately after preparing. The chips are best when they are crispy, so wait until just before serving to add them to the sauce.
- Storage Info: Leftover Chilaquiles can be stored in the fridge but will lose their crispness. Reheat in the oven to regain some crunch.
Recipe Variations about Chilaquiles

There are countless ways to enjoy Chilaquiles, making this dish endlessly versatile. Here are some variations and tips to inspire you.
- Vegetarian Option: Skip the fried eggs and top with scrambled tofu for a protein-rich vegetarian version.
- Spicy Twist: Add sliced jalapeños or a drizzle of hot sauce to kick things up a notch!
- Cheesy Goodness: Mix in shredded cheese like Monterey Jack or sprinkle it on top before serving for a gooey finish.
- Bean Addition: Incorporate black beans or pinto beans for a heartier meal that’s packed with protein.
- Seasonal Toppings: Use seasonal produce like roasted corn or fresh radishes to add color and nutrients to your dish.
- Breakfast Style: Serve Chilaquiles as a breakfast dish with a poached egg on top and a side of fresh fruit.
- Storage: Refrigerate any leftovers in an airtight container for up to two days. Reheat in the oven for best results.
Serving Ideas for Chilaquiles
When it comes to serving Chilaquiles, the possibilities are as vibrant as the flavors. Here are some ideas to help you enjoy this dish to the fullest:
- Brunch Delight: Serve Chilaquiles as a hearty brunch dish, paired with fresh fruit or a simple green salad.
- Family Dinner: Make it a family affair by setting up a topping bar with all your favorite extras, allowing everyone to customize their plate.
- Special Occasions: Perfect for gatherings or celebrations, Chilaquiles can be a fun and interactive meal for guests.
- Garnish Generously: Sprinkle extra cilantro and diced avocado for a fresh finishing touch that makes the dish pop.
- Pair with Drinks: Enjoy with a refreshing drink like agua fresca or a light beer for a delightful pairing.
- Seasonal Sides: Serve alongside seasonal vegetables or a fresh slaw to balance the richness of the dish.
FAQ
Conclusion
Chilaquiles is a vibrant and delicious dish that brings warmth and comfort to any meal. The combination of crispy chips, savory sauce, and rich toppings makes it a favorite among many food lovers. I encourage you to try making Chilaquiles yourself; whether for brunch, lunch, or dinner, it’s sure to impress your family and friends. Enjoy the process of creating this beautiful dish and savor every bite!
Chilaquiles
Ingredients
Equipment
Method
- Heat the ½ cup vegetable oil in a large skillet over medium-high heat until shimmering. This means the oil is hot enough to fry the tortilla wedges, producing the perfect crunch. You’ll want to test the heat by dropping in a small piece of tortilla; if it sizzles immediately, you’re ready to go.
- Add about a quarter of the tortilla wedges to the hot oil. Cook them for a couple of minutes, flipping once, until they are lightly brown and crisp. Watch them closely to avoid burning and ensure they have a gorgeous golden color.
- Once the chips are fried, drain the freshly fried tortilla chips on a paper towel-lined baking sheet. This helps absorb excess oil and keeps them crispy. Repeat this process until all the tortilla wedges are fried, adding more oil if needed to maintain the frying temperature.
- After frying the chips, drain the oil from the skillet. It’s time to make the fried eggs! Heat ½ tablespoon butter over medium heat until melted, then add the eggs individually, ensuring they don’t touch. Cook for 2 to 3 minutes, until the whites are firm but the yolks remain runny.
- In another skillet, heat the enchilada sauce (or prepare it fresh). Once it’s warm, gently add the tortilla chips into the sauce. Carefully stir to coat the chips evenly, allowing them to soak up the sauce's flavorful goodness.
- Cook the tortilla chips in the sauce until they are heated through, about 2 minutes. Taste and season with salt as needed. The sauce should cling to the chips, providing a perfect balance of flavors.
- Once everything is ready, add the chips to a plate, and top them with a fried egg. You can add any other toppings you desire, such as salt, pepper, or extra queso fresco. The combination of the runny yolk and the sauce is simply irresistible!
- Finally, don’t forget to sprinkle fresh cilantro and top with avocado slices. The freshness from the cilantro and the creaminess of the avocado elevate the dish to new heights.
Notes
- Frying Tip: Always ensure that the oil is hot enough before adding the tortilla wedges. If the oil is not hot enough, the chips will absorb too much oil and become soggy.
- Egg Cooking: For perfectly fried eggs, keep the heat medium. This allows the whites to cook through without overcooking the yolk.
- Serving Suggestion: Serve Chilaquiles immediately after preparing. The chips are best when they are crispy, so wait until just before serving to add them to the sauce.
- Storage Info: Leftover Chilaquiles can be stored in the fridge but will lose their crispness. Reheat in the oven to regain some crunch.