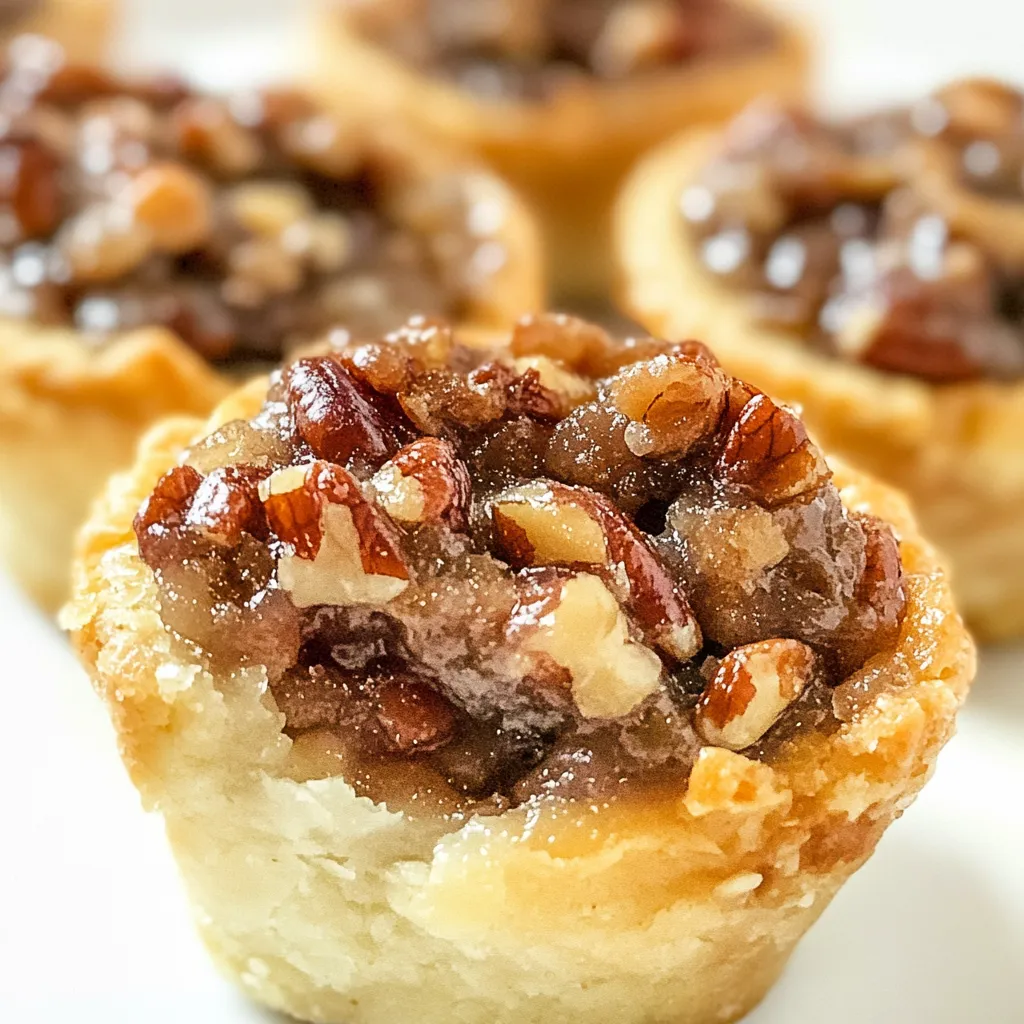
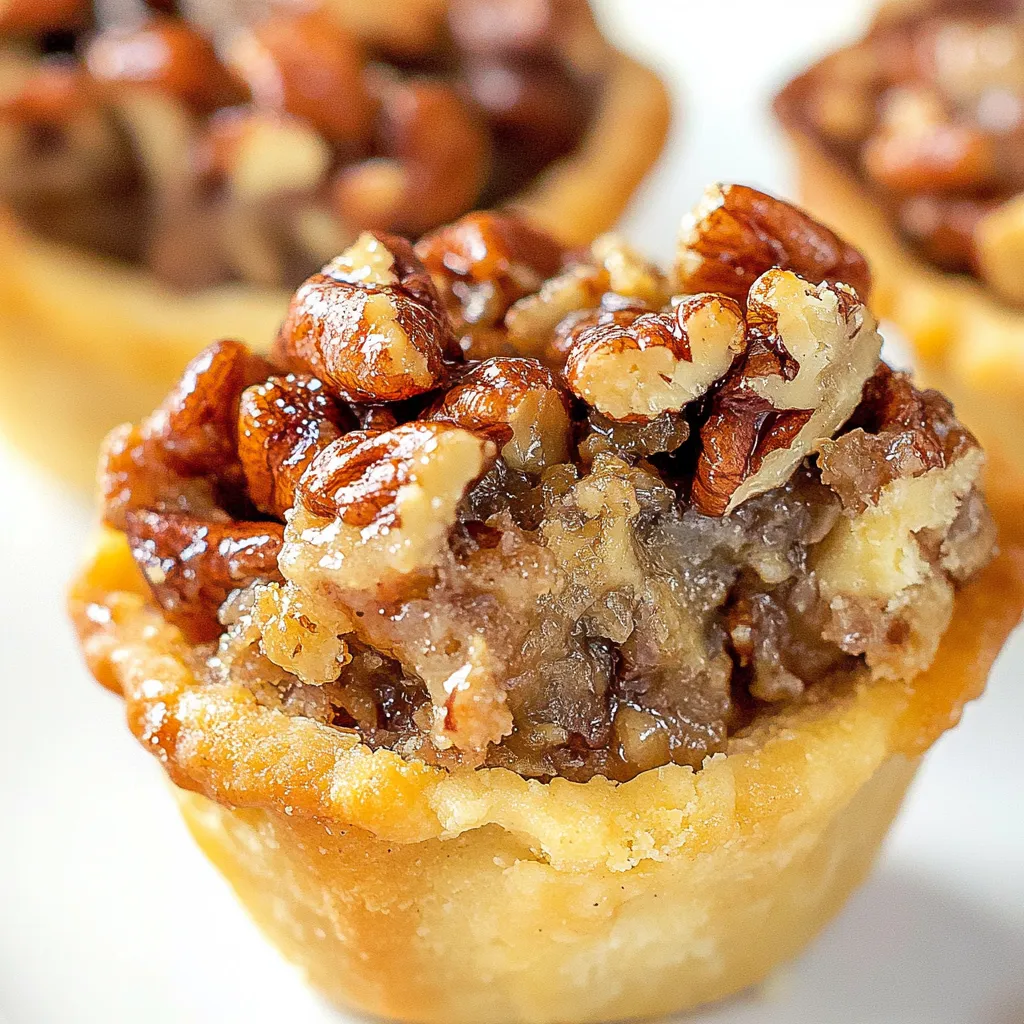
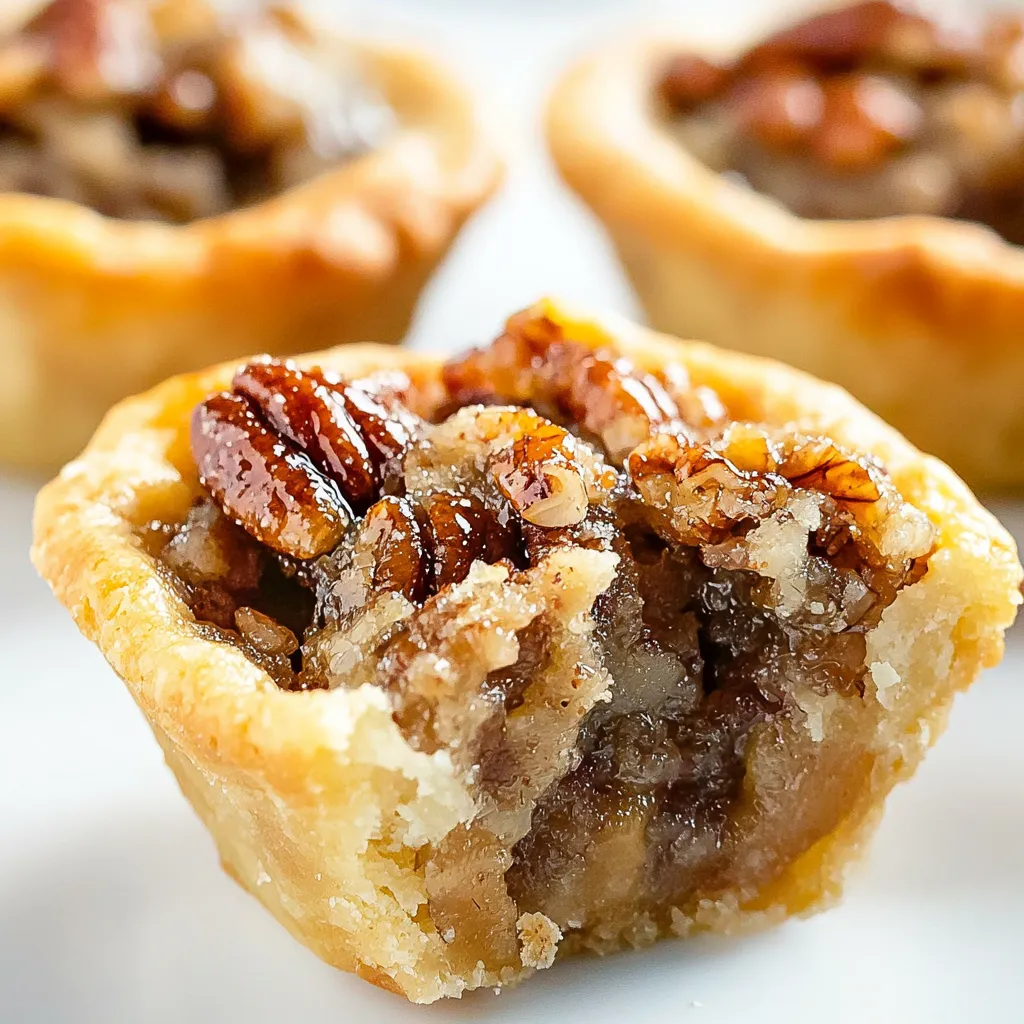
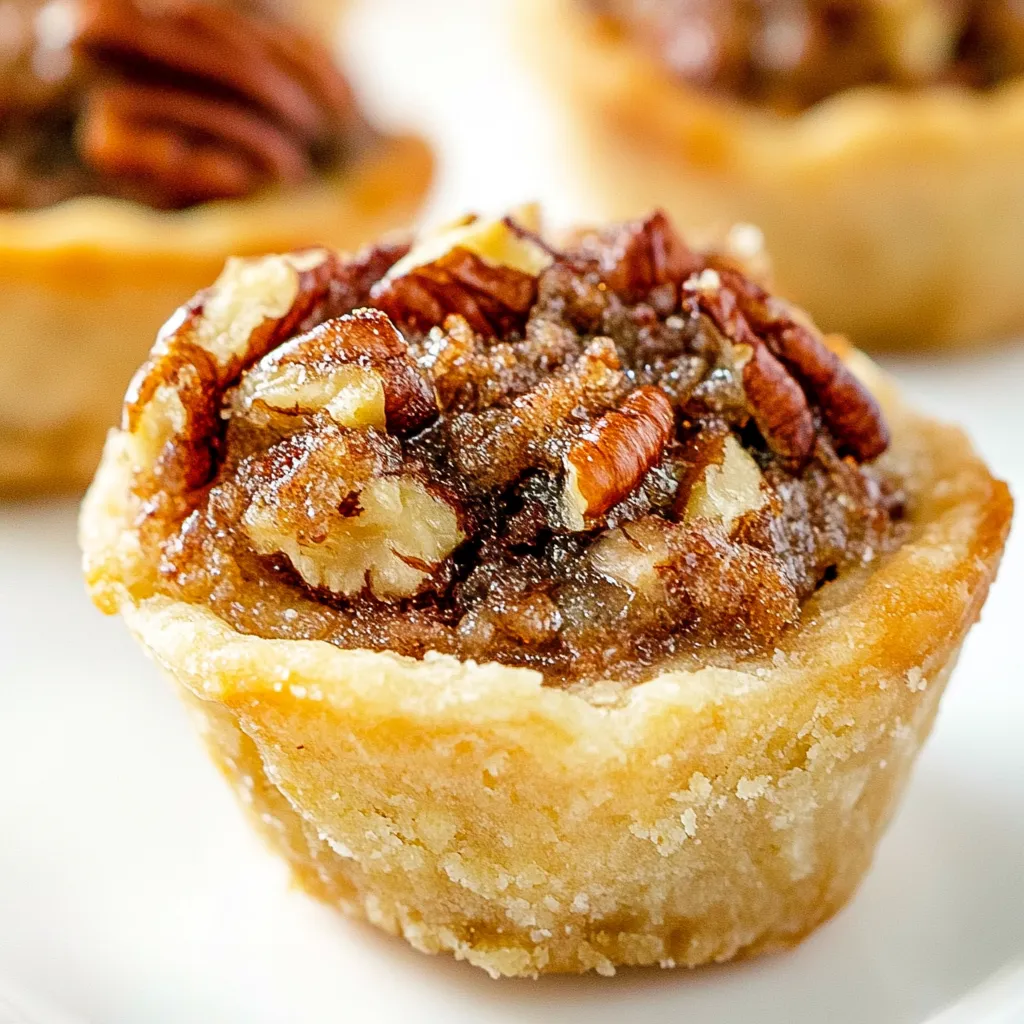
There’s something incredibly comforting about a warm batch of Pecan Tassies that beckons me back to my childhood kitchen. I remember the scent of roasting pecans filling the air, mingling with the sweet aroma of baked goods on a crisp fall afternoon. Each tiny tart, with its flaky crust and gooey filling, reminds me of family gatherings where laughter and stories flowed as freely as the desserts. These delightful morsels are not just treats; they’re little treasures that evoke memories of love, warmth, and togetherness. I can still see my grandmother expertly rolling out her dough, her hands deftly crafting each tassie with care and precision. It’s a recipe passed down through generations, each bite a reminder of the joy that comes from sharing good food with great company.
Recipe Snapshot
35 mins
15 mins
20 mins
Easy
150 kcal
2 g
Gluten-Free, Low FODMAP
8 g
Frying Pan, Oven, Chef’s Knife, Mixing Bowl, Baking Sheet
What Sets This Pecan Tassies Apart
1. A Rich Tradition
Every bite of Pecan Tassies carries a story, steeped in tradition. This recipe has been a staple in my family for years, served during holidays and special occasions. It’s more than just a dessert; it’s a connection to my roots.
2. Perfectly Bite-Sized
These delightful tarts are the perfect portion! The small size makes them ideal for sharing, whether at a gathering or simply as a treat for yourself. Each tassie is just enough to satisfy your sweet tooth without being overwhelming.
3. Easy to Make
Don’t let the fancy name fool you; Pecan Tassies are surprisingly easy to whip up. With just a few basic ingredients, you can create something that looks and tastes like it came from a bakery.
4. Versatile for Any Occasion
Whether it’s a cozy holiday gathering, a summer picnic, or an everyday dessert, Pecan Tassies fit perfectly into any setting. They’re a crowd-pleaser and can be enjoyed year-round.
5. Customizable Flavors
The beauty of Pecan Tassies lies in their versatility. You can easily tweak the flavor by adding a splash of bourbon, or even chocolate chips for a twist. The options are endless!
Main Ingredients for Pecan Tassies
Each ingredient in this recipe plays a significant role in creating the delightful flavor and texture of Pecan Tassies. The combination of rich butter, sweet brown sugar, and crunchy pecans creates a perfect harmony that is hard to resist. This collection of ingredients is not just a list; they are the essential players that come together to create a delicious masterpiece.
- ½ cup unsalted butter, room temperature: This is the star of the show, providing a rich, creamy base that forms the flaky crust of the tassies.
- 3 ounces original cream cheese, room temperature: Cream cheese adds a wonderful tanginess and smooth texture to the crust, enhancing the overall flavor.
- 1 cup all-purpose flour: Essential for structure, the flour binds the ingredients together to form the dough.
- 1 large egg, room temperature: The egg is crucial for the filling, providing moisture and helping it set perfectly.
- ¾ cup packed light brown sugar: Adds sweetness and a hint of caramel flavor that perfectly complements the pecans.
- 1 tablespoon unsalted butter, room temperature: This is added to the filling for richness and flavor.
- 1 teaspoon pure vanilla extract: Vanilla enhances the sweetness and adds depth to the flavor.
- ¼ teaspoon kosher salt: Balances the sweetness and enhances the overall flavor.
- ⅔ cup pecans, finely chopped: The star ingredient, providing crunch and that distinct nutty flavor.
Recipe Steps for Pecan Tassies
Making Pecan Tassies is truly a labor of love, and every step in the process brings us closer to those delicious little bites of heaven. Let’s dive into the joyful experience of crafting these delightful treats together. I promise, the end result will be worth the time!
In a medium mixing bowl, use a hand mixer to combine ½ cup room temperature unsalted butter and 3 ounces of original cream cheese. Beat them together until the mixture is creamy and smooth, ensuring there are no lumps for a perfect dough.
Once the butter and cream cheese are well-combined, scrape down the sides of the bowl with a spatula. Slowly add 1 cup of all-purpose flour and mix until just combined. Be careful not to overmix, as we want a tender crust.
After mixing, scrape down the sides of the bowl again and cover it with plastic wrap. Place the bowl in the refrigerator for about an hour. This chilling step is crucial for easy handling later.
While the dough chills, preheat your oven to 350 degrees Fahrenheit. Prepare a mini muffin pan by spraying it lightly with cooking spray to prevent sticking.
Once chilled, remove the dough from the refrigerator. Using a 1 tablespoon cookie scoop, form 24 equal-sized dough balls, about 1 inch in diameter.
Next, place each dough ball into the prepared mini muffin cups. Gently press the dough evenly into the bottom and sides of each cup to create a small cup shape.
Now, let’s make the filling! In a clean mixing bowl, beat together 1 large egg, ¾ cup of packed brown sugar, 1 tablespoon of softened butter, 1 teaspoon of vanilla extract, and ¼ teaspoon of kosher salt until well combined and creamy.
Before you add the pecans, reserve 2 tablespoons of the chopped pecans and set them aside for later. Then, gently fold in the remaining ⅔ cup of finely chopped pecans into the filling mixture.
Now, it’s time to fill those mini muffin cups! Spoon 1 teaspoon of the pecan filling into each muffin cup until they are just about full. Don’t worry if they look a little messy; they’ll bake perfectly!
Finally, sprinkle the reserved 2 tablespoons of chopped pecans over the top of the filling in each cup. This adds a lovely texture and enhances the nutty flavor.
Place the muffin pan in your preheated oven and bake for 15 to 20 minutes, or until the tassies are golden brown on top. When they’re done, remove them from the oven and allow them to cool on a wire rack for about 5 to 10 minutes.
Things Worth Knowing
- Chilling is Key: Resting the dough in the refrigerator is essential for achieving a flaky crust. It helps the butter solidify, which creates that wonderful texture.
- Don’t Overmix: When combining the dough and filling, mix just until combined. Overmixing can lead to tough tassies.
- Monitor Baking Time: Every oven is different. Keep an eye on your Pecan Tassies as they bake to prevent burning.
- Let Them Cool: Allow the Pecan Tassies to cool slightly before removing them from the muffin pan. This will help them hold their shape.
How to Switch It Up
Even though Pecan Tassies are perfect as they are, there’s always room to play with flavors and techniques to customize them to your liking. Here are some ways to make this recipe your own:
- Storage: After baking, these Pecan Tassies can be stored in an airtight container at room temperature for about 3 to 4 days. They’ll remain delicious!
- Refrigeration: If you want them to last longer, store them in the refrigerator in an airtight container for about 2 weeks. Just be sure they are sealed tightly.
- Freezing: Want to make them ahead of time? Freeze them in an airtight container for up to 3 months. Place parchment or wax paper between layers to prevent sticking.
- Flavor Variations: Consider adding a splash of maple syrup to the filling for an extra depth of sweetness, or mix in some chocolate chips for a delightful twist!
- Serving Ideas: Serve these Pecan Tassies warm with a scoop of vanilla ice cream or whipped cream for an indulgent dessert.
Accompaniments for Pecan Tassies
Pairing your Pecan Tassies with the right accompaniments can elevate your dessert experience. Here are some delightful ideas to consider:
- Serving with Coffee: Enjoying a Pecan Tassie alongside a cup of freshly brewed coffee creates a perfect balance of flavors, making for a cozy treat.
- Ice Cream: A scoop of vanilla or caramel ice cream on the side will complement the nutty flavors beautifully.
- Fruit Compote: Consider serving a warm fruit compote as a topping. The tartness of berries contrasts nicely with the sweetness of the tassies.
- Perfect for Celebrations: These Pecan Tassies are ideal for holiday gatherings, birthday parties, or any special occasion where you want to impress your guests.
- Storage Tips: If you have leftovers, make sure to store them in a cool, dry place to maintain their freshness.
FAQ
Conclusion
Pecan Tassies are truly special, offering a delightful combination of flavors and textures that make them irresistible. They bring back fond memories and create new ones with each batch. I encourage you to try making these delicious little tarts; they’re sure to be a hit at your next gathering!
Pecan Tassies
Ingredients
Equipment
Method
- In a medium mixing bowl, use a hand mixer to combine ½ cup room temperature unsalted butter and 3 ounces of original cream cheese until creamy and smooth. Scrape down the sides, then slowly add 1 cup of all-purpose flour and mix until just combined. Scrape down the sides again and cover the bowl. Place it in the refrigerator for 1 hour.
- Preheat oven to 350 degrees Fahrenheit. Prepare a mini muffin pan with cooking spray. Remove the dough from the refrigerator and use a 1 tablespoon cookie scoop to form 24 1-inch dough balls. Next, place each dough ball into the prepared mini muffin cups and press evenly into the bottom and sides of the muffin cups to form a cup.
- In a medium mixing bowl, use a hand mixer to mix 1 large egg, ¾ cup packed brown sugar, 1 tablespoon butter, softened, 1 teaspoon vanilla extract and ¼ teaspoon kosher salt until combined. Reserve 2 tablespoons of chopped pecans and set aside. Fold in the remaining ⅔ cup of finely chopped pecans.
- Fill each muffin cup with 1 teaspoon of the pecan filling. Next, sprinkle 2 tablespoons of reserved pecans over the top of the tassies.
- In the preheated oven at 350 degrees Fahrenheit bake for 15 – 20 minutes or until golden brown. Remove from oven, place on a cooling rack, and allow to cool for 5 – 10 minutes.
Notes
- Store Bought Crust: Yes! They may not be near as tasty as they are with homemade crust, but store bought crust is a great way to save time.
- Room Temperature: These will store well at room temperature for about 3 to 4 days.
- Refrigeration: If you want them to last a bit longer, store them in the refrigerator in an airtight container for about 2 weeks.
- Freezer: If you choose to make them ahead of time, store them in an airtight container in the freezer up to 3 months. Be sure to add parchment or wax paper in between stacks of pecan tassies so that they don’t stick together. Thaw in the container at room temperature when ready to use.