When the leaves start to turn and the air becomes crisp, I can’t help but think of my favorite dessert: Apple Slab Pie. Every fall, my thoughts drift to the sweet, spicy aroma of freshly baked apples wafting through my kitchen. It takes me back to cozy family gatherings where laughter surrounded us as we savored each slice of pie. With a perfectly flaky crust cradling sweet, cinnamon-spiced apples, this dish has become a tradition in my home. I remember the first time I made it for my friends; their eyes lit up with delight as they dug into the warm, gooey filling. There’s something magical about sharing homemade desserts, especially one as comforting as Apple Slab Pie. It’s a recipe that brings everyone together, celebrating both the season and the love we pour into our cooking.
Recipe Snapshot
1 hr 25 mins
45 mins
40 mins
Medium
350 kcal
2 g
Gluten-Free, Low FODMAP
18 g
Food Processor, Frying Pan, Grater, Wooden Spoon, Oven, Mixing Bowl, Peeler, Baking Sheet
Why This Apple Slab Pie Shines
Perfect for Sharing
What I love about the Apple Slab Pie is its size. Unlike traditional pies, this one is meant to be shared, making it perfect for gatherings. You can easily serve a crowd, so it’s ideal for those big family dinners or Thanksgiving feasts.
Easy to Make
Despite its impressive appearance, making Apple Slab Pie is simpler than you might think. The steps are straightforward, and you get to enjoy the process of baking. Plus, using a food processor saves time on mixing the dough!
Versatile Filling
The filling of this pie is wonderfully flexible. While I love sticking to the classic apple flavor, you can experiment with different types of apples or even add a splash of lemon to brighten the filling. The combination of spices really brings the apples to life, making each bite a burst of flavor.
Great for Leftovers
If there’s any left after your gathering, Apple Slab Pie tastes even better the next day! You can enjoy it warm, or serve it cold with a scoop of ice cream for a delightful treat.
Family Tradition
This recipe has become a family tradition in my home. It’s a dessert that sparks joy and conversation, and I love that it’s something I can pass down to future generations. There’s a sense of comfort in knowing that we can create sweet memories together, one slice at a time.
Fall Flavors
Finally, nothing says fall like the flavors of cinnamon, nutmeg, and freshly baked apples. It’s a symphony of tastes that warms the heart and fills the home with delightful aromas.
What You’ll Need for Apple Slab Pie
Gathering the right ingredients is essential for creating the perfect Apple Slab Pie. Each element plays a vital role in building the flavors and textures that make this dessert truly special. You’ll find a balance of sweetness, spice, and a flaky crust that will have everyone coming back for seconds.
- One quarter sheet pan (9×13-inch with a 1-inch tall rim): This is the base for your pie, allowing for a generous amount of filling.
- 2 1/2 cups + 2 tablespoons all-purpose flour: This is the backbone of your crust, providing structure.
- 16 tablespoons unsalted butter, cubed and frozen for 20 minutes: Using cold butter is crucial for achieving a flaky crust.
- 1/4 teaspoon kosher salt: A small amount enhances the flavor of the dough.
- 1/2 cup ice water: Helps bring the dough together without melting the butter.
- 3 to 4 pounds (6-7 large) apples: A mix of tart and sweet varieties yields the best flavor.
- 1/3 cup packed light brown sugar: Adds depth and richness to the apple filling.
- 2 tablespoons all-purpose flour: This helps to thicken the filling.
- 1 tablespoon freshly squeezed lemon juice: Balances the sweetness of the apples.
- 1/2 teaspoon ground cinnamon: A classic spice that complements the apples beautifully.
- 1/2 teaspoon ground ginger: Adds a warm, zesty kick.
- 1/2 teaspoon ground nutmeg: Provides a lovely aromatic flavor.
- 1/4 teaspoon kosher salt: Enhances the overall taste of the filling.
- 2 tablespoons cold unsalted butter, cut into pieces: This will be scattered over the top of the filling before baking.
- 1 tablespoon heavy cream or whole milk: Gives the crust a beautiful golden finish.
- 2 tablespoons sparkling or granulated sugar: For a sweet and crunchy topping.
Preparation Steps for Apple Slab Pie
Making Apple Slab Pie is a delightful process that fills your kitchen with warmth and a fantastic aroma. Follow these simple steps to create this crowd-pleaser from scratch.
- Start by preparing the dough. In a food processor, pulse the flour, butter, and salt until the mixture resembles small peas, about 15 pulses. This method ensures that the butter is nicely coated with flour.
- Add the ice water all at once and process until the mixture almost forms a ball. Be careful not to over-process; we want to maintain some chunks of butter for a flaky crust.
- Form the dough into a rectangle, about 6×4 inches, using plastic wrap and a bench scraper. Wrap tightly and refrigerate for at least 4 hours, allowing it to chill and firm up.
- Once chilled, remove the dough from the refrigerator and let it warm slightly on the counter—just enough so it’s pliable. Divide it into two pieces, making one slightly larger than the other for the bottom crust.
- Roll out the larger piece into a rectangle, roughly 11×15 inches. Carefully place it into the quarter sheet pan, pressing it into the corners and letting the excess drape over the sides. Refrigerate this while you prepare the filling and top crust.
- Roll out the smaller piece of dough to about 10×14 inches and lay it on a lightly floured sheet of parchment paper. Refrigerate it to keep it cold.
- Now, let’s preheat the oven to 400 degrees F. If you have a baking stone or an inverted baking sheet, place it on the center rack to heat. This will help create an even baking environment.
- For the filling, line a large bowl with a clean thin cotton kitchen towel or a double layer of cheesecloth. Use a box grater to grate the apples, cores included, right into the towel. Once grated, twist the towel to extract the juice. This step helps prevent a soggy bottom crust!
- In a large bowl, combine the squeezed apples with brown sugar, flour, lemon juice, cinnamon, ginger, nutmeg, and salt. Mix well, using your hands if necessary to ensure everything is evenly coated.
- Take the bottom crust out of the refrigerator and pile the filling in the center, spreading out the apples to fit. Scatter the cold unsalted butter pieces on top of the filling.
- Trim the excess crust to about 1/2 inch over the edge of the pan, tucking it up and over the top. Use a fork to crimp the edges securely.
- Chill the assembled pie in the refrigerator for about 20 minutes. This step helps to maintain the shape of the crust during baking.
- Before baking, brush the surface with heavy cream and generously sprinkle with sugar. Make a couple of slashes in the top crust to allow steam to escape.
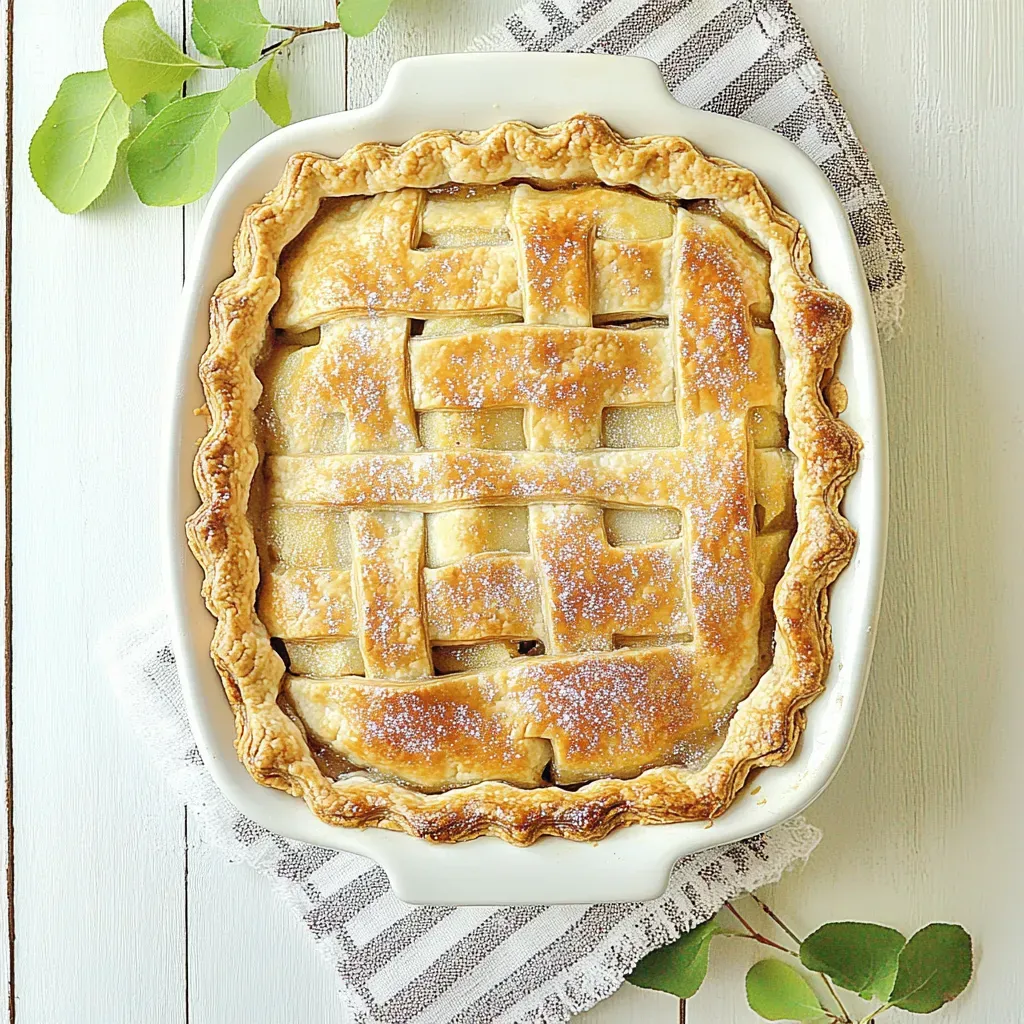
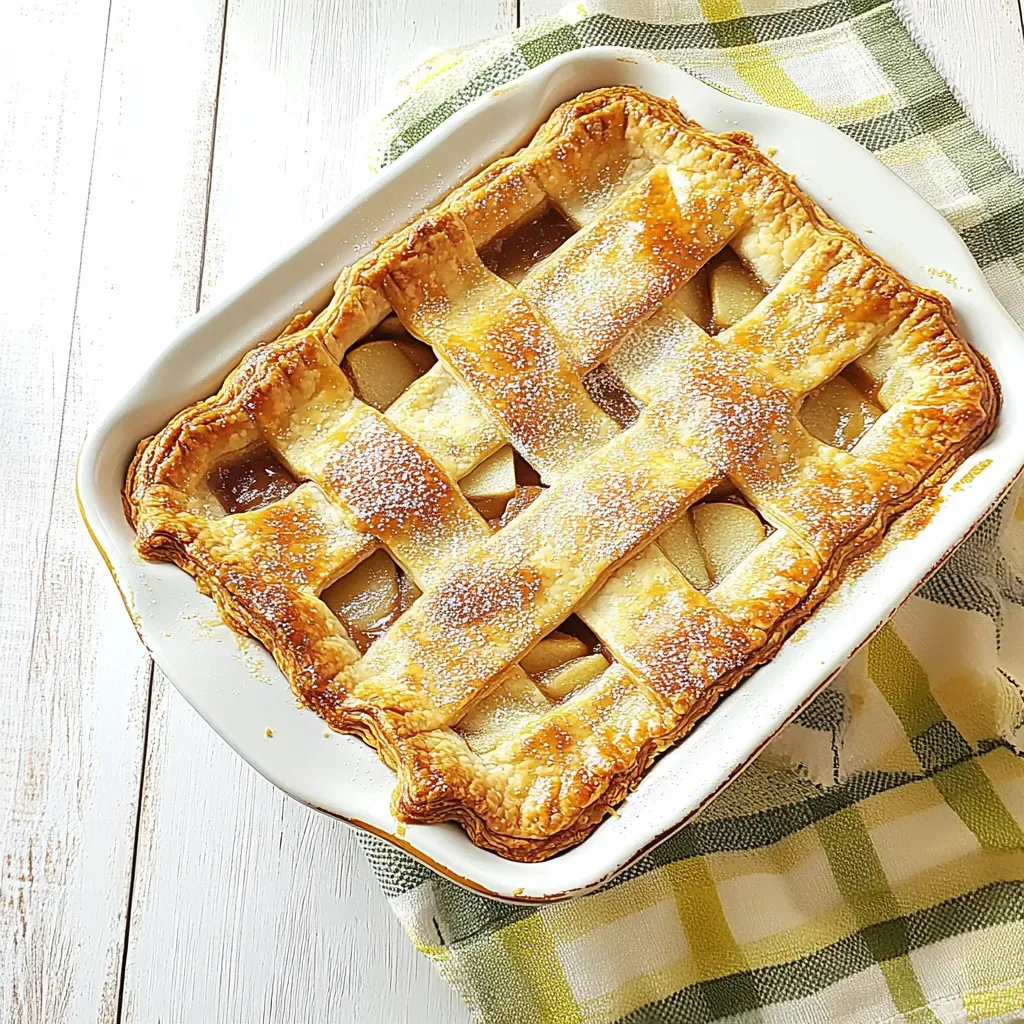
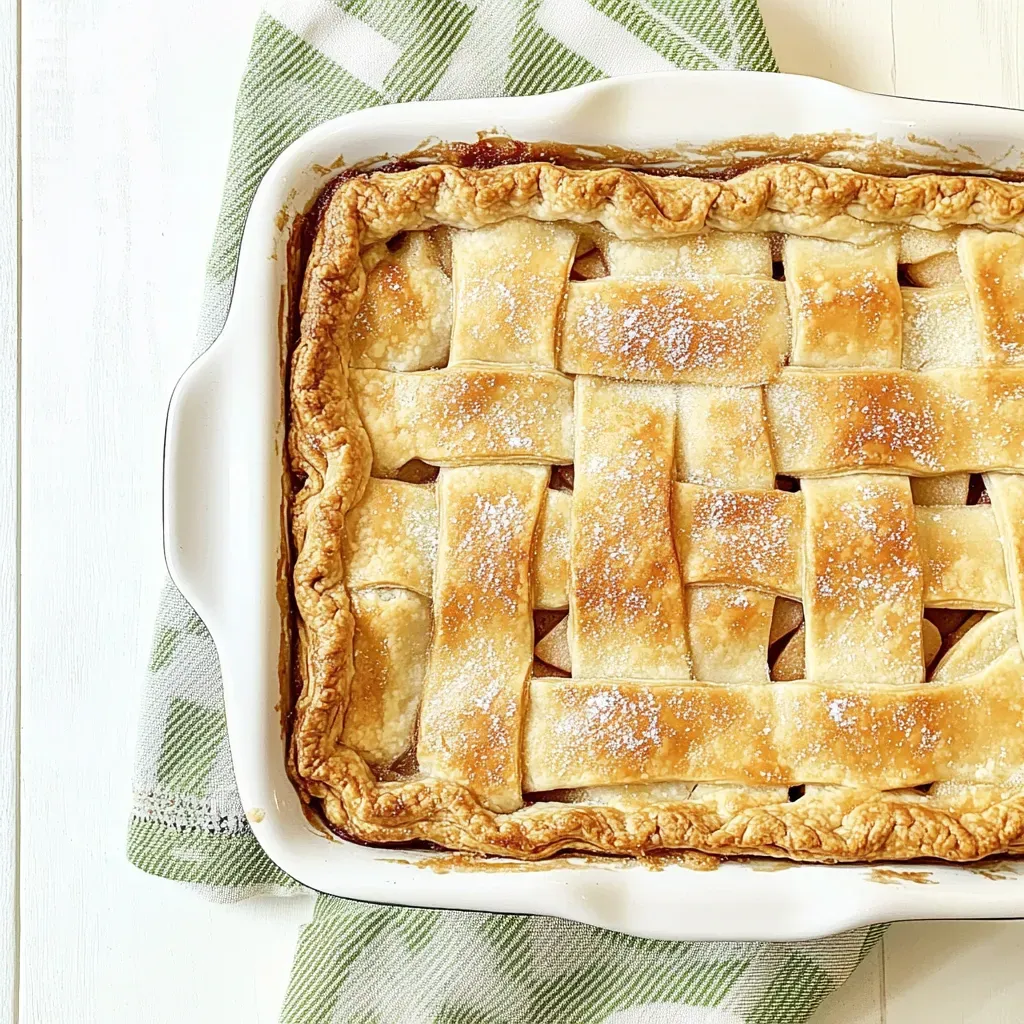
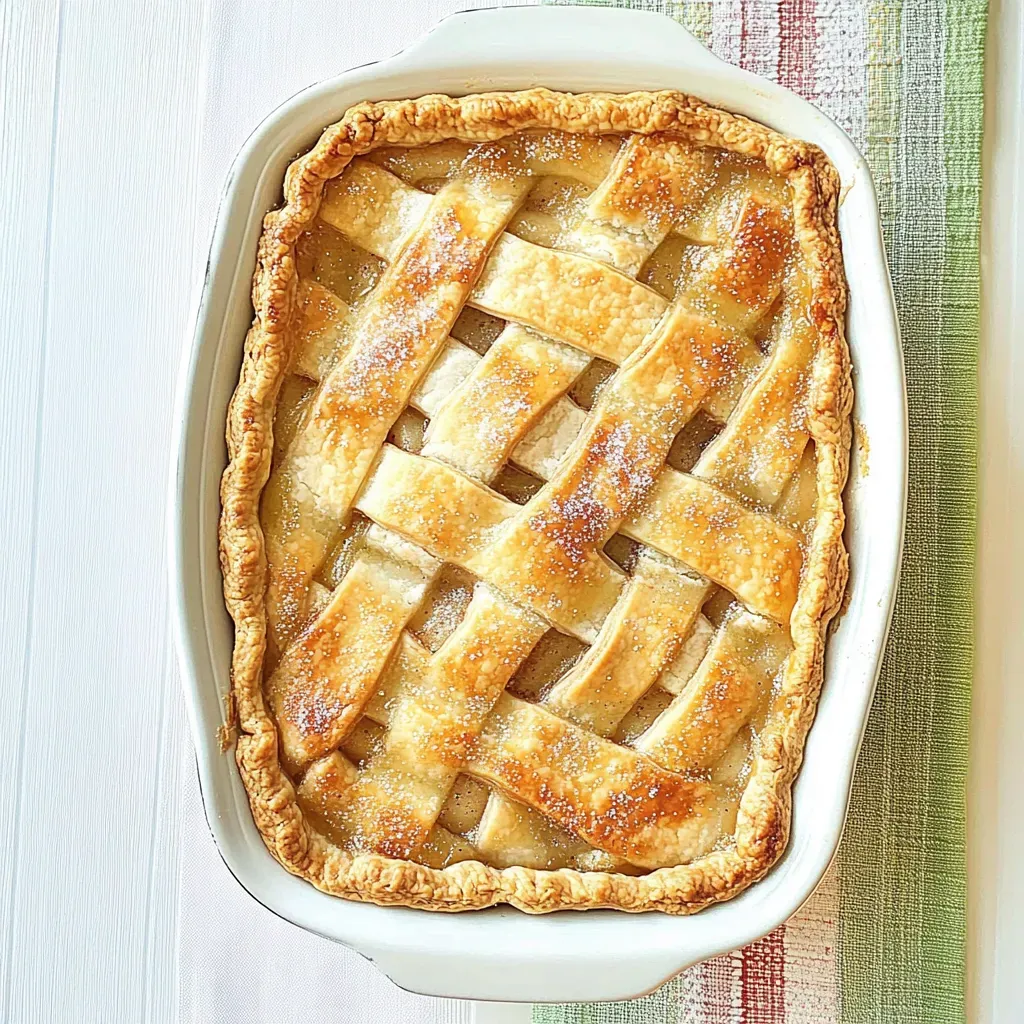
- Carefully transfer the pie to the oven, placing it on the hot stone or baking sheet. Bake for 40 to 45 minutes, or until the filling is bubbling and the crust is a deep golden brown. If the crust darkens too quickly, use a piece of foil to tent the pie.
- Once baked, let the pie cool for at least 10 minutes before slicing. This gorgeous Apple Slab Pie can be enjoyed warm or at room temperature, perhaps with a scoop of your favorite ice cream!
Things Worth Knowing
- Use Cold Ingredients: Ensure your butter and water are cold to create a flaky crust.
- Apple Variety: Mixing different varieties of apples gives a depth of flavor.
- Prevent Soggy Crust: Grate and squeeze the apples to remove excess moisture.
- Cooling Time: Allow the pie to cool before slicing to set the filling.
Helpful Notes about Apple Slab Pie
To get the most out of your Apple Slab Pie, here are some helpful tips:
- Storage: Keep leftover pie covered in the refrigerator for up to 3 days.
- Freezing: Unbaked pie can be frozen for up to 1 month. Bake it straight from the freezer; just add a few extra minutes to the baking time.
- Pairing: Serve with fresh whipped cream, vanilla ice cream, or a drizzle of caramel sauce.
- Ingredient Quality: Use fresh, high-quality apples for the best flavor and texture.
- Serving Suggestions: This pie is perfect for holidays, family gatherings, or simply as a comforting dessert.
How to Serve Apple Slab Pie
When it comes to serving Apple Slab Pie, the possibilities are endless!
- Classic Presentation: Serve warm, sliced into generous squares, and offer a scoop of vanilla ice cream on the side.
- Perfect for Gatherings: This pie is ideal for potlucks or family reunions, providing a comforting dessert that everyone loves.
- Seasonal Decor: For a festive touch, garnish with a sprinkle of cinnamon or a drizzle of caramel.
- Breakfast Treat: Leftovers are fantastic for breakfast, enjoyed alongside a hot cup of coffee.
- Storage: Keep any uneaten pie in the fridge, and it will be just as delightful the next day!
- Occasional Indulgence: Whether it’s a holiday feast or a cozy family dinner night, this pie fits perfectly on any table.
FAQ
Conclusion
Apple Slab Pie is a comforting dessert that brings warmth and joy to any gathering. With its flaky crust and delicious apple filling, it’s perfect for sharing with family and friends. I encourage you to give this recipe a try—you won’t be disappointed. It’s a wonderful way to celebrate the flavors of fall and create sweet memories around the table. Enjoy every slice!
Apple Slab Pie
Ingredients
Equipment
Method
- Start by preparing the dough. In a food processor, pulse the flour, butter, and salt until the mixture resembles small peas, about 15 pulses. This method ensures that the butter is nicely coated with flour.
- Add the ice water all at once and process until the mixture almost forms a ball. Be careful not to over-process; we want to maintain some chunks of butter for a flaky crust.
- Form the dough into a rectangle, about 6x4 inches, using plastic wrap and a bench scraper. Wrap tightly and refrigerate for at least 4 hours, allowing it to chill and firm up.
- Once chilled, remove the dough from the refrigerator and let it warm slightly on the counter—just enough so it’s pliable. Divide it into two pieces, making one slightly larger than the other for the bottom crust.
- Roll out the larger piece into a rectangle, roughly 11x15 inches. Carefully place it into the quarter sheet pan, pressing it into the corners and letting the excess drape over the sides. Refrigerate this while you prepare the filling and top crust.
- Roll out the smaller piece of dough to about 10x14 inches and lay it on a lightly floured sheet of parchment paper. Refrigerate it to keep it cold.
- Now, let’s preheat the oven to 400 degrees F. If you have a baking stone or an inverted baking sheet, place it on the center rack to heat. This will help create an even baking environment.
- For the filling, line a large bowl with a clean thin cotton kitchen towel or a double layer of cheesecloth. Use a box grater to grate the apples, cores included, right into the towel. Once grated, twist the towel to extract the juice. This step helps prevent a soggy bottom crust!
- In a large bowl, combine the squeezed apples with brown sugar, flour, lemon juice, cinnamon, ginger, nutmeg, and salt. Mix well, using your hands if necessary to ensure everything is evenly coated.
- Take the bottom crust out of the refrigerator and pile the filling in the center, spreading out the apples to fit. Scatter the cold unsalted butter pieces on top of the filling.
- Trim the excess crust to about 1/2 inch over the edge of the pan, tucking it up and over the top. Use a fork to crimp the edges securely.
- Chill the assembled pie in the refrigerator for about 20 minutes. This step helps to maintain the shape of the crust during baking.
- Before baking, brush the surface with heavy cream and generously sprinkle with sugar. Make a couple of slashes in the top crust to allow steam to escape.
- Carefully transfer the pie to the oven, placing it on the hot stone or baking sheet. Bake for 40 to 45 minutes, or until the filling is bubbling and the crust is a deep golden brown. If the crust darkens too quickly, use a piece of foil to tent the pie.
- Once baked, let the pie cool for at least 10 minutes before slicing. This gorgeous Apple Slab Pie can be enjoyed warm or at room temperature, perhaps with a scoop of your favorite ice cream!
Notes
- Tip 1: Buy a mixture of apple varieties: Granny Smith, Pink Lady, Gala, Fuji.
- Tip 2: MAKE AHEAD TIP: Freeze the unbaked pie, wrapped tightly in plastic and then in foil, for up to 1 month. Bake straight from the freezer.