The moment I think of Hot Cross Buns, I’m transported back to my childhood, where the aroma of freshly baked buns wafted through the house every Easter. It was a lovely ritual that brought our family together, creating an ambiance filled with love and laughter. As I kneaded the dough, I could already envision the joy on my family’s faces as they indulged in those sweet, spiced treats. The soft, pillowy texture of each bun paired with the delightful sweetness of raisins and the aromatic spices was simply irresistible. They were more than just a treat; they symbolized the arrival of spring and the joy of togetherness. Whether enjoyed as a breakfast delight or a sweet snack, I always find a way to incorporate Hot Cross Buns into our Easter celebrations. This tradition continues to warm my heart and fill my home with delightful memories.
Recipe Snapshot
3 hr 40 mins
200 mins
20 mins
Hard
210 kcal
4g g
Vegan, Gluten-Free, Low FODMAP
6g g
Baking Sheet, Wooden Spoon, Mixing Bowl, Whisk
Why This Hot Cross Buns Shines
Tradition Meets Flavor
There’s something magical about Hot Cross Buns that transcends generations. The iconic cross on top represents the crucifixion, making them a staple during the Easter season. It’s fascinating how a simple bun can carry such deep significance while simultaneously delighting our taste buds. Each bite offers a delightful blend of spices, sweetness, and nostalgia, reminding us of the joy of tradition.
The Perfect Balance
What sets Hot Cross Buns apart is their unique flavor profile. The combination of spices like cinnamon, nutmeg, and cardamom creates a warm and inviting taste that is perfect for any occasion. The soft, fluffy texture paired with the slight crunch from the cross adds a delightful contrast, making each bite a luxurious experience.
Versatility in Serving
These buns are incredibly versatile. Whether you enjoy them plain, toasted with a pat of butter, or glazed with apricot jam, they adapt beautifully to your preference. You can also get creative with mix-ins, such as adding chocolate chips or different dried fruits, making each batch uniquely yours!
Perfect for All Occasions
While Hot Cross Buns are traditionally enjoyed during Easter, they are delightful year-round. They make for a perfect snack, a sweet breakfast option, or even a lovely addition to brunch gatherings. Their rich history paired with their delicious flavor ensures they are loved by all, no matter the season.
Simple Ingredients, Beautiful Results
This recipe highlights how simple ingredients can create something extraordinary. With just flour, water, yeast, and spices, you’re crafting a beautiful tradition that fills your home with warmth. Baking these buns from scratch allows you to connect with the food, making each bite taste even better.
A Community Experience
There’s something special about baking Hot Cross Buns as a collective activity. Gathering friends and family to knead the dough and shape the buns not only enhances the joy of baking but also creates lasting memories. Sharing these buns with loved ones makes every bite taste even sweeter.
Shopping List for Hot Cross Buns
Gathering the right ingredients is the first step to creating delicious Hot Cross Buns. Each ingredient plays a crucial role in crafting the perfect batch. The blend of spices, the sweetness of the dried fruits, and the warmth of the yeast come together to create a treat that is not just tasty but also comforting. Here’s what you’ll need:
- 1 cup warm water (aim for 107-110° F)
- 1 cup warm milk (aim for 107-110° F)
- 4 1/2 teaspoons active dry yeast (0.5 oz, 2 packages)
- 1 tablespoon honey or granulated sugar
- 3 cups all-purpose flour (plus more as needed)
- 2 teaspoons ground cinnamon
- 1/2 teaspoon ground nutmeg
- 1/4 teaspoon ground cardamom or allspice or cloves
- 1/4 cup light brown sugar (packed)
- 2 teaspoons salt
- 1/4 cup butter (melted and cooled)
- 1 cup raisins or sultanas or currants
- 1 naval orange (zested)
- 1/4 cup milk
- 2/3 cup all-purpose flour
- 1/2 cup water (see notes below)
- 1/2 cup apricot jam or orange marmalade (optional)
How to Prepare Hot Cross Buns
Making Hot Cross Buns is a delightful, rewarding process. The smell as they bake is enough to make your mouth water! Follow these steps closely to ensure your buns turn out soft, fluffy, and absolutely delicious.
In a liquid measuring cup, combine the warm water, warm milk, yeast, and honey. Allow it to proof for about 10 minutes. You’ll know it’s ready when the top appears frothy and bubbly. This is crucial as the yeast needs to activate properly to give your buns their rise.
While the yeast is proofing, measure out 3 cups of flour along with cinnamon, nutmeg, cardamom, brown sugar, and salt into the bowl of a stand mixer fitted with a dough hook. Stir until well combined. This mixture of dry ingredients will add depth to the flavor of your buns.
Once the yeast has bloomed, pour it into the dry ingredients. Stir until the mixture becomes sticky. As it mixes, gradually pour in the melted butter. Continue ‘kneading’ the dough by slowly adding another 1-2 cups of flour, a little at a time, until the dough pulls away from the sides of the bowl and feels tacky but doesn’t stick to your fingers. This should take about 6 minutes, giving you a smooth and elastic dough.
Transfer the dough into a well-greased bowl. Cover it with plastic wrap and let it rise for about an hour, or until it has doubled in size. Finding a warm, draft-free place will help the dough rise beautifully.
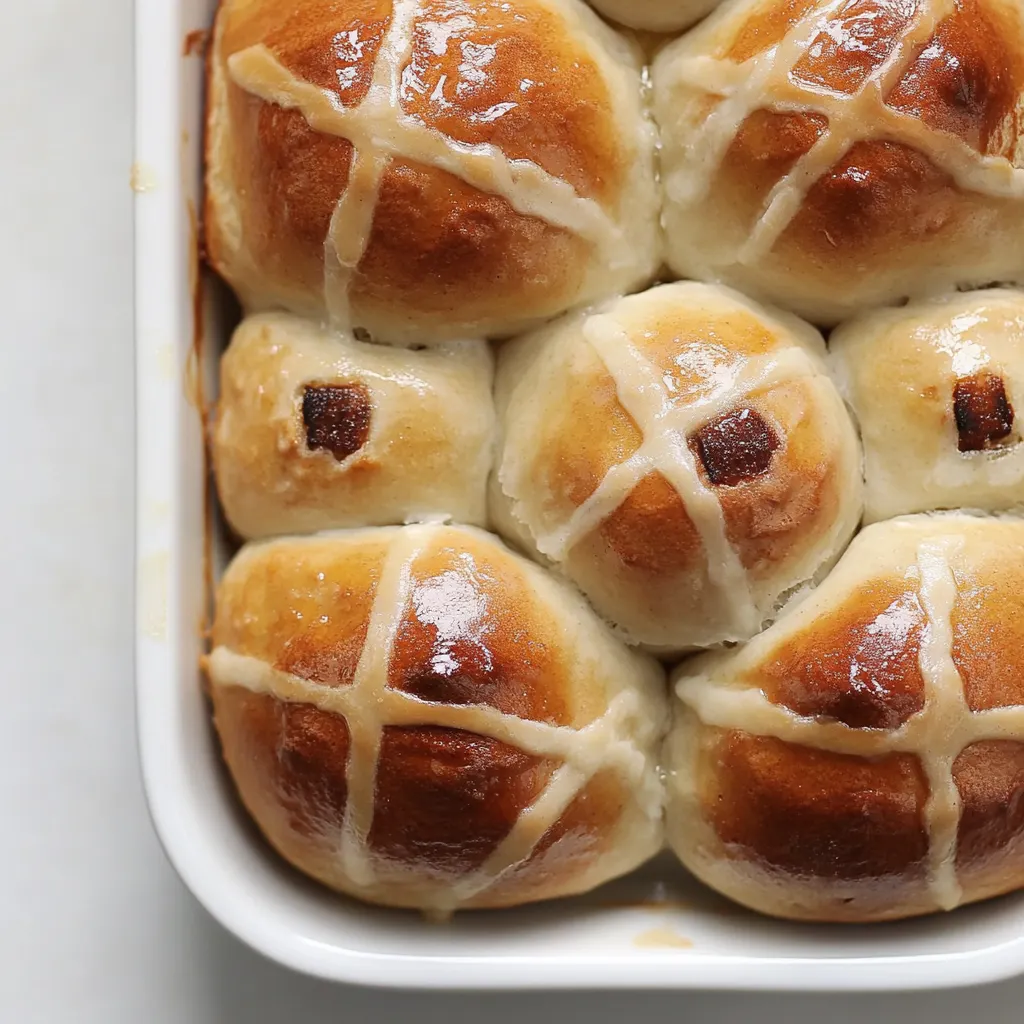
When the dough has risen, punch it down gently to release the air. Turn it out onto a floured surface and press it into a large rectangle. Gently fold in the raisins and the zest of the orange. Divide the dough into 24 equal pieces, shaping them into balls of around 2 ounces each. Place these balls onto a parchment paper-lined baking sheet. Cover them again with plastic wrap or a clean dish towel and let them rise for another 45 minutes to 1 hour.
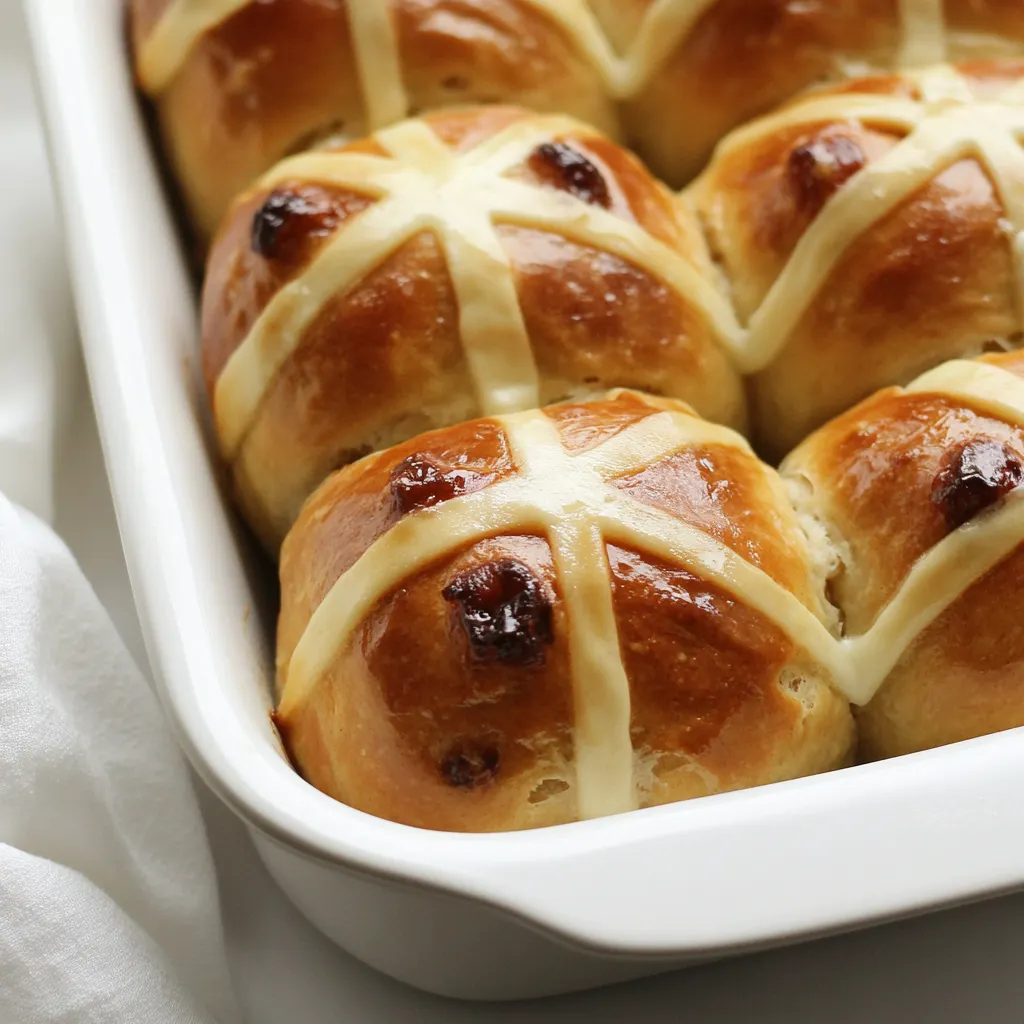
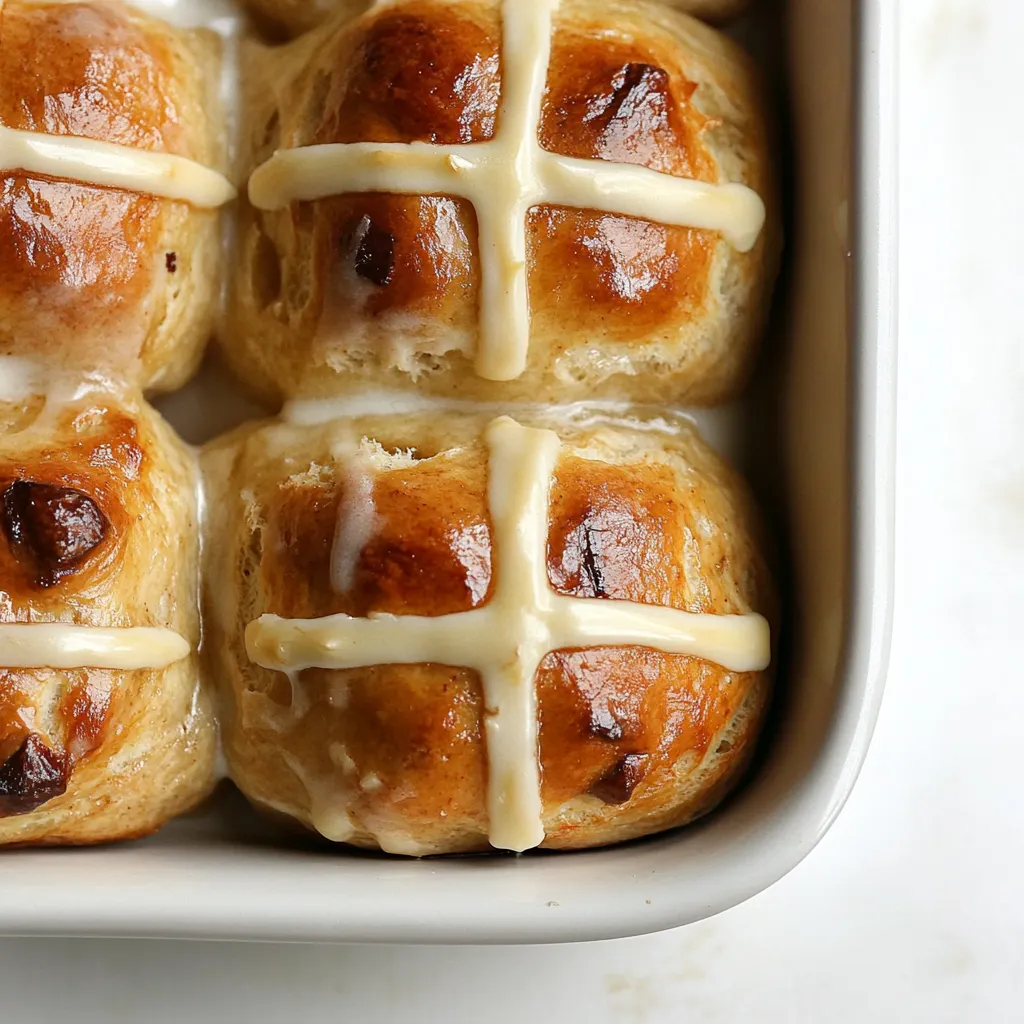
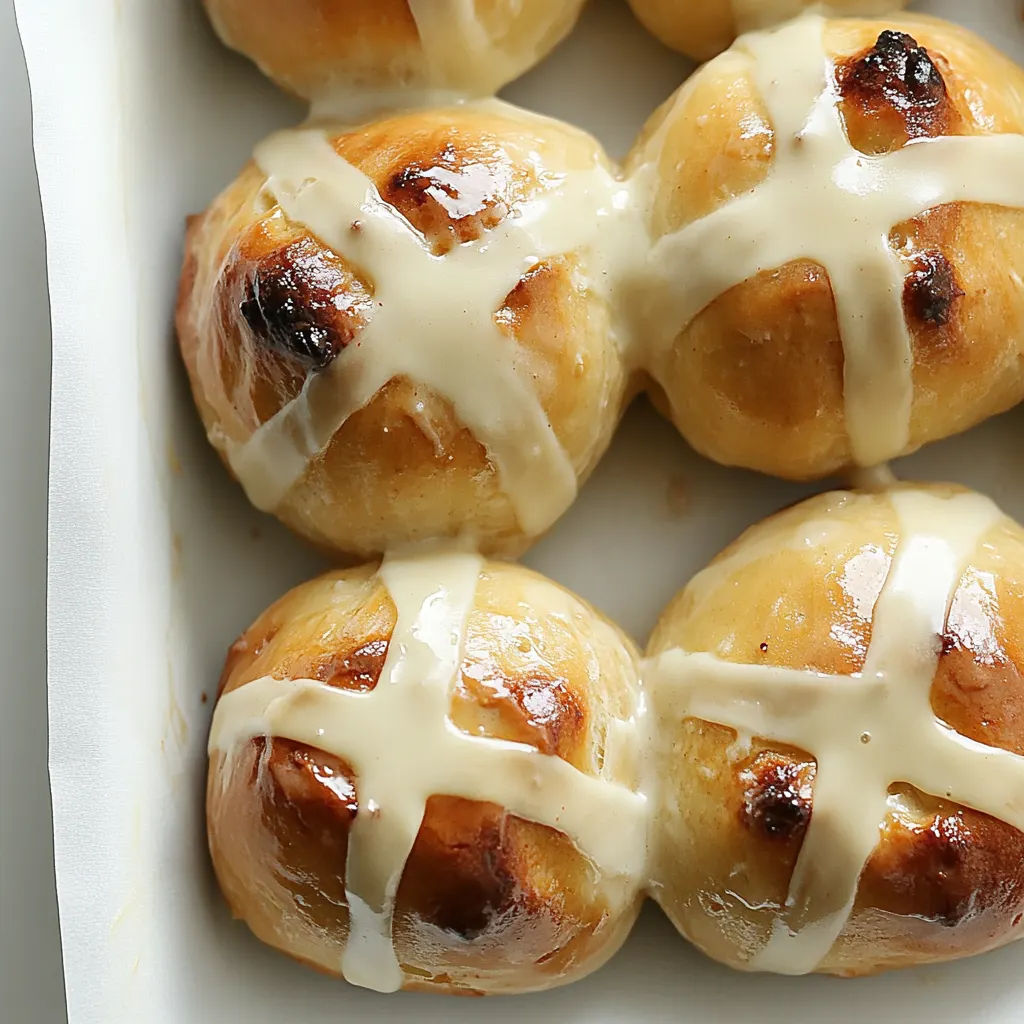
Preheat your oven to 350° F. After the buns have risen, brush each one with milk for a shiny finish. To make the crosses, whisk together flour and water until you form a thick, pipeable paste. Spoon this mixture into a piping bag or a Zip-top bag, snip the tip, and pipe crosses on top of each bun.
Bake the buns in the preheated oven for 20 minutes or until they are golden brown. This is where the magic happens; the smell will be out of this world!
Once they are baked, you may want to glaze them. Melt apricot jam or orange marmalade in the microwave until it’s runny, then brush it over the tops of the buns for an extra touch of sweetness. Serve your Hot Cross Buns warm or at room temperature and enjoy the delighted faces around you.
Things Worth Knowing
- Yeast Activation: Ensure your yeast is fresh and activated properly. If it doesn’t foam during proofing, it might be dead, and you’ll need to start over.
- Dough Consistency: The dough should be tacky but not overly sticky. Adjust the amount of flour as necessary to achieve the right consistency.
- Rising Environment: Find a warm, draft-free area for your dough to rise, such as an oven with just the light on. This helps achieve a nice rise.
- Crosses: Make sure your cross paste is thick enough to hold its shape while baking but not so thick that it doesn’t pipe out easily.
- Glazing: Glazing your buns after baking gives them a beautiful finish and an added layer of flavor.
Helpful Notes about Hot Cross Buns
When making Hot Cross Buns, a few helpful notes can ensure your baking adventure is smooth and successful. Here are some tips to keep in mind:
- Storage: Allow the buns to cool completely before storing them in an airtight container. They can be stored at room temperature for up to 3 days.
- Freezing: You can freeze the buns after they cool. Wrap each bun tightly in plastic wrap and store them in a freezer bag. They’ll last for up to 3 months.
- Toasting: Reheat the buns in the toaster for a warm, crispy treat, perfect for breakfast or a snack.
- Variations: Feel free to mix in different dried fruits or nuts to personalize your buns. You can even add chocolate chips for a sweeter twist!
- Serving Suggestions: Serve the buns with cream cheese or sweet butter for an extra touch of luxury.
Perfect Pairings for Hot Cross Buns
When it comes to serving Hot Cross Buns, the possibilities are endless. Here are some ideas to make your meal even more special:
- Spring Brunch: These buns are perfect for a springtime brunch gathering. Pair them with fresh fruit salads or a light yogurt parfait.
- Tea Time: Enjoy Hot Cross Buns with a cup of tea in the afternoon. They make for a delightful snack that pairs beautifully with a warm beverage.
- Easter Breakfast: Serve them alongside scrambled eggs and crispy, fresh pastries for a festive Easter breakfast that your guests will love.
- Picnic Treats: Pack them for a picnic along with cheese, fruits, and charcuterie for a delightful outdoor meal.
- Storage Tips: If you have leftovers, storing them properly ensures they maintain their deliciousness. Use an airtight container to keep them fresh for up to three days on your counter.
- Seasonal Pairings: Enjoy Hot Cross Buns during the spring season, as they coincide perfectly with various celebrations and gatherings.
FAQ
Conclusion
The charm of Hot Cross Buns lies in their rich history and delightful flavors. Each bite is a reminder of the joy of gathering with loved ones and celebrating traditions. I invite you to try making these buns at home and experience the warmth they bring. You’ll find that the process is as enjoyable as the result. Happy baking and enjoy sharing these delectable treats with family and friends!
Hot Cross Buns
Ingredients
Equipment
Method
- In a liquid measuring cup, combine the warm water, warm milk, yeast, and honey. Allow it to proof for about 10 minutes. You’ll know it’s ready when the top appears frothy and bubbly. This is crucial as the yeast needs to activate properly to give your buns their rise.
- While the yeast is proofing, measure out 3 cups of flour along with cinnamon, nutmeg, cardamom, brown sugar, and salt into the bowl of a stand mixer fitted with a dough hook. Stir until well combined. This mixture of dry ingredients will add depth to the flavor of your buns.
- Once the yeast has bloomed, pour it into the dry ingredients. Stir until the mixture becomes sticky. As it mixes, gradually pour in the melted butter. Continue 'kneading' the dough by slowly adding another 1-2 cups of flour, a little at a time, until the dough pulls away from the sides of the bowl and feels tacky but doesn’t stick to your fingers. This should take about 6 minutes, giving you a smooth and elastic dough.
- Transfer the dough into a well-greased bowl. Cover it with plastic wrap and let it rise for about an hour, or until it has doubled in size. Finding a warm, draft-free place will help the dough rise beautifully.
- When the dough has risen, punch it down gently to release the air. Turn it out onto a floured surface and press it into a large rectangle. Gently fold in the raisins and the zest of the orange. Divide the dough into 24 equal pieces, shaping them into balls of around 2 ounces each. Place these balls onto a parchment paper-lined baking sheet. Cover them again with plastic wrap or a clean dish towel and let them rise for another 45 minutes to 1 hour.
- Preheat your oven to 350° F. After the buns have risen, brush each one with milk for a shiny finish. To make the crosses, whisk together flour and water until you form a thick, pipeable paste. Spoon this mixture into a piping bag or a Zip-top bag, snip the tip, and pipe crosses on top of each bun.
- Bake the buns in the preheated oven for 20 minutes or until they are golden brown. This is where the magic happens; the smell will be out of this world!
- Once they are baked, you may want to glaze them. Melt apricot jam or orange marmalade in the microwave until it’s runny, then brush it over the tops of the buns for an extra touch of sweetness. Serve your Hot Cross Buns warm or at room temperature and enjoy the delighted faces around you.
Notes
- Overnight Instructions: Follow the directions all the way through until after you have shaped the dough into 24 even balls. At this point, cover the shaped buns tightly with plastic wrap and store in the fridge for up to 15 hours.
- Next Day: The next day, at least 3 hours before you need them, remove the buns from the fridge. Keep them covered, and let them rise at room temperature for 1-2 hours before baking. Then brush with milk and proceed with the recipe instructions.