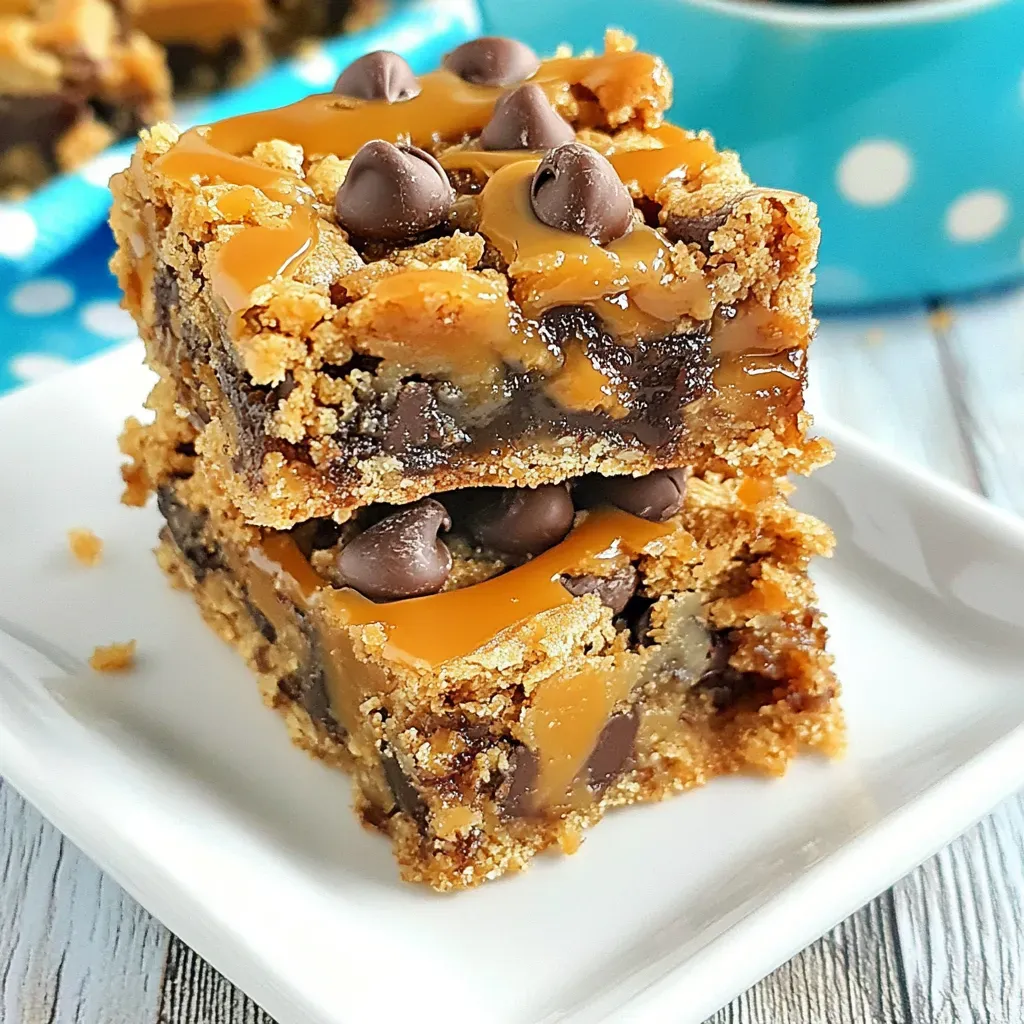
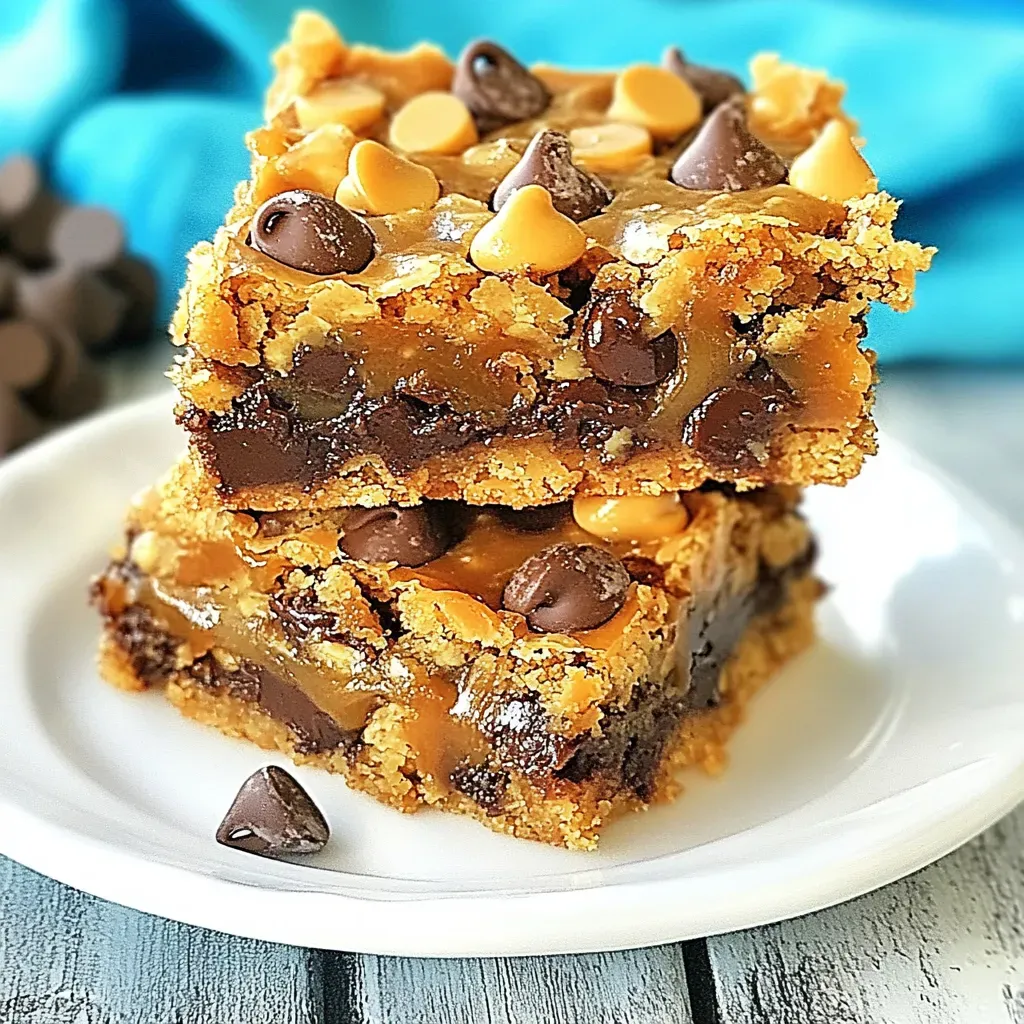
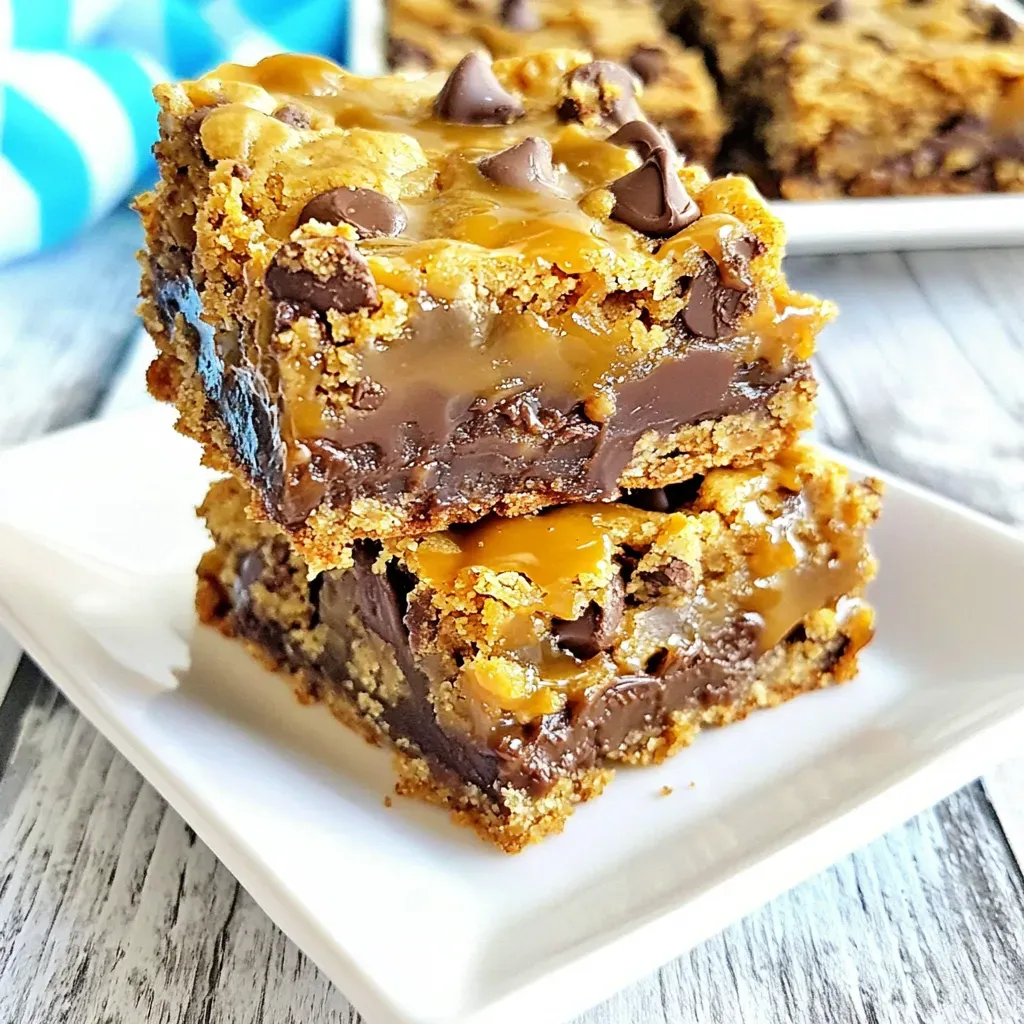
As a lover of all things sweet, the moment I discovered Chocolate Chip Caramel Cookie Bars, I knew I had stumbled upon something special. Picture this: a bustling afternoon filled with laughter, and the irresistible scent of warm cookies wafting through the air, mingling with the sound of my kids excitedly chatting about their day. This delightful treat is a perfect blend of chewy cookie goodness and gooey caramel, making it a crowd-pleaser at any gathering. I remember the first time I served these bars at a family get-together; they disappeared in seconds, and everyone was asking for the recipe. That’s when I realized that these cookie bars aren’t just a dessert; they’re an experience, a way to create lasting memories around the table.
Recipe Snapshot
50 mins
20 mins
30 mins
Medium
280 kcal
3 g
Gluten-Free, Low FODMAP
14 g
Frying Pan, Wooden Spoon, Oven, Mixing Bowl, Baking Sheet
Why This Chocolate Chip Caramel Cookie Bars Stands Out
Comfort in Every Bite
Let’s be honest, who doesn’t crave a bit of comfort food now and then? The Chocolate Chip Caramel Cookie Bars deliver exactly that with every chewy, chocolatey bite. The combination of sweet and salty flavors works harmoniously, creating a dessert that’s not overly sweet but perfectly balanced.
Perfect for Sharing
These cookie bars are fantastic for sharing. Whether you’re hosting a casual get-together or need a treat for a bake sale, they are easy to cut into squares and serve. Trust me, everyone will love them!
Easy to Make
Even novice bakers can whip up these bars! With simple ingredients and straightforward steps, you don’t have to be a pro in the kitchen to impress your friends and family.
Versatile and Customizable
The beauty of the Chocolate Chip Caramel Cookie Bars lies in their versatility. Feel free to add nuts, switch up the type of chocolate, or even play around with different flavored chips. The base recipe is solid enough to support your creative twists.
Perfect for Any Occasion
From birthday parties to cozy movie nights, these cookie bars shine in any scenario. They’re not just a dessert; they’re a treat that enhances any occasion, making it feel special.
Storage and Freshness
Leftover bars? No problem! They store well in the fridge, and you can even freeze them for later indulgence. Just ensure they’re well-wrapped to keep their freshness intact.
Ingredients Overview for Chocolate Chip Caramel Cookie Bars
The ingredients for Chocolate Chip Caramel Cookie Bars are quite simple, yet they come together to create a delightful treat. Each component plays a crucial role in achieving that perfect texture and flavor balance. From the rich butter that adds creaminess to the chocolate chips that provide bursts of sweetness, every ingredient is essential.
- 11 oz vanilla caramels (1 bag): These will melt beautifully and create that gooey layer that everyone loves.
- 14 oz sweetened condensed milk (1 can): This adds richness and helps bind the ingredients together.
- 4 tbsp butter: Essential for a moist, flavorful base.
- 1 1/2 sticks unsalted butter: Extra butter guarantees that decadent taste and chewy texture.
- 2 cups light brown sugar: This provides the depth of flavor that complements the sweetness of the cookies.
- 1/2 cup creamy peanut butter: Adds a nutty element that elevates the flavor profile.
- 2 eggs (room temperature): Essential for binding the ingredients and adding moisture.
- 1 tbsp vanilla: Pure flavor that enhances all the other ingredients.
- 2 cups flour: The base ingredient for any cookie bar.
- 1 cup old fashioned oats: For added texture and chewiness.
- 2 1/2 tsp baking powder: Gives the bars a lovely rise.
- 1/4 tsp salt: Balances the sweetness.
- 2 cups chocolate chips: The star ingredient that provides bursts of chocolatey goodness.
Chocolate Chip Caramel Cookie Bars Instructions
Making Chocolate Chip Caramel Cookie Bars is an enjoyable process that fills your kitchen with tantalizing aromas. Let’s dive into the steps to create these delicious bars!
- Start by preheating your oven to 350 degrees. This ensures that your bars bake evenly and thoroughly.
- Line a 9×13 inch baking dish with parchment paper. This helps in easy removal after baking and keeps the bars from sticking.
- Unwrap the vanilla caramels and place them in a small saucepan along with the butter and sweetened condensed milk. Cook over medium-low heat, stirring occasionally until the caramels melt completely and the mixture is smooth.
- In a large mixing bowl, cream the butter and light brown sugar together until light and fluffy. This will incorporate air into the mixture, giving your bars a nice texture.
- Add the creamy peanut butter to the butter and sugar mixture and continue mixing until well combined.
- Beat in the eggs, one at a time, ensuring that each egg is well incorporated before adding the next. Stir in the vanilla for an extra flavor boost.
- In a separate bowl, combine the flour, old fashioned oats, baking powder, and salt. This helps to evenly distribute the dry ingredients.
- Gradually add the flour mixture to the wet ingredients, stirring slowly until everything is well combined. You’ll know it’s ready when there are no dry patches left.
- Stir in the chocolate chips until evenly distributed throughout the dough.
- Spread about 2/3 of the dough onto the bottom of the lined pan. Use a spatula to ensure an even layer.
- Pour the melted caramel mixture evenly over the dough layer in the pan. The caramel adds a luscious layer of sweetness.
- Drop the remaining dough on top by the teaspoonful. Don’t worry about making it perfect; rustic is charming!
- Bake in the preheated oven for approximately 30 minutes. You’ll know they’re done when the edges are lightly golden and a toothpick comes out clean.
- Once baked, let the bars cool completely in the pan. Then, lift them out using the parchment paper and cut them into squares.
Things Worth Knowing
- Watch the Caramel: When melting the caramels, stir continuously to prevent burning and ensure a smooth mixture.
- Room Temperature Ingredients: Ensure your eggs are at room temperature for better mixing and texture.
- Don’t Overmix: Mix just until combined to avoid tough bars.
- Cooling Time: Let the bars cool completely for easier cutting.
Tips and Variations

Here are some fantastic tips and variations to elevate your Chocolate Chip Caramel Cookie Bars experience!
- Storage: Keep your cookie bars in an airtight container at room temperature for up to a week. You can also refrigerate them for longer freshness.
- Freezing: You can freeze the bars for up to three months. Just ensure they are wrapped well to prevent freezer burn.
- Pairing: Serve with a scoop of vanilla ice cream for a more indulgent dessert.
- Nutty Twist: Add 1 cup of chopped nuts to the dough for an extra crunch!
- Chocolate Options: Experiment with different chocolate varieties such as dark chocolate chips or white chocolate chunks for diverse flavors.
- Serving Occasion: These bars are perfect for parties, potlucks, or a cozy family dessert.
- Garnish: Drizzle additional melted chocolate over the top before serving for a decorative touch!
Serving Ideas for Chocolate Chip Caramel Cookie Bars
When it comes to serving your Chocolate Chip Caramel Cookie Bars, the possibilities are endless. Here are some creative ideas:
- With Ice Cream: Serve warm bars with a scoop of your favorite ice cream on top for a delightful dessert.
- At Parties: Cut into small squares and place on a dessert table at gatherings for a sweet treat that guests will love.
- Seasonal Treat: These are delightful during the fall when you can pair them with warm spiced drinks.
- Lunchbox Treats: Pack them in your kids’ lunchboxes for a sweet surprise that will brighten their school day.
- Movie Nights: Enjoy these bars during family movie nights for a cozy, delicious snack.
- Gift Giving: Wrap them in cute boxes as homemade gifts for friends and family during the holidays.
- Picnic Perfect: Take these cookie bars to picnics; they hold up well and are easy to transport.
FAQ
Conclusion
The Chocolate Chip Caramel Cookie Bars are truly a delightful blend of flavors, making them a dessert that everyone can enjoy. Their chewy texture combined with the rich, gooey caramel and chocolate is simply irresistible. So why not give this recipe a try? You’ll not only satisfy your sweet tooth, but you’ll also create wonderful memories with friends and family as you share these delicious treats.
Chocolate Chip Caramel Cookie Bars
Ingredients
Equipment
Method
- Start by preheating your oven to 350 degrees. This ensures that your bars bake evenly and thoroughly.
- Line a 9x13 inch baking dish with parchment paper. This helps in easy removal after baking and keeps the bars from sticking.
- Unwrap the vanilla caramels and place them in a small saucepan along with the butter and sweetened condensed milk. Cook over medium-low heat, stirring occasionally until the caramels melt completely and the mixture is smooth.
- In a large mixing bowl, cream the butter and light brown sugar together until light and fluffy. This will incorporate air into the mixture, giving your bars a nice texture.
- Add the creamy peanut butter to the butter and sugar mixture and continue mixing until well combined.
- Beat in the eggs, one at a time, ensuring that each egg is well incorporated before adding the next. Stir in the vanilla for an extra flavor boost.
- In a separate bowl, combine the flour, old fashioned oats, baking powder, and salt. This helps to evenly distribute the dry ingredients.
- Gradually add the flour mixture to the wet ingredients, stirring slowly until everything is well combined. You’ll know it’s ready when there are no dry patches left.
- Stir in the chocolate chips until evenly distributed throughout the dough.
- Spread about 2/3 of the dough onto the bottom of the lined pan. Use a spatula to ensure an even layer.
- Pour the melted caramel mixture evenly over the dough layer in the pan. The caramel adds a luscious layer of sweetness.
- Drop the remaining dough on top by the teaspoonful. Don't worry about making it perfect; rustic is charming!
- Bake in the preheated oven for approximately 30 minutes. You’ll know they’re done when the edges are lightly golden and a toothpick comes out clean.
- Once baked, let the bars cool completely in the pan. Then, lift them out using the parchment paper and cut them into squares.