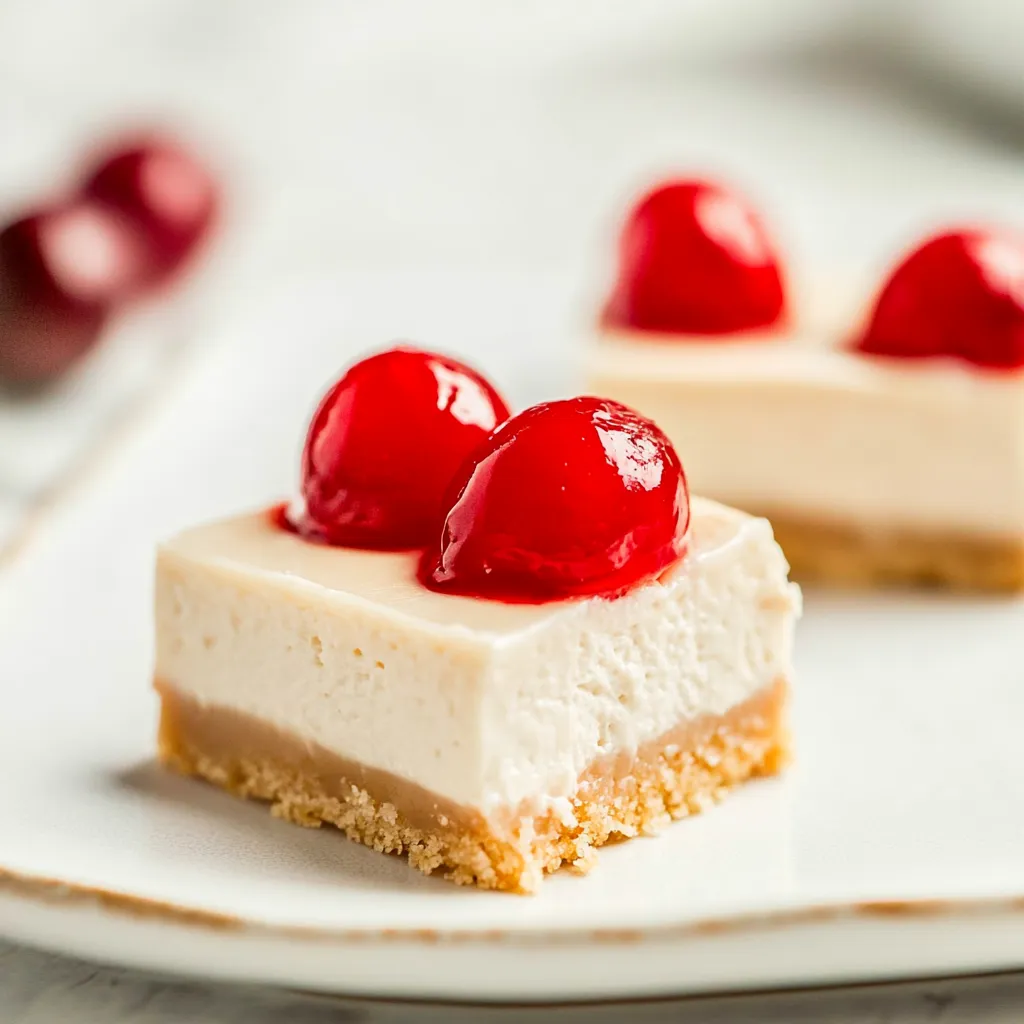
The first time I made Cherry Cheesecake Bars, I was hosting a summer gathering for my friends. As the sun dipped below the horizon, the warm laughter and clinking of glasses filled the air. I wanted to serve something sweet, but not too heavy – just the perfect end to our evening. That’s when these Cherry Cheesecake Bars came into play. Their tangy and creamy filling topped with sweet cherry pie filling is a match made in dessert heaven! Everyone was raving about them, and I knew I had struck gold with this recipe. It quickly became a staple in my summer repertoire, perfect for backyard barbecues, picnics, or just a treat to enjoy at home.
Recipe Snapshot
20 mins
20 mins
0 mins
Medium
210 kcal
3 g
Gluten-Free, Low FODMAP
11 g
Frying Pan, Wooden Spoon, Mixing Bowl, Food Processor
The Best Thing About This Cherry Cheesecake Bars
Easy to Make
One of the best things about Cherry Cheesecake Bars is how simple they are to prepare. Unlike traditional cheesecakes that can be intimidating and time-consuming, these bars come together quickly and require minimal effort. With just a few ingredients and easy steps, you’ll have a delicious dessert that looks stunning!
Perfect for Any Occasion
Whether it’s a birthday party, a potluck, or simply a family dinner, these Cherry Cheesecake Bars are a hit. Their vibrant colors and rich flavors make them suitable for any gathering, ensuring you leave a lasting impression on your guests.
Versatile Topping Options
While cherry pie filling is the star of the show, you can easily customize these bars. Try topping them with blueberries, strawberries, or even a drizzle of chocolate for a twist. The versatility allows you to match the dessert to the occasion or your personal taste.
Make Ahead Delight
These bars can be prepared in advance and stored in the refrigerator, making them a great option for busy hosts. You can whip them up a day or two ahead of time, ensuring you have a delicious dessert ready to serve without any last-minute stress.
Creamy and Delicious
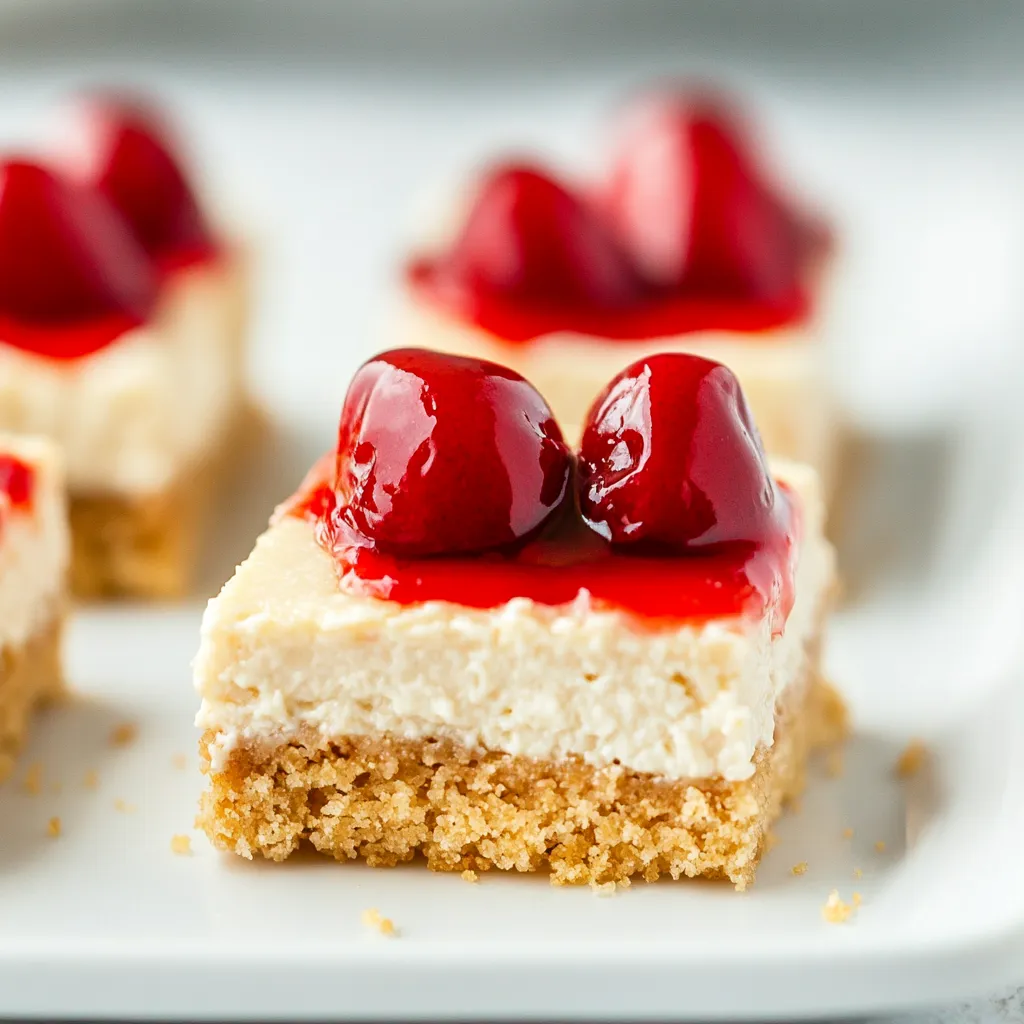
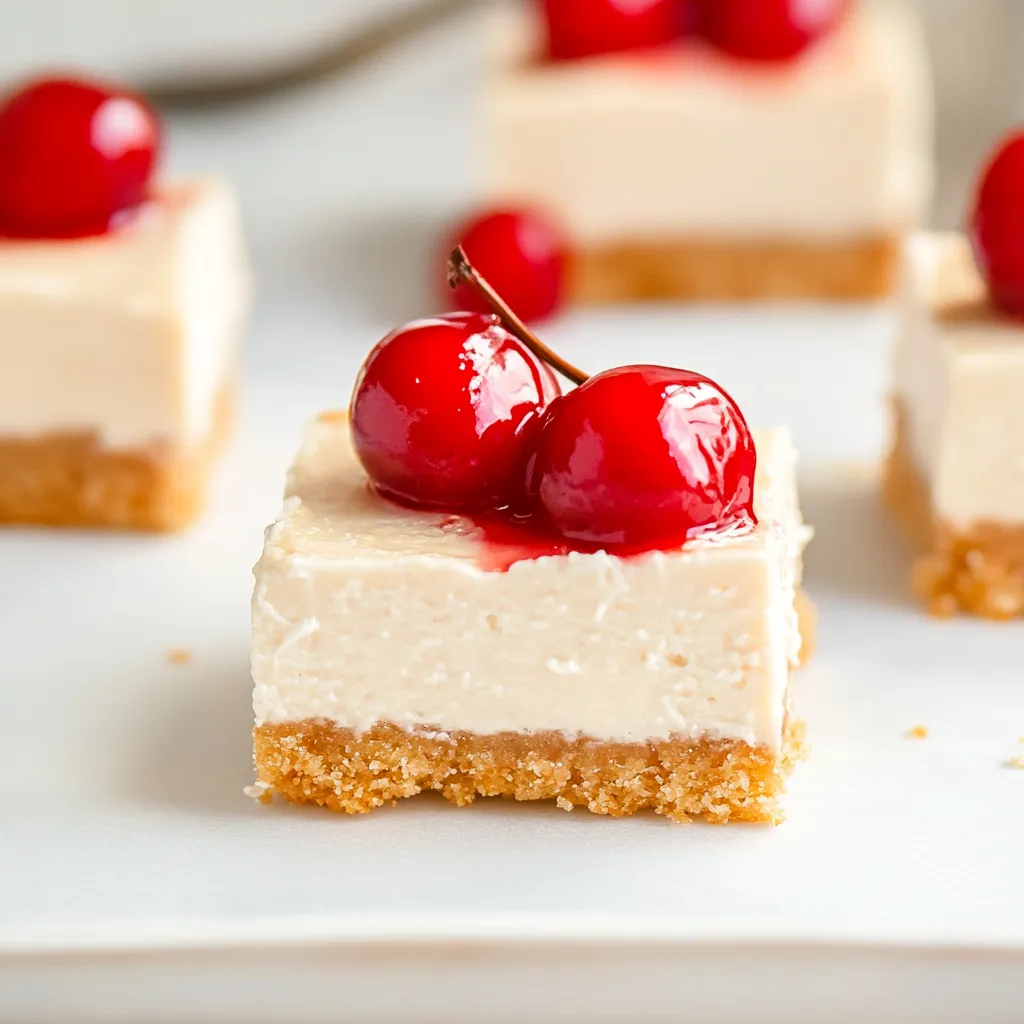
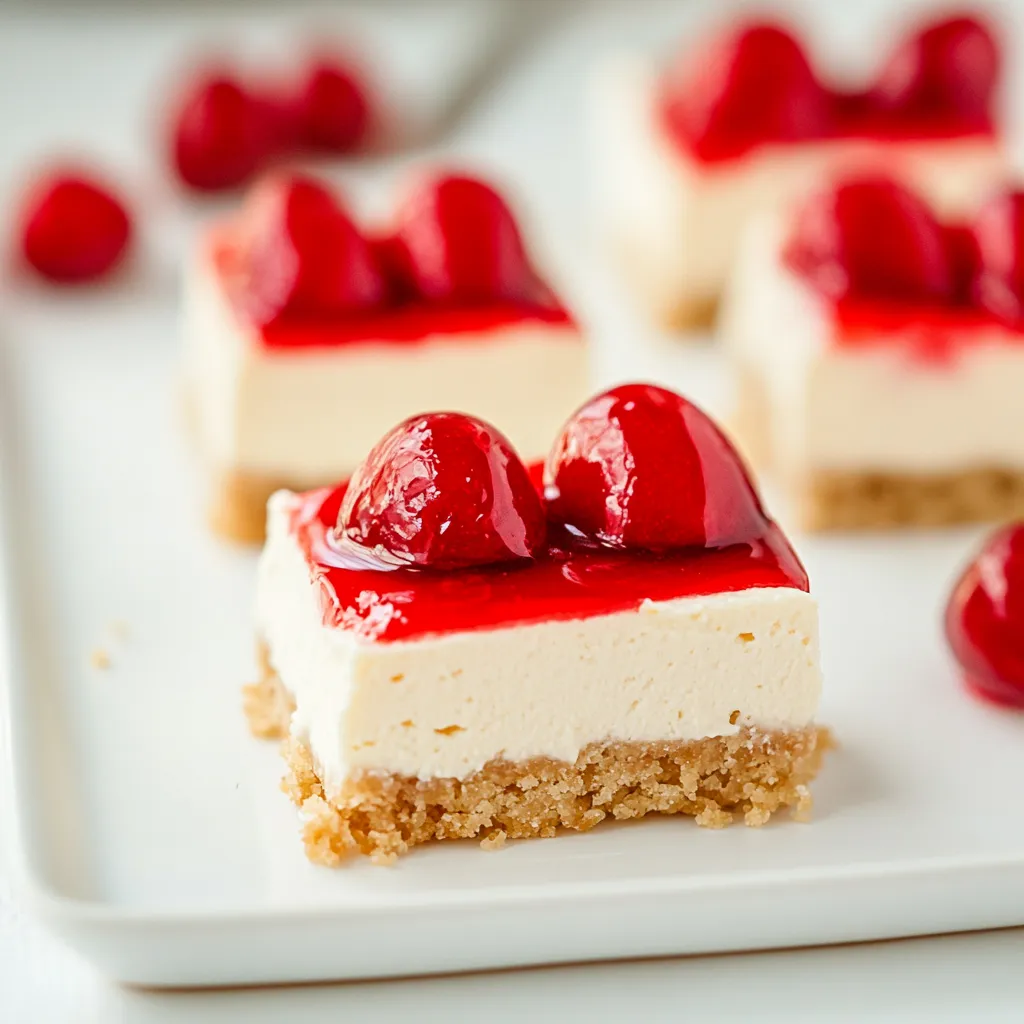
The creamy texture of the cheesecake paired with the crunchy graham cracker crust is just heavenly. Each bite is a harmonious balance of flavors, and the cherry topping adds a refreshing tartness that elevates the dessert. It’s a flavor profile that everyone loves.
Kid-Friendly Treat
Kids adore these Cherry Cheesecake Bars! They’re perfect for young ones who want a sweet treat without the fuss of slicing into a traditional cheesecake. The bars are easy to handle and make for a fun dessert at any kid’s party or gathering.
Ingredients for Cherry Cheesecake Bars
When it comes to the ingredients for Cherry Cheesecake Bars, quality is key. Each component plays a vital role in achieving that rich flavor and satisfying texture. The base consists of a buttery crust made from graham cracker crumbs, while the filling features creamy cream cheese that lends a lusciousness to every bite. Of course, the sweet cherry topping adds the perfect finishing touch.
- 1¾ cups graham cracker crumbs (or 1 package of graham crackers) – This forms the buttery base that gives the bars their satisfying crunch.
- 6 tablespoons salted butter, melted – The melted butter binds the crumbs together, creating a rich, flavorful crust.
- 2½ tablespoons granulated white sugar – A touch of sweetness that enhances the flavor of the crust.
- Two 8-ounce packages cream cheese, at room temperature – The star of the filling, providing that creamy, rich texture we all love in cheesecake.
- 1 cup powdered sugar – Sweetens the filling and helps achieve a smooth consistency.
- ¼ cup half and half cream – Adds creaminess and richness to the cheesecake mixture.
- 1 tablespoon honey – A natural sweetener that adds depth to the flavor.
- 1 teaspoon vanilla extract – Infuses the filling with a lovely vanilla aroma.
- ½ teaspoon salt – Balances the sweetness for a well-rounded flavor.
- ¼ teaspoon ground cinnamon – Adds a warm spice note that complements the cream cheese.
- One 21-ounce can cherry pie filling – Topping that brings sweetness and a pop of color to the bars.
Making Cherry Cheesecake Bars
Creating these Cherry Cheesecake Bars is a process that’s as enjoyable as it is rewarding. With each step, you’ll find the aroma of the ingredients come together beautifully, culminating in a dessert that’s sure to impress.
- Begin by preparing your baking pan. Spray an 8×8-inch pan with nonstick spray and then line it with parchment paper. This makes it easy to remove the bars after they’ve set.
- In a medium bowl, combine graham cracker crumbs, melted butter, and granulated white sugar. Stir everything together until the crumbs are well-coated with the butter. You want a mixture that resembles wet sand.
- Press the crust mixture firmly into the bottom of the prepared pan. Use a flat tool or your hands to create an even layer. Place it in the refrigerator to chill while you prepare the filling.
- In a large bowl, use an electric mixer to combine cream cheese, powdered sugar, half and half, honey, vanilla extract, salt, and ground cinnamon. Beat until the mixture is completely smooth and creamy. This can take a few minutes, but it’s worth the wait!
- Once your filling is smooth, pour it over the chilled crust in the baking pan. Use a spatula to smooth it out evenly, ensuring no air pockets remain.
- Place the pan in the refrigerator and allow it to chill for at least two hours. This helps the cheesecake layer firm up nicely.
- After the chilling time, take the pan out and cut the cheesecake into bars. Use a sharp knife for clean cuts, and transfer them to a serving platter.
- Top each bar with a generous spoonful of cherry pie filling. This adds a sweet, fruity layer that contrasts beautifully with the creamy filling.
- Return the bars to the refrigerator for at least one more hour to let the flavors meld together and the topping to set.
- Finally, serve the Cherry Cheesecake Bars cold. They’re best enjoyed chilled, and you can garnish them with fresh cherries for an extra touch!
Things Worth Knowing
- Chilling Time: Allow the bars to chill thoroughly. This step is crucial for achieving the perfect texture.
- Room Temperature Ingredients: Make sure your cream cheese is at room temperature for easy mixing and a creamy texture.
- Use Quality Ingredients: The flavor of your cheesecake depends significantly on the quality of your cream cheese and butter.
- Cutting Technique: Use a sharp knife and clean it after each cut for neat bar edges.
Tips and Tricks about Cherry Cheesecake Bars
These tips will help ensure your Cherry Cheesecake Bars turn out perfectly every time. Whether you’re a novice or an experienced baker, a little advice can make a big difference!
- Storage: Store any leftovers in an airtight container in the refrigerator for up to five days.
- Freezing: You can freeze these bars. Just wrap them tightly and they will last for up to three months. Thaw overnight in the refrigerator before serving.
- Pairing: These bars pair wonderfully with a dollop of whipped cream or a scoop of vanilla ice cream for extra indulgence.
- Serving Style: For a fun presentation, serve the bars on a platter with a variety of toppings like crushed nuts or chocolate drizzle.
- Flavor Variations: Feel free to experiment with different fruit toppings, such as blueberries or raspberries, to suit your taste.
Great Combinations for Cherry Cheesecake Bars
Serving Cherry Cheesecake Bars is as enjoyable as making them. Here’s how to elevate your dessert experience:
- Summer Picnics: These bars are perfect for outdoor gatherings. Their refreshing taste pairs beautifully with fresh fruits like strawberries and watermelon.
- Game Day Treat: Bring these bars to your next game day gathering. They are a crowd pleaser and easy to grab and enjoy.
- After Dinner Delight: Serve them as a sweet treat after dinner, alongside a cup of coffee or tea for a delightful evening.
- Birthday Parties: These make a fantastic birthday dessert – everyone loves cheesecake!
- Seasonal Celebrations: Adapt the toppings for holidays, using cranberries for Thanksgiving or strawberries for Valentine’s Day.
FAQ
Conclusion
These Cherry Cheesecake Bars are a delightful treat that brings together the rich creaminess of cheesecake with the sweet-tart flavor of cherries. Perfect for any occasion—from casual summer get-togethers to holiday celebrations—these bars are sure to impress everyone at the table. I encourage you to try making them yourself! Once you taste the combination of flavors and textures, you’ll understand why they’re a favorite. Enjoy making and sharing this delicious dessert with your loved ones!
Cherry Cheesecake Bars
Ingredients
Equipment
Method
- Begin by preparing your baking pan. Spray an 8x8-inch pan with nonstick spray and then line it with parchment paper. This makes it easy to remove the bars after they’ve set.
- In a medium bowl, combine graham cracker crumbs, melted butter, and granulated white sugar. Stir everything together until the crumbs are well-coated with the butter. You want a mixture that resembles wet sand.
- Press the crust mixture firmly into the bottom of the prepared pan. Use a flat tool or your hands to create an even layer. Place it in the refrigerator to chill while you prepare the filling.
- In a large bowl, use an electric mixer to combine cream cheese, powdered sugar, half and half, honey, vanilla extract, salt, and ground cinnamon. Beat until the mixture is completely smooth and creamy. This can take a few minutes, but it's worth the wait!
- Once your filling is smooth, pour it over the chilled crust in the baking pan. Use a spatula to smooth it out evenly, ensuring no air pockets remain.
- Place the pan in the refrigerator and allow it to chill for at least two hours. This helps the cheesecake layer firm up nicely.
- After the chilling time, take the pan out and cut the cheesecake into bars. Use a sharp knife for clean cuts, and transfer them to a serving platter.
- Top each bar with a generous spoonful of cherry pie filling. This adds a sweet, fruity layer that contrasts beautifully with the creamy filling.
- Return the bars to the refrigerator for at least one more hour to let the flavors meld together and the topping to set.
- Finally, serve the Cherry Cheesecake Bars cold. They’re best enjoyed chilled, and you can garnish them with fresh cherries for an extra touch!