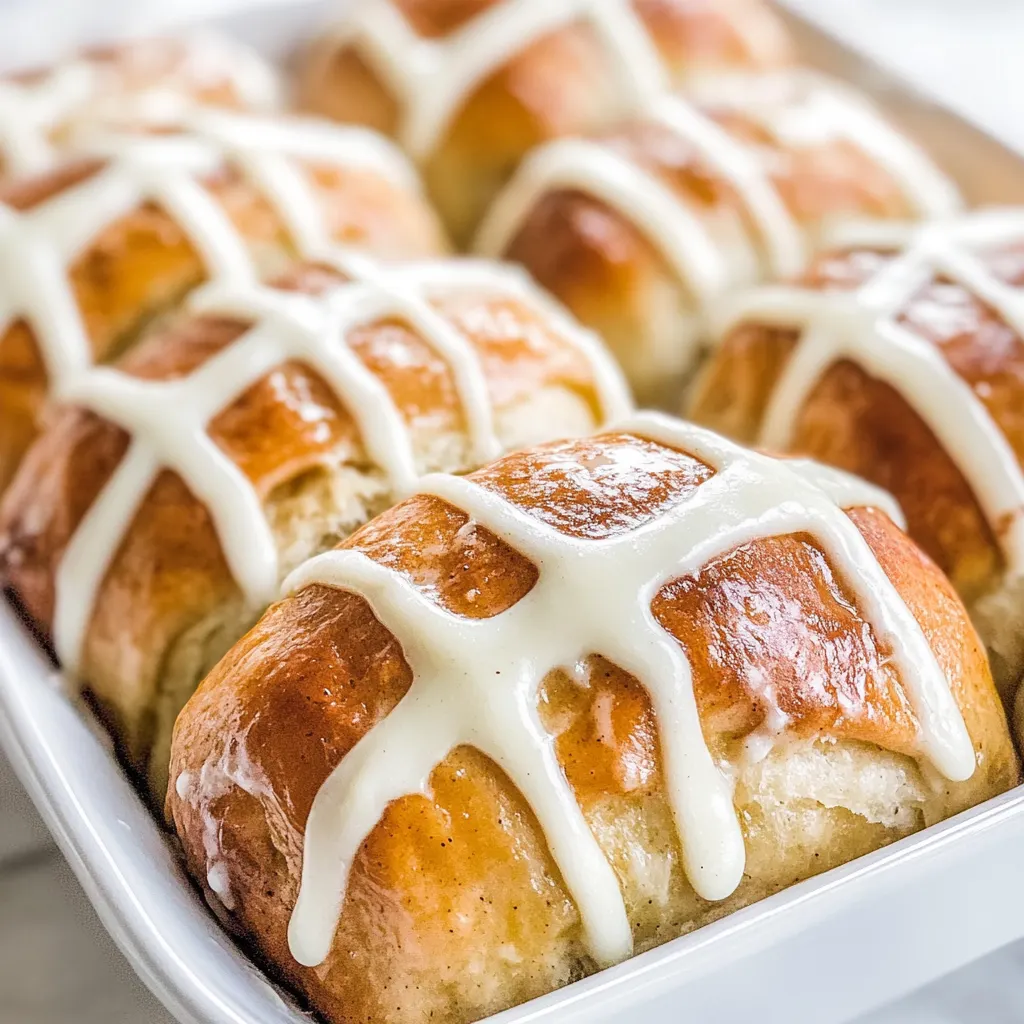
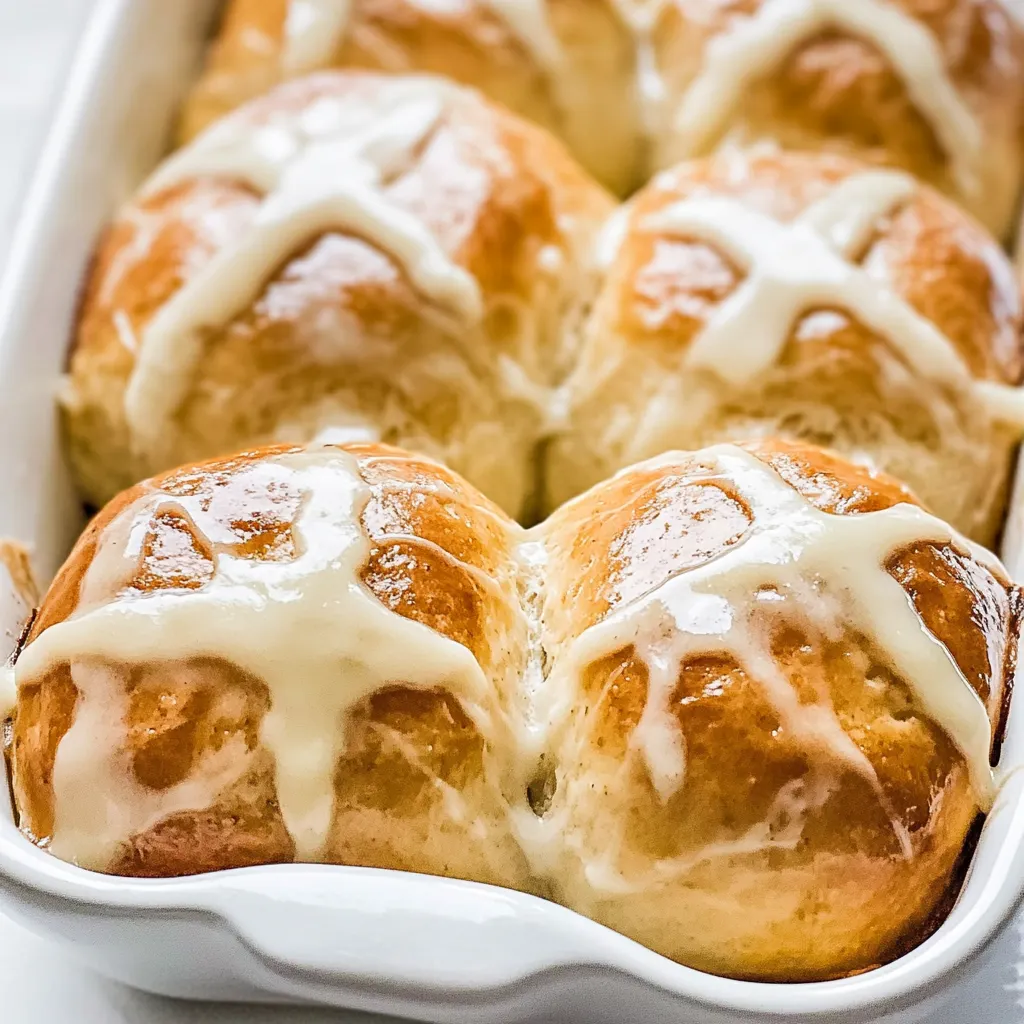
The first time I made No Knead Hot Cross Buns was during a chilly spring morning filled with the scent of blooming flowers and anticipation for Easter. My kitchen was alive with the chatter of family, as we gathered to create something special together. The idea of crafting warm, fragrant buns seemed like the perfect way to celebrate the season. With little effort required, these buns rose beautifully, filling our home with an irresistible aroma that had everyone eagerly waiting for their first taste.
Recipe Snapshot
50 mins
25 mins
25 mins
Medium
190 kcal
4 g
Gluten-Free, Low FODMAP
7 g
Large Pot, Frying Pan, Wooden Spoon, Oven, Whisk, Mixing Bowl, Peeler, Baking Sheet
Why This No Knead Hot Cross Buns Hits Different
1. Effortlessly Delicious
What I absolutely love about No Knead Hot Cross Buns is how simple they are to make. You don’t need to be a pro baker to achieve that perfect soft and fluffy texture. Just mix, let it rise, and bake! This hands-off approach allows you to enjoy the process without being tied to the kitchen.
2. A Family Tradition
These buns have become a cherished family tradition in our home. Each year, we gather to bake them together, sharing laughter and making memories. The act of preparing No Knead Hot Cross Buns has transformed into a beautiful ritual that brings us closer, reminding us of the significance of family and togetherness.
3. Perfect for Any Occasion
While they are traditionally associated with Easter, these buns are delightful for any gathering. Whether it’s a spring brunch or a cozy afternoon tea, the sweet aroma and spiced flavor make them universally loved. Serving them warm, straight from the oven, is a surefire way to impress your guests!
4. Endless Customization
One of the best aspects of No Knead Hot Cross Buns is the endless customization options. Feel free to play with the spices or add different dried fruits to suit your preferences. Each batch can be uniquely yours, which keeps the baking experience exciting and fresh.
5. Sweet and Slightly Spicy
The combination of spices like cinnamon, nutmeg, and allspice, along with the sweetness of the buns, creates a flavor explosion in every bite. It’s the perfect balance of sweetness and warmth that makes you want to reach for another bun.
No Knead Hot Cross Buns Shopping List
When it comes to making No Knead Hot Cross Buns, the ingredients play a vital role in achieving the ideal flavor and texture. Each component works harmoniously together to create these delightful treats. Let’s dive into the key players that will help you create this masterpiece!
- 5 medium apples (peeled, cored, and shredded) – I used Gala apples for their sweetness and moisture.
- 1 teaspoon salt – Balances the sweetness and enhances the flavor of the buns.
- 2 cups milk (lukewarm, I used 2%) – Provides moisture and richness to the dough.
- ½ cup granulated sugar – Sweetens the dough and helps in browning the crust.
- 1 tablespoon instant yeast (or active dry yeast) – Essential for leavening the buns, creating that fluffy texture.
- 6 cups all-purpose flour – The foundation of the buns, providing structure.
- ½ teaspoon nutmeg (ground) – Adds a warm, spicy flavor to the buns.
- ½ teaspoon allspice – Enhances the overall flavor profile.
- 1 teaspoon cinnamon (ground) – A warm spice that complements the sweetness of the buns.
- 3 large eggs – Contributes to richness and helps bind the ingredients.
- 6 tablespoons butter (unsalted, melted) – Adds richness and flavor.
- ⅓ cup water – Helps achieve the right consistency for the dough.
- ⅓ cup granulated sugar – Used for the glaze, adding sweetness and shine.
- ¾ cup icing sugar (same as confectioners’ sugar or powdered sugar) – Used for the icing that decorates the buns.
- 3 tablespoons cream cheese (at room temperature) – Adds a creamy texture to the icing.
- 1 tablespoon water – For adjusting the icing consistency.
Recipe Directions for No Knead Hot Cross Buns
Making No Knead Hot Cross Buns is a straightforward process that fills your home with delightful aromas and warmth. Let’s walk through the steps together, ensuring you create the perfect buns.
Start by preparing your apples. Place the shredded apples on four sheets of paper towels in a strainer, and set the strainer inside a bowl. Sprinkle with 1 teaspoon of salt and stir. This process will draw out excess liquid from the apples, which is crucial for controlling the moisture in your dough. Allow them to sit for five minutes, then squeeze out as much juice as possible. Keep the juice; it may come in handy for the dough consistency.
In a medium bowl, whisk together the warm milk with 1/2 cup of sugar and the yeast. Allow it to rest for about five minutes. If you’re using active dry yeast, it may take longer, approximately 10 to 15 minutes, to activate. You should see some bubbles forming on the surface, indicating that the yeast is alive and kicking!
Meanwhile, in a large bowl, combine flour, the remaining 1 teaspoon of salt, nutmeg, allspice, and cinnamon. Whisk thoroughly until everything is well mixed. Add the shredded apples to the dry mixture, ensuring they’re evenly distributed.
Next, add the egg mixture of eggs, butter, and the yeast mixture to the flour and apples. Mix with a wooden spoon until everything is combined. You’re looking for a thick, sticky dough. Cover the bowl with a clean kitchen towel and let it rest until it doubles in size, which should take about one hour. This is where the magic happens!
Once the dough has risen, prep your baking sheet. Line a 16.5 x 11.38 x 1 inches baking sheet with parchment paper. Remove the towel and dust the dough lightly with flour. Turn it out onto a floured surface and shape it into a log. Cut the log into 24 equal pieces.
To shape each piece into a roll, take one piece of dough, flatten it gently with your palm, and fold the edges inward to create a ball. Pinch the sides together and roll it briefly to smoothen the surface. Place the shaped bun with the smooth side up onto your prepared baking sheet. Repeat with the remaining dough pieces, arranging them in a 4 x 6 pattern.
Cover the baking sheet with a clean towel and let the buns rise for a second time, about 30 minutes. This rise is key; don’t let them rise too long; you only want them to puff up by 50% to 75% more, as they will continue rising in the oven.
Preheat your oven to 350℉ about ten minutes before the second rise is done. Once ready, place the baking sheet into the oven and bake the buns for about 25 minutes or until they turn golden brown. The smell will be intoxicating!
While the buns are baking, prepare the glaze. In a small saucepan, combine all the glaze ingredients and heat over medium. Once it comes to a boil, reduce the heat and let it simmer for three minutes until the sugar dissolves and the glaze thickens slightly. Remove from heat and set aside.
Once the buns are out of the oven, brush them generously with the glaze while they’re still warm. Let them cool for about ten minutes on a wire rack.
For the icing, whisk together all the icing ingredients. Transfer the icing into a piping bag or a zipped bag and snip a small corner. Pipe crosses onto the buns for that traditional touch.
Things Worth Knowing
- Tip for rising dough: Preheat your oven to 150 to 200 degrees Fahrenheit, then turn it off. Place your covered dough inside the warm oven for a draft-free environment to help it rise faster.
- Yeast choices: I used instant yeast, which doesn’t need activation, but you can also use active dry yeast. Just remember that active dry yeast typically requires activation first.
- Milk temperature: Ensure your milk is lukewarm, ideally between 105°F and 110°F, as too hot can kill the yeast, preventing your dough from rising.
- Storage: Store leftover buns in an airtight container at room temperature for up to three days, or refrigerate for up to a week.
- Freezing: You can freeze buns for up to three months. Just wrap them tightly and let them thaw at room temperature when ready to eat.
Ways to Adapt This Recipe

There are countless ways to personalize your No Knead Hot Cross Buns. Here are some fun adaptions you can try!
- Fruit variations: Add dried cranberries or raisins for a fruity twist.
- Spice experiments: Try adding ginger or cardamom for different flavor profiles.
- Glaze alternatives: Instead of a sugar glaze, make a honey glaze for a richer flavor.
- Nutty additions: Incorporate chopped nuts for an added crunch.
- Chocolate twist: Add chocolate chips for a delicious dessert version.
- Vegan option: Substitute eggs with flaxseed meal and use plant-based milk and butter.
Perfect Matches for No Knead Hot Cross Buns
When it comes to serving No Knead Hot Cross Buns, there are a multitude of delightful pairings to consider. Here are some ideas:
- Fresh Fruit: Serve with a side of fresh fruit salad for a refreshing breakfast.
- Cheese Platter: Pair with a selection of cheeses for a light brunch experience.
- Hot Beverages: Enjoy with your favorite hot beverage, be it tea, coffee, or hot chocolate.
- Brunch Spread: Perfect for Easter brunch, alongside other pastries and egg dishes.
- Picnic Treat: Take them along on a picnic for a sweet treat outdoors.
- Winter Delight: A great addition to your holiday gatherings, sharing the warmth of the season.
FAQ
Conclusion
In summary, No Knead Hot Cross Buns bring a unique blend of flavors and a wonderful texture that’s hard to resist. They not only celebrate tradition but also create lovely memories with family and friends. Don’t wait too long to try this recipe; gather your loved ones and enjoy the warm, comforting taste of these delightful buns today!

No Knead Hot Cross Buns
Ingredients
Equipment
Method
- Start by preparing your apples. Place the shredded apples on four sheets of paper towels in a strainer, and set the strainer inside a bowl. Sprinkle with 1 teaspoon of salt and stir. This process will draw out excess liquid from the apples, which is crucial for controlling the moisture in your dough. Allow them to sit for five minutes, then squeeze out as much juice as possible. Keep the juice; it may come in handy for the dough consistency.
- In a medium bowl, whisk together the warm milk with 1/2 cup of sugar and the yeast. Allow it to rest for about five minutes. If you’re using active dry yeast, it may take longer, approximately 10 to 15 minutes, to activate. You should see some bubbles forming on the surface, indicating that the yeast is alive and kicking!
- Meanwhile, in a large bowl, combine flour, the remaining 1 teaspoon of salt, nutmeg, allspice, and cinnamon. Whisk thoroughly until everything is well mixed. Add the shredded apples to the dry mixture, ensuring they’re evenly distributed.
- Next, add the egg mixture of eggs, butter, and the yeast mixture to the flour and apples. Mix with a wooden spoon until everything is combined. You’re looking for a thick, sticky dough. Cover the bowl with a clean kitchen towel and let it rest until it doubles in size, which should take about one hour. This is where the magic happens!
- Once the dough has risen, prep your baking sheet. Line a 16.5 x 11.38 x 1 inches baking sheet with parchment paper. Remove the towel and dust the dough lightly with flour. Turn it out onto a floured surface and shape it into a log. Cut the log into 24 equal pieces.
- To shape each piece into a roll, take one piece of dough, flatten it gently with your palm, and fold the edges inward to create a ball. Pinch the sides together and roll it briefly to smoothen the surface. Place the shaped bun with the smooth side up onto your prepared baking sheet. Repeat with the remaining dough pieces, arranging them in a 4 x 6 pattern.
- Cover the baking sheet with a clean towel and let the buns rise for a second time, about 30 minutes. This rise is key; don’t let them rise too long; you only want them to puff up by 50% to 75% more, as they will continue rising in the oven.
- Preheat your oven to 350℉ about ten minutes before the second rise is done. Once ready, place the baking sheet into the oven and bake the buns for about 25 minutes or until they turn golden brown. The smell will be intoxicating!
- While the buns are baking, prepare the glaze. In a small saucepan, combine all the glaze ingredients and heat over medium. Once it comes to a boil, reduce the heat and let it simmer for three minutes until the sugar dissolves and the glaze thickens slightly. Remove from heat and set aside.
- Once the buns are out of the oven, brush them generously with the glaze while they’re still warm. Let them cool for about ten minutes on a wire rack.
- For the icing, whisk together all the icing ingredients. Transfer the icing into a piping bag or a zipped bag and snip a small corner. Pipe crosses onto the buns for that traditional touch.
Notes
- Tip for rising dough: Preheat your oven to 150 to 200 degrees Fahrenheit, then turn it off. Place your covered dough inside the warm oven for a draft-free environment to help it rise faster.
- Yeast choices: I used instant yeast, which doesn't need activation, but you can also use active dry yeast. Just remember that active dry yeast typically requires activation first.
- Milk temperature: Ensure your milk is lukewarm, ideally between 105°F and 110°F, as too hot can kill the yeast, preventing your dough from rising.
- Storage: Store leftover buns in an airtight container at room temperature for up to three days, or refrigerate for up to a week.
- Freezing: You can freeze buns for up to three months. Just wrap them tightly and let them thaw at room temperature when ready to eat.